


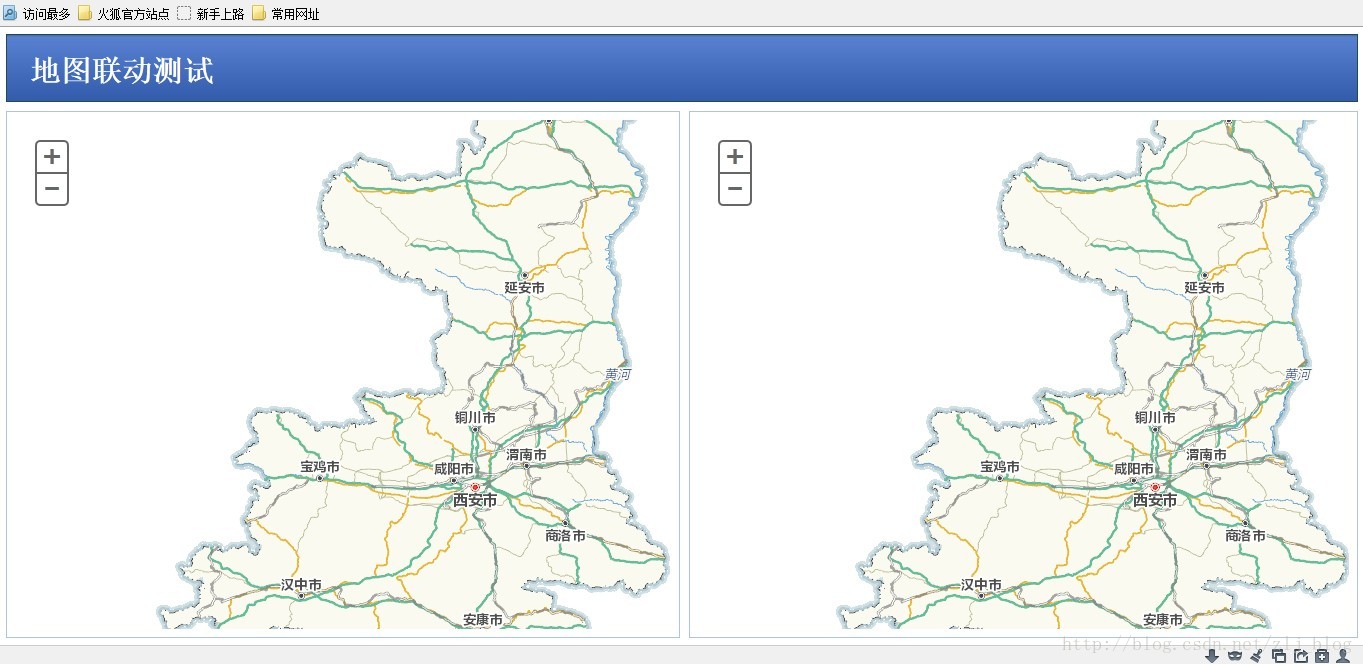
使用ArcGIS API for JavaScript,可以很方便的实现地图联动。最简单的方式是借助Map对象的extent-change 事件,当然,也可以借助zoom-end、pan-end、mouse-drag-end等事件,本文使用第一种方式,实现地图的平移联动、鼠标双击放大联动、点击缩放按钮联动等,具体实现代码如下:
<!--
功能:地图分屏
-->
<!DOCTYPE html>
<html>
<head>
    <meta http-equiv="Content-Type" content="text/html; charset=utf-8">
    <!--The viewport meta tag is used to improve the presentation and behavior of the samples
      on iOS devices-->
    <meta name="viewport" content="initial-scale=1, maximum-scale=1,user-scalable=no">
    <title>地图分屏</title>
    <link rel="stylesheet" href="http://js.arcgis.com/3.8/js/dojo/dijit/themes/claro/claro.css">
    <link rel="stylesheet" href="http://js.arcgis.com/3.8/js/esri/css/esri.css">
    <link rel="stylesheet" href="css/fenping.css">
    <script src="http://js.arcgis.com/3.8/"></script>
    <script>
        require([
            "dojo/ready",
            "dojo/parser",
            "dijit/layout/BorderContainer",
            "dijit/layout/ContentPane",
            "esri/map",
            "esri/geometry/Extent",
            "esri/layers/ArcGISTiledMapServiceLayer",
            "dojo/domReady!"
        ], function(ready,parser,BorderContainer, ContentPane,Map,Extent,ArcGISTiledMapServiceLayer) {
            parser.parse();
            /*
             * 矢量地图的构建
             */
            var vecMap=new Map("vecMap",{
                extent: new Extent({xmin:105,ymin:31,xmax:110,ymax:40,
                    spatialReference:{wkid:4326}}),
                logo:false
            });
            var tiledMapServiceLayerV=new ArcGISTiledMapServiceLayer("矢量地图服务的url");
            vecMap.addLayer(tiledMapServiceLayerV);
            /*
             * 影像地图的构建
             */
            var imgMap=new Map("imgMap",{
                extent: new Extent({xmin:105,ymin:31,xmax:110,ymax:40,
                    spatialReference:{wkid:4326}}),
                logo:false
            })
            var tiledMapServiceLayerI=new ArcGISTiledMapServiceLayer("影像地图的url");
            imgMap.addLayer(tiledMapServiceLayerI);
            /*
             * 添加extent-change事件,实现地图联动
             * flagV矢量地图的extent-change控制标志,flagI影像地图的extent-change控制标志消除死循环情况
             */
            var flagV=true,flagI=true;
            vecMap.on("extent-change",function(){
                if(flagV){
                    var vExtent=vecMap.extent;
                    imgMap.setExtent(vExtent);
                    flagI=false;
                }else if(!flagV){
                    flagV=true;
                }
            });
            imgMap.on("extent-change",function(){
                if(flagI){
                    var iExtent=imgMap.extent;
                    vecMap.setExtent(iExtent);
                    flagV=false;
                }else if(!flagI){
                    flagI=true;
                }
            });

        });
    </script>
</head>

<body class="claro">
<div id="mainWindow" data-dojo-type="dijit.layout.BorderContainer" data-dojo-props="design:'headline'"
     style="width:100%; height:100%;">
    <div id="header" data-dojo-type="dijit.layout.ContentPane" data-dojo-props="region:'top'">
        <div id="title">天地图</div>
        <div id="snippet">
        </div>
    </div>

    <div id="vecMap" data-dojo-type="dijit.layout.ContentPane" data-dojo-props="region:'left'">
    </div>
    <div id="imgMap" data-dojo-type="dijit.layout.ContentPane" data-dojo-props="region:'center'">
    </div>

</div>
</body>

</html>
页面对应的样式文件为fenping.css,代码如下
  html,body {
    height:100%;
    width:100%;
    margin:0;
    padding:0;
  }

  body {
    background-color:#FFF;
    color:#333;
    font-size:14px;
    overflow:hidden;
    font-family:Helvetica, "Trebuchet MS", Arial, sans-serif;
  }

  #header {
    border:solid 1px #224a54;
    height:50px;
    margin:2px;
    background-image: url("../images/background.jpg");
  }

  #title {
    color:white;
    font-size:30px;
    text-align:left;
    font-weight:bolder;
    padding-top:10px;
    padding-left:15px;
  }

  #snippet {
    font-size:14px;
    color:#444;
    padding-left:15px;
  }

  #vecMap {
    border:solid 1px #b0c4de;
    width:48%;
    margin:2px;
  }

  #imgMap {
    border:solid 1px #b0c4de;
    width:48%;
    margin:2px;
  }
  .dj_ie .infowindow .window .top .right .user .content { position: relative; }
  .dj_ie .simpleInfoWindow .content {position: relative;}
效果图如下:


 446
446

 被折叠的 条评论
为什么被折叠?
被折叠的 条评论
为什么被折叠?
 到【灌水乐园】发言


