


前段时间写dialog底部弹出动画的时候明明觉得自己写的是对的,但效果却不对.相信很多人在写View动画的时候都遇到过这种情况.今天本文就对症下药,跟大家聊聊Animation动画坐标系,至于Animation动画的使用一般都会这里不过多赘言.
Animation 动画一共有四个
1. AlphaAnimation
2. ScaleAnimation
3. RotateAnimation
4. TranslateAnimation
而之所以会出现动画效果与所写不符的主要原因是对Animation.RELATIVE_TO_PARENT,Animation.RELATIVE_TO_SELF,Animation.ABSOLUTE这三个属性的理解不够,下面将详细讲解
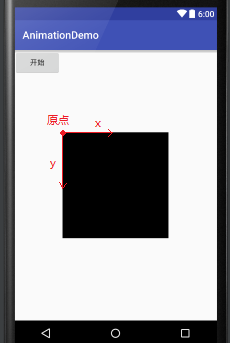
首先需要了解动画的原点是相对于该控件也就是自身的左上角.
Animation.ABSOLUTE:指的绝对坐标(单位像素),假如100,就是相对于原点正方向偏移100个像素.
Animation.RELATIVE_TO_SELF:指的是相对于自己.在该类型下值为float类型,比如0.5f,就是相对于原点正方向偏移自身控件百分之五十长度.
Animation.RELATIVE_TO_PARENT:指的是相对于父类.在该类型下值为float类型,比如0.5f,就是相对于原点正方向偏移父控件百分之五十长度.
(ps:这尼玛不太懂啊…楼主太逗了… 别急后面有例子验证^_^)
这里直接用TranslateAnimation动画来验证我们上面的结论
先上布局文件
<?xml version="1.0" encoding="utf-8"?>
<RelativeLayout xmlns:android="http://schemas.android.com/apk/res/android"
xmlns:tools="http://schemas.android.com/tools"
android:layout_width="match_parent"
android:layout_height="match_parent"
tools:context="com.zly.www.animationdemo.MainActivity">
<Button
android:layout_width="wrap_content"
android:layout_height="wrap_content"
android:text="开始"
android:onClick="start"/>
<ImageView
android:id="@+id/iv"
android:layout_width="200dp"
android:layout_height="200dp"
android:background="#000"
android:layout_centerInParent="true"/>
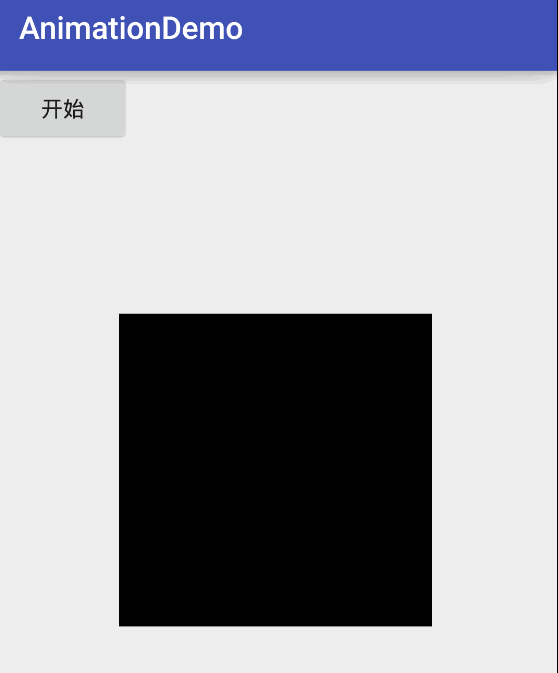
</RelativeLayout>很简单一个按钮开始动画,一个ImageView展示动画效果
布局展示如下
activity代码
package com.zly.www.animationdemo;

import android.os.Bundle;
import android.support.v7.app.AppCompatActivity;
import android.view.View;
import android.view.animation.Animation;
import android.view.animation.TranslateAnimation;
import android.widget.ImageView;

public class MainActivity extends AppCompatActivity {

    private ImageView iv;

    @Override
    protected void onCreate(Bundle savedInstanceState) {
        super.onCreate(savedInstanceState);
        setContentView(R.layout.activity_main);
        iv = (ImageView) findViewById(R.id.iv);
    }

    public void start(View v){
        TranslateAnimation translateAnimation = new TranslateAnimation(
                Animation.RELATIVE_TO_SELF,0,
                Animation.RELATIVE_TO_SELF,0.5f,
                Animation.RELATIVE_TO_SELF,0,
                Animation.RELATIVE_TO_SELF,0
        );
        translateAnimation.setDuration(1000);
        translateAnimation.setFillAfter(true);

        iv.startAnimation(translateAnimation);
    }
}
这里根据控制变量法来分别验证说明
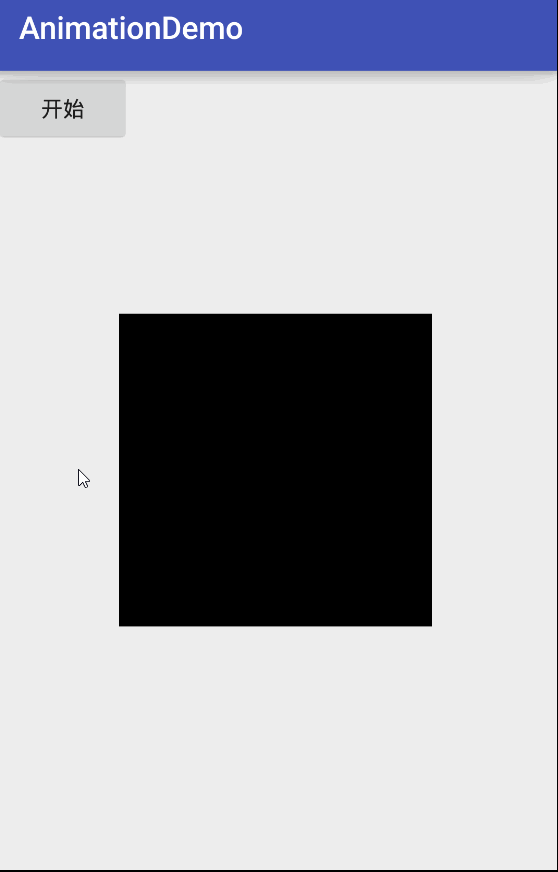
1.Animation.RELATIVE_TO_SELF
我们要分析的核心如下
TranslateAnimation translateAnimation = new TranslateAnimation(
                Animation.RELATIVE_TO_SELF,0,
                Animation.RELATIVE_TO_SELF,0.5f,
                Animation.RELATIVE_TO_SELF,0,
                Animation.RELATIVE_TO_SELF,0
        );
按照刚刚上面说的,这个平移动画
x坐标是 (x轴原点+ImageView宽 * 0% = x轴原点) -> (x轴原点 + ImageView宽*50%)
y坐标是 (y轴原点+ImageView高 * 0% = y轴原点) -> (y轴原点+ImageView高 * 0% = y轴原点)
那么分析出来的结果应该是imageview向右水平平移,长度为ImageView宽*50%.
效果如下
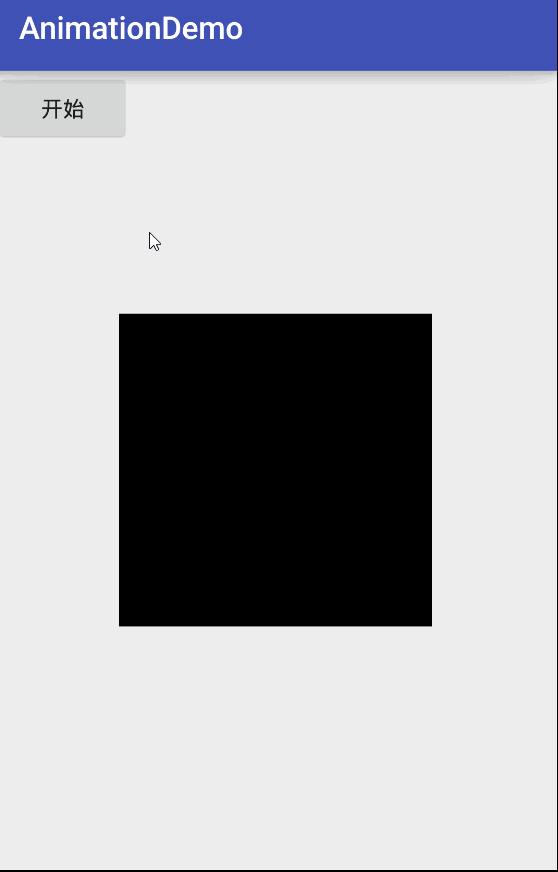
2.Animation.RELATIVE_TO_PARENT
核心代码如下
TranslateAnimation translateAnimation = new TranslateAnimation(
                Animation.RELATIVE_TO_SELF,0,
                Animation.RELATIVE_TO_SELF,0,
                Animation.RELATIVE_TO_SELF,0,
                Animation.RELATIVE_TO_PARENT,0.5f
        );
x坐标是 (x轴原点+ImageView宽 * 0% = x轴原点) -> (x轴原点+ImageView宽 * 0% = x轴原点)
y坐标是 (y轴原点+ImageView高 * 0% = y轴原点) -> (y轴原点+Relativelayout* 50%)
那么分析出来的结果应该是imageview向下垂直平移,长度为Relativelayout高 * 50%
3.Animation.ABSOLUTE
该属性下我们想实现imageview向右平移,长度为imageview宽度一半,由于Animation.ABSOLUTE下输入数值单位为像素,那么根据dp=px*160/dpi即px=dp*dpi/160,这里我使用的模拟器是xxhdpi的即dpi等于480,然后imageview宽为200dp一半就是100dp所以要想实现该效果px为300
核心代码如下
TranslateAnimation translateAnimation = new TranslateAnimation(
                Animation.RELATIVE_TO_SELF,0,
                Animation.ABSOLUTE,300,
                Animation.RELATIVE_TO_SELF,0,
                Animation.RELATIVE_TO_SELF,0
        );
效果和我们分析的一样
总结
view动画除了通过java代码实现外还有xml方式,对于这三个属性理解跟上面并无差别,唯一需要注意的是
xml中
1) 当值为”50”表示使用绝对位置定位
2) 当值为”50%”表示使用相对于自身控件定位
3) 当值为”50%p”表示使用相对于父控件定位
这里也给上一个例子方便理解
<?xml version="1.0" encoding="utf-8"?>
<set xmlns:android="http://schemas.android.com/apk/res/android"
    android:interpolator="@android:anim/accelerate_interpolator">
    <!--
        fromDegrees:开始的角度
        toDegrees:结束的角度,+表示是正的
        pivotX:用于设置旋转时的x轴坐标
        例
           1)当值为"50",表示使用绝对位置定位
           2)当值为"50%",表示使用相对于控件本身定位
           3)当值为"50%p",表示使用相对于控件的父控件定位
        pivotY:用于设置旋转时的y轴坐标
      -->
    <rotate
        android:fromDegrees="0"
        android:toDegrees="+360"
        android:pivotX="50%"
        android:pivotY="50%"
        android:duration="1000"/>
</set>
这里关于这三个属性的介绍就完成了,希望通过本文能让大家对View动画有更深的理解,如有疑问欢迎留言


 5460
5460


 被折叠的 条评论
为什么被折叠?
被折叠的 条评论
为什么被折叠?
 到【灌水乐园】发言


