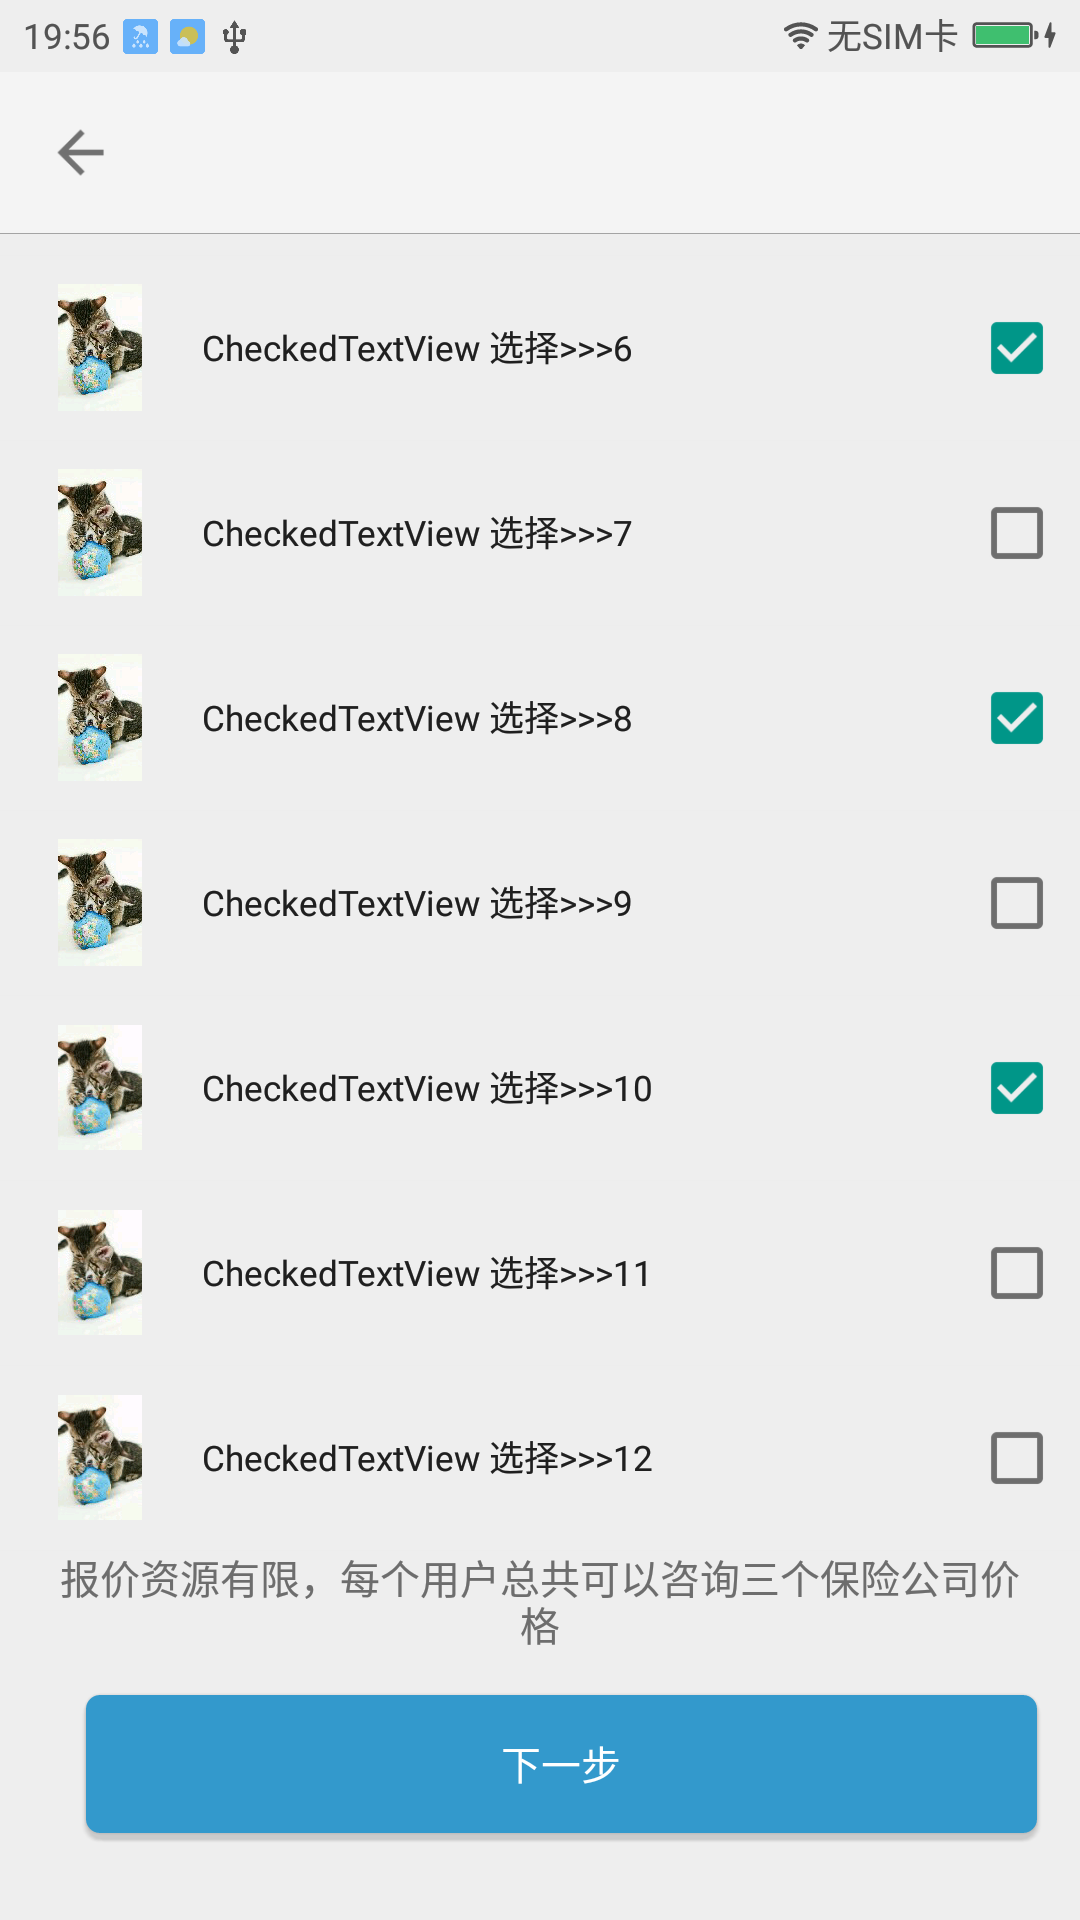
由于CheckedTextView使用很少,所以用的不多,之前自己用TextView和CheckBox结合使用过,实现类似的功能。但是不如使用CheckedTextView这么优雅,所以这次做项目的时候就使用这个了,虽然不是新的什么点,但是作为一个总结吧,记录下来!!
直接用代码来看问题:
步骤一:
做主界面的布局,直接使用了一个的ListView,
<?xml version="1.0" encoding="utf-8"?>
<ListView xmlns:android="http://schemas.android.com/apk/res/android"
    android:layout_width="match_parent"
    android:layout_height="match_parent"
    android:layout_gravity="center_horizontal"
    android:divider="?attr/layoutparentbg"
    android:dividerHeight="1dp"
    android:listSelector="@android:color/transparent"
    android:orientation="vertical"
    android:overScrollMode="never"
    android:scrollbars="none"
    />
步骤二:
自定义该ListView 的样式布局文件:
<?xml version="1.0" encoding="utf-8"?>
<RelativeLayout xmlns:android="http://schemas.android.com/apk/res/android"
    android:layout_width="match_parent"
    android:layout_height="wrap_content">

    <ImageView
        android:id="@+id/img_icon"
        android:layout_width="wrap_content"
        android:layout_height="@dimen/intro_common_height"
        android:layout_alignParentLeft="true"
        android:layout_marginLeft="@dimen/intro_margin_20"
        android:layout_centerVertical="true"
        android:contentDescription="@string/app_name"
        android:scaleType="fitCenter"
        android:src="@drawable/icon_res_friend" />
    <CheckedTextView
        android:id="@+id/checktv_title"
        android:layout_width="match_parent"
        android:layout_height="?android:attr/listPreferredItemHeight"
        android:textAppearance="?android:attr/textAppearanceLarge"
        android:gravity="center_vertical"
        android:checkMark="?android:attr/listChoiceIndicatorMultiple"
        android:paddingLeft="6dip"
        android:filterTouchesWhenObscured="true"
        android:focusableInTouchMode="true"
        android:text="公司"
        android:layout_toRightOf="@+id/img_icon"
        android:layout_marginLeft="@dimen/intro_margin_15"
        android:textSize="12sp"
        android:paddingRight="6dip"
        />

</RelativeLayout>
步骤三:代码实现部分:
适配器:
   class CompanyListAdapter extends BaseAdapter
    {
        private ArrayList<InsuranceCompany> riskArrayList;

        public ArrayList<InsuranceCompany> getRiskArrayList()
        {
            return riskArrayList;
        }

        public CompanyListAdapter(ArrayList<InsuranceCompany> regionArrayList)
        {
            this.riskArrayList = regionArrayList;
            checkedMap = new HashMap<>();
        }

        public void updateRefresh(ArrayList<InsuranceCompany> refreshRegions)
        {
            if (riskArrayList == null)
            {
                riskArrayList = new ArrayList<>();
            }
            this.riskArrayList.clear();
            this.riskArrayList.addAll(refreshRegions);
            this.notifyDataSetChanged();
        }

        @Override
        public int getCount()
        {
            if (riskArrayList == null)
                return 0;
            return riskArrayList.size();
        }

        @Override
        public Object getItem(int position)
        {
            return riskArrayList.get(position);
        }

        @Override
        public long getItemId(int position)
        {
            return position;
        }

        class Holder
        {
            ImageView img_icon;

            CheckedTextView text_AreaName;
        }

        @Override
        public View getView(final int position, View convertView, ViewGroup parent)
        {
            Holder holder;
            if (convertView == null)
            {
                // android.R.layout.simple_list_item_checked
                convertView = LayoutInflater.from(mContext).inflate(R.layout.item_list_insurancecompany, null);
                holder = new Holder();
                holder.text_AreaName = (CheckedTextView)convertView.findViewById(R.id.checktv_title);
                holder.img_icon = (ImageView)convertView.findViewById(R.id.img_icon);
                convertView.setTag(holder);
            }
            else
            {
                holder = (Holder)convertView.getTag();
            }
            InsuranceCompany region = riskArrayList.get(position);
            holder.text_AreaName.setText(region.name);
            if (checkedMap.get(position) != null && checkedMap.get(position) == true)
            {
                holder.text_AreaName.setChecked(true);
            }
            else
            {
                holder.text_AreaName.setChecked(false);
            }
            holder.text_AreaName.setOnClickListener(new View.OnClickListener()
            {

                @Override

                public void onClick(View v)
                {

                    // TODO Auto-generated method stub

                    CheckedTextView checkedTextView = (CheckedTextView)v;
                    checkedTextView.toggle();
                    checkedMap.put(position, checkedTextView.isChecked());

                }

            });

            Glide.with(mContext).load("http://p4.so.qhimg.com/t01eead9be5f0a448de.jpg").into(holder.img_icon);
            // Glide.with(mContext).load(region.icon).into(holder.img_icon);
            return convertView;
        }
    }
关键部分:必须在适配器里给CheckedTextView 设置监听器,设置选中和未选中的状态
 holder.text_AreaName.setOnClickListener(new View.OnClickListener()
            {

                @Override

                public void onClick(View v)
                {

                    // TODO Auto-generated method stub

                    CheckedTextView checkedTextView = (CheckedTextView)v;
                    checkedTextView.toggle();
                    checkedMap.put(position, checkedTextView.isChecked());

                }

            });
这样,CheckedTextView 选中和未选中,就能进行改变和存储了!
效果图:
写的不好,希望尽情指正不足!提前感谢


 4003
4003


 被折叠的 条评论
为什么被折叠?


