


上一篇文章 讲解了如何对矢量图进行转换(scale, rotation, translation),以及讲解了如何对 Path Data 进行图形变换(Morph)。那么今天,我继续完成矢量图动画的最后两个内容,修剪(trim) 和 裁剪(clip),这将作为矢量图动画的完结篇,在这篇文章中,我并不会抠细节,因为细节的问题,我在前2篇文章中已经讲解了,因此如果你看这篇文章比较吃力的话,肯定就是前面基础没打好。
那么本篇要完成的效果如下

获取矢量图
首先从 Android Studio 中获取这个小机器人的矢量图(不知道的看前面的文章),代码如下
<vector xmlns:android="http://schemas.android.com/apk/res/android"
        android:name="root"
        android:width="24dp"
        android:height="24dp"
        android:viewportHeight="24.0"
        android:viewportWidth="24.0">

    <path
        android:fillColor="#FF000000"
        android:pathData="M6,18c0,0.55 0.45,1 1,1h1v3.5c0,0.83 0.67,1.5 1.5,1.5s1.5,-0.67 1.5,-1.5L11,19h2v3.5c0,0.83 0.67,1.5 1.5,1.5s1.5,-0.67 1.5,-1.5L16,19h1c0.55,0 1,-0.45 1,-1L18,8L6,8v10zM3.5,8C2.67,8 2,8.67 2,9.5v7c0,0.83 0.67,1.5 1.5,1.5S5,17.33 5,16.5v-7C5,8.67 4.33,8 3.5,8zM20.5,8c-0.83,0 -1.5,0.67 -1.5,1.5v7c0,0.83 0.67,1.5 1.5,1.5s1.5,-0.67 1.5,-1.5v-7c0,-0.83 -0.67,-1.5 -1.5,-1.5zM15.53,2.16l1.3,-1.3c0.2,-0.2 0.2,-0.51 0,-0.71 -0.2,-0.2 -0.51,-0.2 -0.71,0l-1.48,1.48C13.85,1.23 12.95,1 12,1c-0.96,0 -1.86,0.23 -2.66,0.63L7.85,0.15c-0.2,-0.2 -0.51,-0.2 -0.71,0 -0.2,0.2 -0.2,0.51 0,0.71l1.31,1.31C6.97,3.26 6,5.01 6,7h12c0,-1.99 -0.97,-3.75 -2.47,-4.84zM10,5L9,5L9,4h1v1zM15,5h-1L14,4h1v1z"/>
</vector>
Trim Path Data
对于修剪(trim),先看看一个比较眼熟的例子

那么,SVG 中对 Path Data 的修剪,在 Android 中是如何做到的呢? 在上篇文章中我们提到,VectorDrawable 是由 < path > < group > < clip-path > 组成的,而 < path > 对 android:pathData 的修剪属性如下
android:trimPathStart:表示从头开始修剪android:pathData的比例因子,默认为0,也就是不做修剪。android:trimPathEnd:表示从尾开始修剪android:pathData的比例因子,默认为1,也就是不做修剪。android:trimPathOffset:这个属性是影响修剪区域的,默认值当然也为0,范围为0到1,设置这个属性后的修剪区域为 trimPathStart + trimPathOffset 到 trimPathEnd + trimPathEnd。
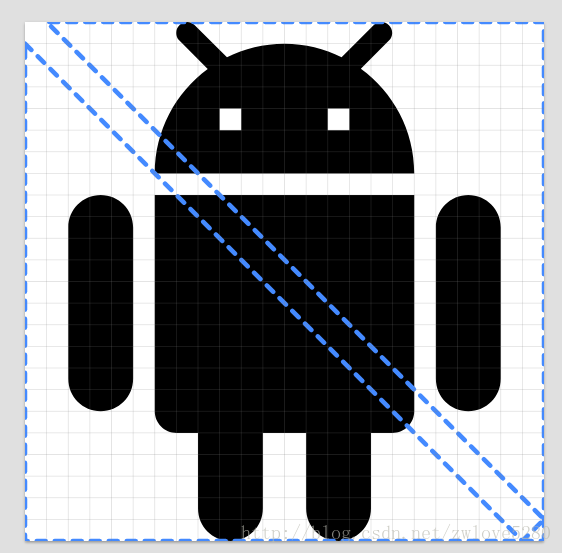
这么说可能比较抽象,那么我在刚获取的 Android 小机器人背后画一条线
<vector xmlns:android="http://schemas.android.com/apk/res/android"
        android:name="root"
        android:width="24dp"
        android:height="24dp"
        android:viewportHeight="24.0"
        android:viewportWidth="24.0">

    <path
        android:trimPathEnd="1"
        android:name="crossPath"
        android:pathData="M 0 2 L 22 24"
        android:strokeColor="#FF000000"
        android:strokeWidth="1"/>

    <path
        android:fillColor="#FF000000"
        android:pathData="M6,18c0,0.55 0.45,1 1,1h1v3.5c0,0.83 0.67,1.5 1.5,1.5s1.5,-0.67 1.5,-1.5L11,19h2v3.5c0,0.83 0.67,1.5 1.5,1.5s1.5,-0.67 1.5,-1.5L16,19h1c0.55,0 1,-0.45 1,-1L18,8L6,8v10zM3.5,8C2.67,8 2,8.67 2,9.5v7c0,0.83 0.67,1.5 1.5,1.5S5,17.33 5,16.5v-7C5,8.67 4.33,8 3.5,8zM20.5,8c-0.83,0 -1.5,0.67 -1.5,1.5v7c0,0.83 0.67,1.5 1.5,1.5s1.5,-0.67 1.5,-1.5v-7c0,-0.83 -0.67,-1.5 -1.5,-1.5zM15.53,2.16l1.3,-1.3c0.2,-0.2 0.2,-0.51 0,-0.71 -0.2,-0.2 -0.51,-0.2 -0.71,0l-1.48,1.48C13.85,1.23 12.95,1 12,1c-0.96,0 -1.86,0.23 -2.66,0.63L7.85,0.15c-0.2,-0.2 -0.51,-0.2 -0.71,0 -0.2,0.2 -0.2,0.51 0,0.71l1.31,1.31C6.97,3.26 6,5.01 6,7h12c0,-1.99 -0.97,-3.75 -2.47,-4.84zM10,5L9,5L9,4h1v1zM15,5h-1L14,4h1v1z"/>
</vector>

对比上面的代码,你会发现,我加上了一个 < path >,没错,这个 path 就是小机器人后面那条线,那么怎么控制这条线的长度呢,android:trimPathEnd 可以帮你解决,当然 android:trimPathStart 也可以,只是看想从哪边修剪这个 path。
那么现在我把 android:trimPathEnd 改小一点看看效果
<vector xmlns:android="http://schemas.android.com/apk/res/android"
        android:name="root"
        android:width="24dp"
        android:height="24dp"
        android:viewportHeight="24.0"
        android:viewportWidth="24.0">

    <path
        android:trimPathEnd="0.25"
        android:name="crossPath"
        android:pathData="M 0 2 L 22 24"
        android:strokeColor="#FF000000"
        android:strokeWidth="1"/>

    <path
        android:fillColor="#FF000000"
        android:pathData="M6,18c0,0.55 0.45,1 1,1h1v3.5c0,0.83 0.67,1.5 1.5,1.5s1.5,-0.67 1.5,-1.5L11,19h2v3.5c0,0.83 0.67,1.5 1.5,1.5s1.5,-0.67 1.5,-1.5L16,19h1c0.55,0 1,-0.45 1,-1L18,8L6,8v10zM3.5,8C2.67,8 2,8.67 2,9.5v7c0,0.83 0.67,1.5 1.5,1.5S5,17.33 5,16.5v-7C5,8.67 4.33,8 3.5,8zM20.5,8c-0.83,0 -1.5,0.67 -1.5,1.5v7c0,0.83 0.67,1.5 1.5,1.5s1.5,-0.67 1.5,-1.5v-7c0,-0.83 -0.67,-1.5 -1.5,-1.5zM15.53,2.16l1.3,-1.3c0.2,-0.2 0.2,-0.51 0,-0.71 -0.2,-0.2 -0.51,-0.2 -0.71,0l-1.48,1.48C13.85,1.23 12.95,1 12,1c-0.96,0 -1.86,0.23 -2.66,0.63L7.85,0.15c-0.2,-0.2 -0.51,-0.2 -0.71,0 -0.2,0.2 -0.2,0.51 0,0.71l1.31,1.31C6.97,3.26 6,5.01 6,7h12c0,-1.99 -0.97,-3.75 -2.47,-4.84zM10,5L9,5L9,4h1v1zM15,5h-1L14,4h1v1z"/>
</vector>

效果不言而喻了把,其他2个修剪属性自己动动手把。
Clip Path Data
先看个比较熟悉的例子

裁剪 Path Data 也就是画出一个区域,在这个区域中的图形显示出来,不在这个区域的就不显示。那么我就再到上面修剪的例子中,裁剪这个小机器人
<vector xmlns:android="http://schemas.android.com/apk/res/android"
        android:name="root"
        android:width="24dp"
        android:height="24dp"
        android:viewportHeight="24.0"
        android:viewportWidth="24.0">

    <clip-path
        android:name="maskClipPath"
        android:pathData="M 0 1 L 23 24 L 24 23 L 1 0 L 24 0 L 24 24 L 0 24 Z"/>

    <path
        android:name="crossPath"
        android:pathData="M 0 2 L 22 24"
        android:strokeColor="#FF000000"
        android:strokeWidth="1"/>

    <path
        android:fillColor="#FF000000"
        android:pathData="M6,18c0,0.55 0.45,1 1,1h1v3.5c0,0.83 0.67,1.5 1.5,1.5s1.5,-0.67 1.5,-1.5L11,19h2v3.5c0,0.83 0.67,1.5 1.5,1.5s1.5,-0.67 1.5,-1.5L16,19h1c0.55,0 1,-0.45 1,-1L18,8L6,8v10zM3.5,8C2.67,8 2,8.67 2,9.5v7c0,0.83 0.67,1.5 1.5,1.5S5,17.33 5,16.5v-7C5,8.67 4.33,8 3.5,8zM20.5,8c-0.83,0 -1.5,0.67 -1.5,1.5v7c0,0.83 0.67,1.5 1.5,1.5s1.5,-0.67 1.5,-1.5v-7c0,-0.83 -0.67,-1.5 -1.5,-1.5zM15.53,2.16l1.3,-1.3c0.2,-0.2 0.2,-0.51 0,-0.71 -0.2,-0.2 -0.51,-0.2 -0.71,0l-1.48,1.48C13.85,1.23 12.95,1 12,1c-0.96,0 -1.86,0.23 -2.66,0.63L7.85,0.15c-0.2,-0.2 -0.51,-0.2 -0.71,0 -0.2,0.2 -0.2,0.51 0,0.71l1.31,1.31C6.97,3.26 6,5.01 6,7h12c0,-1.99 -0.97,-3.75 -2.47,-4.84zM10,5L9,5L9,4h1v1zM15,5h-1L14,4h1v1z"/>
</vector>
效果也是不言而喻吧。那么,问题来了,怎么才能裁剪这么精准呢? 那当然是用前面文章提到的网站,给大家看下用网站完成的修剪区域
前面例子中,小机器人背后那一条线,也是用网站模拟的。
生成AnimatedVectorDrawable
上面裁剪例子中的图片与效果图中有点差距,是因为没有设置 alpha ,那么现在设置下
my_android_disable.xml
<vector xmlns:android="http://schemas.android.com/apk/res/android"
        android:name="root"
        android:width="24dp"
        android:height="24dp"
        android:alpha="0.3"
        android:viewportHeight="24.0"
        android:viewportWidth="24.0">

    <clip-path
        android:name="maskClipPath"
        android:pathData="M 0 1 L 23 24 L 24 23 L 1 0 L 24 0 L 24 24 L 0 24 Z"/>

    <path
        android:name="crossPath"
        android:pathData="M 0 2 L 22 24"
        android:strokeColor="#FF000000"
        android:strokeWidth="1"/>

    <path
        android:fillColor="#FF000000"
        android:pathData="M6,18c0,0.55 0.45,1 1,1h1v3.5c0,0.83 0.67,1.5 1.5,1.5s1.5,-0.67 1.5,-1.5L11,19h2v3.5c0,0.83 0.67,1.5 1.5,1.5s1.5,-0.67 1.5,-1.5L16,19h1c0.55,0 1,-0.45 1,-1L18,8L6,8v10zM3.5,8C2.67,8 2,8.67 2,9.5v7c0,0.83 0.67,1.5 1.5,1.5S5,17.33 5,16.5v-7C5,8.67 4.33,8 3.5,8zM20.5,8c-0.83,0 -1.5,0.67 -1.5,1.5v7c0,0.83 0.67,1.5 1.5,1.5s1.5,-0.67 1.5,-1.5v-7c0,-0.83 -0.67,-1.5 -1.5,-1.5zM15.53,2.16l1.3,-1.3c0.2,-0.2 0.2,-0.51 0,-0.71 -0.2,-0.2 -0.51,-0.2 -0.71,0l-1.48,1.48C13.85,1.23 12.95,1 12,1c-0.96,0 -1.86,0.23 -2.66,0.63L7.85,0.15c-0.2,-0.2 -0.51,-0.2 -0.71,0 -0.2,0.2 -0.2,0.51 0,0.71l1.31,1.31C6.97,3.26 6,5.01 6,7h12c0,-1.99 -0.97,-3.75 -2.47,-4.84zM10,5L9,5L9,4h1v1zM15,5h-1L14,4h1v1z"/>
</vector>

那么现在我需要一个AnimatedVectorDrawable,让它回到原本小机器人的样子。
<?xml version="1.0" encoding="utf-8"?>
<animated-vector xmlns:android="http://schemas.android.com/apk/res/android"
                 android:drawable="@drawable/my_android_disable">

    <target
        android:animation="@animator/my_android_alpha_to_1"
        android:name="root"/>

    <target
        android:animation="@animator/my_android_cross_to_disappear"
        android:name="crossPath"/>

    <target
        android:animation="@animator/my_android_clip"
        android:name="maskClipPath"/>

</animated-vector>
my_android_alpha_to_1.xml
<?xml version="1.0" encoding="utf-8"?>
<objectAnimator xmlns:android="http://schemas.android.com/apk/res/android"
                android:duration="1000"
                android:interpolator="@android:interpolator/fast_out_slow_in"
                android:propertyName="alpha"
                android:valueFrom="0.3"
                android:valueTo="1.0"/>
my_android_cross_to_disappear.xml
<?xml version="1.0" encoding="utf-8"?>
<objectAnimator xmlns:android="http://schemas.android.com/apk/res/android"
                android:duration="1000"
                android:interpolator="@android:interpolator/fast_out_slow_in"
                android:propertyName="trimPathEnd"
                android:valueFrom="1"
                android:valueTo="0"/>
my_android_clip.xml
<?xml version="1.0" encoding="utf-8"?>
<objectAnimator xmlns:android="http://schemas.android.com/apk/res/android"
                android:duration="1000"
                android:interpolator="@android:interpolator/fast_out_slow_in"
                android:propertyName="pathData"
                android:valueFrom="M 0 1 L 23 24 L 24 23 L 1 0 L 24 0 L 24 24 L 0 24 Z"
                android:valueTo="M 0 1 L 0.333 0.667 L 0.667 0.333 L 1 0 L 24 0 L 24 24 L 0 24 Z"
                android:valueType="pathType">

</objectAnimator>
如果你看到这里觉得非常吃力,请看我前面的2篇文章
现在我为一个 ImageView 设置一个 android:src
    <ImageView
        android:id="@+id/android_avd1"
        android:layout_width="200dp"
        android:layout_height="200dp"
        android:layout_centerInParent="true"
        android:src="@drawable/my_android_disable_to_enable"
        android:tint="@color/colorPrimary"/>
然后,启动动画
        imageView.setOnClickListener(new View.OnClickListener() {
            @Override
            public void onClick(View v) {
                AnimatedVectorDrawable drawable = (AnimatedVectorDrawable) finalImageView.getDrawable();
                drawable.start();
            }
        });
到一步的话,就恭喜你

那么,制作一个相反的动画的 AnimatedVectorDrawable 应该就小菜一碟吧。
Animated-Selector实现切换动画
现在我们已经知道如何绘制转换的动画了,那么怎么才能实现动画切换呢? “小弟,我看你骨骼惊奇,是万中无一的练武奇才。维护世界和平的任务就靠你了。我这里有本秘籍,我看与你有缘,免费送你了!”

回归正题,用 Animated-Selector 可以根据不同的状态来调用不同的动画,从而达到切换动画的效果。
<?xml version="1.0" encoding="utf-8"?>
<animated-selector xmlns:android="http://schemas.android.com/apk/res/android">

    <item
        android:state_activated="true"
        android:id="@+id/android_enable"
        android:drawable="@drawable/my_android_enable"/>

    <item
        android:id="@+id/android_disable"
        android:drawable="@drawable/my_android_disable"
        />

    <transition
        android:drawable="@drawable/my_android_disable_to_enable"
        android:fromId="@id/android_disable"
        android:toId="@id/android_enable"/>

    <transition
        android:drawable="@drawable/my_android_enable_to_disable"
        android:fromId="@id/android_enable"
        android:toId="@id/android_disable"/>
</animated-selector>
代码里面所涉及的动画和矢量图,其实在前面已经给出了,就请大家自己动手实现。 最后我们需要切换状态,来显示不同的图片
        imageView.setOnClickListener(new View.OnClickListener() {
            @Override
            public void onClick(View v) {
                imageView.setActivated(!finalImageView1.isActivated());
            }
        });
如果,你到这一步,我只能说,兄弟,你果然是个练武奇才。
结束
本篇文章是 Android 矢量图以及矢量图动画的完结篇,综合前面一片文章,总共讲解了对 Path Data 的转换(transition: scale, rotation, translation) , 修剪(trim),裁剪(clip)。重点应该都覆盖了,其他细节就给大家自己去探索了。
参考文章
http://www.androiddesignpatterns.com/2016/11/introduction-to-icon-animation-techniques.html
http://www.jcodecraeer.com/a/anzhuokaifa/androidkaifa/2015/0519/2894.html
https://developer.android.com/reference/android/graphics/drawable/VectorDrawable.html


 3212
3212


 被折叠的 条评论
为什么被折叠?
被折叠的 条评论
为什么被折叠?
 到【灌水乐园】发言


