


在一些项目中,可能有多个服务器,每个服务器都有session,但,同一个用户,我们肯定是希望只存在同一个session。比如,用户的多端登录。这样的话,我们就需要使用session复制,或者redis、memcache等缓存来实现,这里,介绍tomcat下的session复制。
1.部署两个tomcat
因为我是单机试验,所以就部署两个不同端口的tomcat,8080端口和8081端口,不清楚的同学,可以参考我这篇文章。tomcat单机多实例部署
2.建立一个j2ee的项目
这个项目,主要有二个功能,
2.1 写一个session
2.2 读取这个session中的值
这里为了简单,就直接在jsp中操作session。
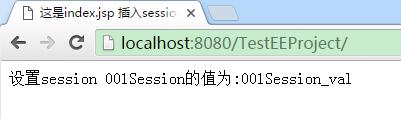
index.jsp 放session
<%@ page language="java" contentType="text/html; charset=utf-8"
	pageEncoding="utf-8"%>
<!DOCTYPE html PUBLIC "-//W3C//DTD HTML 4.01 Transitional//EN" "http://www.w3.org/TR/html4/loose.dtd">
<html>
<head>
	<meta http-equiv="Content-Type" content="text/html; charset=utf-8">
	<title>这是index.jsp 插入session</title>
	<%
		session.setAttribute("001Session", "001Session_val");
		out.print("设置session 001Session的值为:001Session_val");
	%>
</head>
<body>

</body>
</html>
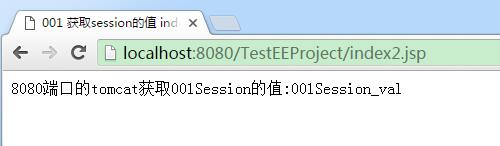
index2.jsp 取session的值(8080端口)
<%@ page language="java" contentType="text/html; charset=utf-8"
	pageEncoding="utf-8"%>
<!DOCTYPE html PUBLIC "-//W3C//DTD HTML 4.01 Transitional//EN" "http://www.w3.org/TR/html4/loose.dtd">
<html>
<head>
	<meta http-equiv="Content-Type" content="text/html; charset=utf-8">
	<title>001 获取session的值  index2.jsp</title>
	<%
		String sessionVal = (String)session.getAttribute("001Session");
		out.print("8080端口的tomcat获取001Session的值:"+sessionVal);
	%>
</head>
<body>

</body>
</html>
index3.jsp 取session的值(8081端口)
<%@ page language="java" contentType="text/html; charset=utf-8"
	pageEncoding="utf-8"%>
<!DOCTYPE html PUBLIC "-//W3C//DTD HTML 4.01 Transitional//EN" "http://www.w3.org/TR/html4/loose.dtd">
<html>
<head>
	<meta http-equiv="Content-Type" content="text/html; charset=utf-8">
	<title>001 获取session的值  index3.jsp</title>
	<%
		String sessionVal = (String)session.getAttribute("001Session");
		out.print("8081端口的tomcat获取001Session的值:" + sessionVal);
	%>
</head>
<body>

</body>
</html>
3.配置tomcat
1.配置8080端口,conf/server.xml文件,<server>节点,开启<Engine>节点,并增加属性 jvmRoute="jvm1"。在engine节点中,增加子节点内容
<Cluster className="org.apache.catalina.ha.tcp.SimpleTcpCluster" channelSendOptions="8">

          <Manager className="org.apache.catalina.ha.session.DeltaManager"
                   expireSessionsOnShutdown="false"
                   notifyListenersOnReplication="true"/>

          <Channel className="org.apache.catalina.tribes.group.GroupChannel">
            <Membership className="org.apache.catalina.tribes.membership.McastService"
                        address="228.0.0.4"
                        port="45564"
                        frequency="500"
                        dropTime="3000"/>
            <Receiver className="org.apache.catalina.tribes.transport.nio.NioReceiver"
                      address="auto"
                      port="4000"
                      autoBind="100"
                      selectorTimeout="5000"
                      maxThreads="6"/>

            <Sender className="org.apache.catalina.tribes.transport.ReplicationTransmitter">
              <Transport className="org.apache.catalina.tribes.transport.nio.PooledParallelSender"/>
            </Sender>
            <Interceptor className="org.apache.catalina.tribes.group.interceptors.TcpFailureDetector"/>
            <Interceptor className="org.apache.catalina.tribes.group.interceptors.MessageDispatch15Interceptor"/>
          </Channel>

          <Valve className="org.apache.catalina.ha.tcp.ReplicationValve"
                 filter=""/>
          <Valve className="org.apache.catalina.ha.session.JvmRouteBinderValve"/>

          <Deployer className="org.apache.catalina.ha.deploy.FarmWarDeployer"
                    tempDir="/tmp/war-temp/"
                    deployDir="/tmp/war-deploy/"
                    watchDir="/tmp/war-listen/"
                    watchEnabled="false"/>

          <ClusterListener className="org.apache.catalina.ha.session.JvmRouteSessionIDBinderListener"/>
          <ClusterListener className="org.apache.catalina.ha.session.ClusterSessionListener"/>
</Cluster>2.配置8081端口,类似1步骤,只需要把jvmRoute="jvm2"
tips:因为这里是本地开启2台tomcat,所以address="auto"
4.测试效果
前面三步已经打好准备,现在我们可以来看下效果。
8080端口
1.在session中写值,即访问8080端口下的index.jsp界面
2.读session的值,即访问8080端口下的index.jsp界面
8081端口
3.读取session的值
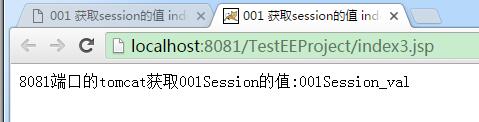
congratulation 8081端口顺利取得8080端口下写的session!
参考 http://containsoft.iteye.com/blog/1728209
http://nanquan.iteye.com/blog/1533906


 被折叠的 条评论
为什么被折叠?
被折叠的 条评论
为什么被折叠?
 到【灌水乐园】发言


