


说明:这里是借鉴:晓风残月 前辈的博客,他是将泰然网的跑酷教程,用cocos2d-x 2.X 版本重写的,目前我正在学习cocos2d-X3.0 于是就用cocos2d-X 3.0重写,并做相关笔记
这一步当中,我们主要完成以下功能:
1.地图的无限滚动---让主角看起来真的是在跑动
2.给主角添加Jump跳跃和crouch下蹲动作
那么首先来让背景滚动起来,在PlayScene.h中添加:
//初始化背景
void initBG();
//用update函数让地图滚动
virtual void update(float dt);

//背景精灵
cocos2d::Sprite* bgSprite1;
cocos2d::Sprite* bgSprite2;
cocos2d::Sprite* groundSprite1;
cocos2d::Sprite* groundSprite2;
void PlayScene::initBG(){
	auto visibleSize = Director::getInstance()->getVisibleSize();
	//背景1
	bgSprite1 = Sprite::create("Map00.png");
	bgSprite1->setPosition(visibleSize.width/2,visibleSize.height/2);
	this->addChild(bgSprite1);

	//地面1
	groundSprite1 = Sprite::create("Ground00.png");
	groundSprite1->setPosition(visibleSize.width/2,groundSprite1->getContentSize().height/2);
	this->addChild(groundSprite1);

	//背景2
	bgSprite2 = Sprite::create("Map01.png");
	bgSprite2->setPosition(bgSprite1->getContentSize().width+visibleSize.width/2,visibleSize.height/2);
	this->addChild(bgSprite2);

	//地面2
	groundSprite2 = Sprite::create("Ground01.png");
	groundSprite2->setPosition(bgSprite1->getContentSize().width+visibleSize.width/2,groundSprite2->getContentSize().height/2);
	this->addChild(groundSprite2);
}

void PlayScene::update(float dt){
	int posX1 = bgSprite1->getPositionX();
	int posX2 = bgSprite2->getPositionX();

	posX1 -= 2;
	posX2 -= 2;

	auto mapSize = bgSprite1->getContentSize();

	if(posX1 < -mapSize.width/2){
		posX1 = mapSize.width + mapSize.width/2;
		posX2 = mapSize.width/2;
	}
	if(posX2 < -mapSize.width/2){
		posX2 = mapSize.width + mapSize.width/2;
		posX1 = mapSize.width/2;
	}

	bgSprite1->setPositionX(posX1);
	bgSprite2->setPositionX(posX2);
	groundSprite1->setPositionX(posX1);
	groundSprite2->setPositionX(posX2);
}
bool PlayScene::init(){
	if(!Layer::init()){
		return false;
	}

	SimpleAudioEngine::getInstance()->playBackgroundMusic("background.mp3",true);

	initPhysicWorld();

	initBG();

	//开启update
	this->scheduleUpdate();

	m_runner = Runner::create();
	m_runner->setPosition(runner_posX,ground_hight+m_runner->getRunJumpSize().height/2);
	m_runner->Run();

	this->addChild(m_runner);

	return true;
}
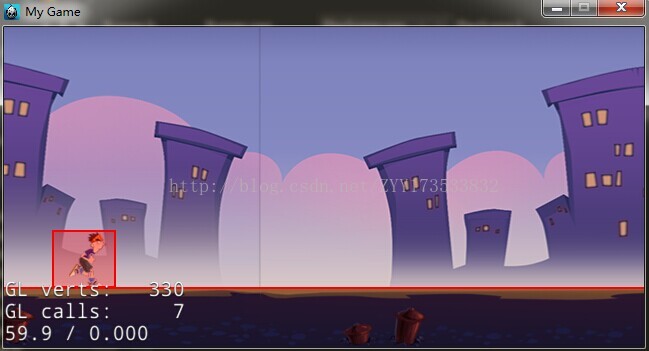
这里任然不是 动态的截图,所以看不出地图滚动的效果,求指导。。。
下面来为主角添加除开跑动的其他动作:
在Runner的 initActionSet函数中,我们先添加其他的帧动画:
void Runer::initActionSet(SpriteFrameCache* frameCache){
	SpriteFrame* frame = NULL;
	//3.0中改用vector 而不是用Array
	Vector<SpriteFrame*>frameVector;

	/* 1.----------------加载跑动的Animation-----------------*/
	for(int i = 0; i <= 7; i ++) {
		//从缓存池中加载精灵到Vector
		frame = frameCache->spriteFrameByName(String::createWithFormat("runner%d.png",i)->getCString());
		frameVector.pushBack(frame);
	}

	//用vector里面的SpriteFrame列表创建Animation  以及设置一些参数
	auto run_animation = Animation::createWithSpriteFrames(frameVector,0.1f,-1);
	//将跑动的 Animation 取名为 running
	AnimationCache::getInstance()->addAnimation(run_animation,"running");

	/*4------------------加载跳跃过程中上升的动画---------------------------*/
	frameVector.clear();
	for(int i = 0; i <= 3; i ++){
		frame = frameCache->spriteFrameByName(String::createWithFormat("runnerJumpUp%d.png",i)->getCString());
		frameVector.pushBack(frame);
	}
	auto jumpUp_animation = Animation::createWithSpriteFrames(frameVector,0.2);//不设置无限循环
	AnimationCache::getInstance()->addAnimation(jumpUp_animation,"jumpUp");

	/*------------------加载跳跃过程中下落的动画----------------------------*/
	frameVector.clear();
	for(int i = 0; i <= 1; i ++){
		frame = frameCache->spriteFrameByName(String::createWithFormat("runnerJumpDown%d.png",i)->getCString());
		frameVector.pushBack(frame);
	}
	auto jumpDown_animation = Animation::createWithSpriteFrames(frameVector,0.3);
	AnimationCache::getInstance()->addAnimation(jumpDown_animation,"jumpDown");

	/*------------------加载下蹲-------------------------------------------*/
	frameVector.clear();
	frame = frameCache->spriteFrameByName("runnerCrouch0.png");
	frameVector.pushBack(frame);
	auto crouch_animation = Animation::createWithSpriteFrames(frameVector,0.3);//不设置无限循环
	AnimationCache::getInstance()->addAnimation(crouch_animation,"crouch");

}
void Jump();

void Crouch();

virtual void update(float dt);
void Runner::Jump(){
	//只有在跑动时才能起跳
	if(m_state == running){
		m_state = jumpUp;

		auto mass = this->getPhysicsBody()->getMass()*150;// 力大小

		this->getPhysicsBody()->applyImpulse(Vect(0,mass));

	    m_runner->stopAllActions();

	    doAction("jumpUp");
	}
}

void Runner::update(float dt){
	auto vel = this->getPhysicsBody()->getVelocity();
	if(m_state == jumpUp){
		if(vel.y < 0.1){
			m_state = jumpDown;
			m_runner->stopAllActions();
			doAction("jumpDown");
		}
	}

	if(m_state == jumpDown){
		CCLOG("%f",vel.y);
		//不应该是 等于 0
		if(vel.y > 0){
			m_state = running;
			m_runner->stopAllActions();
			doAction("running");
		}
	}
}

void Runner::Crouch(){
	//只能在跑动的时候蹲下
	if(m_state == running){
		m_state = crouch;
		m_runner->stopAllActions();
		initBody();
		doAction("crouch");
	}
}这里的Jump 我们就给主角一个向上的力,并且这个力是瞬时力,这样主角就会上升,但是加速度向下,慢慢到达最高点然后 由于重力而下落;
这里的 update函数用来做这个事: 当主角向上跳到最高点的时候,就应该下落,切换下落状态,执行下落帧动画,这里是借鉴了前辈的,首先在JumpUp状态下,如果y速度小于 0.1 那么我们认为它到了最高点,切换下落。在JumpDown状态下,y速度大于0,我们就认为它到达了地面,切换跑动状态。 前辈的判断中是 vel.y == 0 过程中我调试了,因为速度是float,== 0这种判断很不精确,然后我的主角就一直处于下落的那个动作状态啦。。。。。Ok到这里,我们主角的动作都准备好了,下面就开始添加 按钮,来控制主角执行这些动作啦!!
个人愚昧观点,欢迎指正与讨论 (好像也没人会和我讨论,,哎
 )
)


 4426
4426


 被折叠的 条评论
为什么被折叠?
被折叠的 条评论
为什么被折叠?
 到【灌水乐园】发言


