


弋.目录
RHCE板块
欢迎来到我的博客,这里是Linux板块,配合之前RHCSA进阶,希望我的博客可以帮助到您,感谢您的阅读,有什么问题还希望一起探讨交流,感谢各位的支持,感谢!
- 使用Linux搭建一个简单的论坛
- RHCE——一、安装部署及例行性工作
- RHCE——二、时间服务器
- RHCE——三、远程连接服务器
- RHCE——四、Web服务器(理论篇
- RHCE——五、Web服务器及内网穿透(实验篇
- RHCE——六、基于https协议的静态网站
- RHCE——七、搭建云存储器
- RHCE——八、DNS域名解析服务器
- RHCE——九、SELinux
- RHCE——十、防火墙、iptables、firewalld
- RHCE——十一、NFS服务器
- RHCE——十二、Mysql服务
- RHCE——十三、Shell自动化运维编程基础
- RHCE——十四、变量和引用
- RHCE——十五、shell条件测试
- RHCE——十六、流程控制之条件判断、循环
- RHCE——十七、文本搜索工具-grep、正则表达式
- RHCE——十八、shell编程之sed
- RHCE——十九、shell编程之awk
- RHCE——二十、Ansible及安装与配置
- RHCE——二十一、Ansible模块
一、什么是数据库
1、数据:
- 描述事物的符号记录, 可以是数字、 文字、图形、图像、声音、语言等,数据有多种形式,它们都可以经过数字化后存入计算机。
2、数据库:
- 存储数据的仓库,是长期存放在计算机内、有组织、可共享的大量数据的集合。数据库中的数据按照一定数据模型组织、描述和存储,具有较小的冗余度,较高的独立性和易扩展性,并为各种用户共享,总结为以下几点:
- 数据结构化
- 数据的共享性高,冗余度低,易扩充
- 数据独立性高
- 数据由 DBMS 统一管理和控制(安全性、完整性、并发控制、故障恢复)
二、mysql概述
- MySQL是一个小型关系数据库管理系统,开发者为瑞典MySQL AB公司。在2008年1月16号被sun公司10亿美金收购。2009年,SUN又被Oracle以74亿美金收购。
- 目前MySQL被广泛地应用在Internet上的中小型网站中。由于体积小、速度快、总体拥有成本低,尤其是开放源代码这一特点,许多中小型网站为了降低网站总体拥有成本而选择了MySQL作为网站数据库。

三、版本及下载
- MySQL数据库存在多种版本,不同的版本在不同的平台上:https://dev.mysql.com/downloads/mysql/

- 也可以选择MySQL对应版本的,找到安装教程,如MySQL5.7为例:https://dev.mysql.com/doc/refman/5.7/en/installing.html

四、yum仓库安装
1、添加yum源
- 访问官方:https://www.mysql.com/
- 查看官方教程:https://dev.mysql.com/doc/refman/8.0/en/linux-installation-yum-repo.html
- 选择downloads页面的:MySQL Community (GPL) Downloads »


- 选择版本后下载yum源

- 添加yum源
[root@server ~]# wget  https://dev.mysql.com/get/mysql80-community-release-el9-4.noarch.rpm    #下载的是yum仓库
[root@server ~]# rpm  -ivh  mysql80-community-release-el9-4.noarch.rpm
[root@server ~]# yum  list  |  grep  mysql
2、安装
[root@server ~]# yum install mysql-community-server.x86_64 -y
3、后续配置
[root@server ~]# systemctl start mysqld
[root@server ~]# systemctl enable mysqld
[root@server ~]# systemctl status mysqld
# 查找more初始登录密码
[root@server ~]# grep  'temporary password'   /var/log/mysqld.log
2023-08-28T06:16:58.147434Z 6 [Note] [MY-010454] [Server] A temporary password is generated for root@localhost: 8ahL5ZigYk#t
[root@server ~]# mysql  -uroot -p
Enter password:    # 粘贴默认初始密码
Welcome to the MySQL monitor.  Commands end with ; or \g.
Your MySQL connection id is 9
Server version: 8.0.34
Copyright (c) 2000, 2023, Oracle and/or its affiliates.
Oracle is a registered trademark of Oracle Corporation and/or its
affiliates. Other names may be trademarks of their respective
owners.
Type 'help;' or '\h' for help. Type '\c' to clear the current input statement.
mysql> show variables like 'validate_password.%';  # 查看密码设置默认的规则
+--------------------------------------+--------+
| Variable_name                        | Value  |
+--------------------------------------+--------+
| validate_password.check_user_name    | ON     | # ON时,账户及密码不能相同
| validate_password.dictionary_file    |        | # 规则文件保存路径
| validate_password.length             | 8      | # 密码长度
| validate_password.mixed_case_count   | 1      | # 至少要包含大/小写字母的个数
| validate_password.number_count       | 1      | # 至少要包含数字的个数
| validate_password.policy             | MEDIUM | # 密码的验证强度等级
| validate_password.special_char_count | 1      | # 密码中特殊字符个数
+--------------------------------------+--------+
7 rows in set (0.01 sec)
# 默认为中级密码验证规则,密码长度8为,内容至少包含:一个大写字母、一个小写字母、一位数字和一个特殊字符
# 若密码不好记忆可以调低密码验证等级,在设置简单的密码,但生产中不推荐
mysql> set global validate_password.policy=low;
mysql> set global validate_password.length=6;
mysql> alter user 'root'@'localhost'  identified  by  '123456';
mysql> exit
Bye
[root@server ~]#  mysql -u root -p
Enter password:       # 密码为123456
mysql> show databases;    # 注意s和分号结尾
+--------------------+
| Database           |
+--------------------+
| information_schema |
| mysql              |
| performance_schema |
| sys                |
+--------------------+
mysql> show global variables like 'port';      # 查看默认端口号
+---------------+-------+
| Variable_name | Value |
+---------------+-------+
| port          | 3306  |
+---------------+------+
1 row in set (0.00 sec)
mysql> quit
Bye
五、本地RPM包安装
1、使用迅雷下载集合包
- 进入下载网站:https://downloads.mysql.com/archives/community/
- 如图:


2、上传数据
- 使用xftp将下载安装包上传到linux端
3、安装


[root@server ~]# cd  /
[root@server /]# tar  -xvf  mysql-8.0.32-1.el9.x86_64.rpm-bundle.tar
[root@server /]# cd  ~
[root@server ~]# systemctl start  mysqld
[root@server ~]# grep  'temporary password'   /var/log/mysqld.log
2023-08-28T07:10:13.995223Z 6 [Note] [MY-010454] [Server] A temporary password is generated for root@localhost: u:Hr.Lt*c4kj
[root@server ~]# mysql  -uroot  -p
Enter password:    # 粘贴默认密码
Welcome to the MySQL monitor.  Commands end with ; or \g.
Your MySQL connection id is 9
Server version: 8.0.32
Copyright (c) 2000, 2023, Oracle and/or its affiliates.
Oracle is a registered trademark of Oracle Corporation and/or its
affiliates. Other names may be trademarks of their respective
owners.
Type 'help;' or '\h' for help. Type '\c' to clear the current input statement.
mysql> alter user 'root'@'localhost'  identified by 'Admin123!';  # 修改密码
Query OK, 0 rows affected (0.01 sec)
mysql> exit
Bye
[root@server ~]# mysql  -uroot  -p
Enter password:   # 用Admin123!尝试登录

六、生产环境中使用通用二进制包安装(省略了源码编译的过程)
1、作用
- 二进制包:源码包经过成功编译之后产生的包
- 优点:由于二进制包在发布之前就已经完成了编译的工作,因此用户安装软件的速度较快
- 注意:在生产环境中通用二进制包安装方法较为常用
2、软件包下载
- 网址:https://dev.mysql.com/downloads/mysql/
- 如图:

- 根据上图系统参数里的glibc版本和cpu架构选择对应的下载选项:

3、使用xftp将软件包上传到根目录并解压缩
[root@server ~]# cd  /
[root@server /]# tar -xvf mysql-8.0.33-linux-glibc2.17-x86_64-minimal.tar
# 解压缩后有三个子包
# mysql-8.0.33-linux-glibc2.17-x86_64-minimal.tar.xz:安装mysql必须的文件
# mysql-router-8.0.33-linux-glibc2.17-x86_64-minimal.tar.xz:官方提供的一个轻量级中间件,主要作用是在应用程序与MySQL服务器之间提供透明的路由方式,是高可用性 (HA) 解决方案的构建块
# mysql-test-8.0.33-linux-glibc2.17-x86_64-minimal.tar.xz:测试框架,用于做mysql 服务的单元,回归和一致性测试,并提供了运行单元测试和创建新单元测试的工具
# 继续解压缩
[root@server /]# tar -xvf mysql-8.0.33-linux-glibc2.17-x86_64-minimal.tar.xz
[root@server /]# ls


4、使用前的准备
[root@server /]# mv mysql-8.0.33-linux-glibc2.17-x86_64-minimal /usr/local/mysql  # 移动到默认安装目录,也可自行修改
[root@server /]# cd /usr/local/mysql
[root@server mysql]# groupadd mysql123    # 创建名为mysql123的用户组
[root@server mysql]# useradd -r -g mysql123 -s /bin/false mysql  # 创建名为 mysql的系统用户,将其添加到mysql123用户组中,并设置其登录shell为/bin/false,以限制该用户的登录权限(-r创建一个系统账户,-g指定基本组,-s指定用户登录后使用的Shell)
[root@server mysql]# mkdir mysql-files   # 创建一个名为 mysql-files 的目录,用于存放MySQL数据文件,一般存储备份数据
[root@server mysql]# chown mysql:mysql123 mysql-files     # 将mysql-files目录的所有者和所属组设置为mysql用户和mysql123组
[root@server mysql]# chmod 750 mysql-files    # 设置mysql-files目录的权限为 750,以确保只有 “mysql” 用户组的成员可以读取、写入和执行该目录

5、初始化软件
[root@server mysql]# bin/mysqld --initialize --user=mysql  # 注意:需要复制密码(rhRil1TiHh-Y)
[root@server mysql]# bin/mysql_ssl_rsa_setup  # 支持ssl,用于安全通信
[root@server mysql]# bin/mysqld_safe --user=mysql &  # 使用后台方式以mysql用户身份启动 MySQL 服务器,mysqld_safe 是一个用于启动和监控 MySQL 服务器的脚本(相当于systemctl start mysqld)
# 注意:此时上述命令执行完毕处于后台运行状态,需要另行启动一个终端
[root@server ~]# ps  -ef | grep  mysql   # 查看进程运行状态
[root@server ~]# cd /usr/local/mysql
[root@server mysql]# bin/mysql -u root -p   # 登录,可能报错
# 报错,需要找到下面的文件进行软连接
[root@server mysql]# find / -name 'libncurses*'


[root@server mysql]# ln -s /usr/lib64/libncurses.so.6.2 /usr/lib64/libncurses.so.5   #做软链接解决
[root@server mysql]# ln -s /usr/lib64/libtinfo.so.6.2  /usr/lib64/libtinfo.so.5

[root@server ~]# bin/mysql -u root -p
Enter password:   # 粘贴之前的初始密码
mysql> alter  user 'root'@'localhost'  identified  with  mysql_native_password by '123456';  修改密码
mysql> flush privileges;   # 刷新
mysql>exit
[root@server ~]# ps -ef | grep mysql
[root@server ~]# kill  -9  pid号   # 在当前终端关闭运行的mysql

6、设置mysql的配置文件(使其可以通过systemctl命令启动)
# 回到之前的终端,敲一个回车,显示进程以杀死
[root@server mysql]# vim /etc/my.cnf  # 新建mysql主配置文件,输入以下内容:
[client]
port = 3306
socket = /tmp/mysql.sock
[mysqld]
server-id = 1
port = 3306
basedir = /usr/local/mysql
datadir = /usr/local/mysql/data
tmpdir = /tmp
socket = /tmp/mysql.sock
character-set-server = utf8mb4
collation-server = utf8mb4_general_ci
init_connect='SET NAMES utf8mb4'
default-storage-engine=INNODB
log_error = error.log

# 注意:以下是上述配置文件的解释
[client]      # 客户端设置
port = 3306   # 默认端口号
socket = /tmp/mysql.sock   # 启动套接字 (启动文件)

[mysqld]
###############################基础设置#####################################
server-id = 1      # Mysql服务的唯一编号 每个mysql服务Id需唯一
port = 3306        # 端口号 3306
basedir = /usr/local/mysql     # mysql安装根目录
datadir = /usr/local/mysql/data    # mysql数据文件所在位置 没有改目录则创建
tmpdir = /tmp    # 临时目录 比如load data infile会用到
socket = /tmp/mysql.sock   # 设置socke文件所在目录
#数据库默认字符集,主流字符集支持一些特殊表情符号(特殊表情符占用4个字节)
character-set-server = utf8mb4
#数据库字符集对应一些排序等规则,注意要和character-set-server对应
collation-server = utf8mb4_general_ci
#设置client连接mysql时的字符集,防止乱码
init_connect='SET NAMES utf8mb4'
default-storage-engine=INNODB
###############################日志设置#####################################
#数据库错误日志文件
log_error = error.log

7、配置启动脚本
[root@server ~]# cd /usr/local/mysql/support-files
[root@server support-files]# cp -a mysql.server /etc/init.d/mysql.server # 拷贝启动脚本,可能报错
[root@server support-files]# yum install chkconfig # 安装修通服务配置的包
[root@server support-files]# cp -a mysql.server /etc/init.d/mysql.server
[root@server support-files]# cd /etc/init.d
[root@server init.d]# vim mysql.server # 增加=之后的内容
basedir=/usr/local/mysql
datadir=/usr/local/mysql/data
[root@server init.d]# cd ~
[root@server ~]# systemctl daemon-reload # 重载系统配置
[root@server ~]# systemctl start mysql
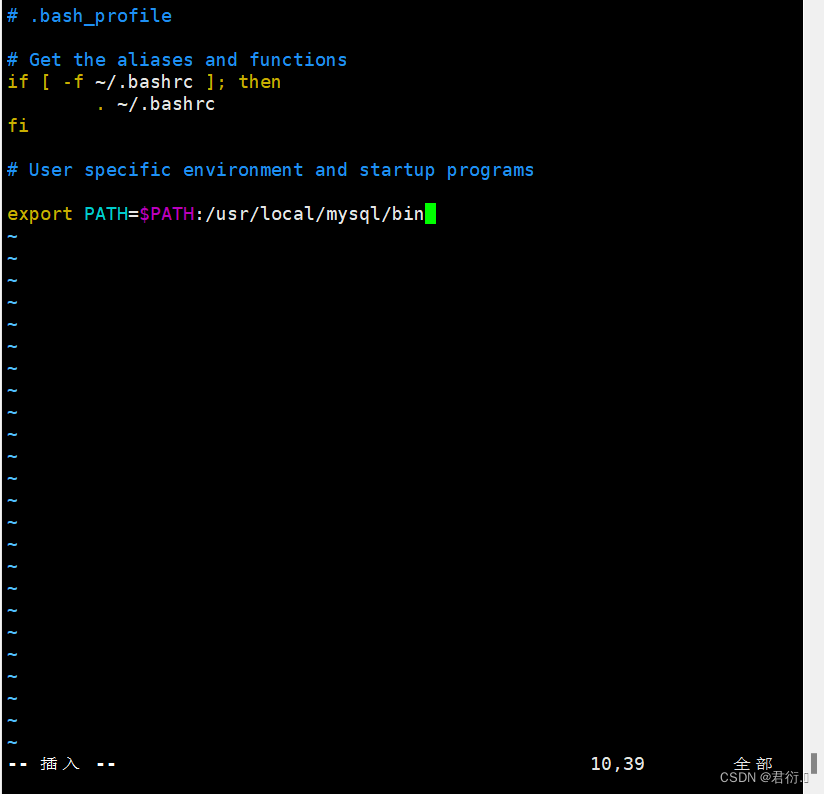
[root@server ~]# vim ~/.bash_profile # 设置环境变量需添加如下语句
export PATH=$PATH:/usr/local/mysql/bin #添加环境变量
[root@server ~]# source ~/.bash_profile
[root@server ~]# mysql -uroot -p
原文件:

修改后:


[root@server ~]# source ~/.bash_profile
[root@server ~]# mysql -uroot -p
**原文件:**

**修改后:**


 2518
2518

 被折叠的 条评论
为什么被折叠?
被折叠的 条评论
为什么被折叠?
 到【灌水乐园】发言


