


pytest
对比一下支持python语言得到自动化框架
| 维度 | unittest(Python 内置) | pytest | Robot Framework |
|---|---|---|---|
| 安装方式 | 无需安装(Python 标准库) | pip install pytest | pip install robotframework |
| 语法风格 | 基于类(需继承TestCase) | 函数式或面向对象(无需样板代码) | 关键字驱动(表格化用例) |
| 断言方法 | self.assertEqual() 等 | 原生 assert 表达式 | 关键字断言(如 Should Be Equal) |
| 参数化支持 | 需 subTest 或第三方库 | 内置 @pytest.mark.parametrize | 数据驱动(Test Template) |
| 插件生态 | 少(依赖扩展库如HTMLTestRunner) | 丰富(如 pytest-html、pytest-xdist、allure-pytest) | 一般(需安装额外库如RequestsLibrary) |
| 测试报告 | 需插件生成报告 | 支持多格式报告(HTML、Allure 等) | 自带详细日志和报告 |
| 学习曲线 | 中等(需熟悉 xUnit 模式) | 低(语法简洁) | 高(需掌握关键字和语法) |
| BDD 支持 | 不支持 | 支持(通过 pytest-bdd 插件) | 支持(通过 robotframework-bdd) |
| 适用场景 | 简单项目或遗留系统维护 | 复杂项目、高扩展性需求 | 团队协作、非技术人员参与 |
pytest的介绍
pytest是一个流行且高效的python测试框架,它提供了丰富的功能和灵活的用法,使得编写和运行测试用例变得简单和高效。
- 简单易用: pytest 的语法简洁清晰,对于编写测试用例非常友好
- 强大的断言库: pytest 内置了丰富的断言库,可以轻松地进行测试结果的判断。
- 支持参数化测试: pytest 支持参数化测试,允许使用不同的参数多次运行同一个测试函数,这大大提高了测试效率。
- 丰富的插件生态系统: pytest 有着丰富的插件生态系统,可以通过插件扩展各种功能,比如覆盖率测试、测试报告生成(如pytest-html 插件可以生成完美的HTML测试报告)、失败用例重复执行(如pytest-rerunfailures 插件)等。此外, pytest 还支持与selenium、requests、appinum等结合,实现Web自动化、接口自动化、App自动化测试。
- 灵活的测试控制: pytest 允许跳过指定用例,或对某些预期失败的case标记成失败,并支持重复执行失败的case。
安装
pip install pytest==8.3.2
执行的三角按钮就是pytest安装成功的标志之一。
更准确的可以通过pip list来查看是否存在pytest
用例运行规则
- 文件名必须是
test_开头或者_test结尾 - 测试类必须以
Test开头,并且不能有个__init__方法 - 测试方法必须以
test开头
pytest命令参数
pytest提供了丰富的命令行选项来控制测试的执行。
| 命令 | 描述 | 备注 |
|---|---|---|
pytest | 在当前目录及其子目录中搜索并运行测试。 | |
pytest -v | 增加输出的详细程度。 | |
pytest -s | 显示测试中的 print 语句。 | |
pytest test_module.py | 运行指定的测试模块。 | |
pytest test_dir/ | 运行指定目录下的所有测试。 | |
pytest -k <keyword> | 只运行测试名包含指定关键字的测试。 | |
pytest -m <marker> | 只运行标记为指定标记的测试。 | |
pytest -q | 减少输出的详细程度。 | |
pytest --html=report.html | 生成 HTML 格式的测试报告。 | 需要安装 pytest-html 插件 |
pytest --cov | 测量测试覆盖率 | 需要安装 pytest-cov 插件 |
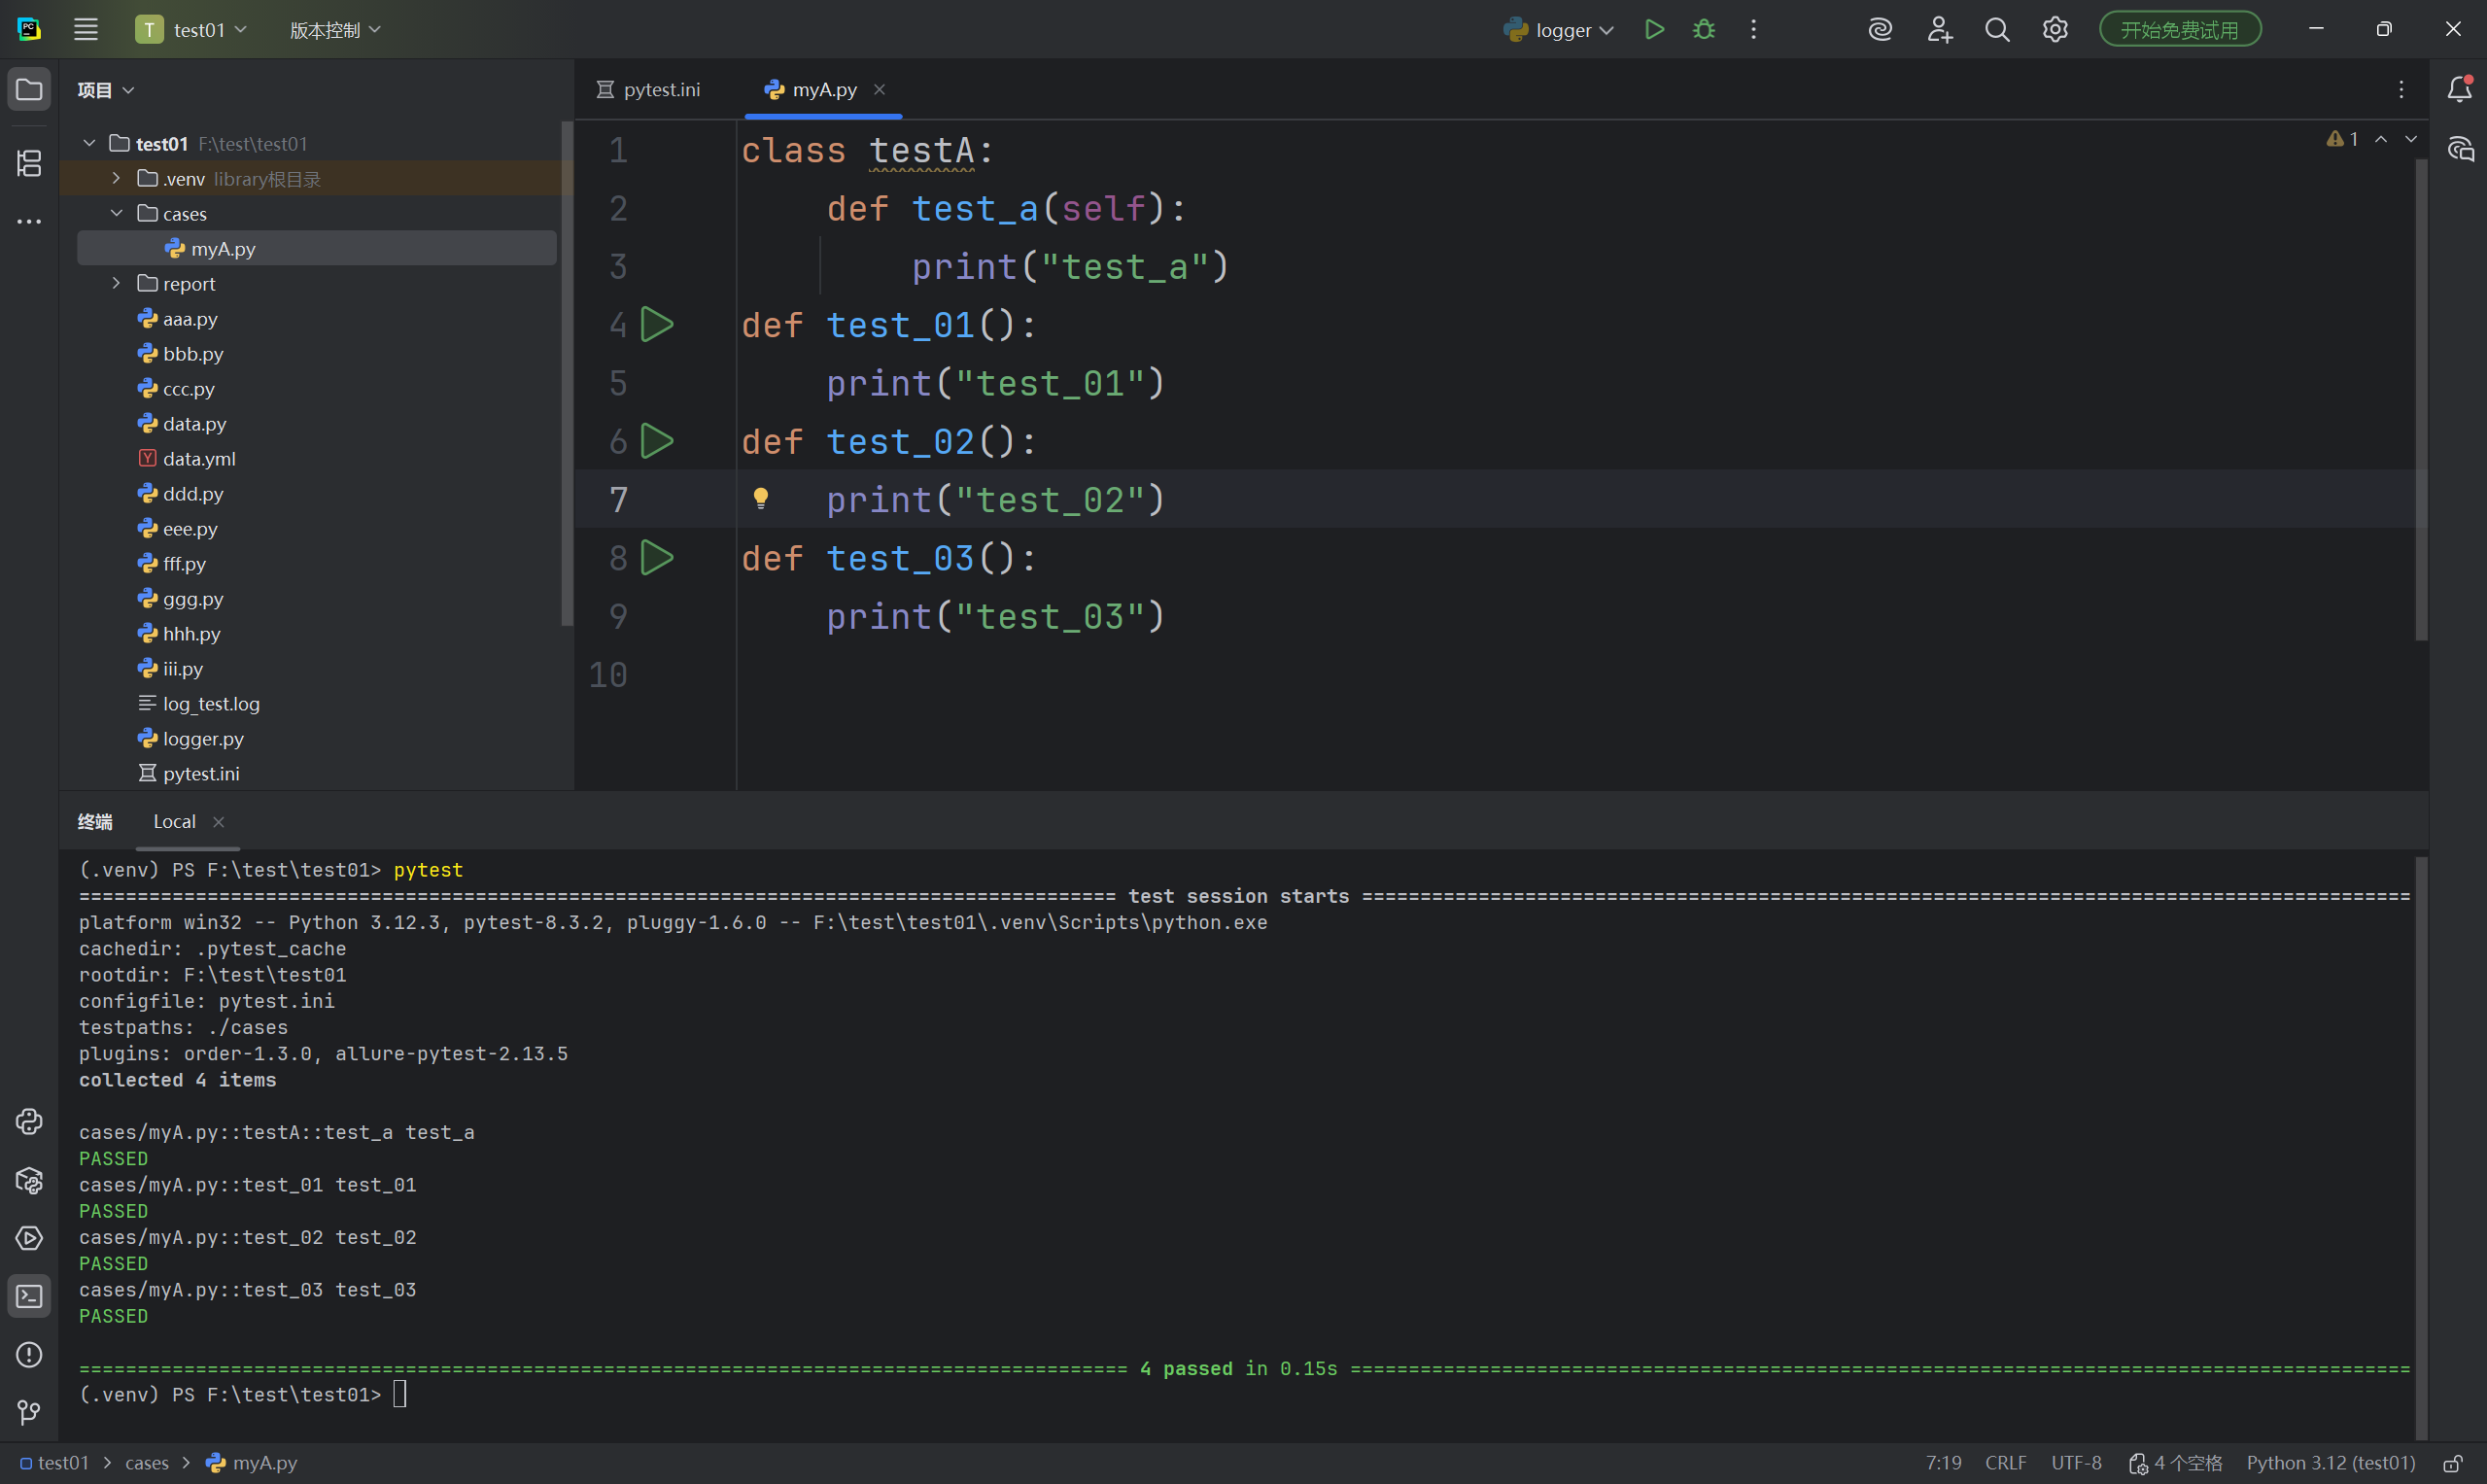
运行符合运行规则的用例
pytest
详细打印,并输入print内容
pytest -sv
指定文件/测试用例
# 指定文件:pytest 包名/文件名
pytest cases/test_01.py
# 指定测试用:pytest 包名/文件名::类名::方法名
pytest cases/test_01.py::Test::test_a
pytest配置文件
在当前项目下创建pytest.ini文件,该文件是pytest的配置文件,以下是常见的配置选项
| 参数 | 解释 |
|---|---|
addopts | 指定在命令行中默认包含的选项。 |
testpaths | 指定搜索测试的目录。 |
python_files | 指定发现测试模块时使用的文件匹配模式。 |
python_classes | 指定发现测试类时使用的类名前缀或模式。 |
python_functions | 指定发现测试函数和方法时使用的函数名前缀或模式。 |
norecursedirs | 指定在搜索测试时应该避免递归进入的目录模式。 |
markers | 定义测试标记,用于标记测试用例。 |
详细输出cases包下文件名为test_凯欧且方法名为Test开头的所有用例
[pytest]
addopts = -sv
testpaths = ./cases
python_files = my*.py
python_classes = Test*
可以发现,不区分大小写
前后置
前面提到,在pytest中,不能使用__init__,那么该如何实现数据的初始化呢?
pytest 框架提供三种⽅法做前后置的操作
- setup_method 和 teardown_method :这两个⽅法⽤于类中的每个测试⽅法的前置和后置操作。
- setup_class 和 teardown_class :这两个⽅法⽤于整个测试类的前置和后置操作。
- • fixture :这是 pytest 推荐的⽅式来实现测试⽤例的前置和后置操作。
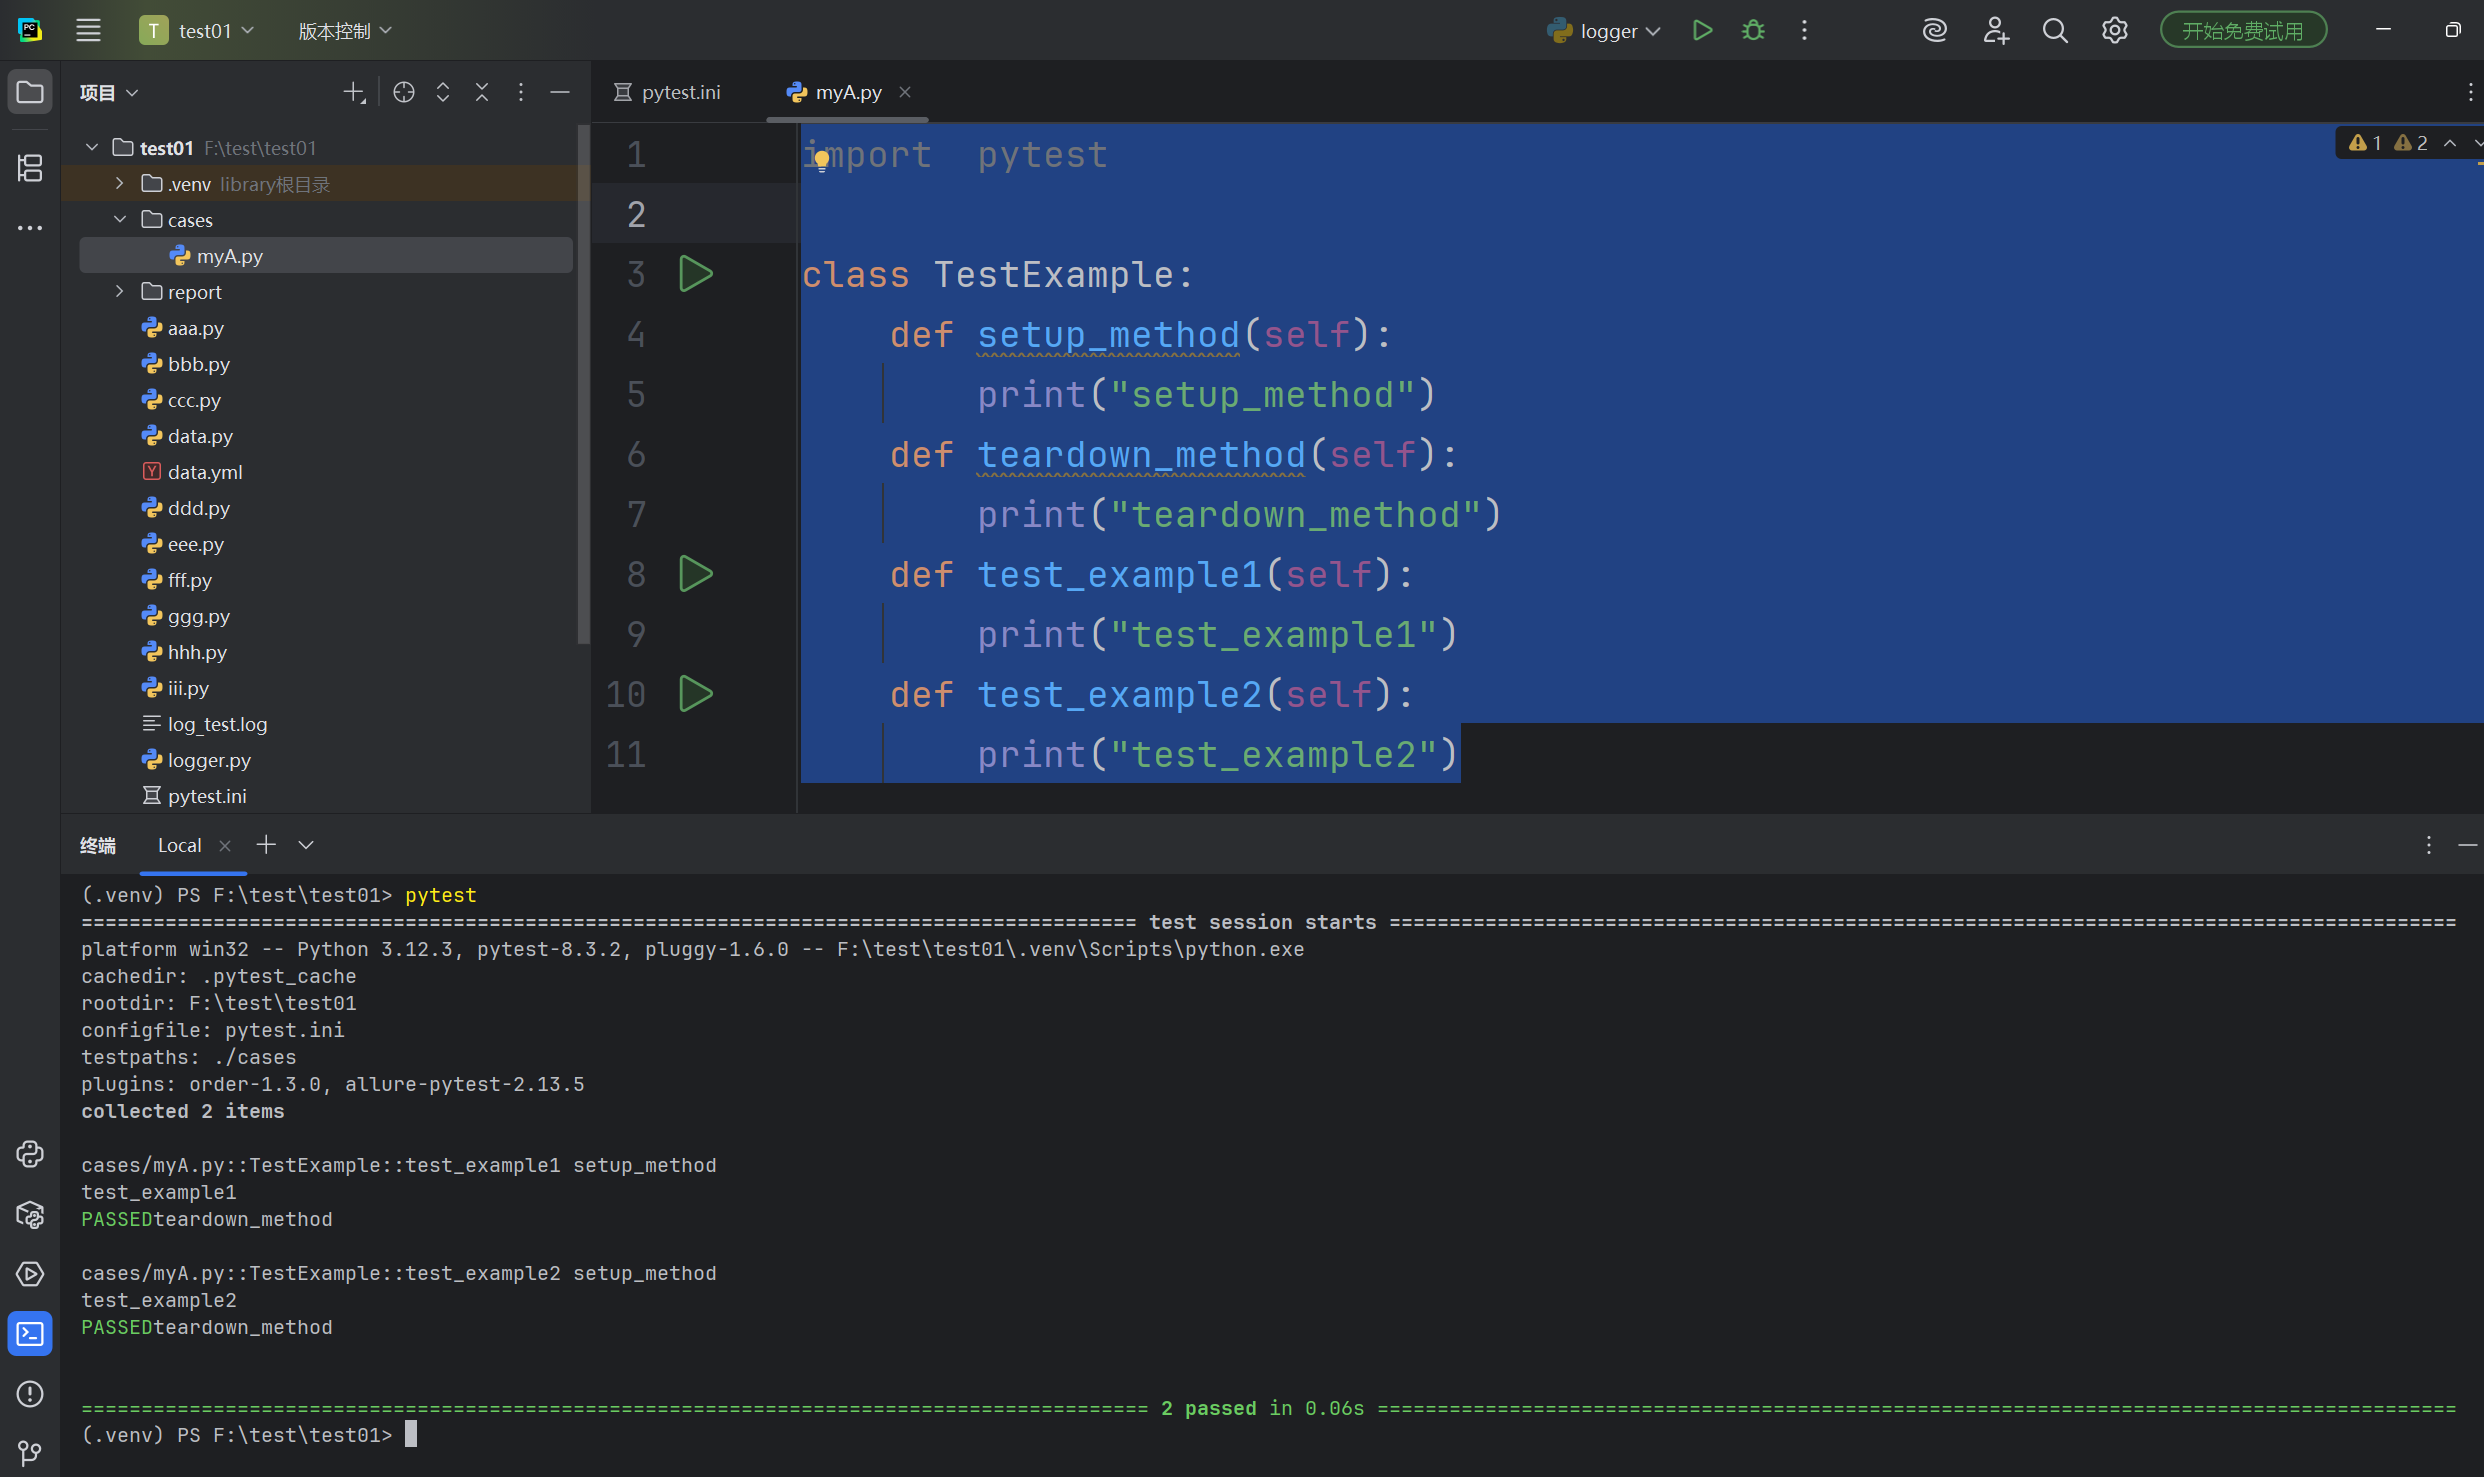
setup_method和teardown_method
import  pytest

class TestExample:
    def setup_method(self):
        print("setup_method")
    def teardown_method(self):
        print("teardown_method")
    def test_example1(self):
        print("test_example1")
    def test_example2(self):
        print("test_example2")
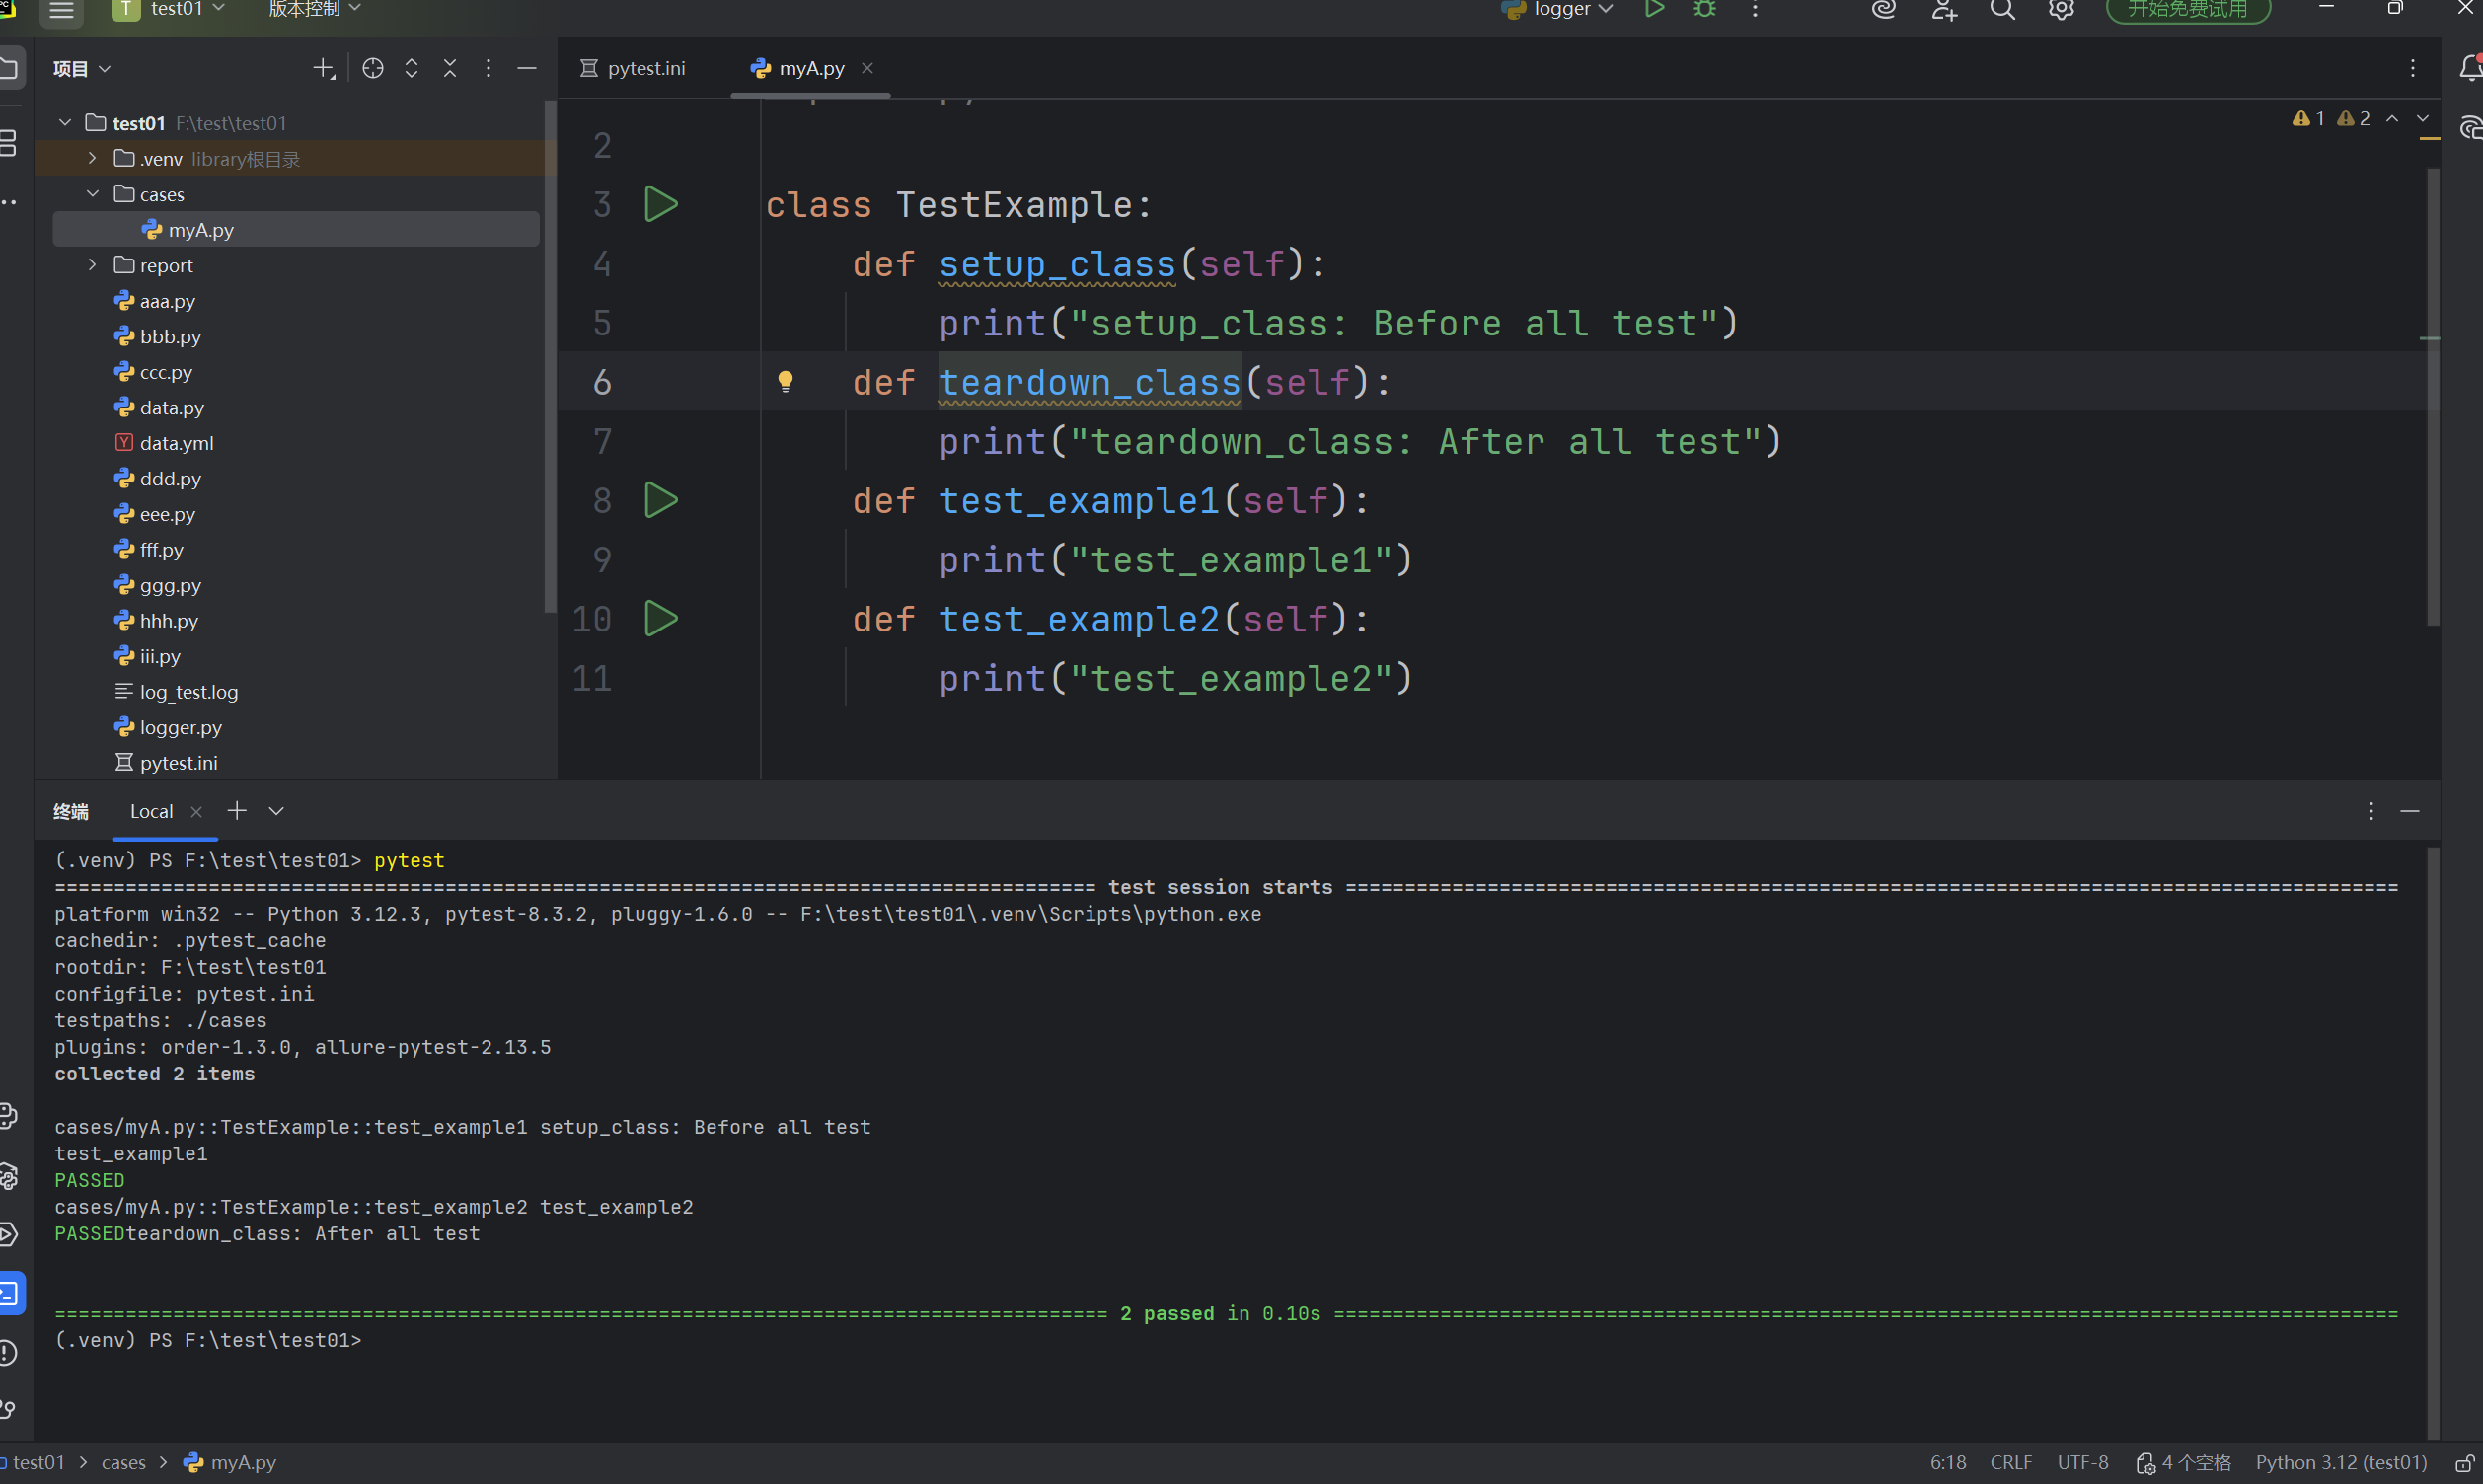
2. setup_class 和 teardown_class
import  pytest

class TestExample:
    def setup_class(self):
        print("setup_class: Before all test")
    def teardown_class(self):
        print("teardown_class: After all test")
    def test_example1(self):
        print("test_example1")
    def test_example2(self):
        print("test_example2")
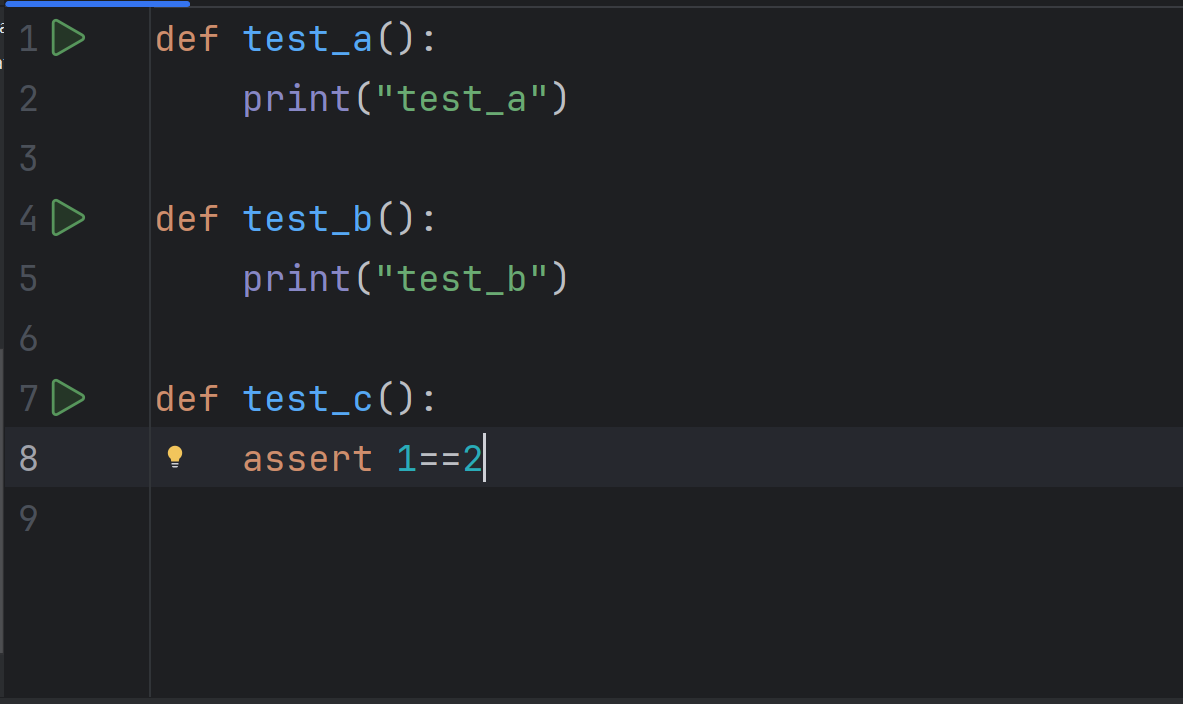
断言
断⾔( assert )是⼀种调试辅助⼯具,⽤于检查程序的状态是否符合预期。如果断⾔失败(即条件为假),Python解释器将抛出⼀个 AssertionError 异常。断⾔通常⽤于检测程序中的逻辑错误。
pytest 允许你在 Python 测试中使⽤标准的 Python assert 语句来验证预期和值。
assert 条件, 错误信息
- 条件:必须是一个布尔表达式
- 错误信息:当条件为假的时候,显示的错误信息
def divide(a,b):
assert b==0,'除数不能为0'
return a/b
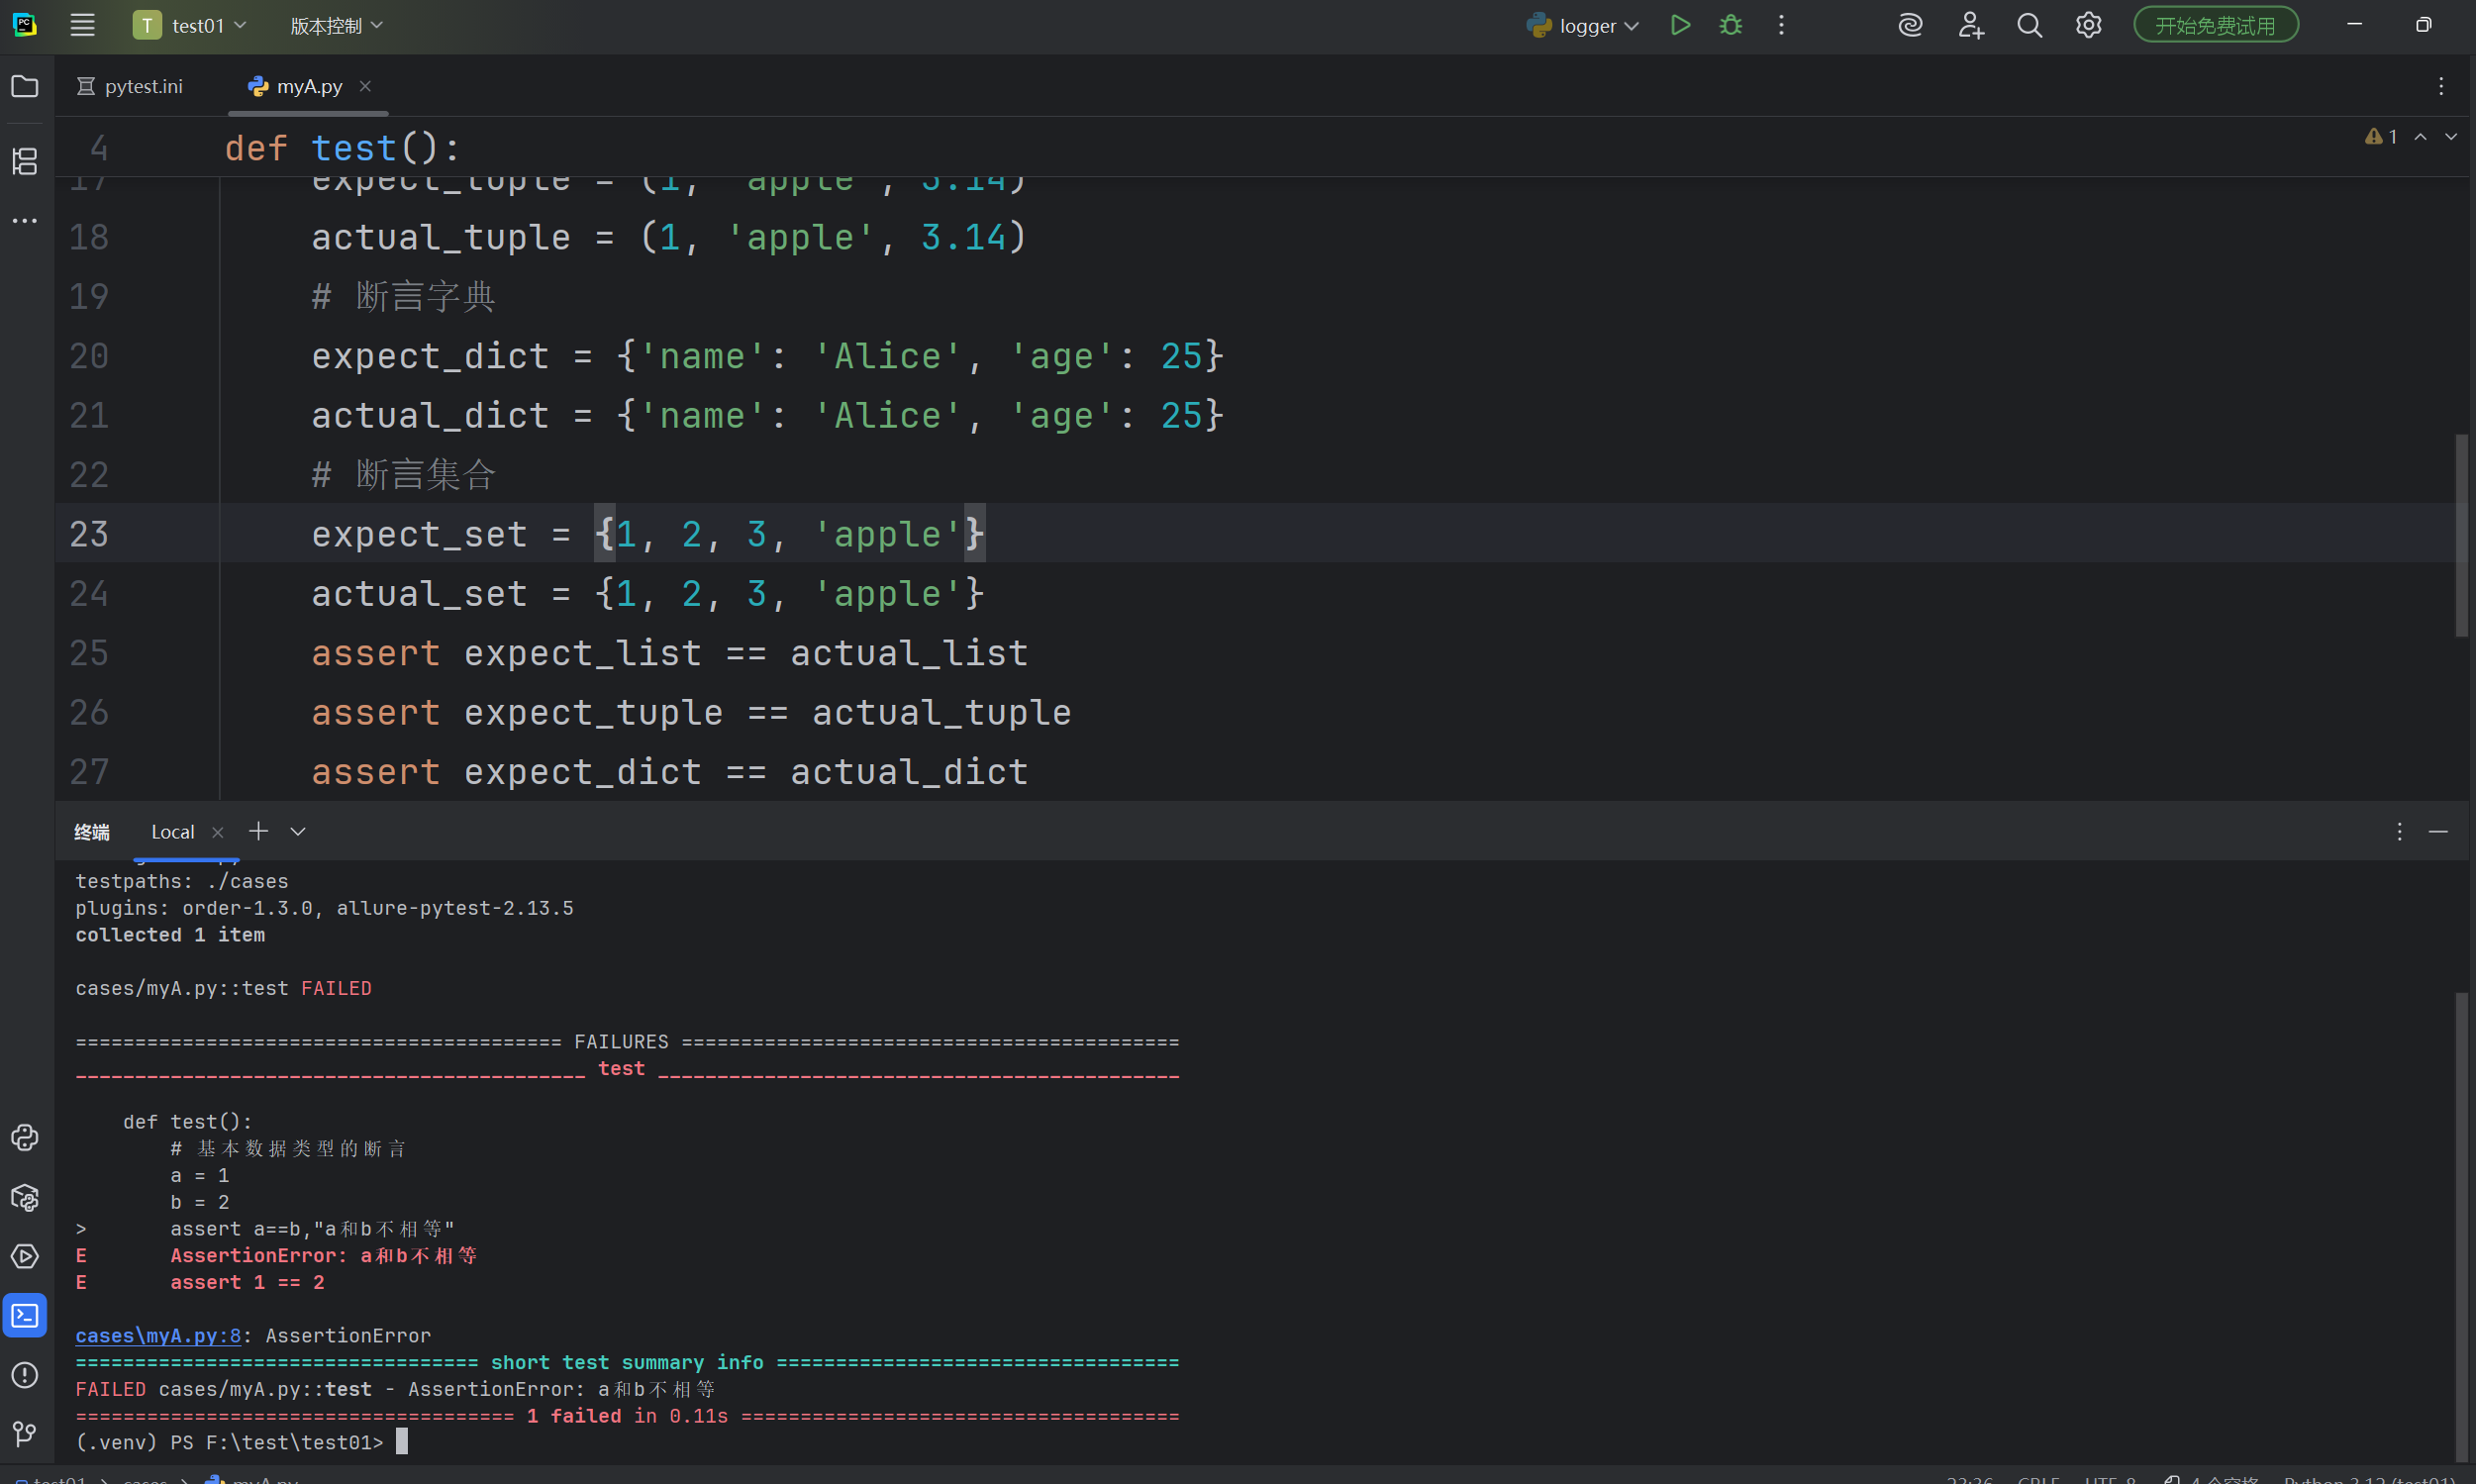
def test():
# 基本数据类型的断言
a = 1
b = 2
assert a==b,"a和b不相等"
# 断言字符串
str = 'hello'
assert str == 'hello'
# 断⾔列表
expect_list = [1, 'apple', 3.14]
actual_list = [1, 'apple', 3.14]
# 断⾔元组
expect_tuple = (1, 'apple', 3.14)
actual_tuple = (1, 'apple', 3.14)
# 断⾔字典
expect_dict = {'name': 'Alice', 'age': 25}
actual_dict = {'name': 'Alice', 'age': 25}
# 断⾔集合
expect_set = {1, 2, 3, 'apple'}
actual_set = {1, 2, 3, 'apple'}
assert expect_list == actual_list
assert expect_tuple == actual_tuple
assert expect_dict == actual_dict
assert expect_set == actual_set
# 函数断言
print(divide(10, 0))
参数化
参数化设计是自动化设计中的一个重要组成部分,他通过定义设计参数和规则,使得设计过程更加灵活和可控
pytest中内置的 pytest.mark.parametrize 装饰器允许对测试函数的参数进⾏参数化。
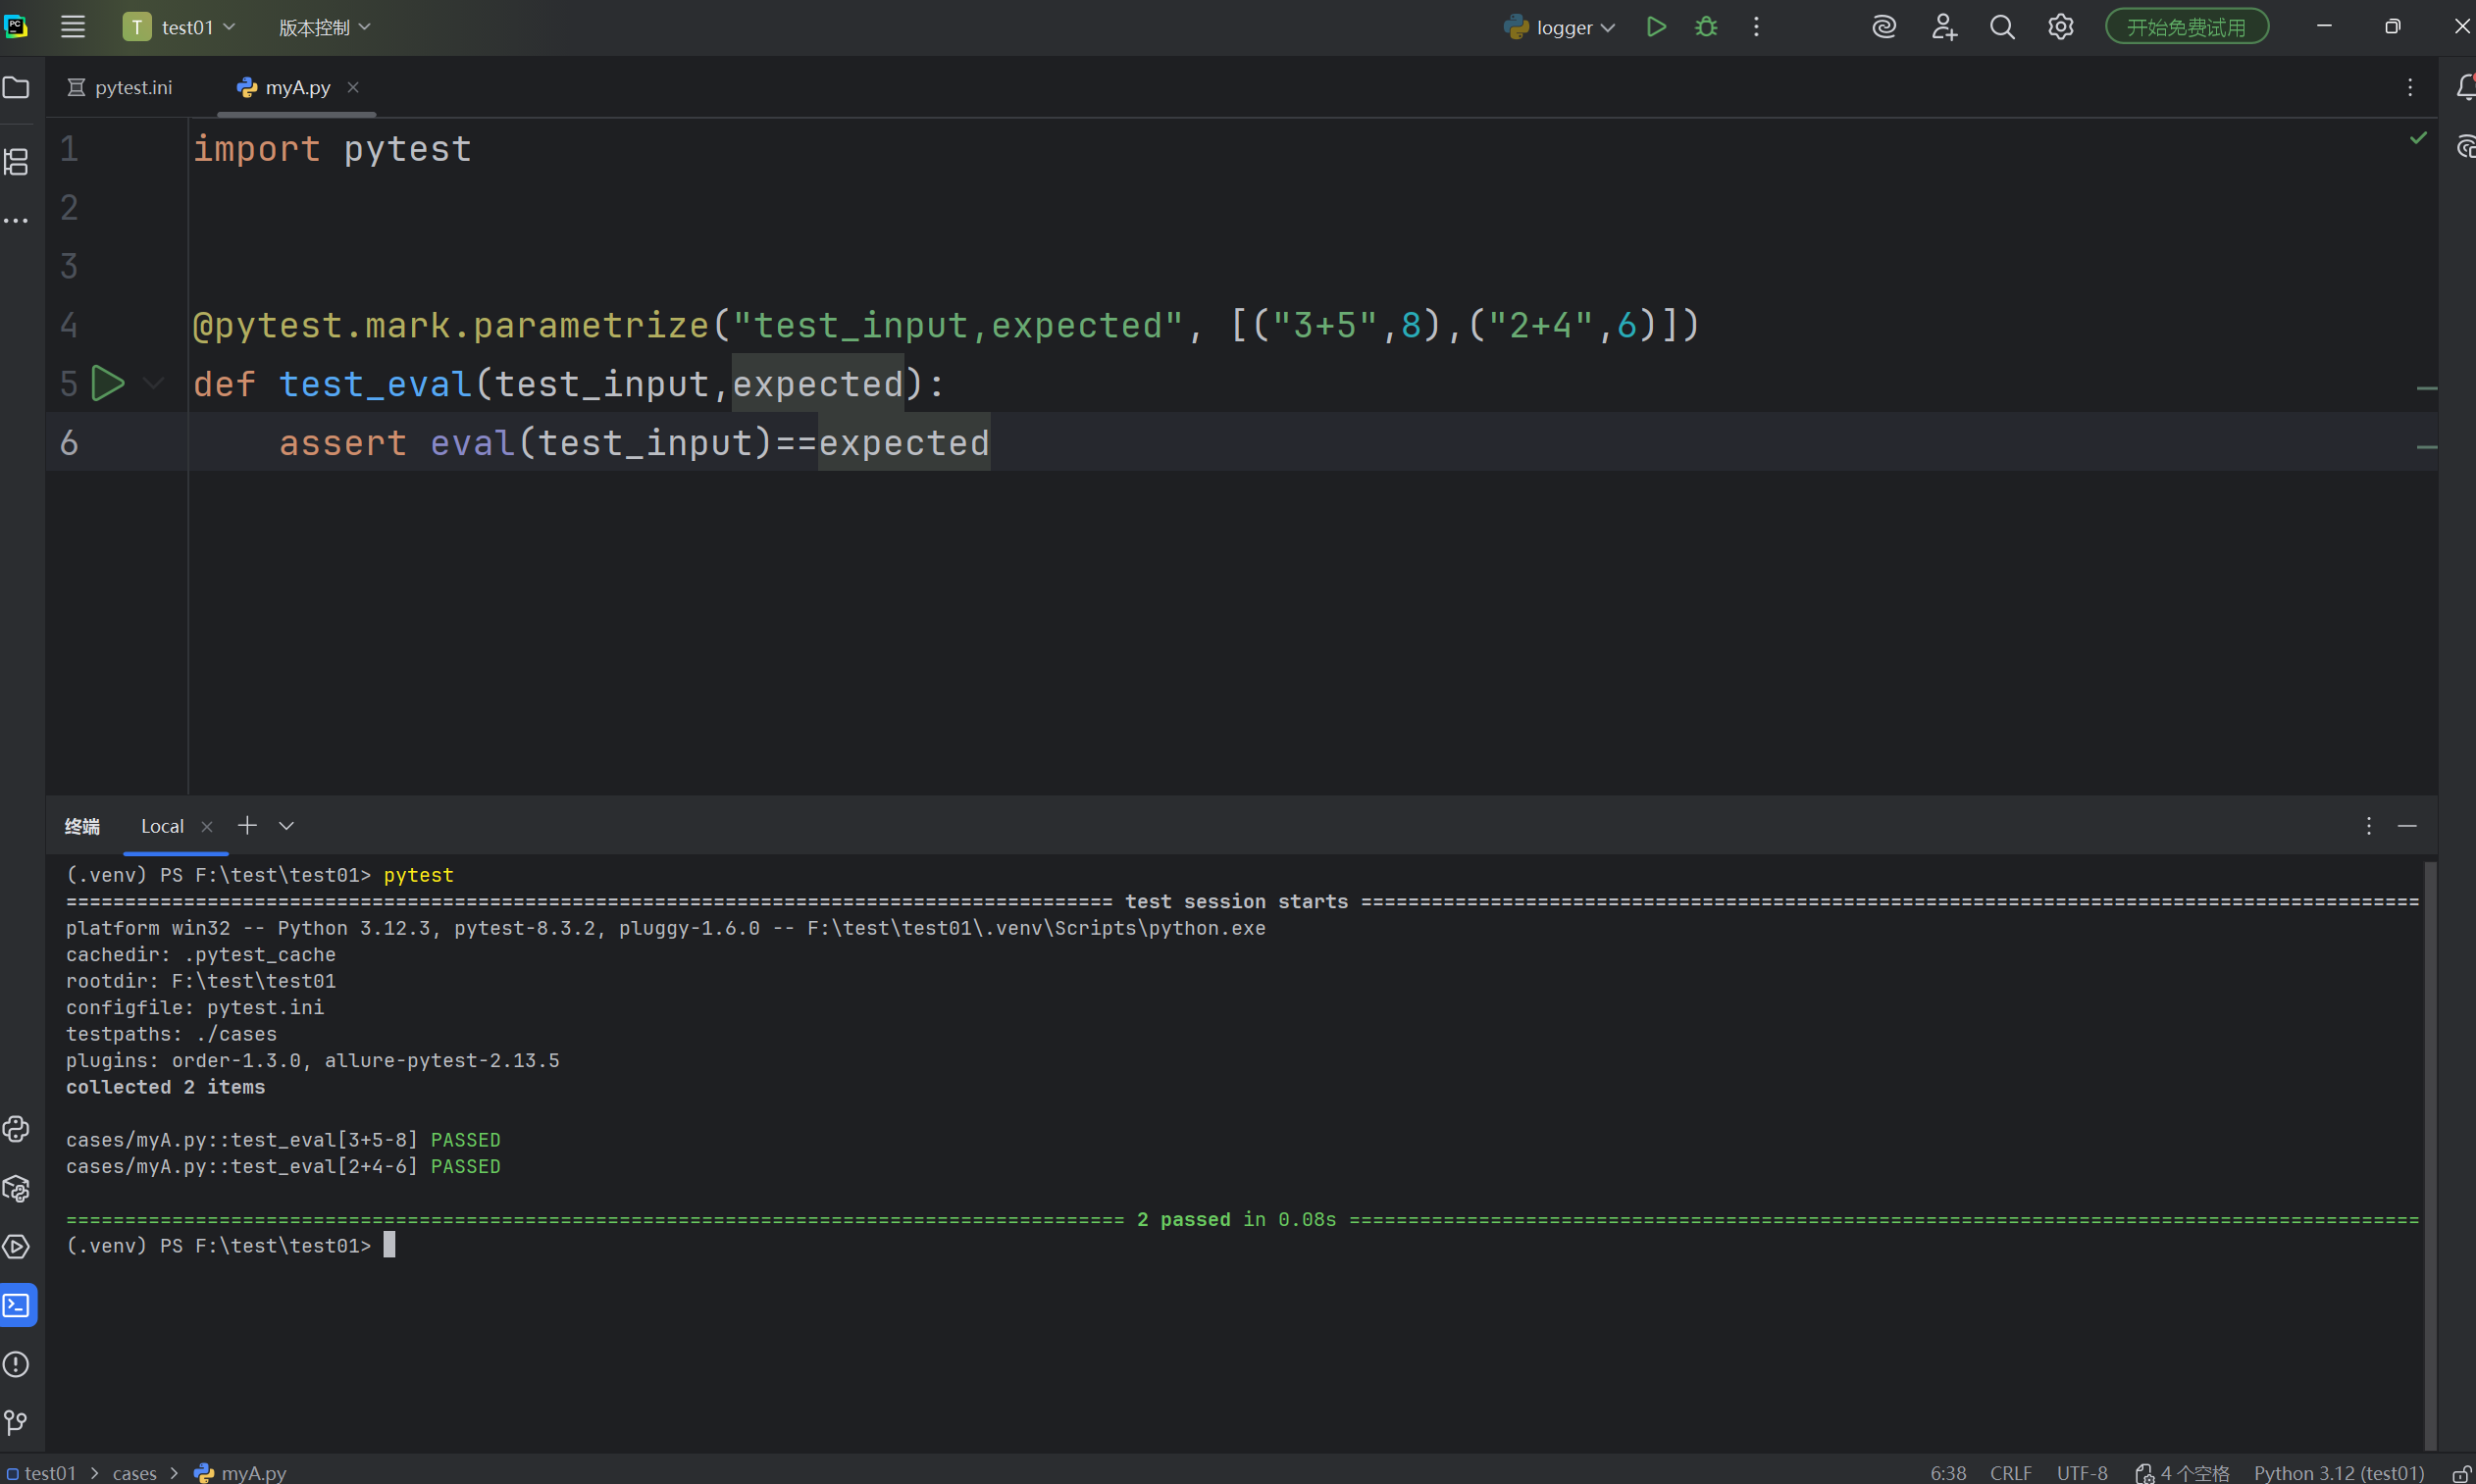
- 在用例上使用参数化
import pytest


@pytest.mark.parametrize("test_input,expected", [("3+5",8),("2+4",6)])
def test_eval(test_input,expected):
    assert eval(test_input)==expected
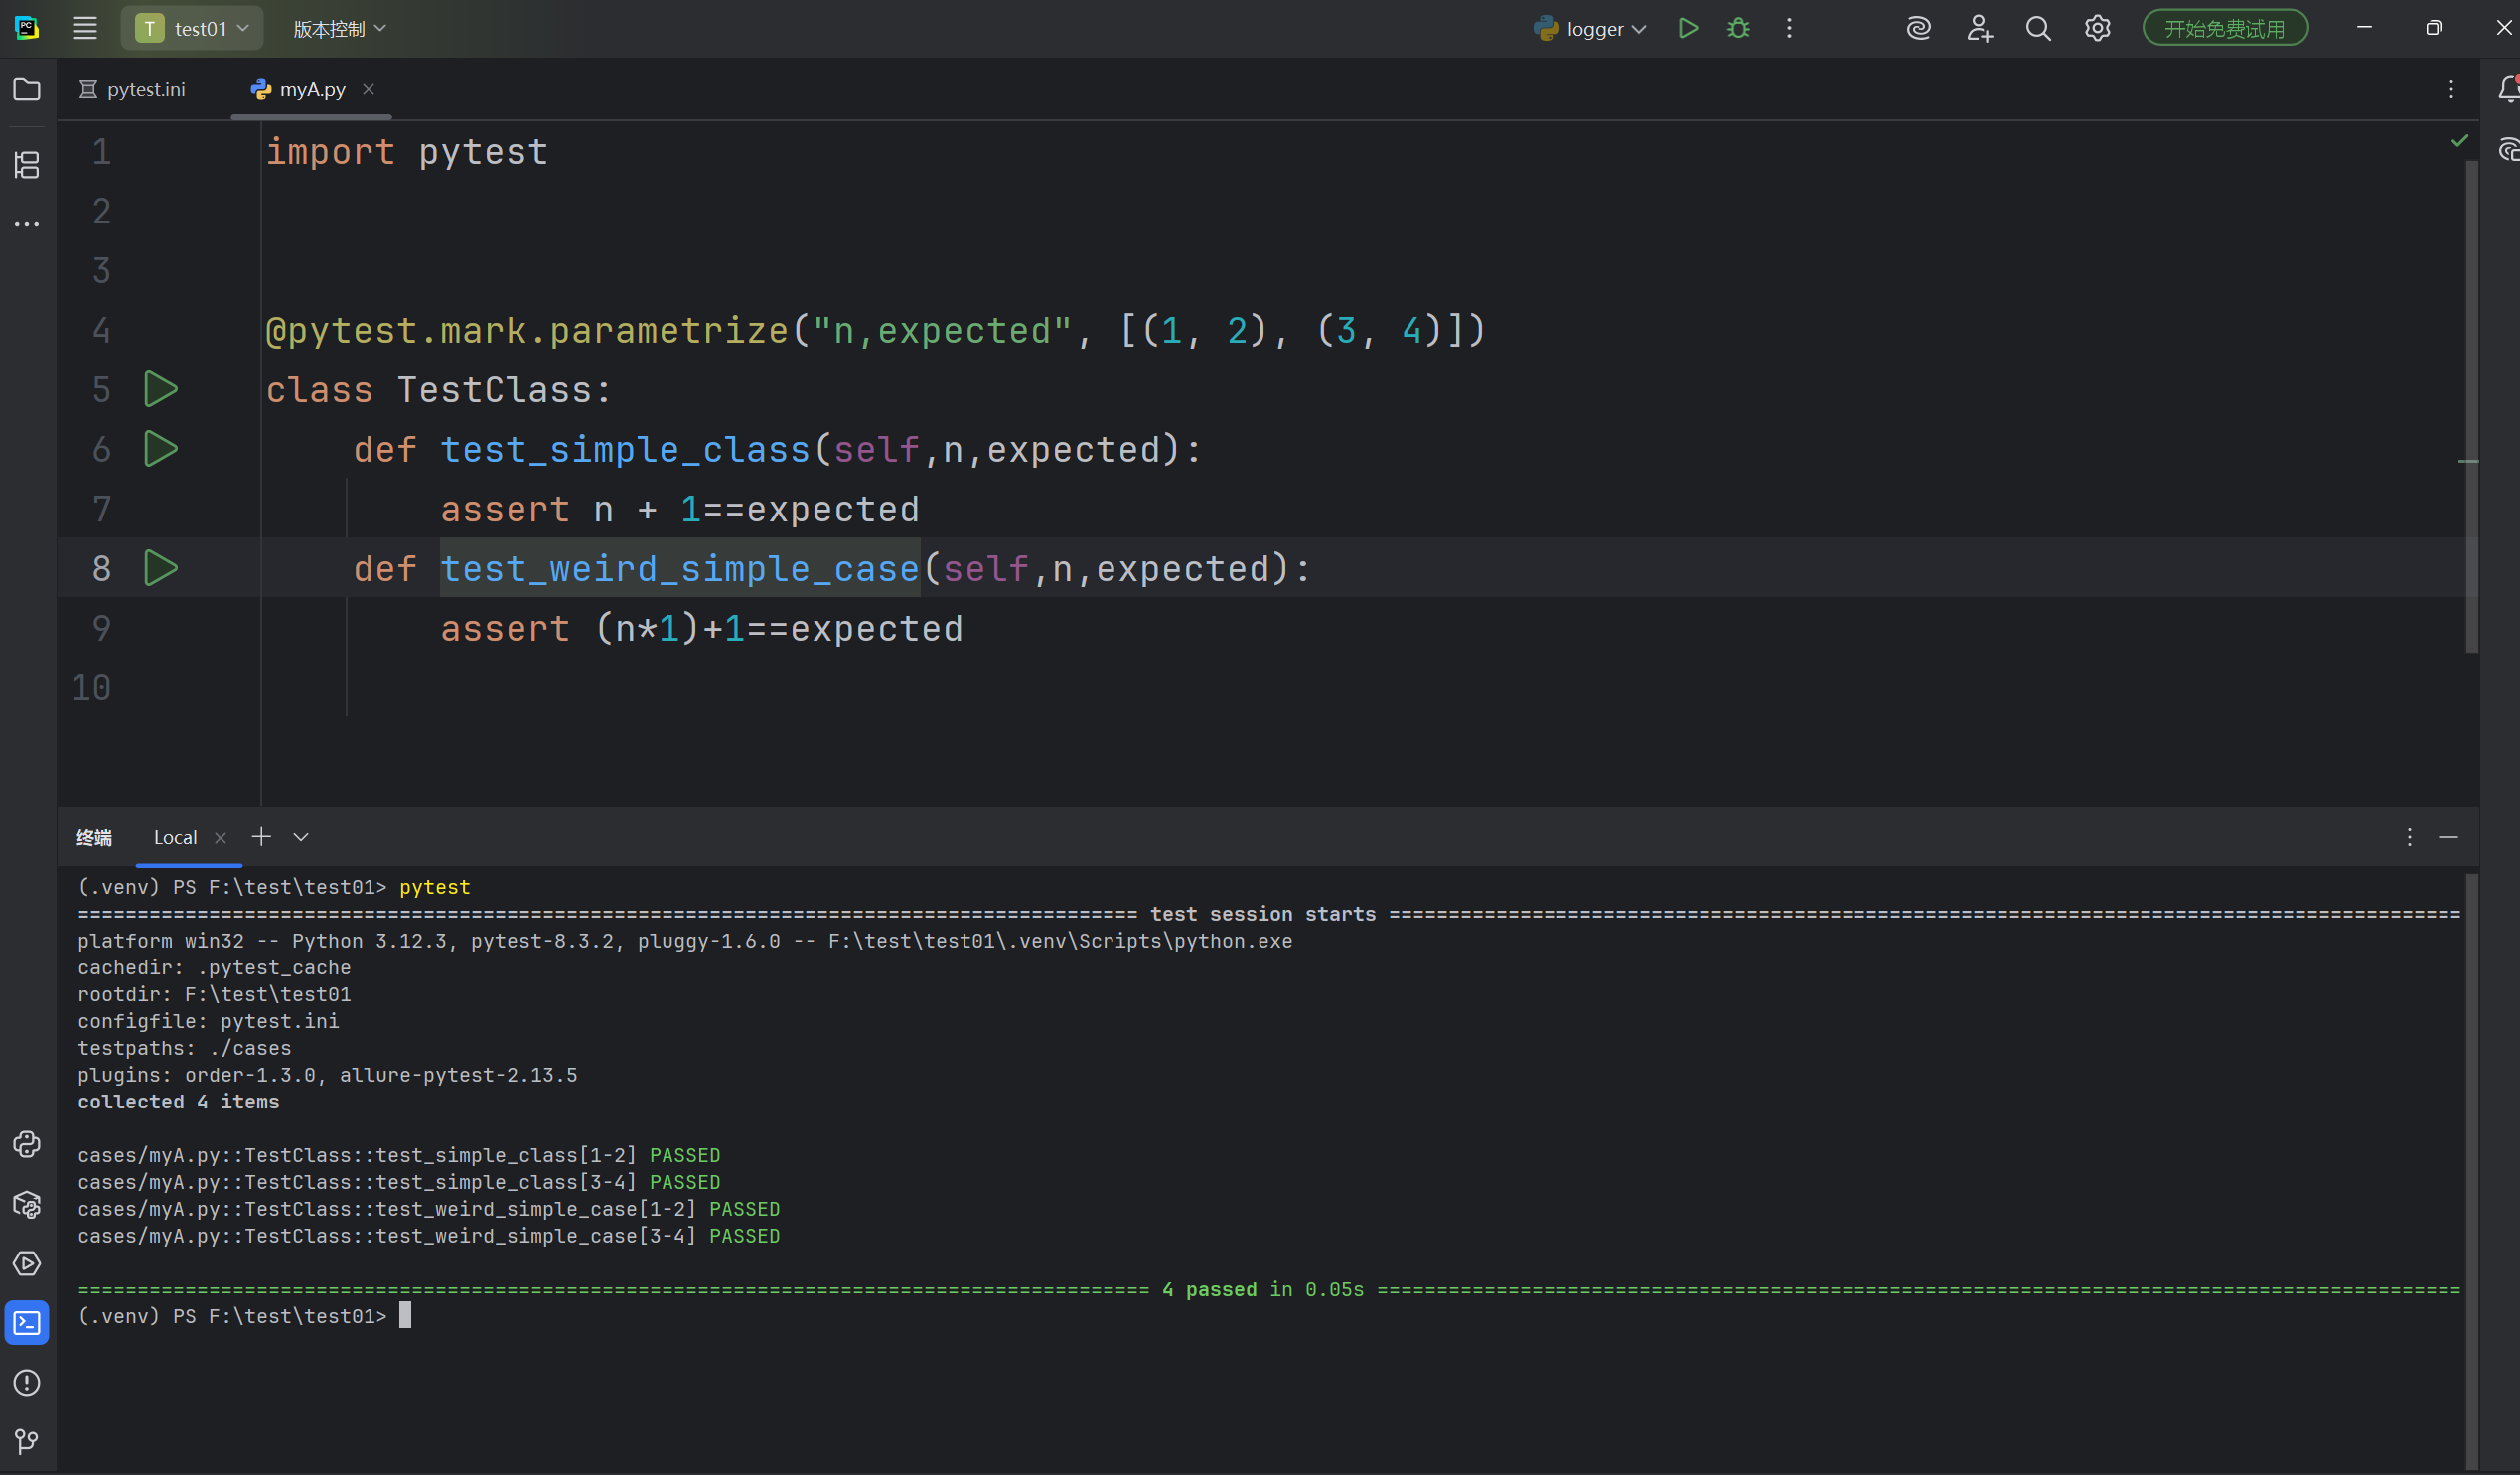
2. 在类上使用参数化
import pytest


@pytest.mark.parametrize("n,expected", [(1, 2), (3, 4)])
class TestClass:
    def test_simple_class(self,n,expected):
        assert n + 1==expected
    def test_weird_simple_case(self,n,expected):
        assert (n*1)+1==expected
要对模块中的所有测试进⾏参数化,你可以将 pytestmark 全局变量赋值:
import pytest


pytestmark = pytest.mark.parametrize("n,expected", [(1, 2), (3, 4)])

class TestClass:
    def test_simple_class(self,n,expected):
        assert n + 1==expected
    def test_weird_simple_case(self,n,expected):
        assert (n*1)+1==expected
class TestClass02:
    def test_simple_case(self, n, expected):
        assert n + 1 == expected
    def test_weird_simple_case(self, n, expected):
        assert (n * 1) + 1 == expected

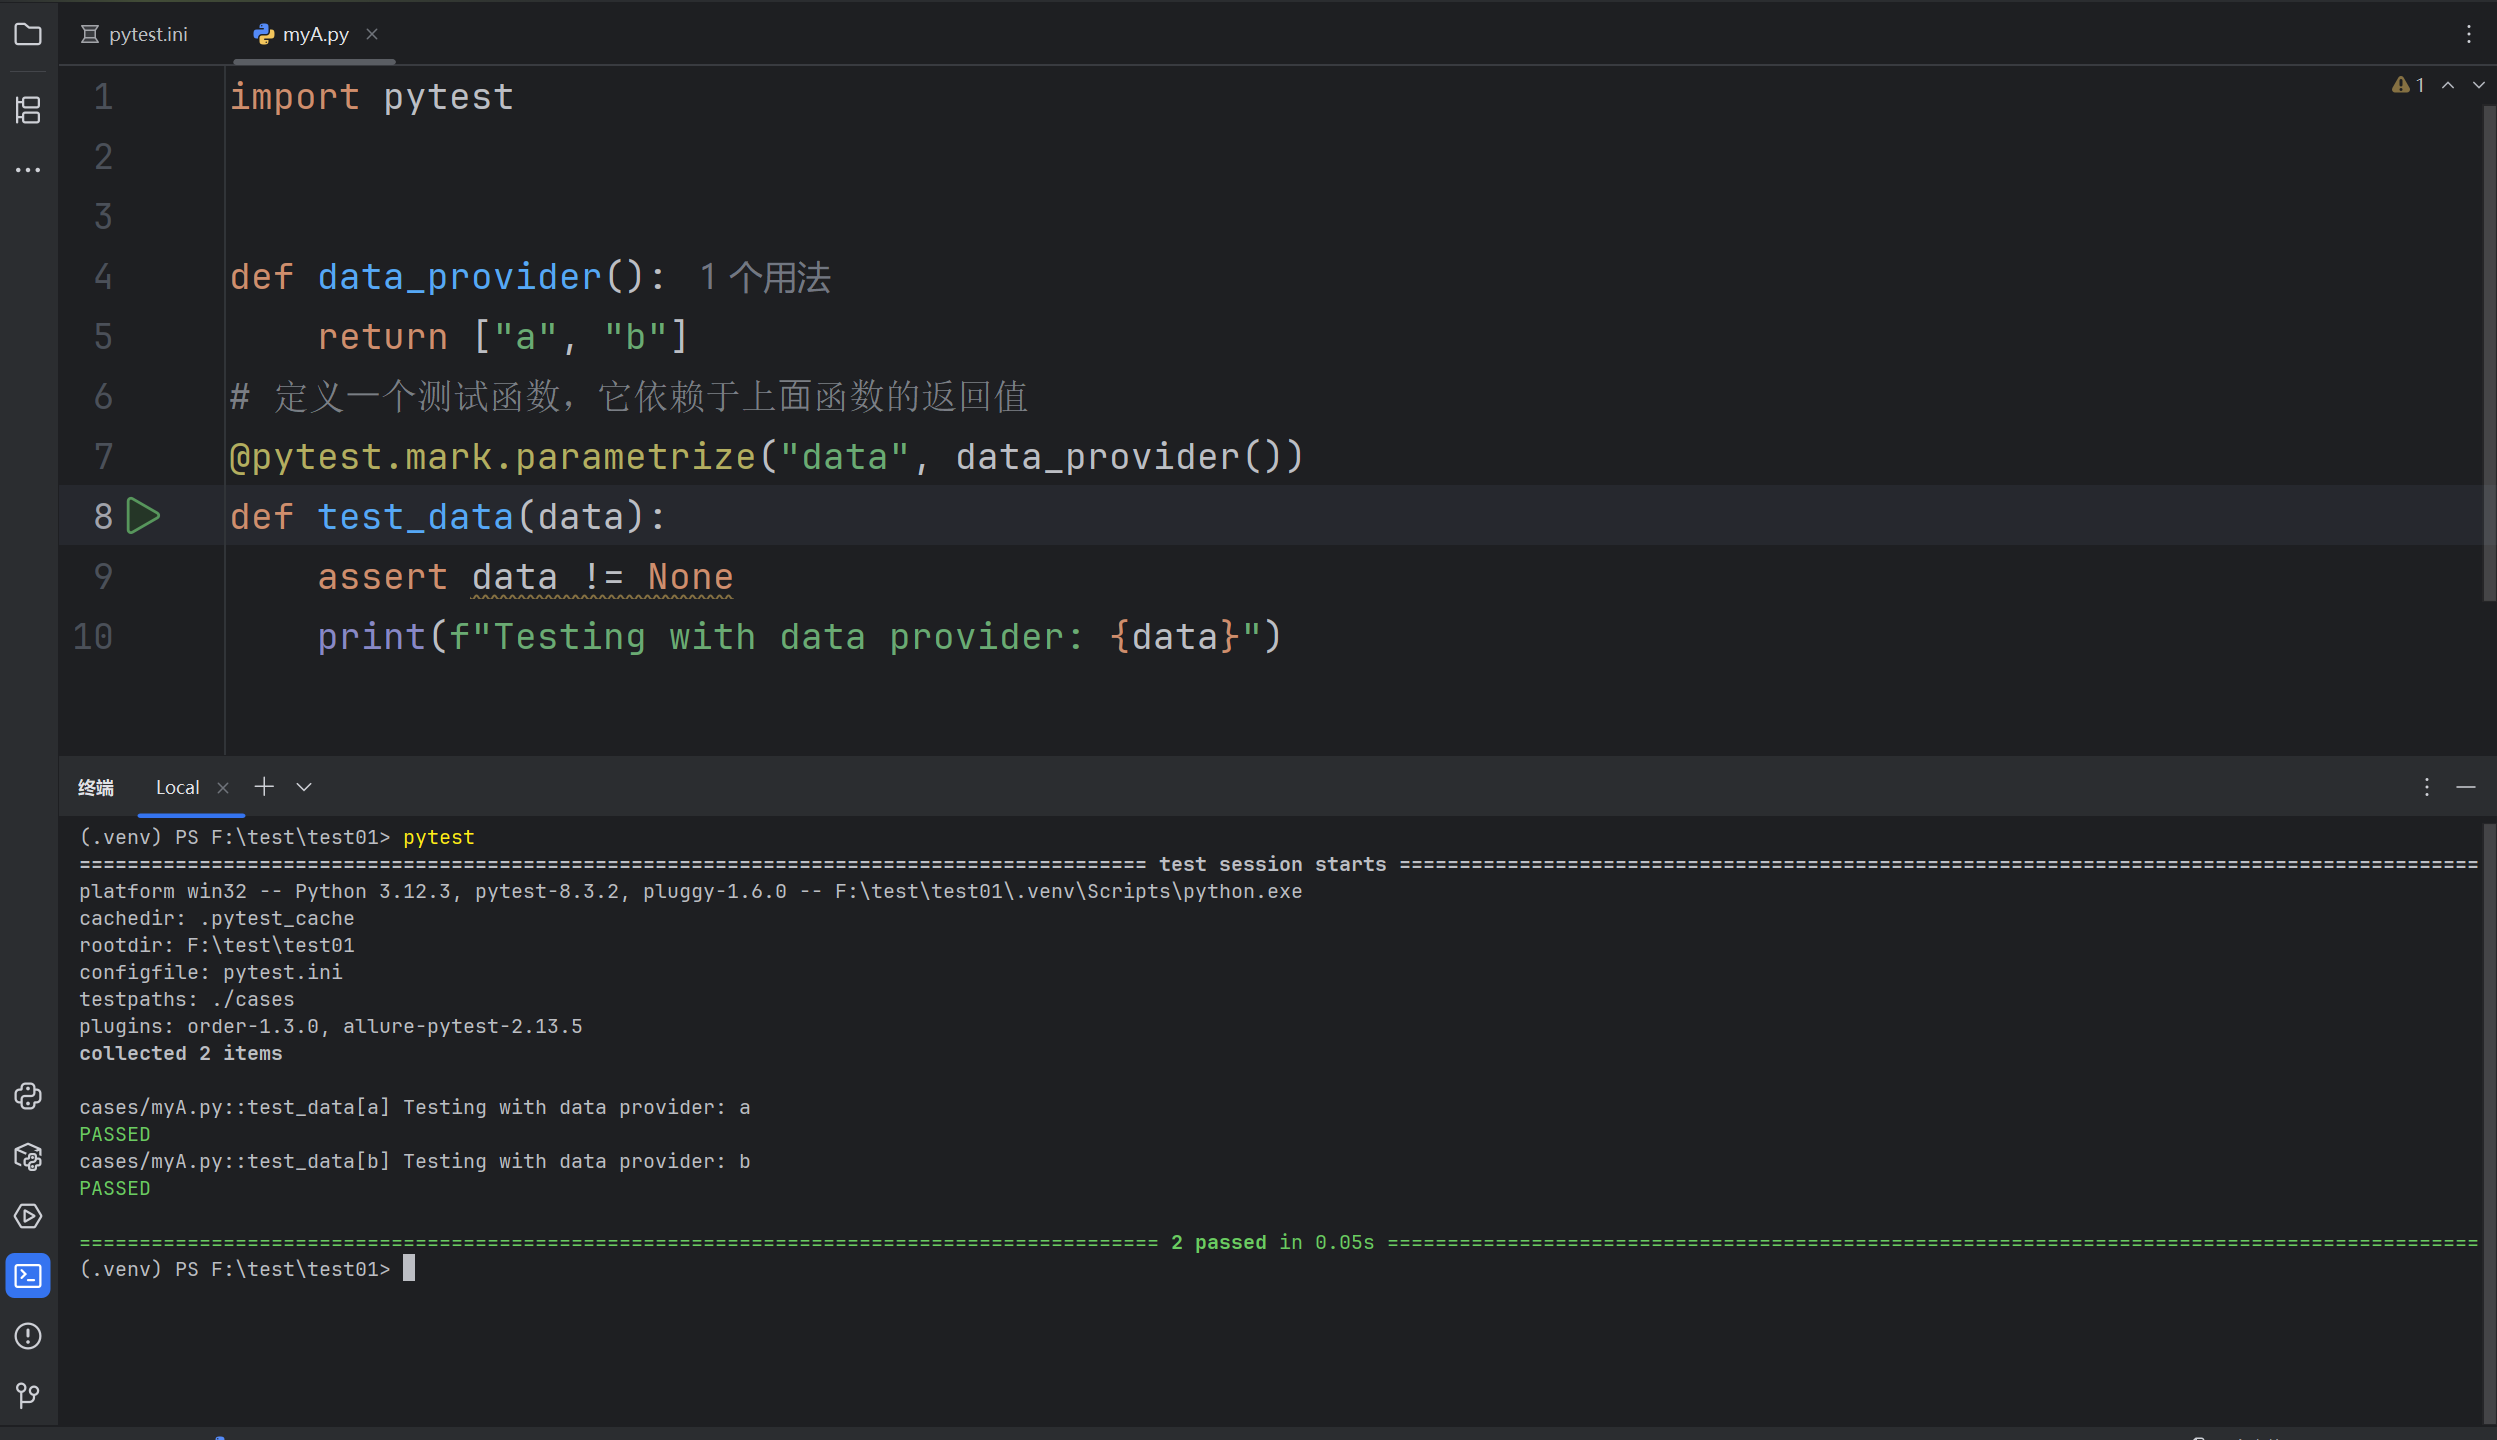
3. 自定义参数化数据源
import pytest


def data_provider():
    return ["a", "b"]
# 定义⼀个测试函数,它依赖于上⾯函数的返回值
@pytest.mark.parametrize("data", data_provider())
def test_data(data):
    assert data != None
    print(f"Testing with data provider: {data}")
fixture
pytest 中的 fixture 是⼀种强⼤的机制,⽤于提供测试函数所需的资源或上下⽂。它可以⽤于设置测试环境、准备数据等。以下是 fixture 的⼀些核⼼概念和使⽤场景.
访问列表页和详情页之间都需要执行登录操作
import pytest


@pytest.fixture
def login():
    print("执行登录操作")
def test_list(login):
    print("访问列表页")
def test_detail(login):
    print("访问详情页")
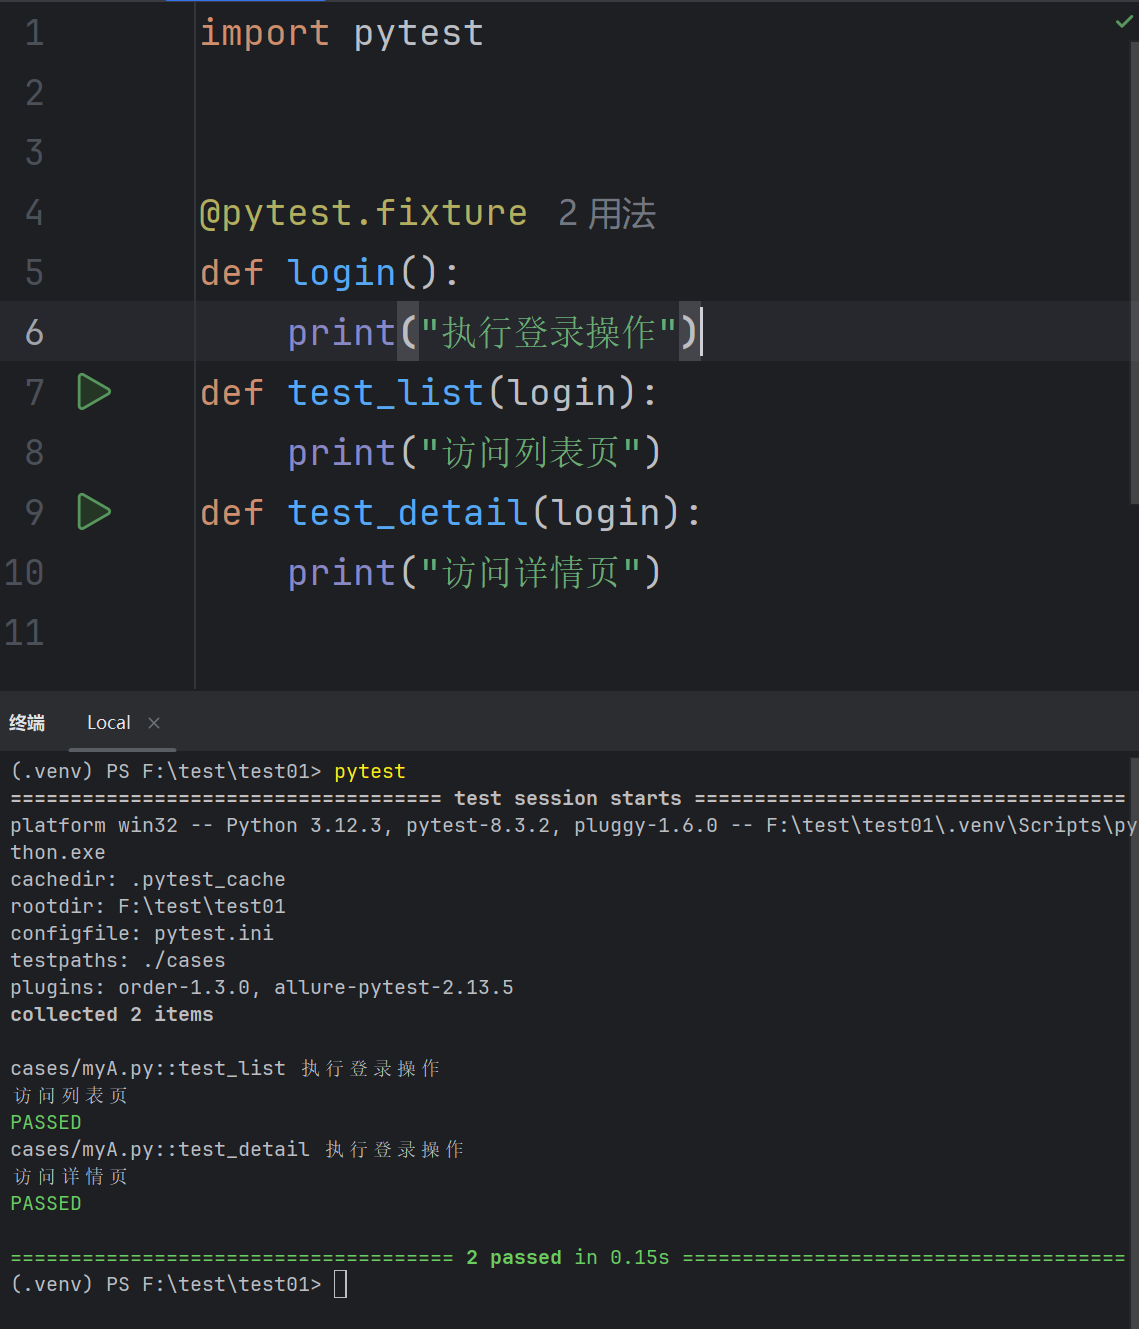
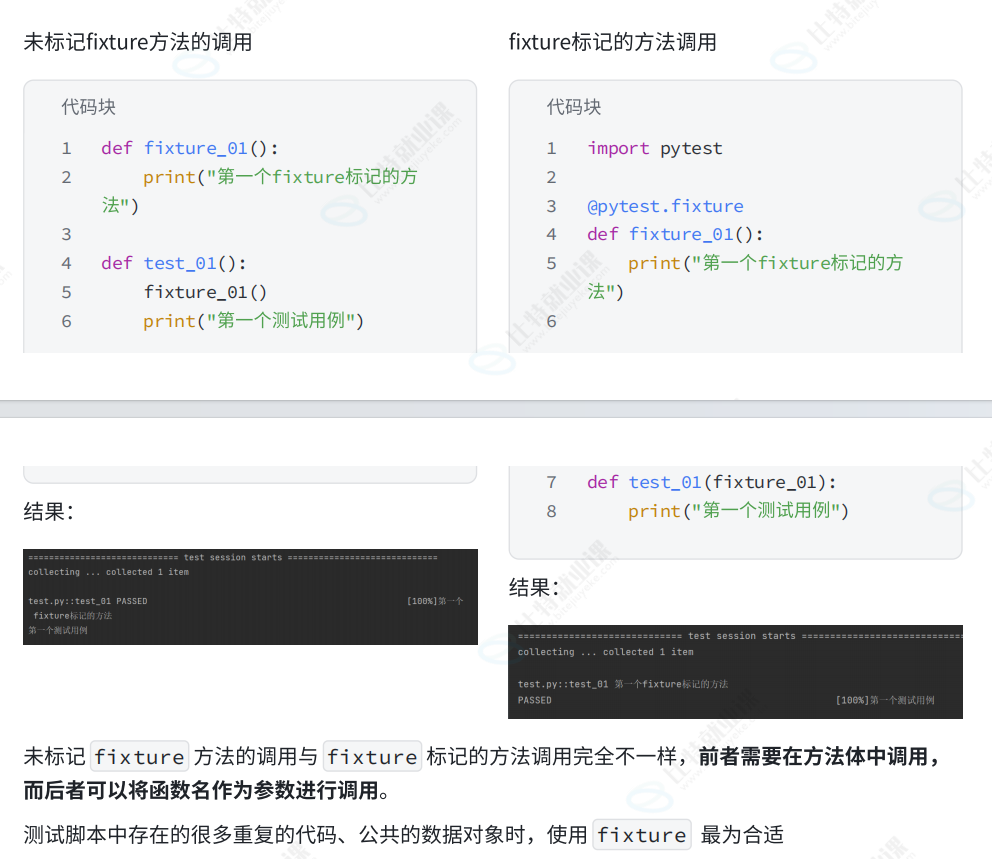
通过使⽤ @pytest.fixture 装饰器来告诉 pytest ⼀个特定函数是⼀个 fixture,通过运⾏结果可⻅,在执⾏列表⻚和详情⻚之前都会先执⾏ login ⽅法
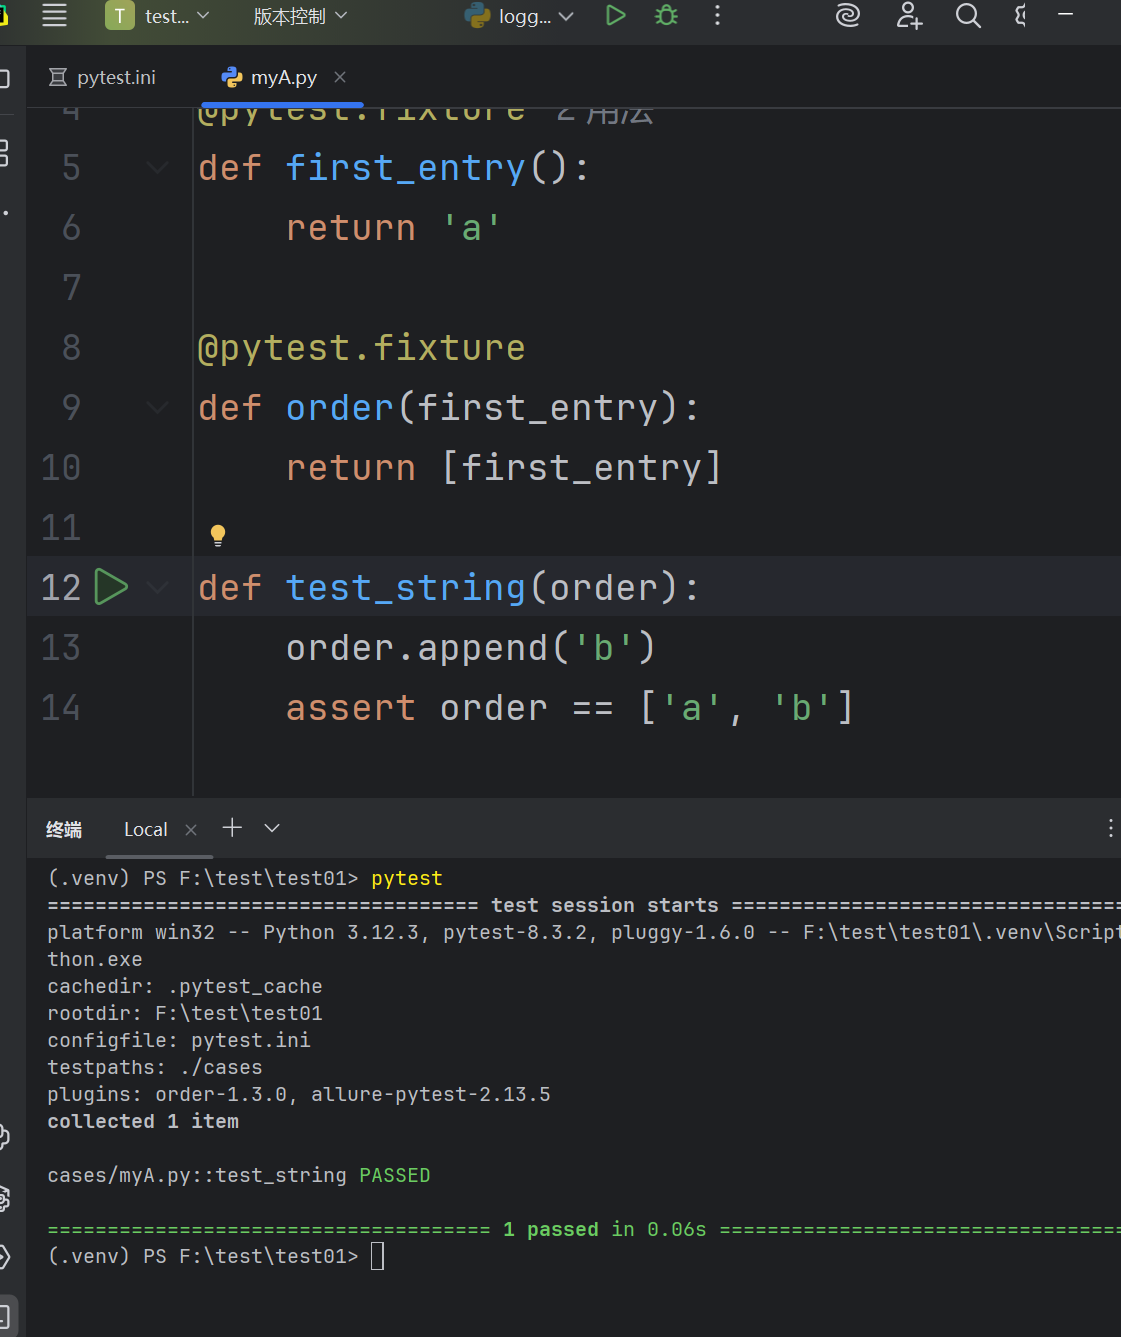
fixture嵌套
import pytest


@pytest.fixture
def first_entry():
    return 'a'

@pytest.fixture
def order(first_entry):
    return [first_entry]

def test_string(order):
    order.append('b')
    assert order == ['a', 'b']
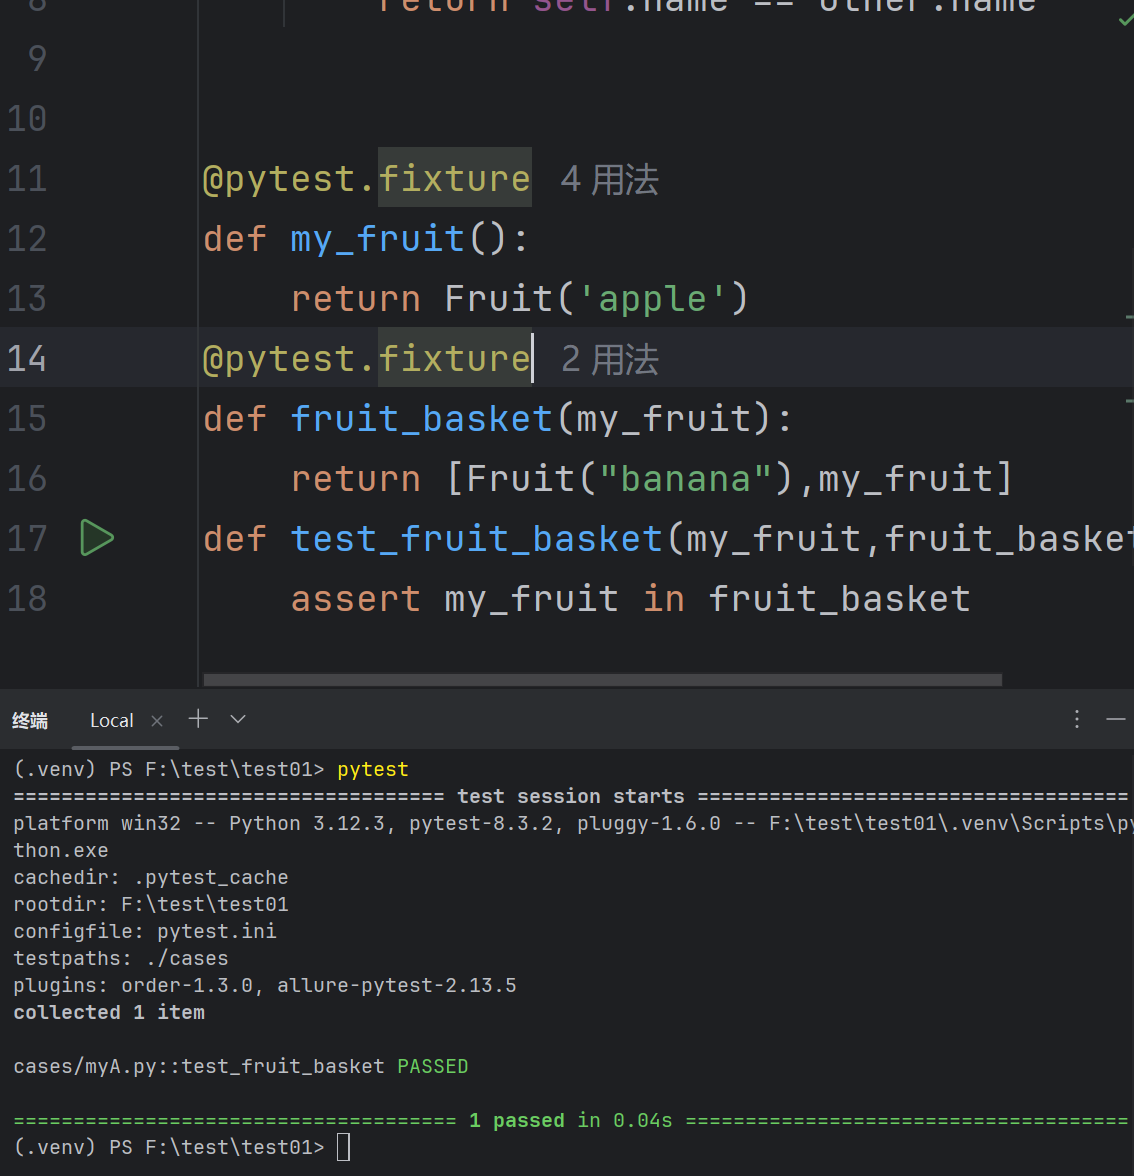
请求多个fixture
import pytest


class Fruit:
    def __init__(self, name):
        self.name = name
    def __eq__(self, other):
        return self.name == other.name


@pytest.fixture
def my_fruit():
    return Fruit('apple')
@pytest.fixture
def fruit_basket(my_fruit):
    return [Fruit("banana"),my_fruit]
def test_fruit_basket(my_fruit,fruit_basket):
    assert my_fruit in fruit_basket
yield fixture
当运行测试的时候,希望确保它们能够自我清理,以便它们不会干扰其他测试。
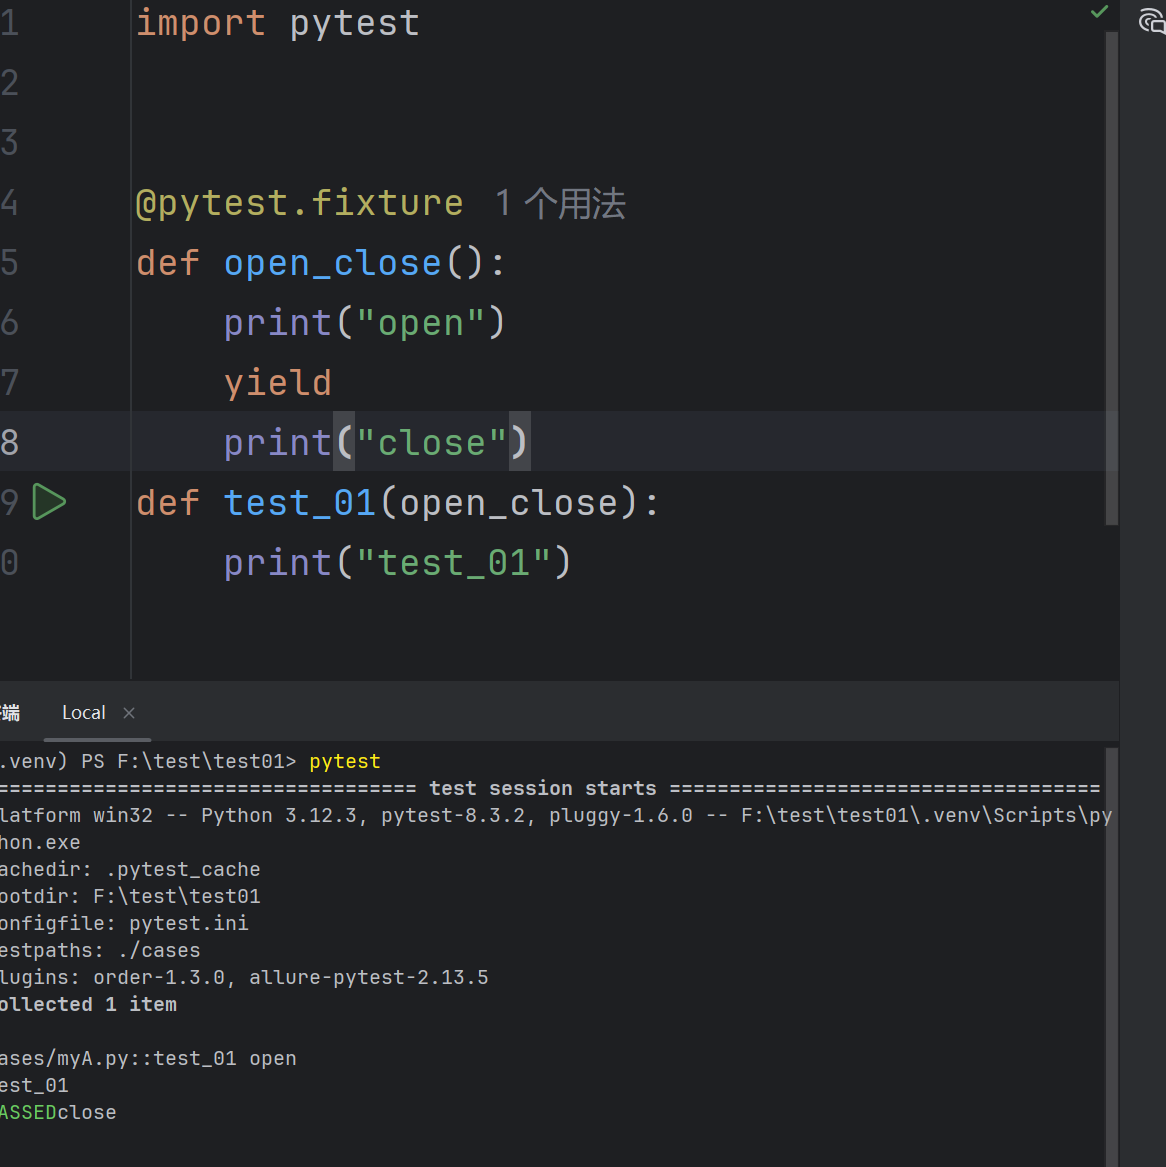
“Yield” fixture 使⽤ yield ⽽不是 return 。有了这些 fixture ,我们可以运⾏⼀些代码,并将对象返回给请求的 fixture/test ,就像其他 fixture ⼀样。
import pytest


@pytest.fixture
def open_close():
    print("open")
    yield
    print("close")
def test_01(open_close):
    print("test_01")
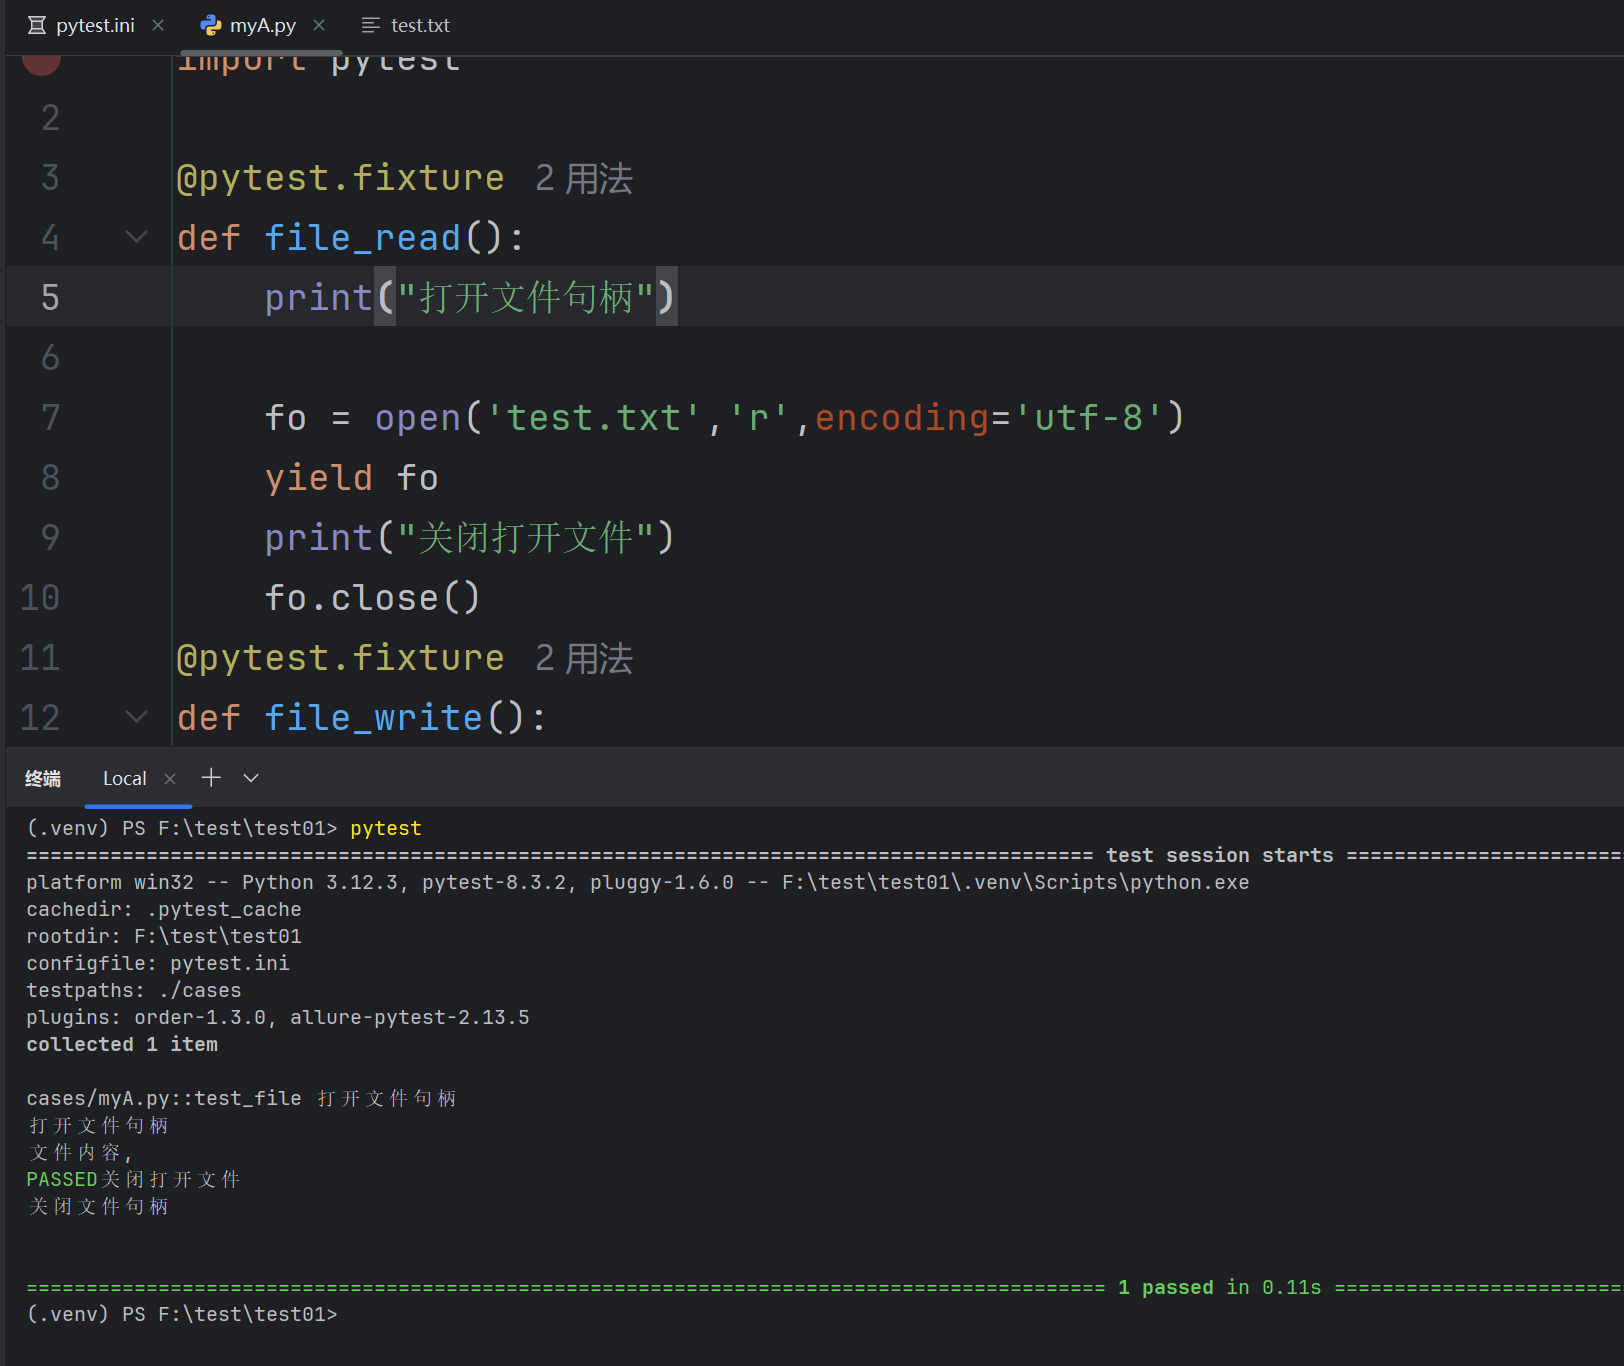
创建文件句柄和关闭文件
import pytest

@pytest.fixture
def file_read():
    print("打开文件句柄")

    fo = open('test.txt','r',encoding='utf-8')
    yield fo
    print("关闭打开文件")
    fo.close()
@pytest.fixture
def file_write():
    print('打开文件句柄')
    fo = open('test.txt','w',encoding='utf-8')
    yield fo
    print("关闭文件句柄")
    fo.close()
def test_file(file_write,file_read):
    # 写入数据
    w = file_write
    w.write("测试数据")
    r = file_read
    str = r.read()
    print("文件内容,", str)
带参数的fixture
pytest.fixture(scope='', params='', autouse='', ids='', name='')
参数详解:
-
scope参数用于控制 fixture 的作用范围,决定了 fixture 的生命周期。可选值有:
function(默认):每个测试函数都会调用一次 fixture。class:在同一个测试类中共享这个 fixture。module:在同一个测试模块中共享这个 fixture。(一个文件里)session:整个测试会话中共享这个 fixture。
-
autouse参数默认为False。如果设置为True,则每个测试函数都会自动调用该 fixture,无需显式传入 -
params参数用于参数化 fixture,支持列表传入。每个参数值都会使 fixture 执行一次,类似于 for 循环 -
ids参数与params配合使用,为每个参数化实例指定可读的标识符(给参数取名字) -
name参数用于为 fixture 显式设置一个名称。如果使用了name,则在测试函数中需要使用这个名称来引用fixture(给 fixture 取名字)
score的使用
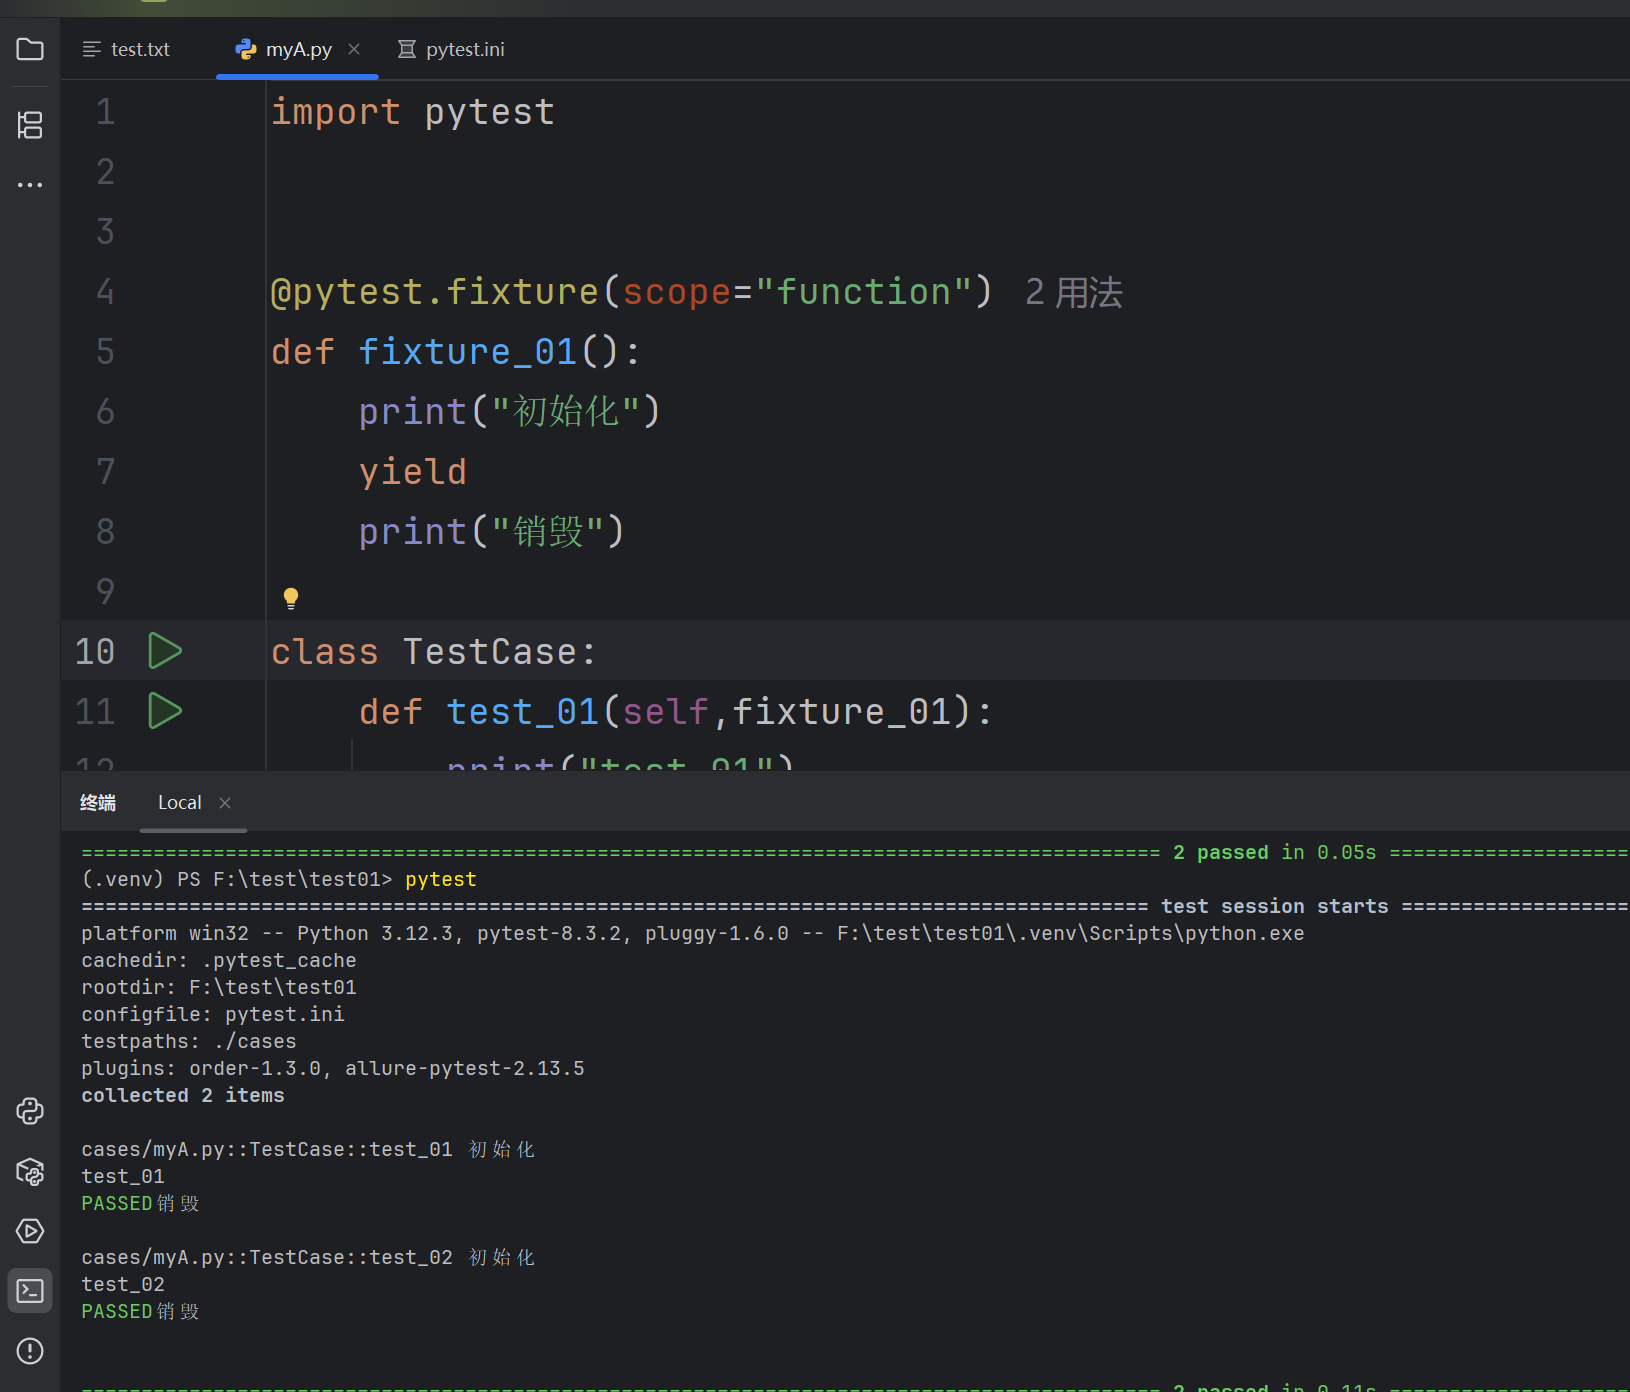
score=function
import pytest


@pytest.fixture(scope="function")
def fixture_01():
    print("初始化")
    yield
    print("销毁")

class TestCase:
    def test_01(self,fixture_01):
        print("test_01")
    def test_02(self,fixture_01):
        print("test_02")
score=class
import pytest


@pytest.fixture(scope="class")
def fixture_01():
    print("初始化")
    yield
    print("销毁")

class TestCase:
    def test_01(self,fixture_01):
        print("test_01")
    def test_02(self,fixture_01):
        print("test_02")
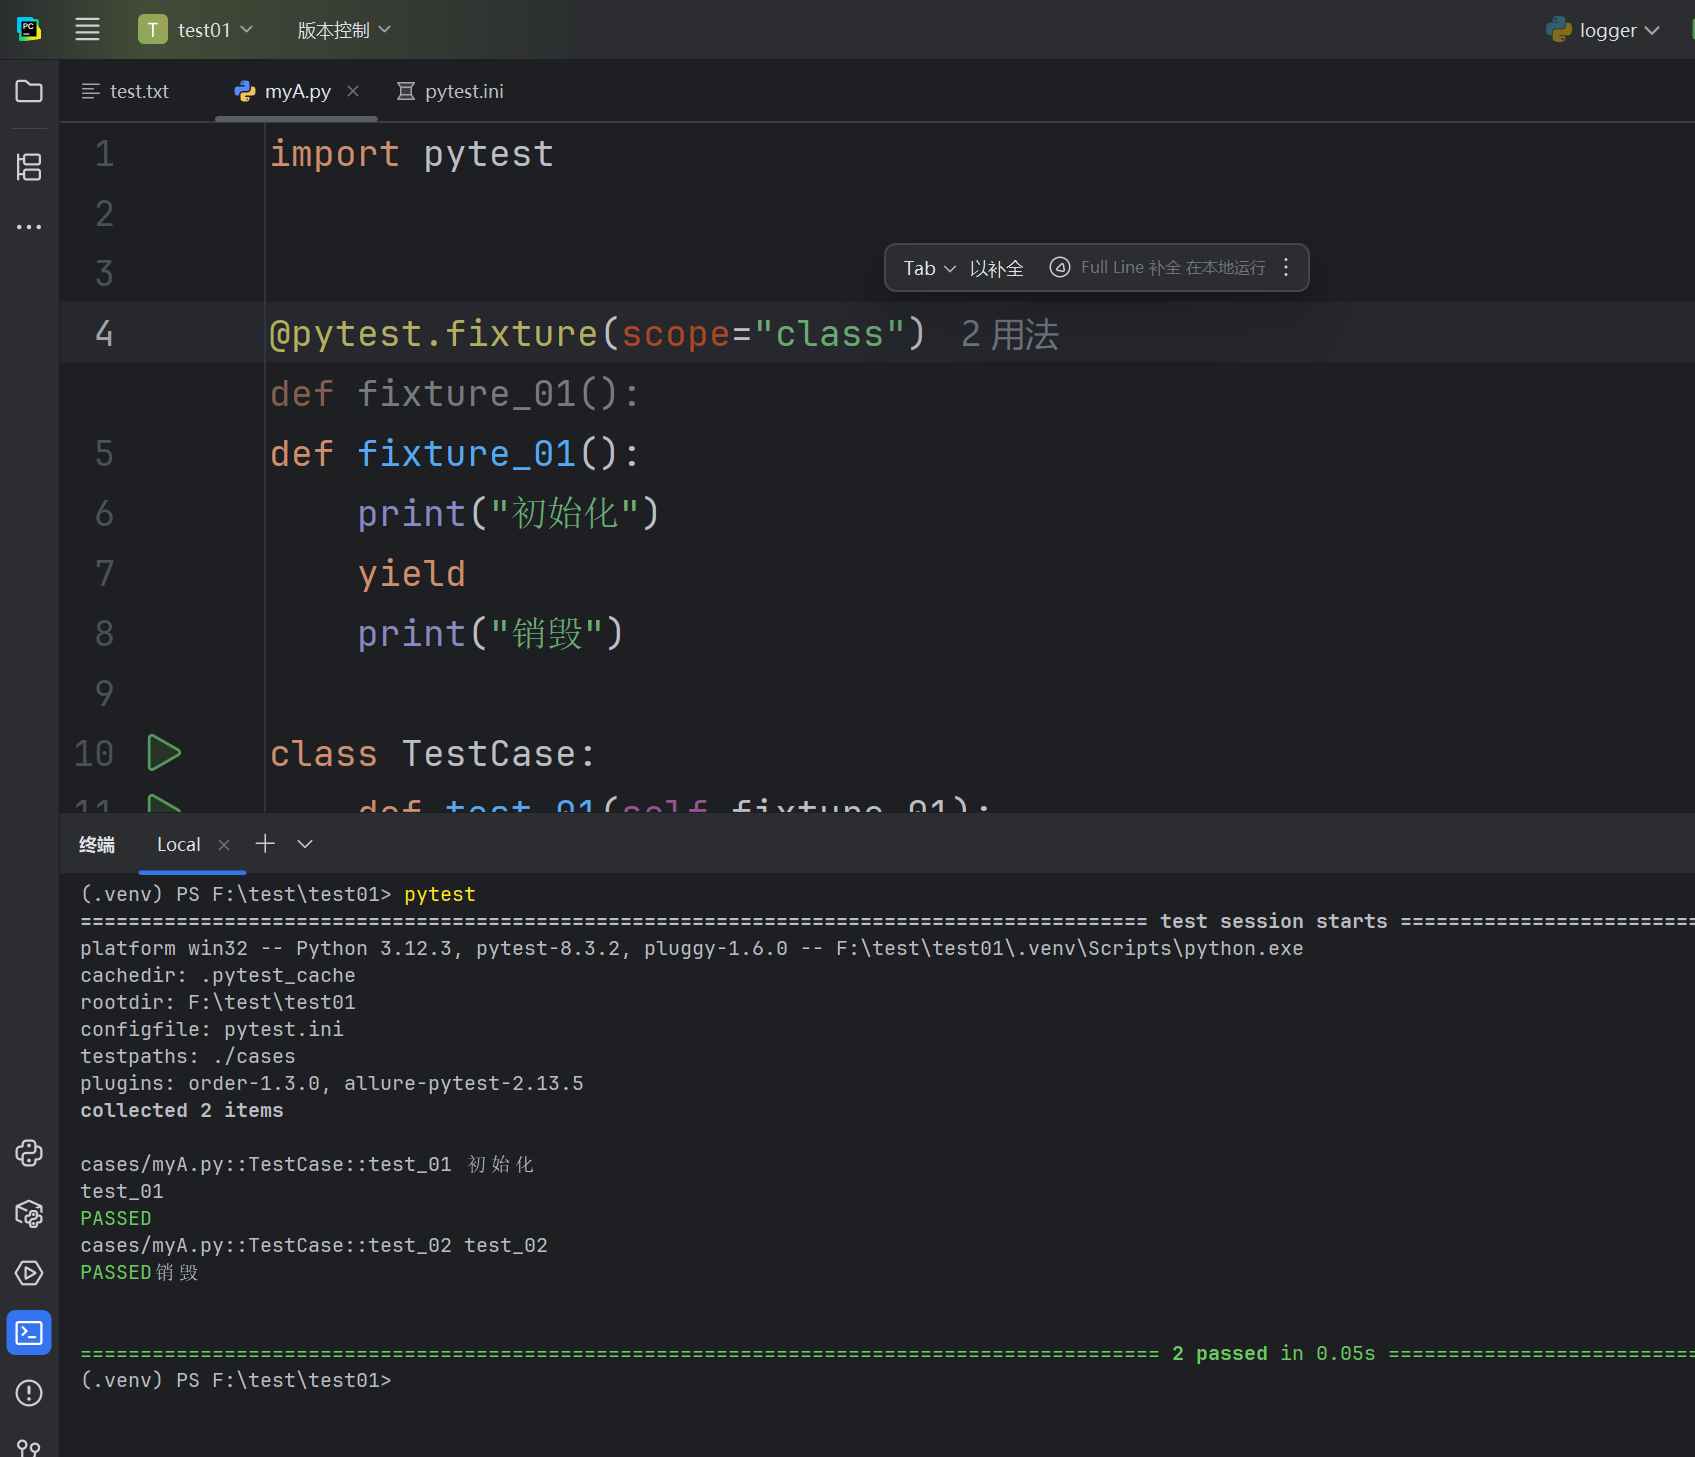
根据比对可以发现,如果scope=class的时候,只会在类创建和销毁的时候分别调用fixture_01;而scope=function,会在每次调用函数的时候都去调用fixture_01函数
2. : scope=“moudle” 、 scope=“session” 实现全局的前后置应⽤
# myA.py
def test_01(fixture_01):
    print("test_01")

def test_02(fixture_01):
    print("test_02")
# myB.py
def test_01(fixture_01):
    print("test_01")

def test_02(fixture_01):
    print("test_02")
# conftest.py
import pytest


@pytest.fixture(scope='module')
# @pytest.fixture(scope='session')
def fixture_01():
    print("初始化")
    yield
    print("销毁")
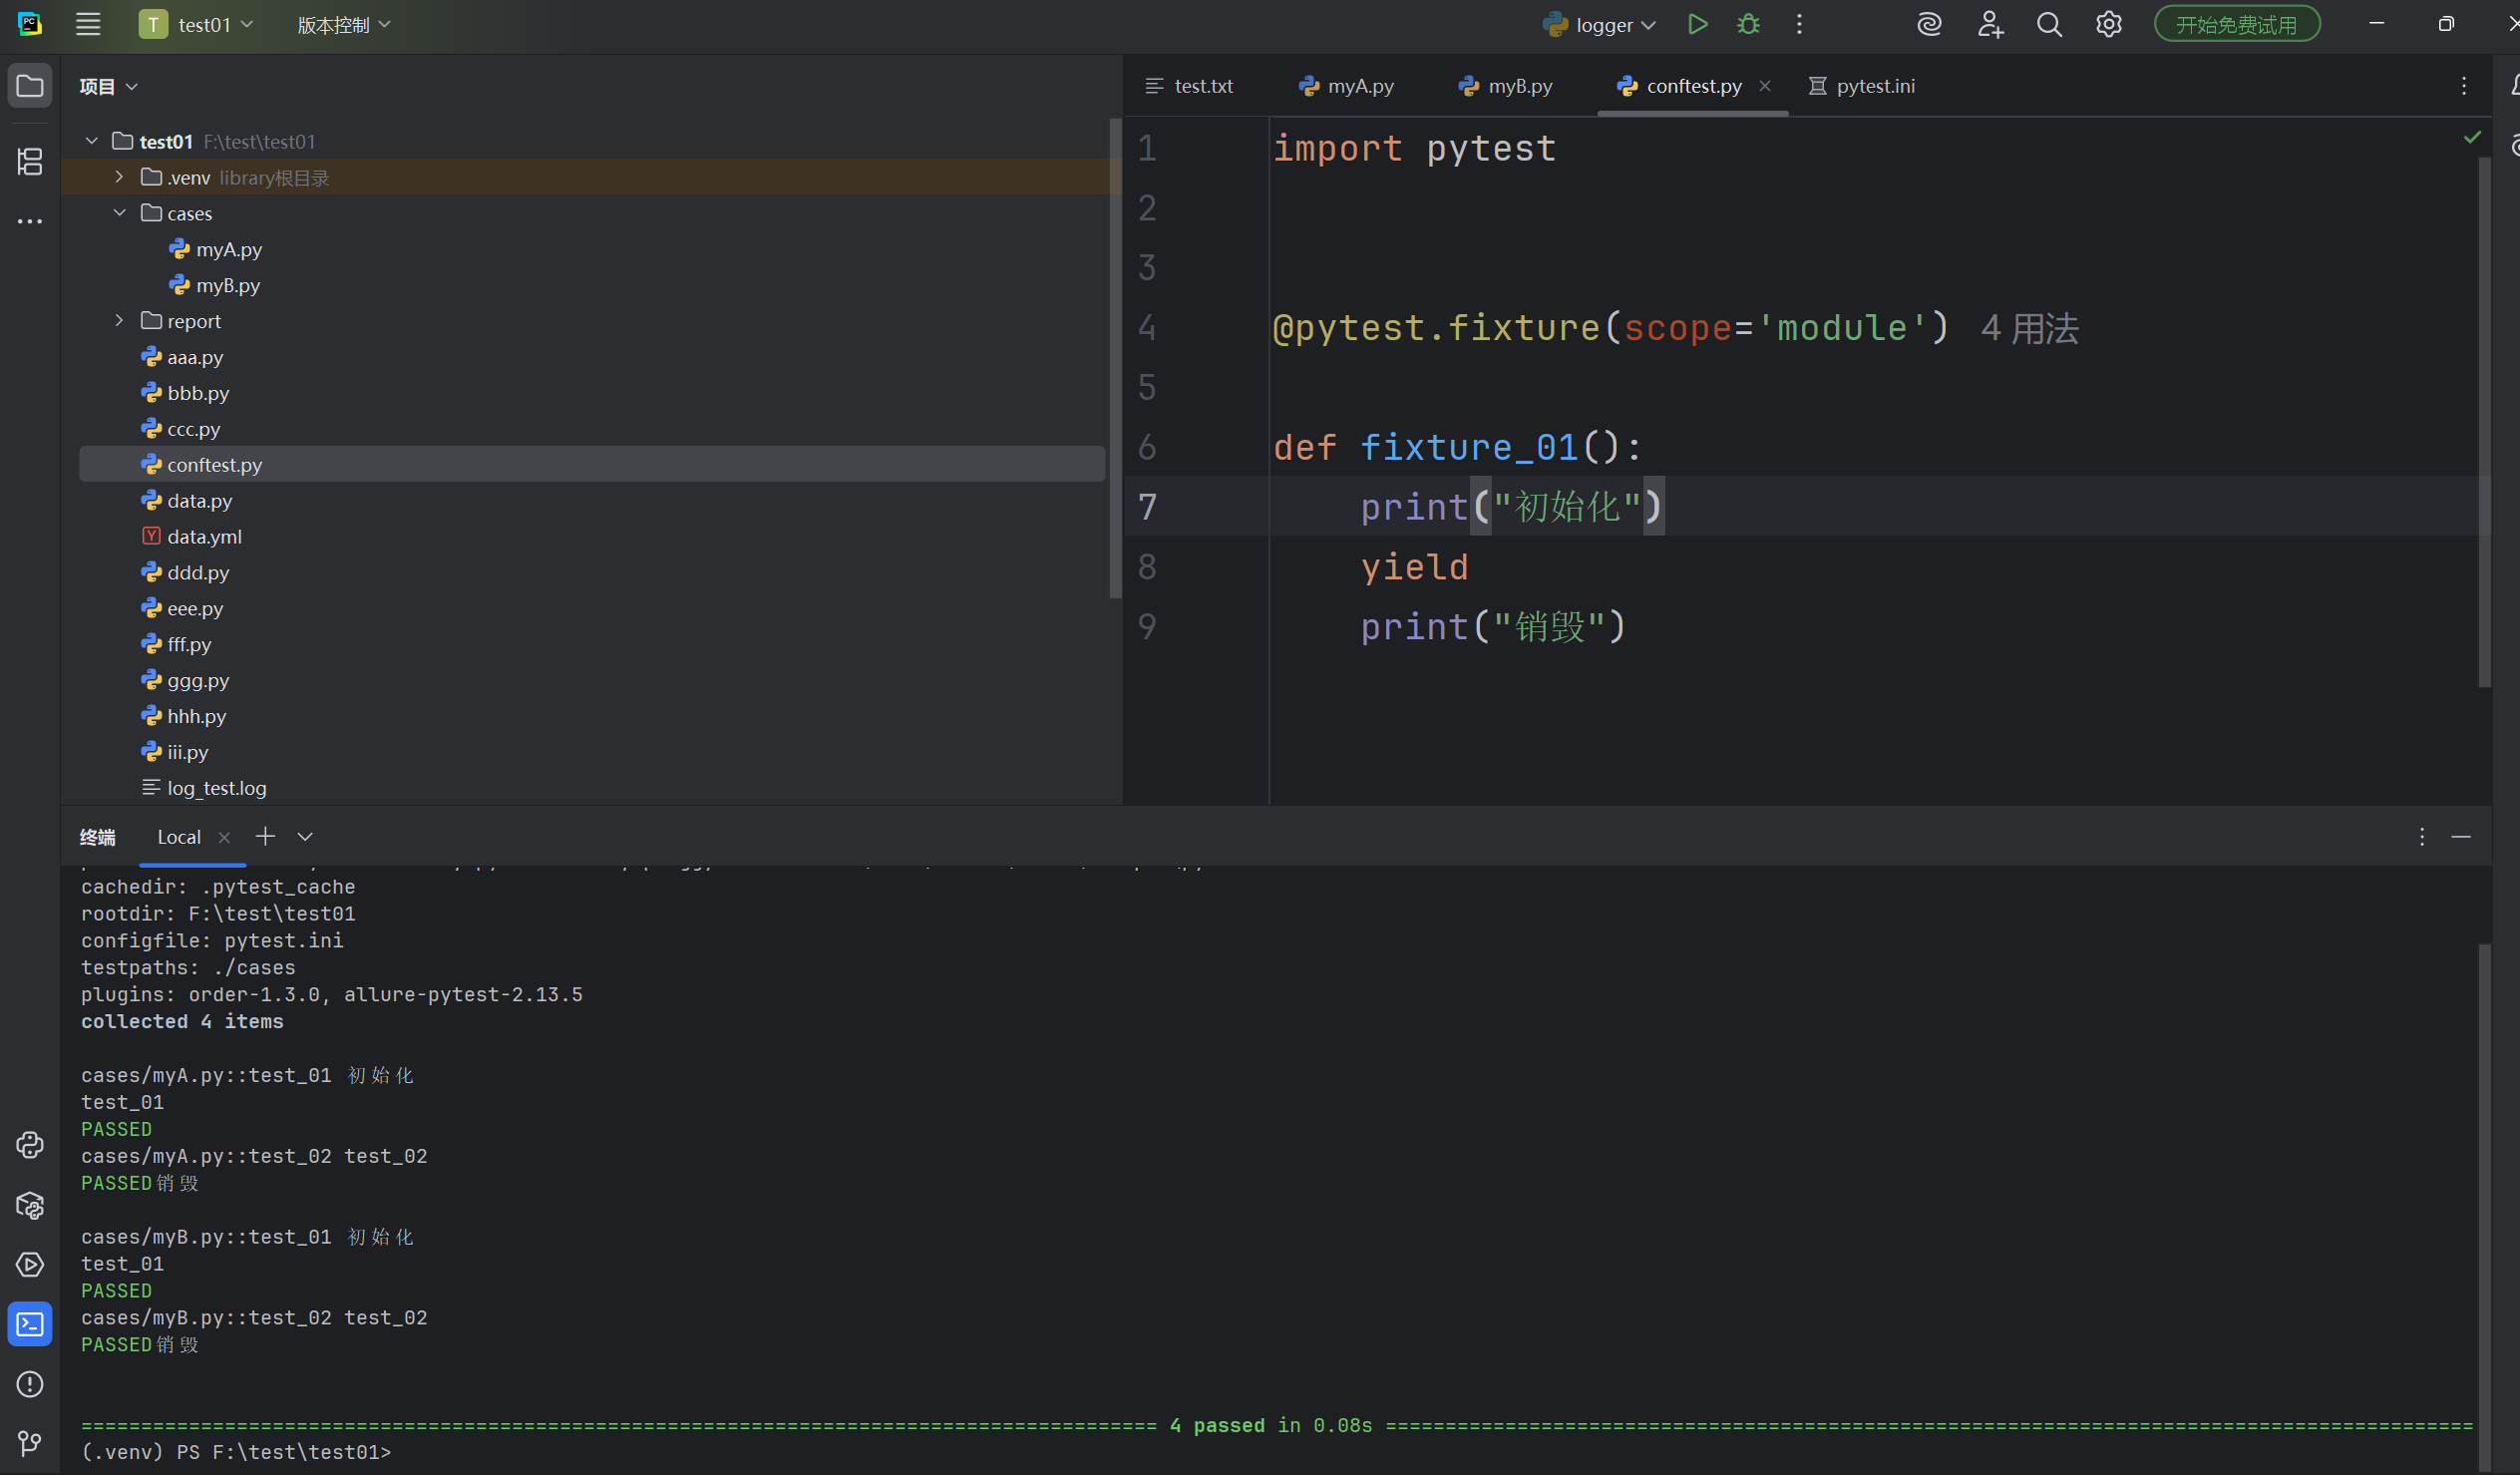
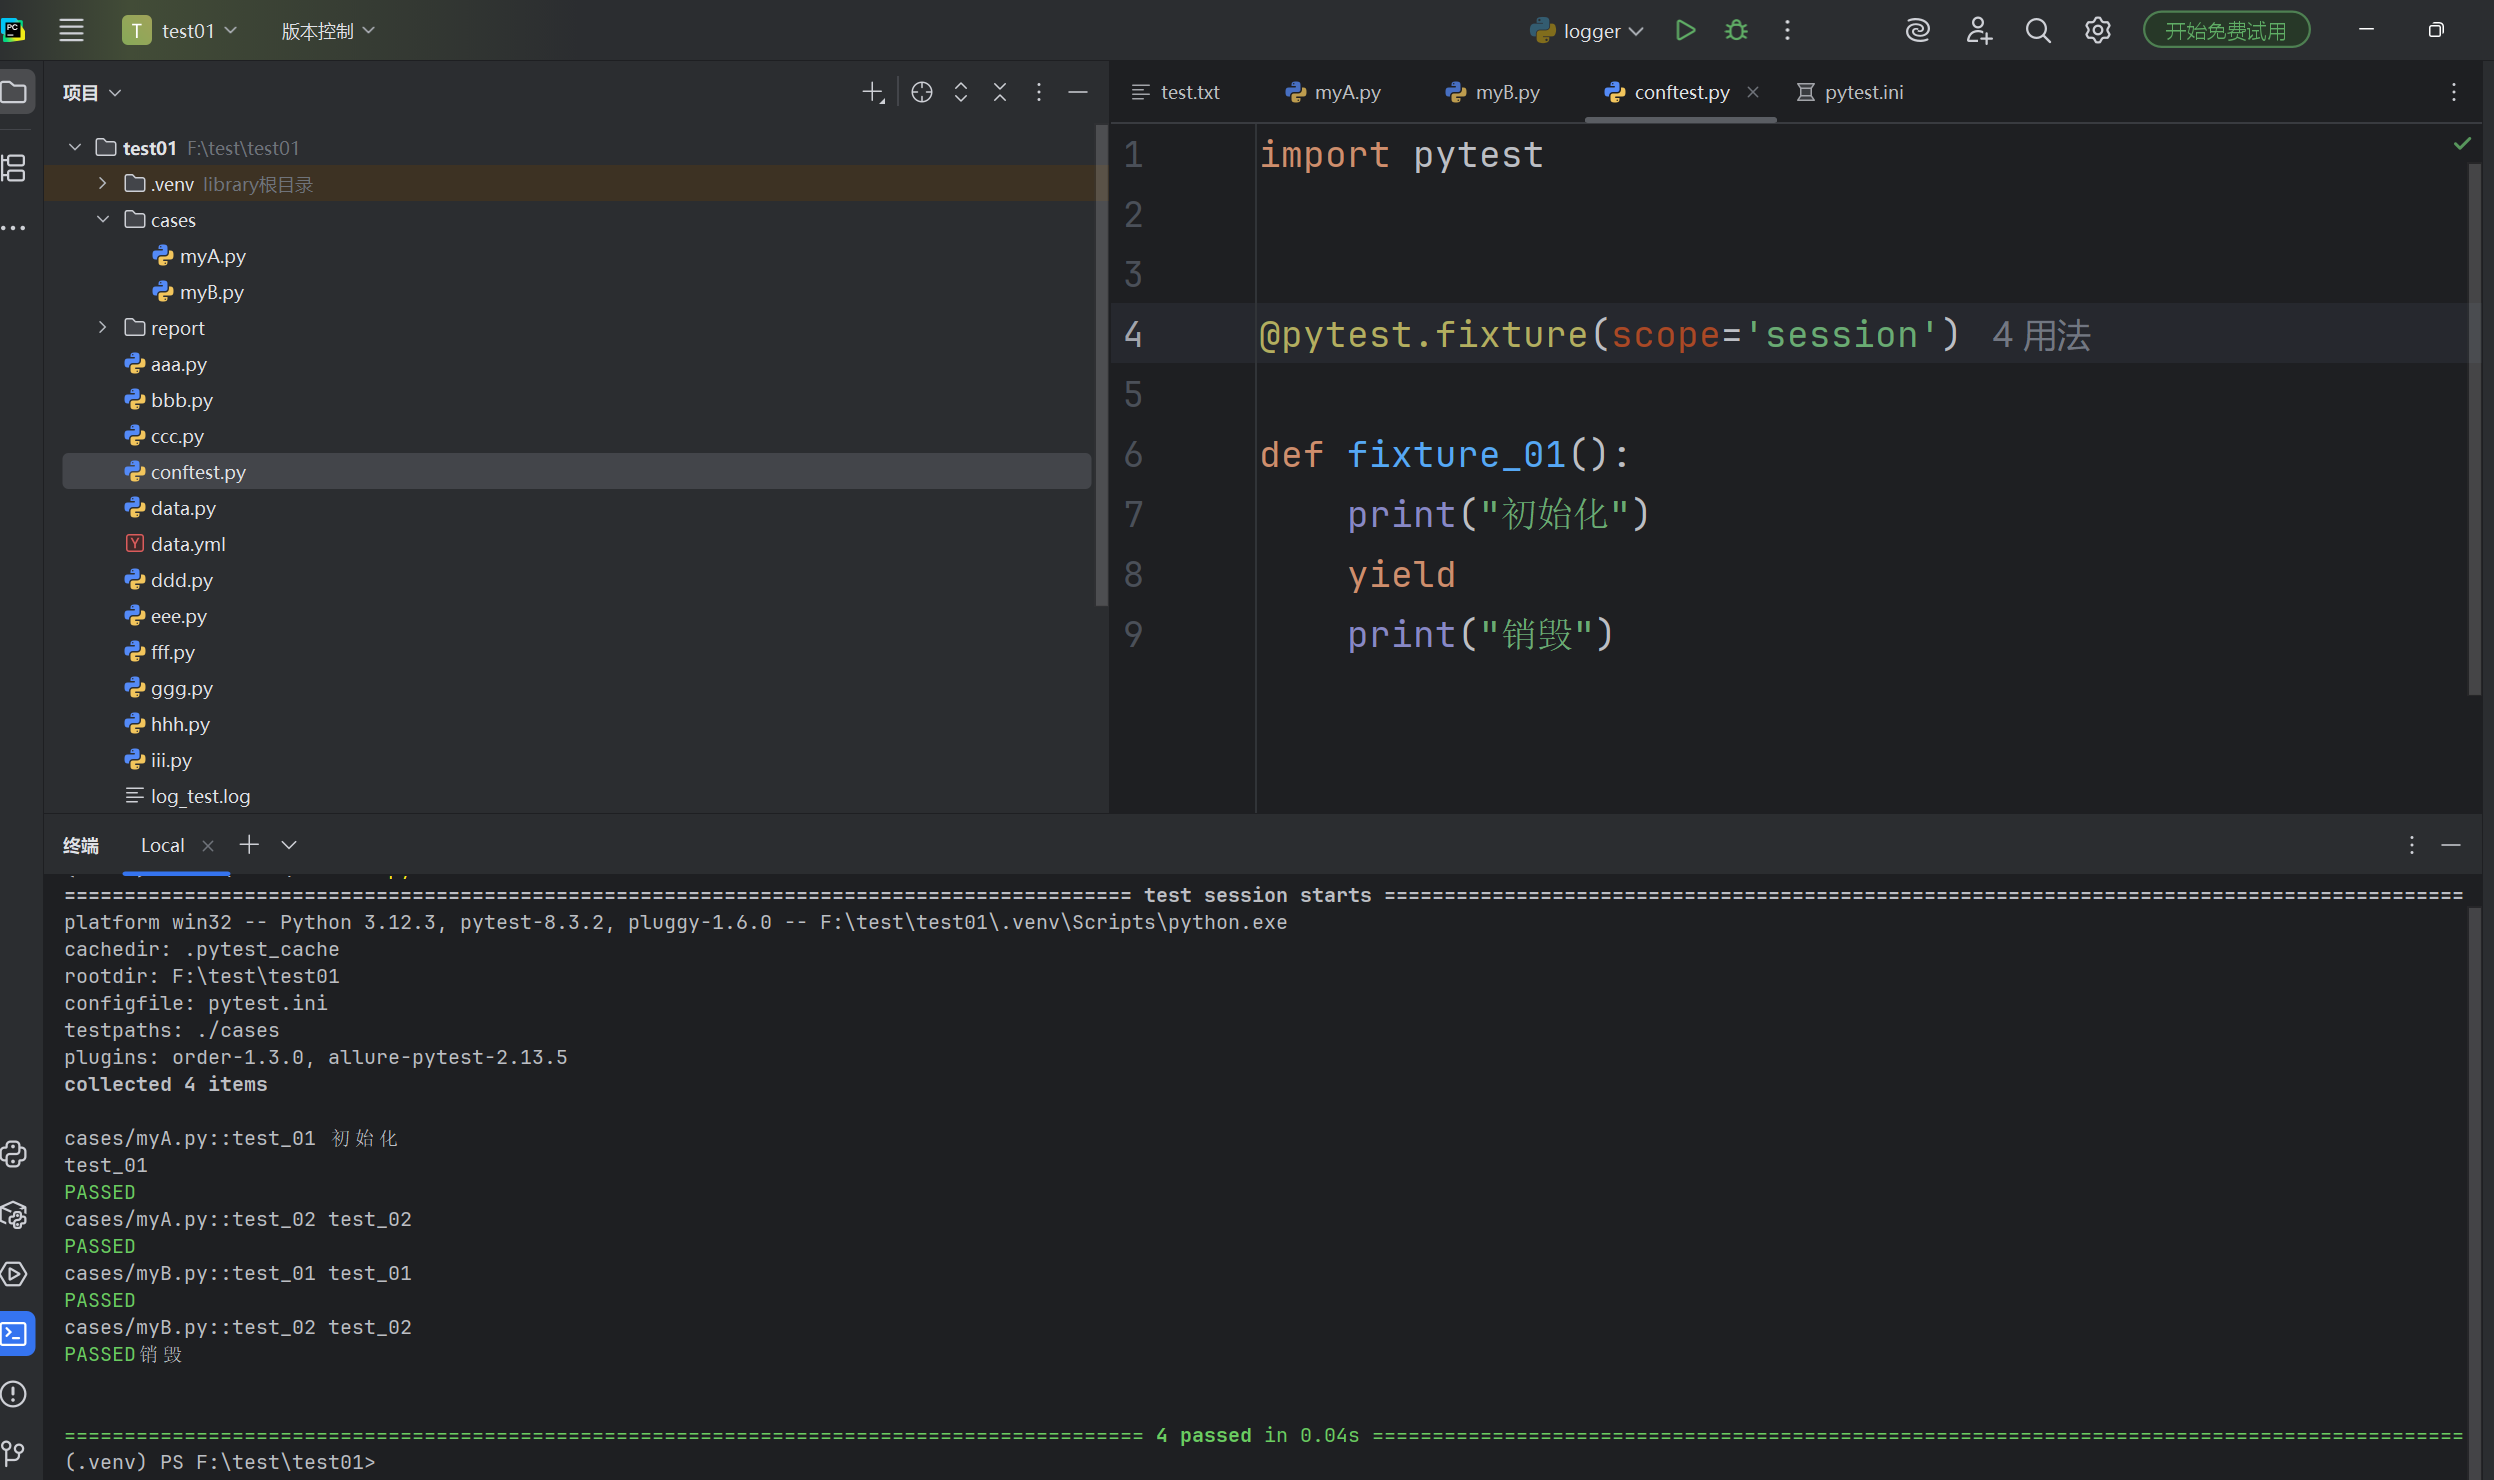
scope=function表示一个函数都需要执行一次,class表示一个类需要执行一次,module表示一个模块需要执行一次(一个文件),session表示一次测试需要执行一次。
3. autouse 的使⽤
autouse默认为False,如果设置为True,则表示每个fixure范围内的函数默认去调用
import pytest

@pytest.fixture(scope="class", autouse=True)
def fixture_01():
    print("初始化")
    yield
    print("清理")
class TestCase():
    def test_01(self):
        print("第⼀个测试⽤例")
    def test_02(self):
        print("第⼆个测试⽤例")

- 通过 params 实现参数化
import pytest


@pytest.fixture(params=['a','b'])
def data_provider(request):
    return request.param

# 定义一个测试函数,依赖上面的参数化fixture
def test_data(data_provider):
    assert data_provider != None
    print(f"{data_provider}")
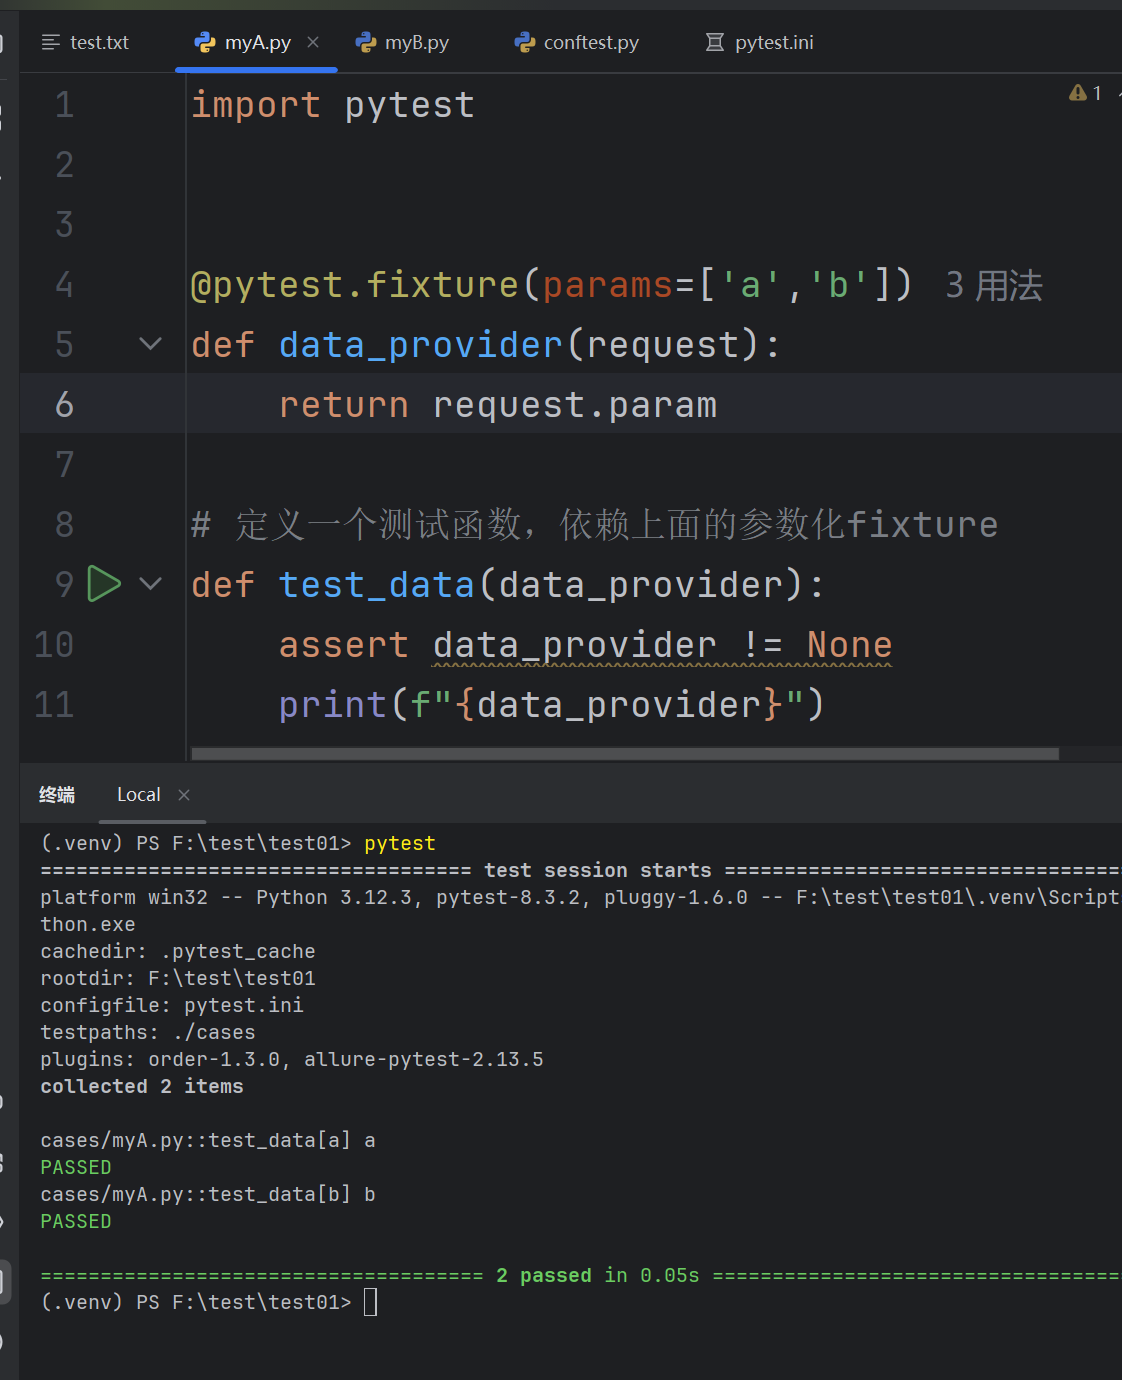
前⾯我们已经学过pytest中通过 @pytest.mark.parametrize 实现参数化,通过 fixture 也可以实现参数化
parametrize 更适合简单场景,⽽ fixture 更适合需要动态数据和资源管理的复杂场景
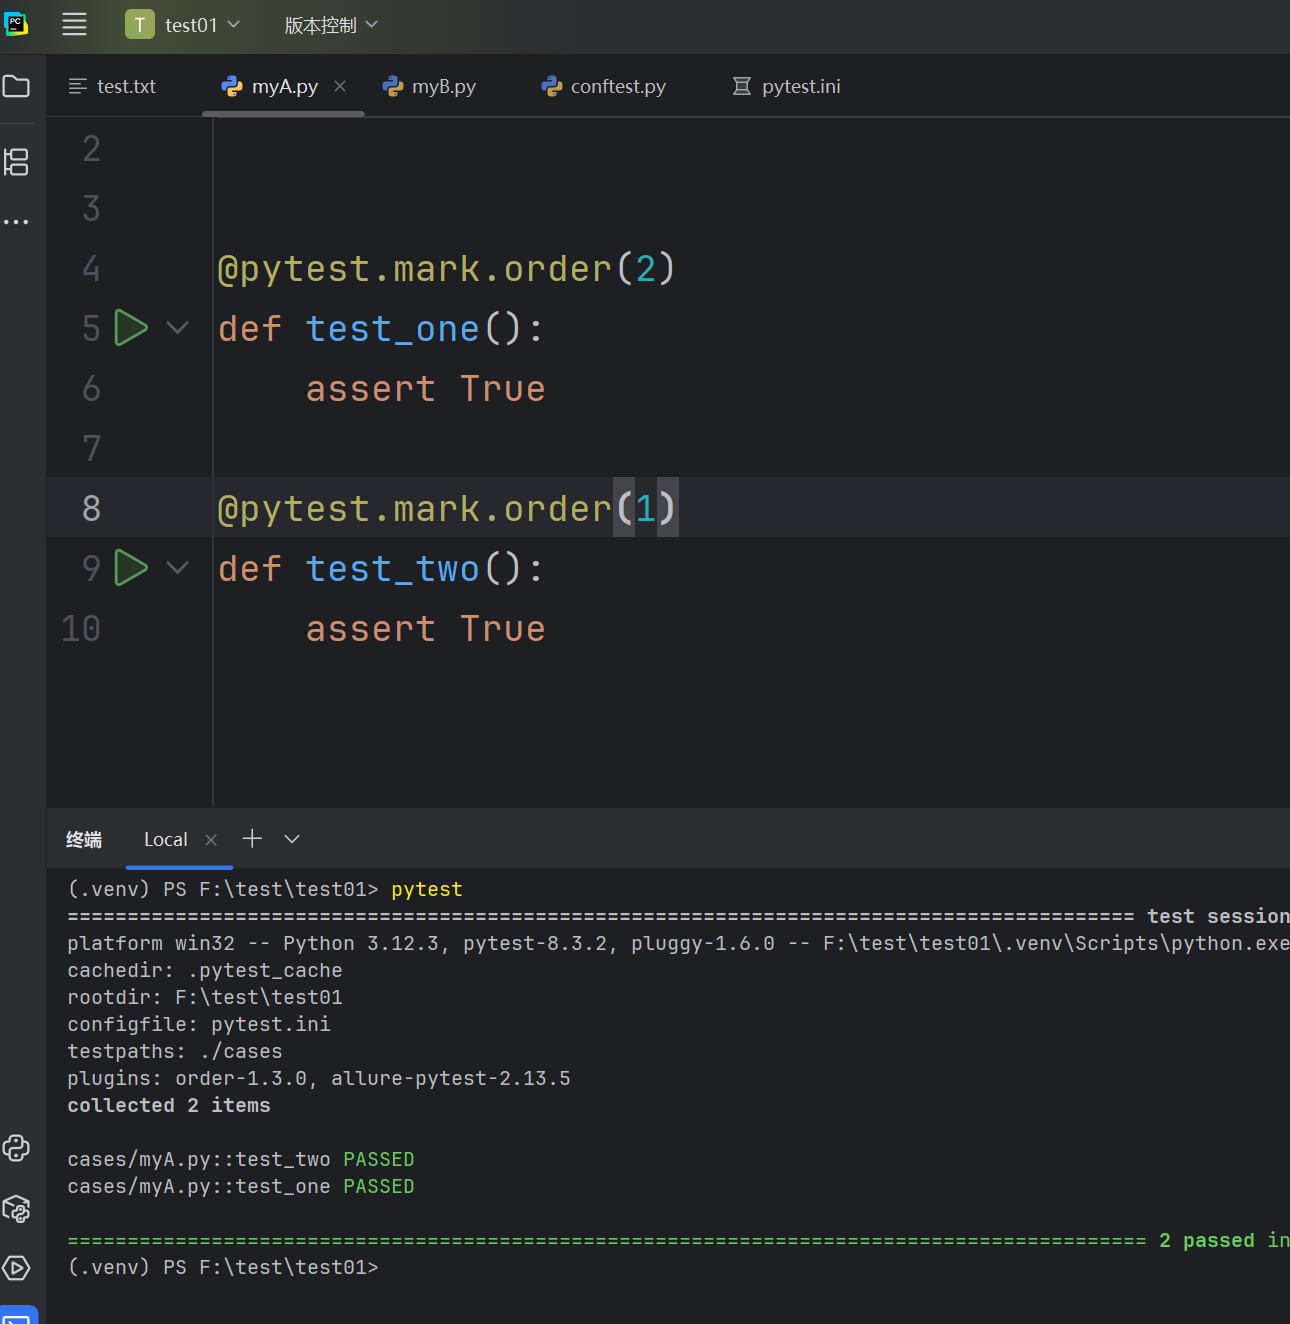
指定用例顺序
在使⽤pytest进⾏测试时,有时候我们需要按照特定的顺序来运⾏测试⽤例,尤其是在涉及到测试⽤例
之间的依赖关系时。pytest本⾝并不直接⽀持通过配置来改变测试⽤例的默认运⾏顺序,pytest-order是一个第三方插件,需要手动下载一下
pip install pytest-order==1.3.0


 988
988

 被折叠的 条评论
为什么被折叠?
被折叠的 条评论
为什么被折叠?
 到【灌水乐园】发言


