


基于51单片机手动计步器设计
(仿真+程序)
功能介绍
具体功能:
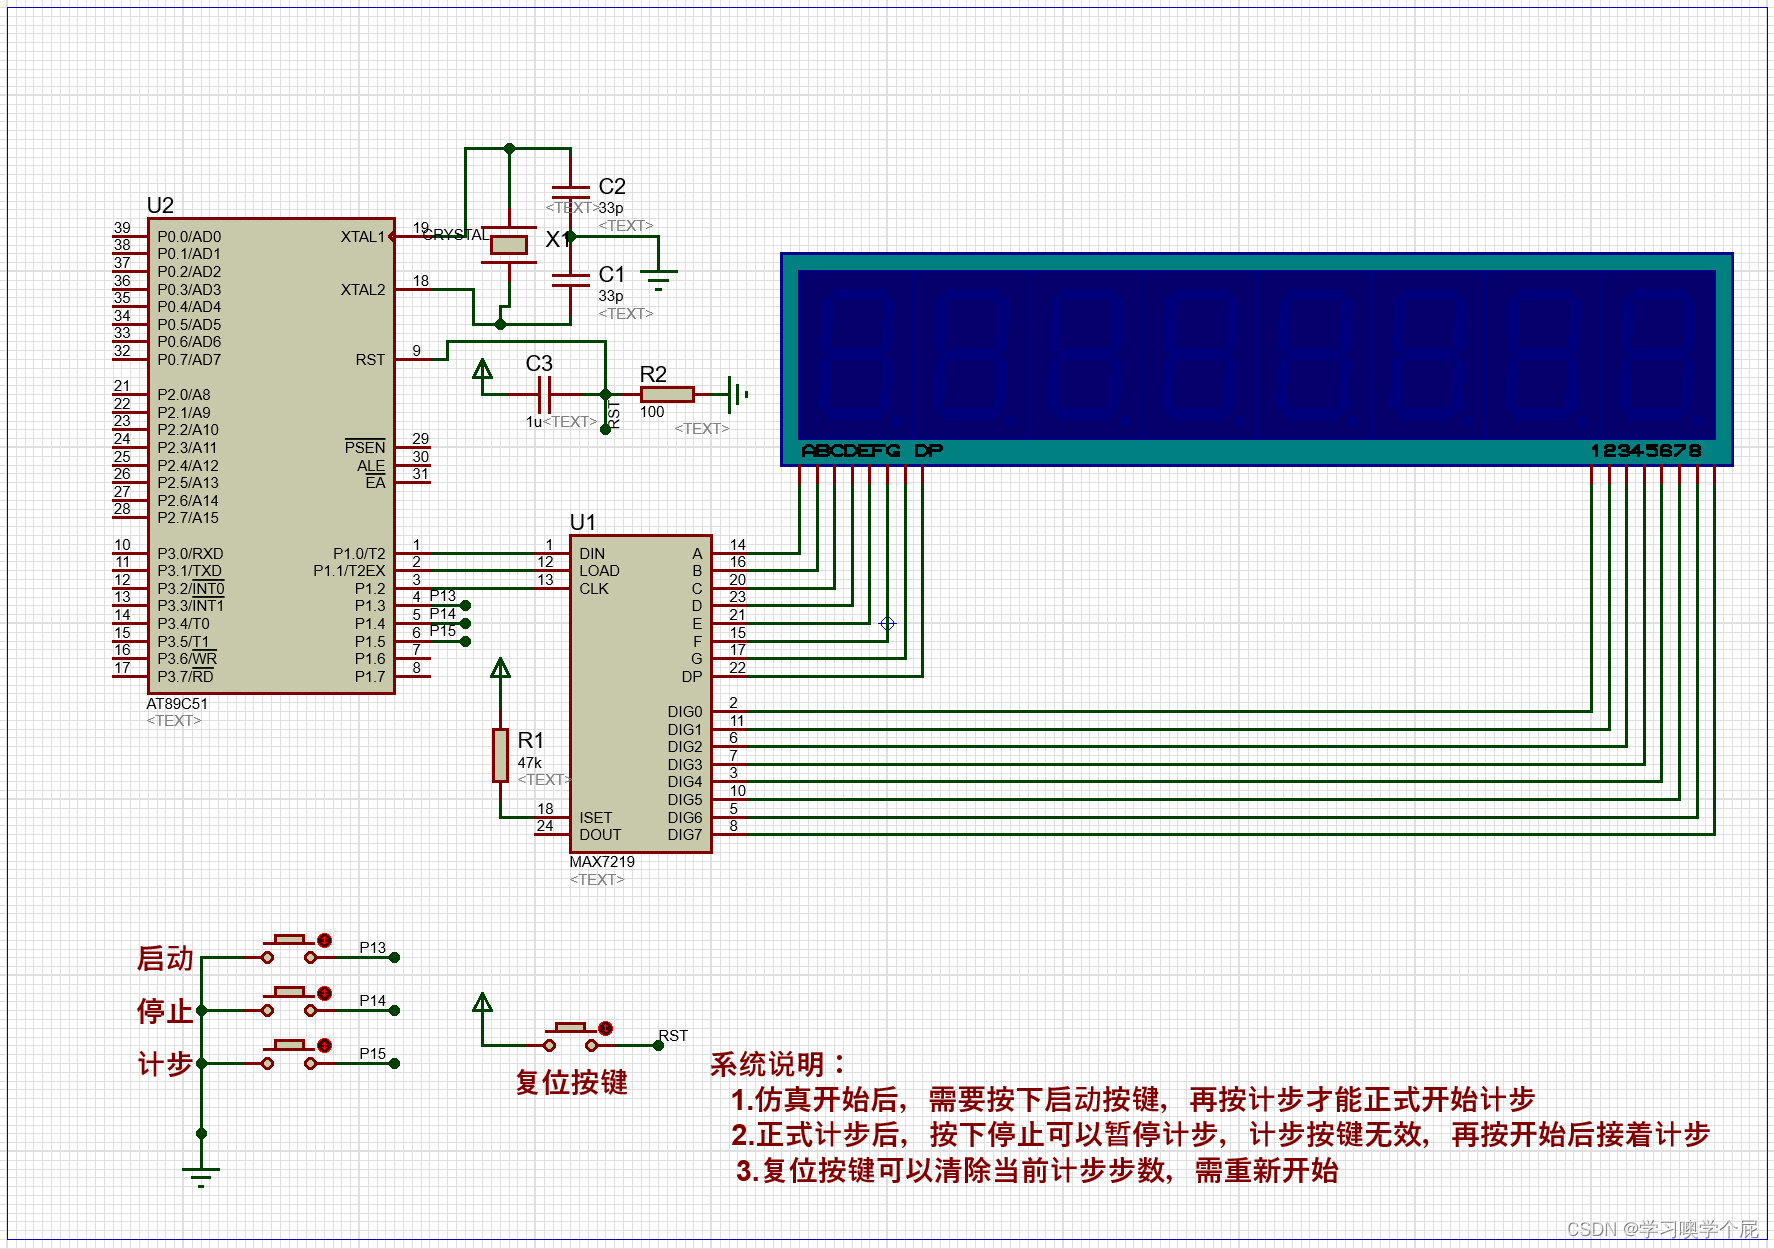
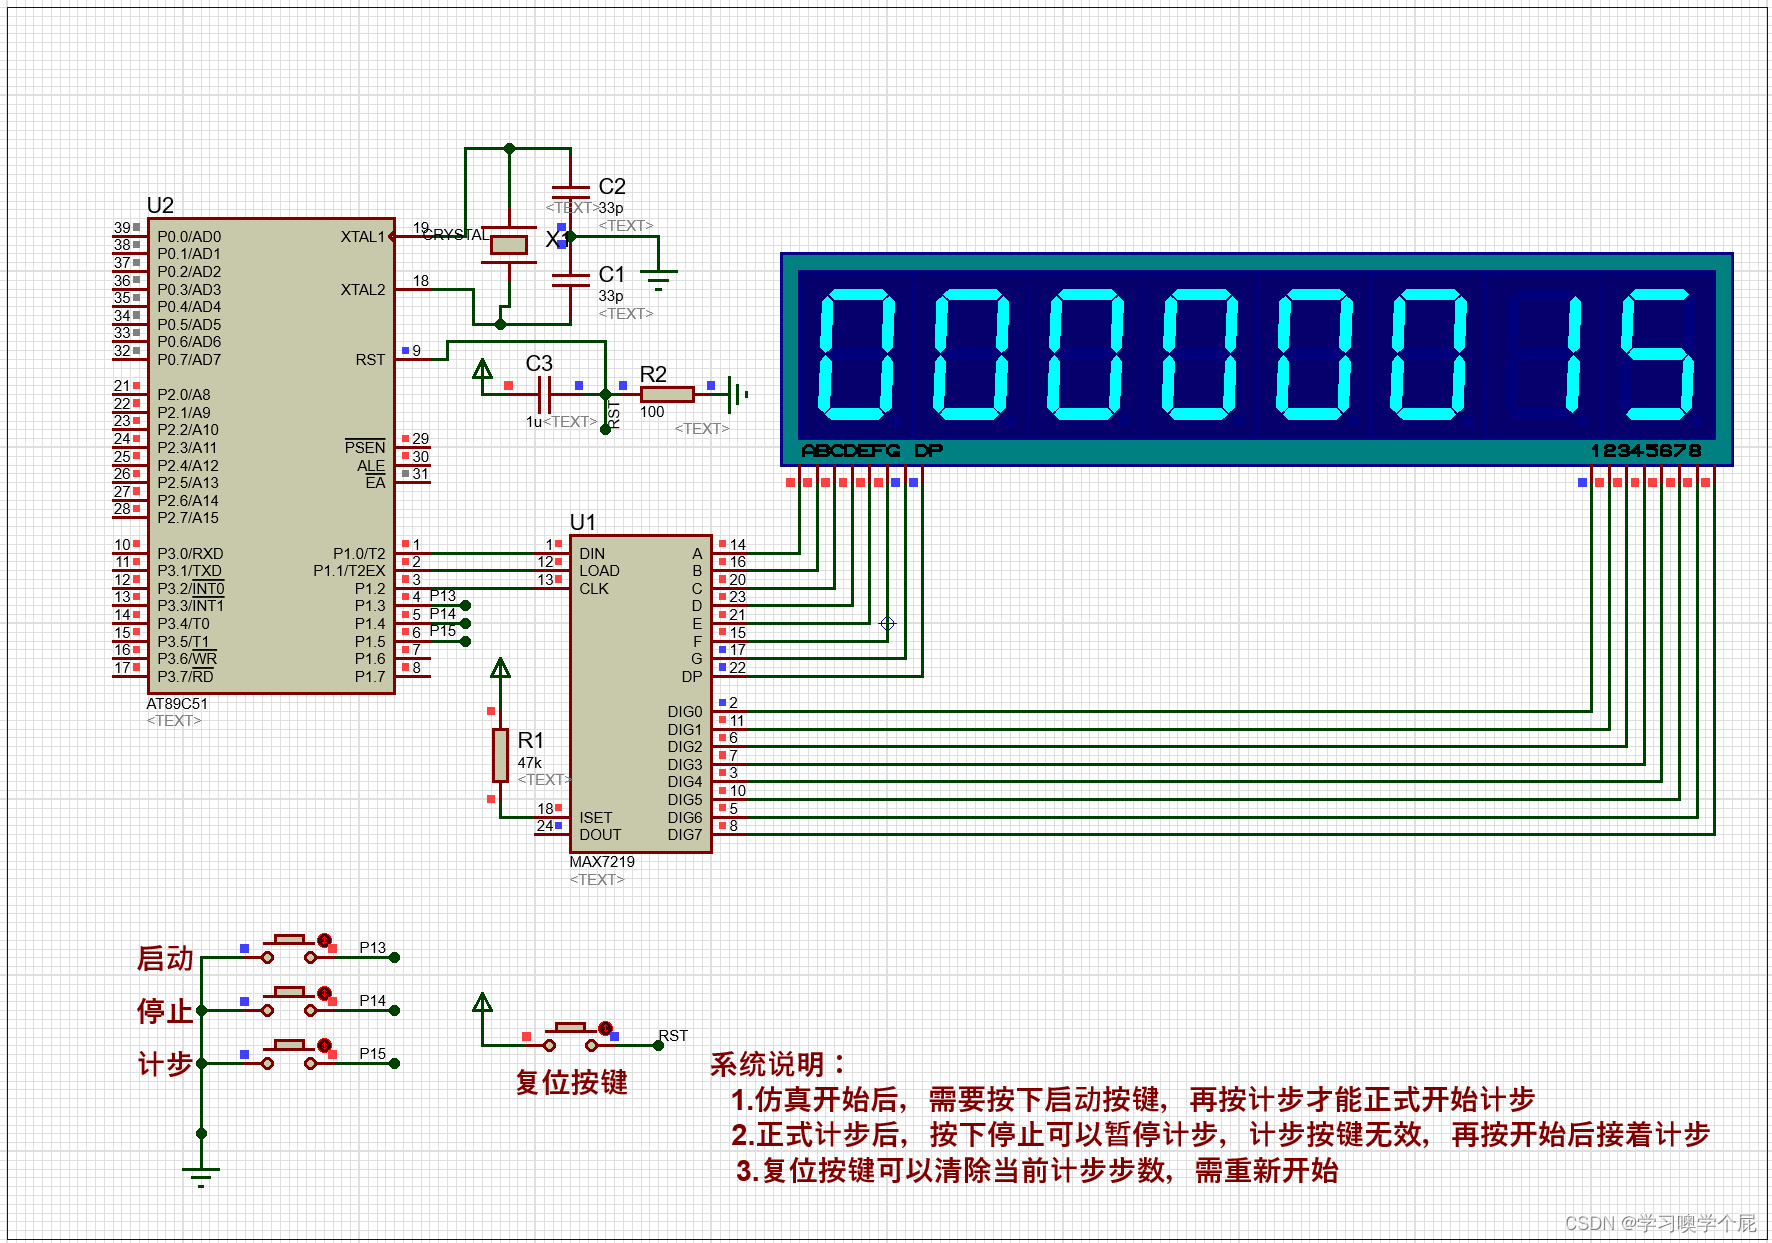
1.51单片机核心、MAX7219驱动芯片,8位数码管显示步数。
2.按下启动按键,才可以按计步键计步。
3.按下暂停按键,计步按键无效。
4.复位按键可以重新记步。
#include "reg51.h"
#define uint unsigned int
#define uchar unsigned char

sbit DIN = P1^0;
sbit LOAD= P1^1;
sbit CLK = P1^2;
sbit StartKey = P1^3;
sbit StopKey = P1^4;
sbit StepKey = P1^5;

uchar StartFlag=0;


#define NoOp 0x00
#define Digit0 0x01
#define Digit1 0x02
#define Digit2 0x03
#define Digit3 0x04
#define Digit4 0x05
#define Digit5 0x06
#define Digit6 0x07
#define Digit7 0x08

#define DecodeMode 0x09
#define Intensity 0x0a
#define ScanLimit 0x0b
#define ShutDown 0x0c
#define DisplayTest 0x0f

#define ShutdownMode 0x00
#define NormalOperation 0x01

#define ScanDigit 0x07
#define DecodeDigit 0xff
#define IntensityGrade 0x0a

#define TestMode 0x01
#define TextEnd 0x00

uchar DisBuffer[8]= {0,0,0,0,0,0,0,0};

void delay(uint t)//简单延时
{
	uint i;
	while(t--)
	{
		for(i=0; i<8; i++);
	}
}

void SendChar(uchar ch)//逐位显示
{
	uchar i,temp;
//	_nop_();
	for(i=0; i<8; i++)
	{
		temp=ch&0x80;
		ch=ch<<1;
		if(temp)
		{
			DIN=1;
			CLK=0;
			CLK=1;
		}
		else
		{
			DIN=0;
			CLK=0;
			CLK=1;
		}
	}
}

void WriteWord(uchar addr,uchar num)
{
	LOAD=0;
//	_nop_();
	SendChar(addr);
//	_nop_();
	SendChar(num);
//	_nop_();
	LOAD=1;
}

void InitDisplay() //初始化
{
	WriteWord(ScanLimit,ScanDigit);
	WriteWord(DecodeMode,DecodeDigit);
	WriteWord(Intensity,IntensityGrade);
	WriteWord(ShutDown,NormalOperation);
}
硬件设计
使用元器件:
单片机:AT89C51;
(注意:单片机是通用的,无论51还是52、无论stc还是at都一样,引脚功能都一样。程序也是一样的。)
设计资料
01 仿真图
本设计使用proteus7.8和proteus8.9两个版本设计,向下兼容,无需担心!具体如图!
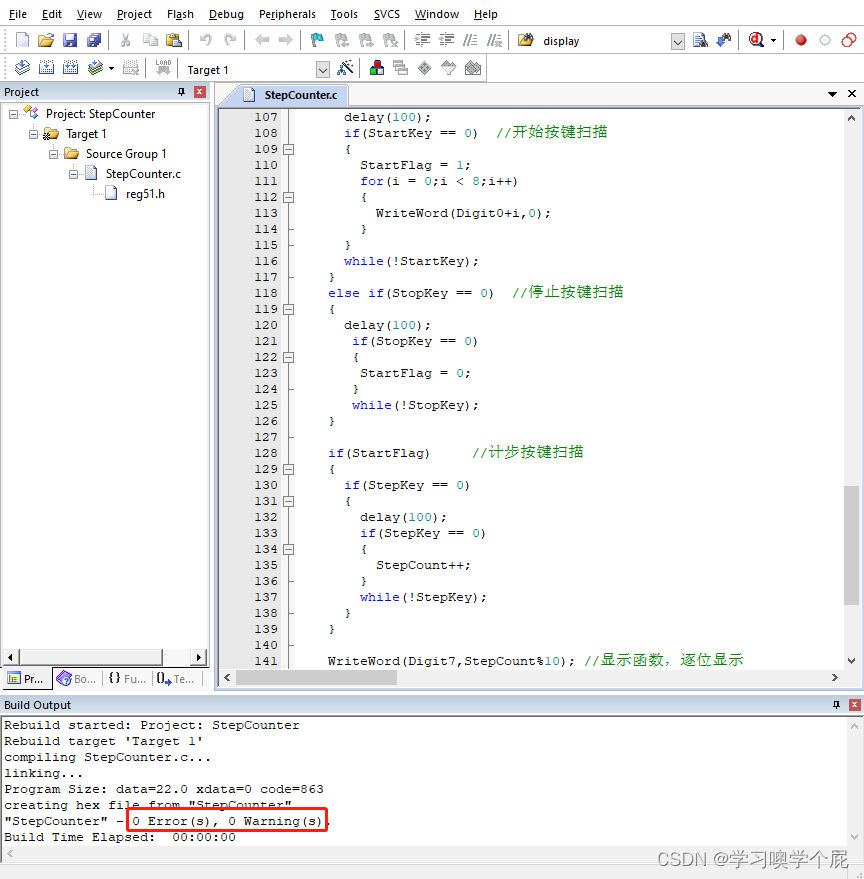
02 程序
本设计使用软件keil4和keil5两个版本编程设计,无需担心!具体如图!
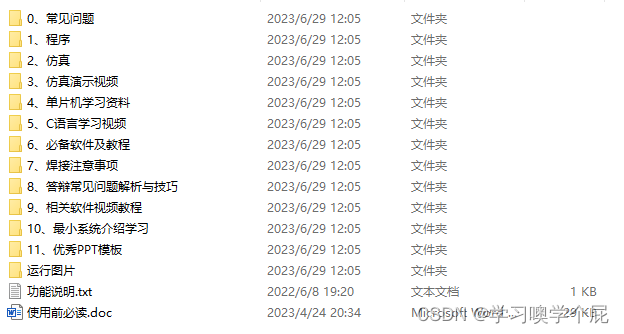
03 设计资料
全部资料包括仿真源文件 、程序(含注释)、演示视频等。具体内容如下,全网最全! !
下面是开源51单片机设计资料
大家共同学习进步:
链接:https://pan.baidu.com/s/1Ola0kIXBbn74XfUBNX2NwQ?pwd=ja8j
提取码:ja8j
点赞分享,一起学习进步!一起成长。


 995
995

 被折叠的 条评论
为什么被折叠?
被折叠的 条评论
为什么被折叠?
 到【灌水乐园】发言


