 Spring Boot与Nacos整合教程


本章主要介绍Spring Boot如何整合Nacos,文章使用的Nacos版本为:nacos-1.4.8
目录
第一步:安装Nacos
因为当前Nacos官网已经无法下载1.4.8版本安装包,博主提供一个百度网盘链接。
通过网盘分享的文件:Nacos
链接: https://pan.baidu.com/s/1mt2IszkRD7heX9YmNu9n4A?pwd=wdmw 提取码: wdmw
--来自百度网盘超级会员v4的分享
这个链接中已经包含了安装启动的markdown文档,根据文档启动Nacos服务器。
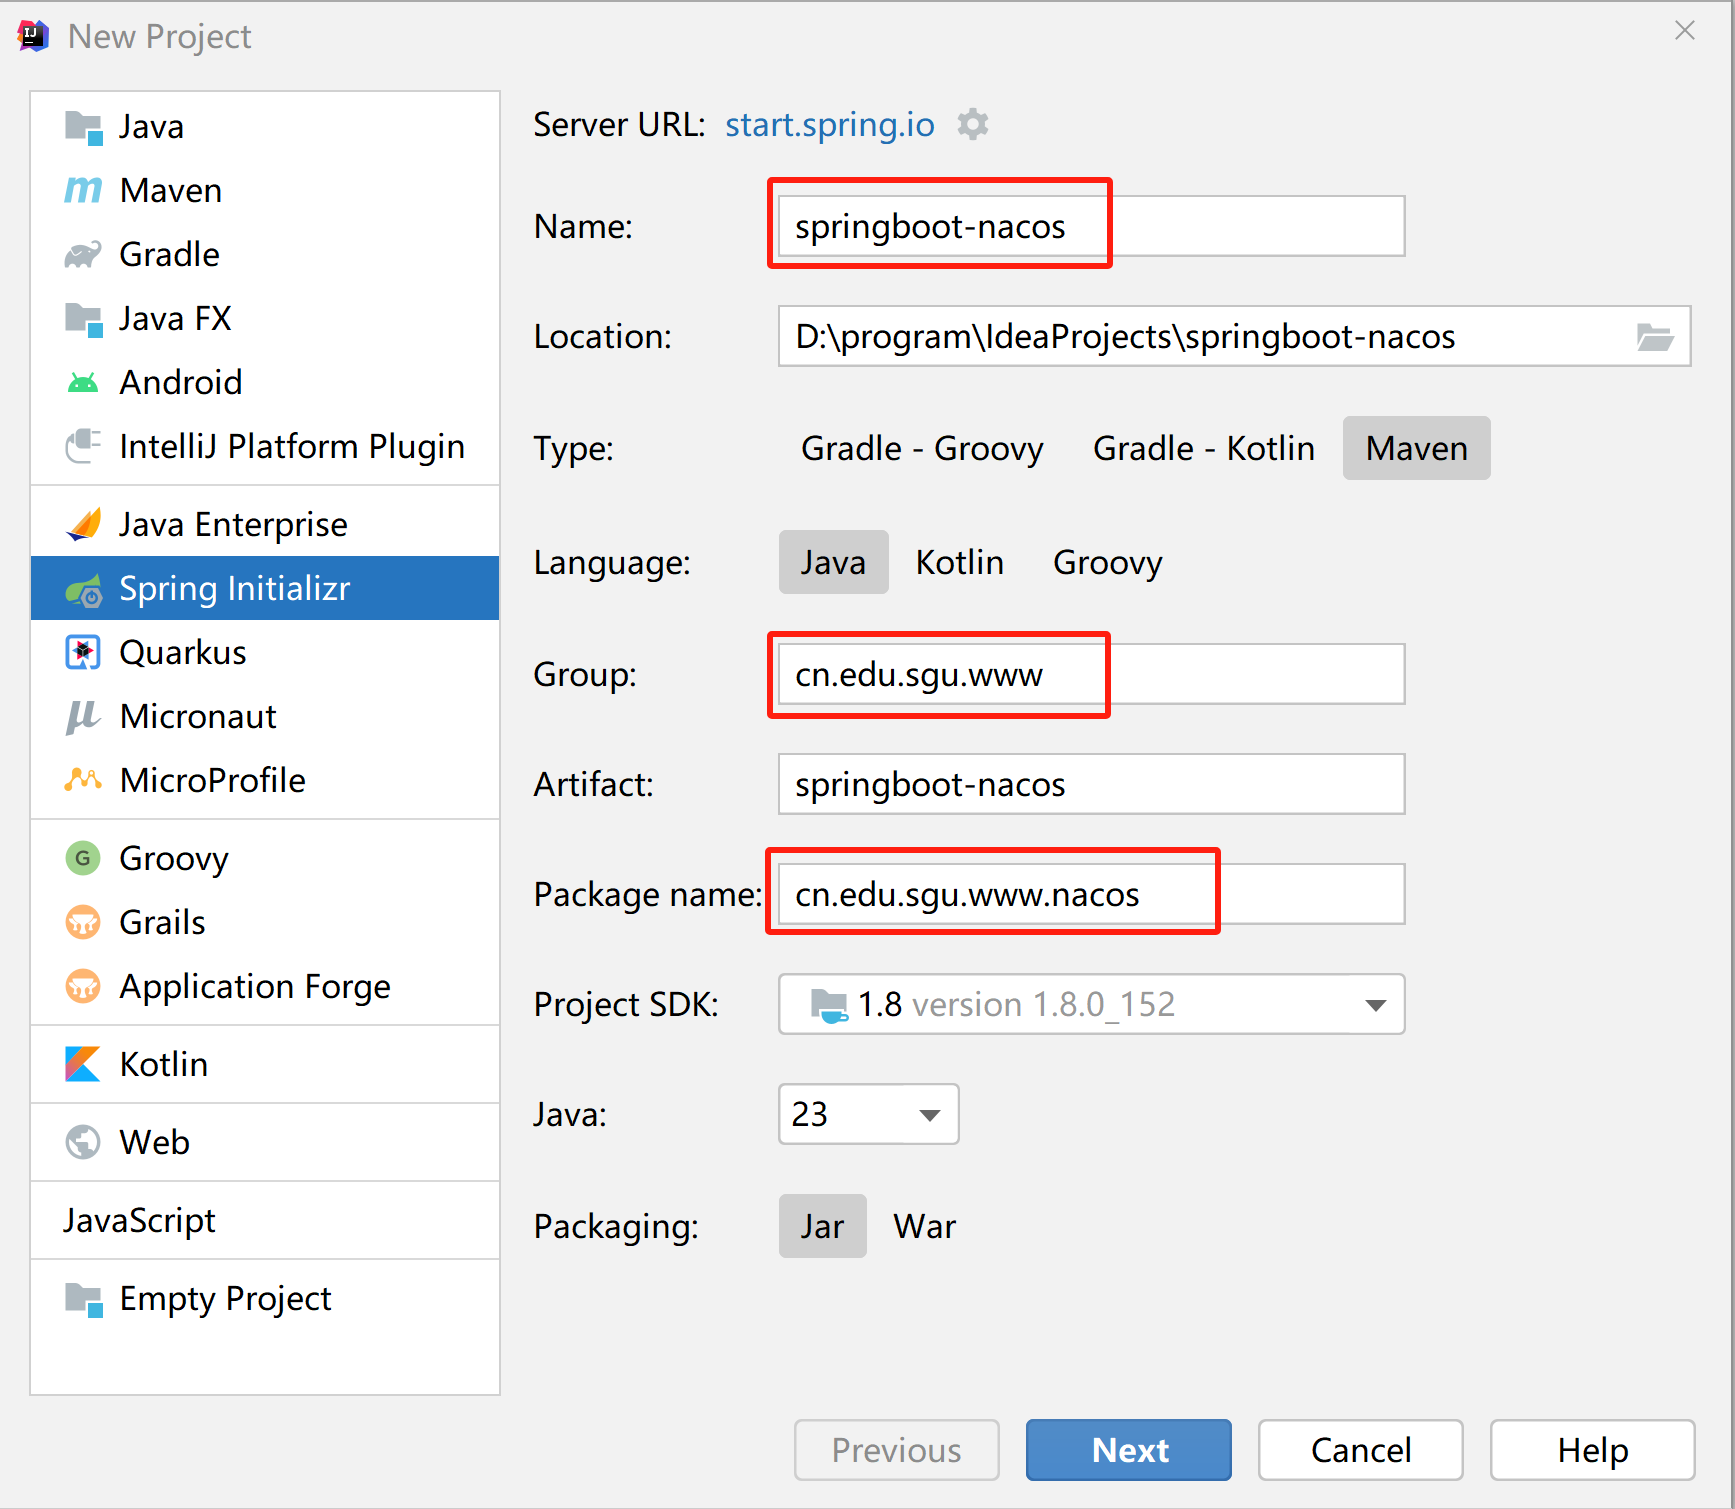
第二步:创建项目
在Intellij IDEA中新建一个SpringBoot项目,项目名为springboot-nacos
第三步:添加依赖
修改pom.xml,并添加必要的依赖,完整的配置文件如下:
<?xml version="1.0" encoding="UTF-8"?>
<project xmlns="http://maven.apache.org/POM/4.0.0" xmlns:xsi="http://www.w3.org/2001/XMLSchema-instance"
         xsi:schemaLocation="http://maven.apache.org/POM/4.0.0 https://maven.apache.org/xsd/maven-4.0.0.xsd">
    <modelVersion>4.0.0</modelVersion>

    <parent>
        <groupId>org.springframework.boot</groupId>
        <artifactId>spring-boot-starter-parent</artifactId>
        <version>2.3.4.RELEASE</version>
    </parent>

    <groupId>cn.edu.sgu.www</groupId>
    <artifactId>springboot-nacos</artifactId>
    <version>0.0.1-SNAPSHOT</version>
    <description>Spring Boot整合Nacos案例项目</description>

    <developers>
        <developer>
            <name>沐雨橙风ιε</name>
            <roles>
                <role>developer</role>
            </roles>
            <timezone>Asia/Shanghai</timezone>
        </developer>
    </developers>

    <scm>
        <url>https://gitee.com/muyu-chengfeng/springboot-nacos.git</url>
    </scm>

    <properties>
        <java.version>1.8</java.version>
    </properties>

    <dependencies>
        <dependency>
            <groupId>org.springframework.boot</groupId>
            <artifactId>spring-boot-starter-web</artifactId>
        </dependency>

        <dependency>
            <groupId>com.alibaba.cloud</groupId>
            <artifactId>spring-cloud-starter-alibaba-nacos-config</artifactId>
            <version>2.2.6.RELEASE</version>
        </dependency>

        <dependency>
            <groupId>com.alibaba.cloud</groupId>
            <artifactId>spring-cloud-starter-alibaba-nacos-discovery</artifactId>
            <version>2.2.6.RELEASE</version>
        </dependency>
    </dependencies>

    <build>
        <plugins>
            <plugin>
                <groupId>org.springframework.boot</groupId>
                <artifactId>spring-boot-maven-plugin</artifactId>
                <version>2.3.4.RELEASE</version>
            </plugin>
        </plugins>
    </build>
</project>
第四步:新建配置文件
在这之前,请确保已经安装并启动了nacos。
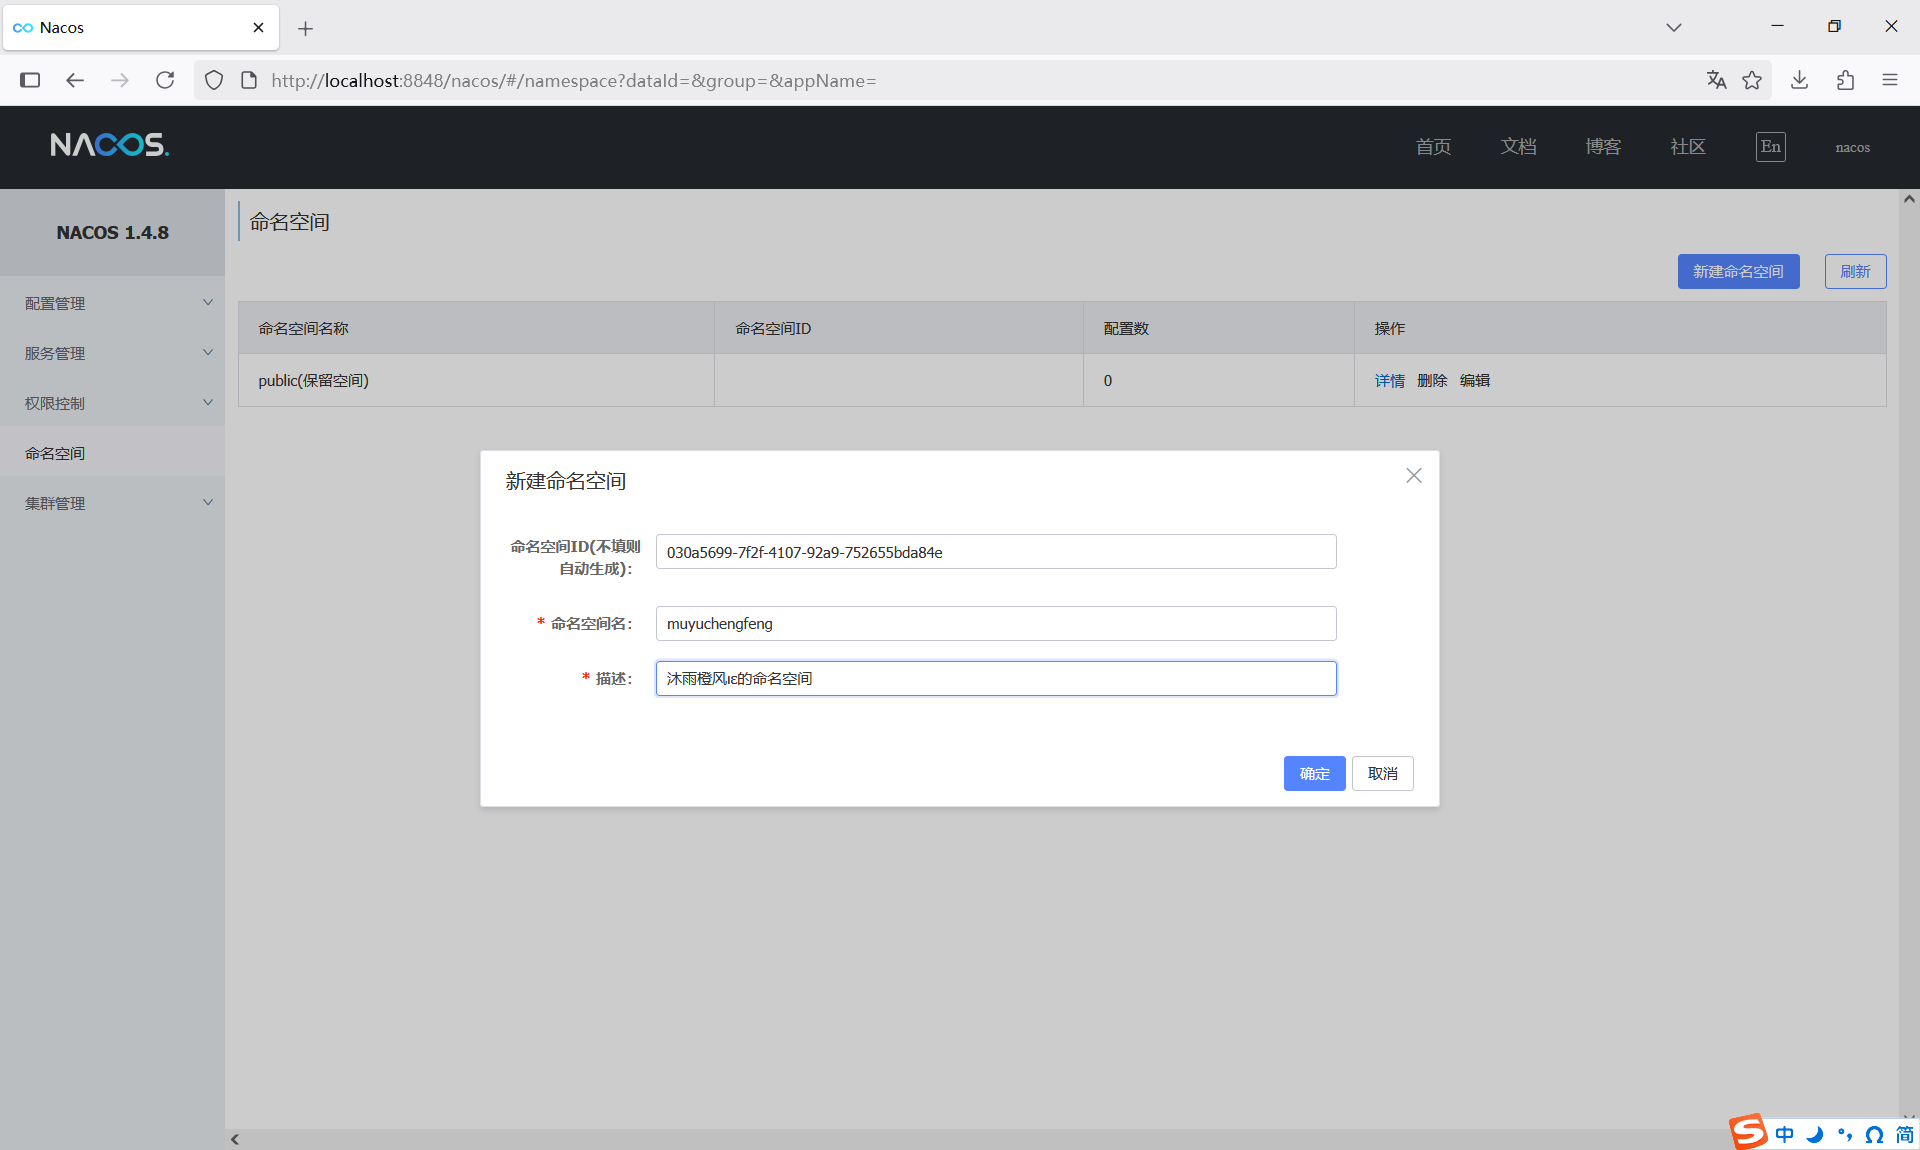
1、创建命名空间
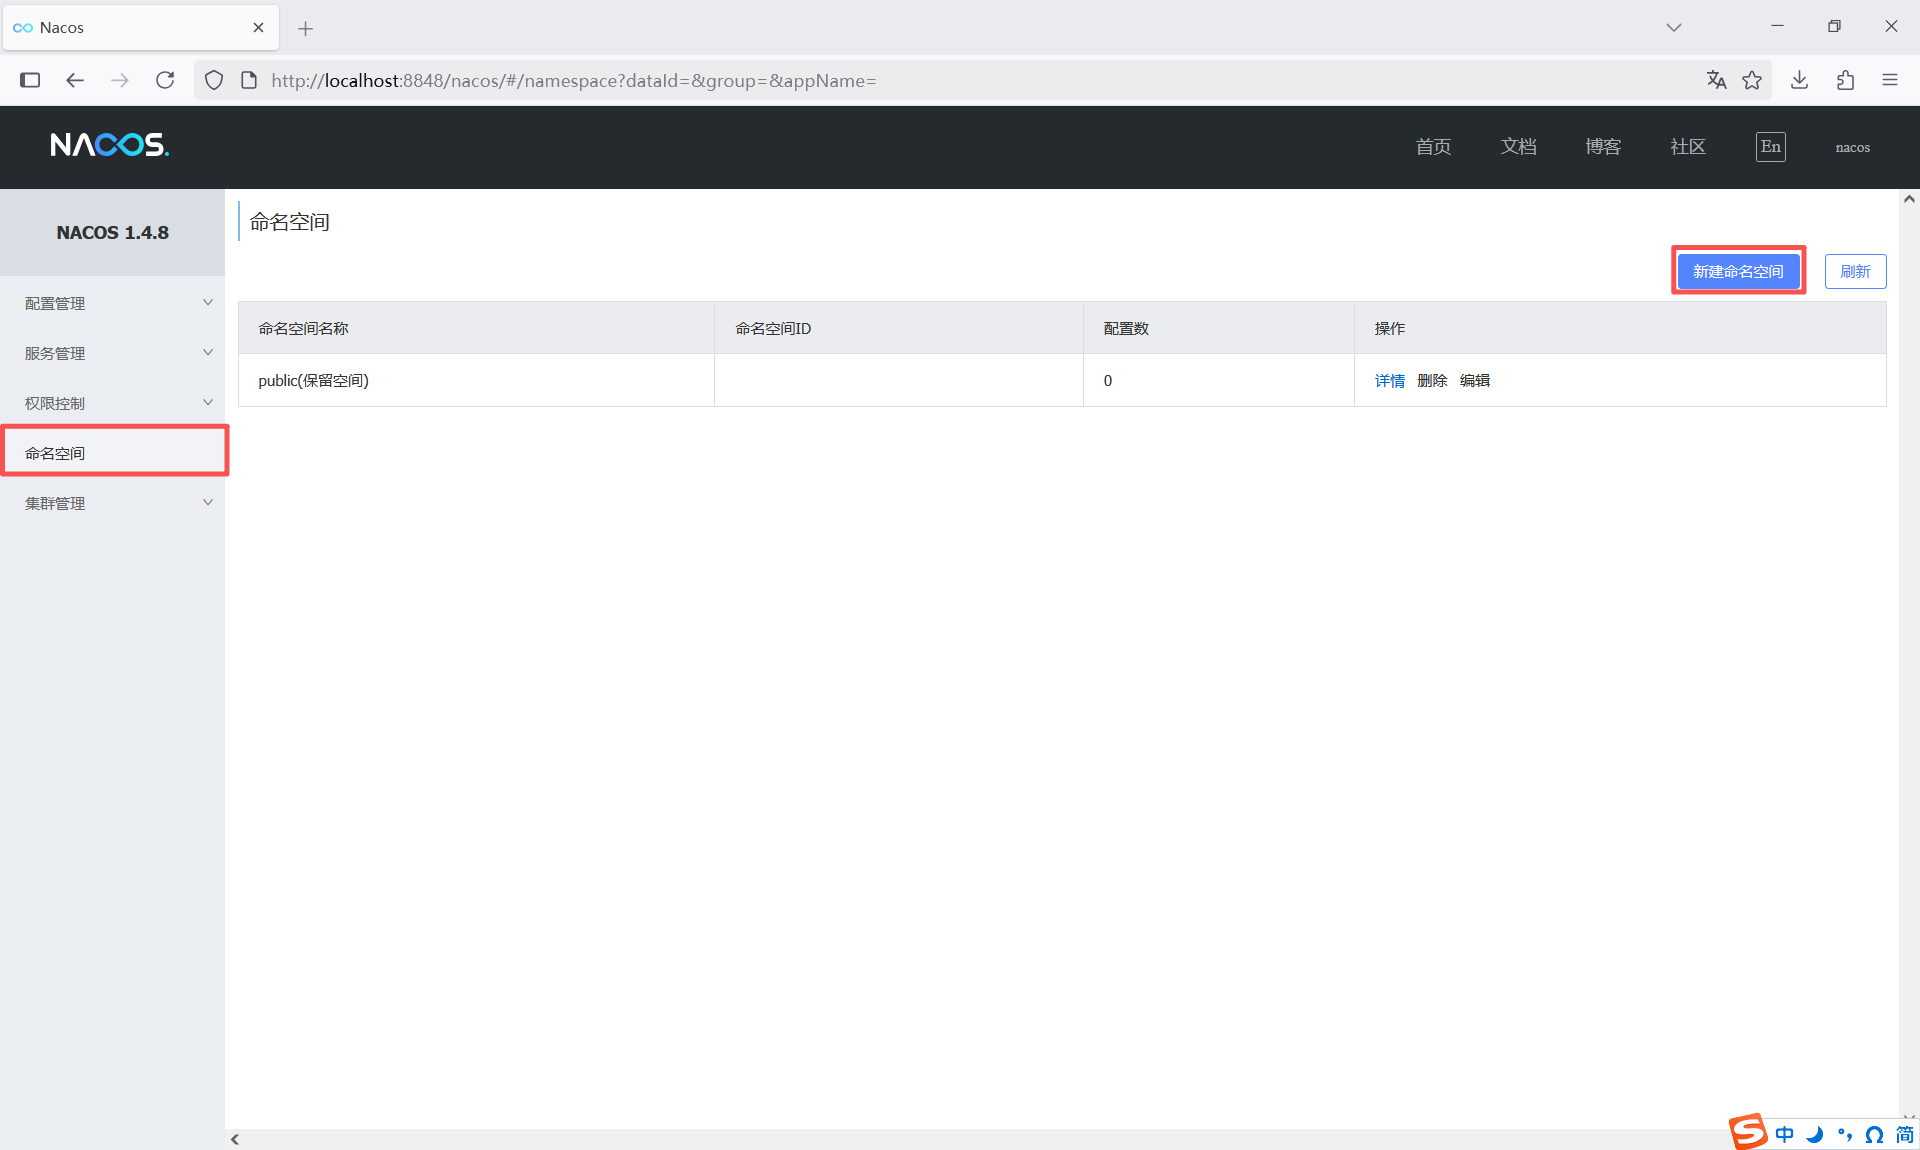
在nacos中新建命名空间,其中命名空间ID指定为:
030a5699-7f2f-4107-92a9-752655bda84e命名空间名和描述可以根据实际情况填写,填写完之后点击【确定】按钮保存命名空间。
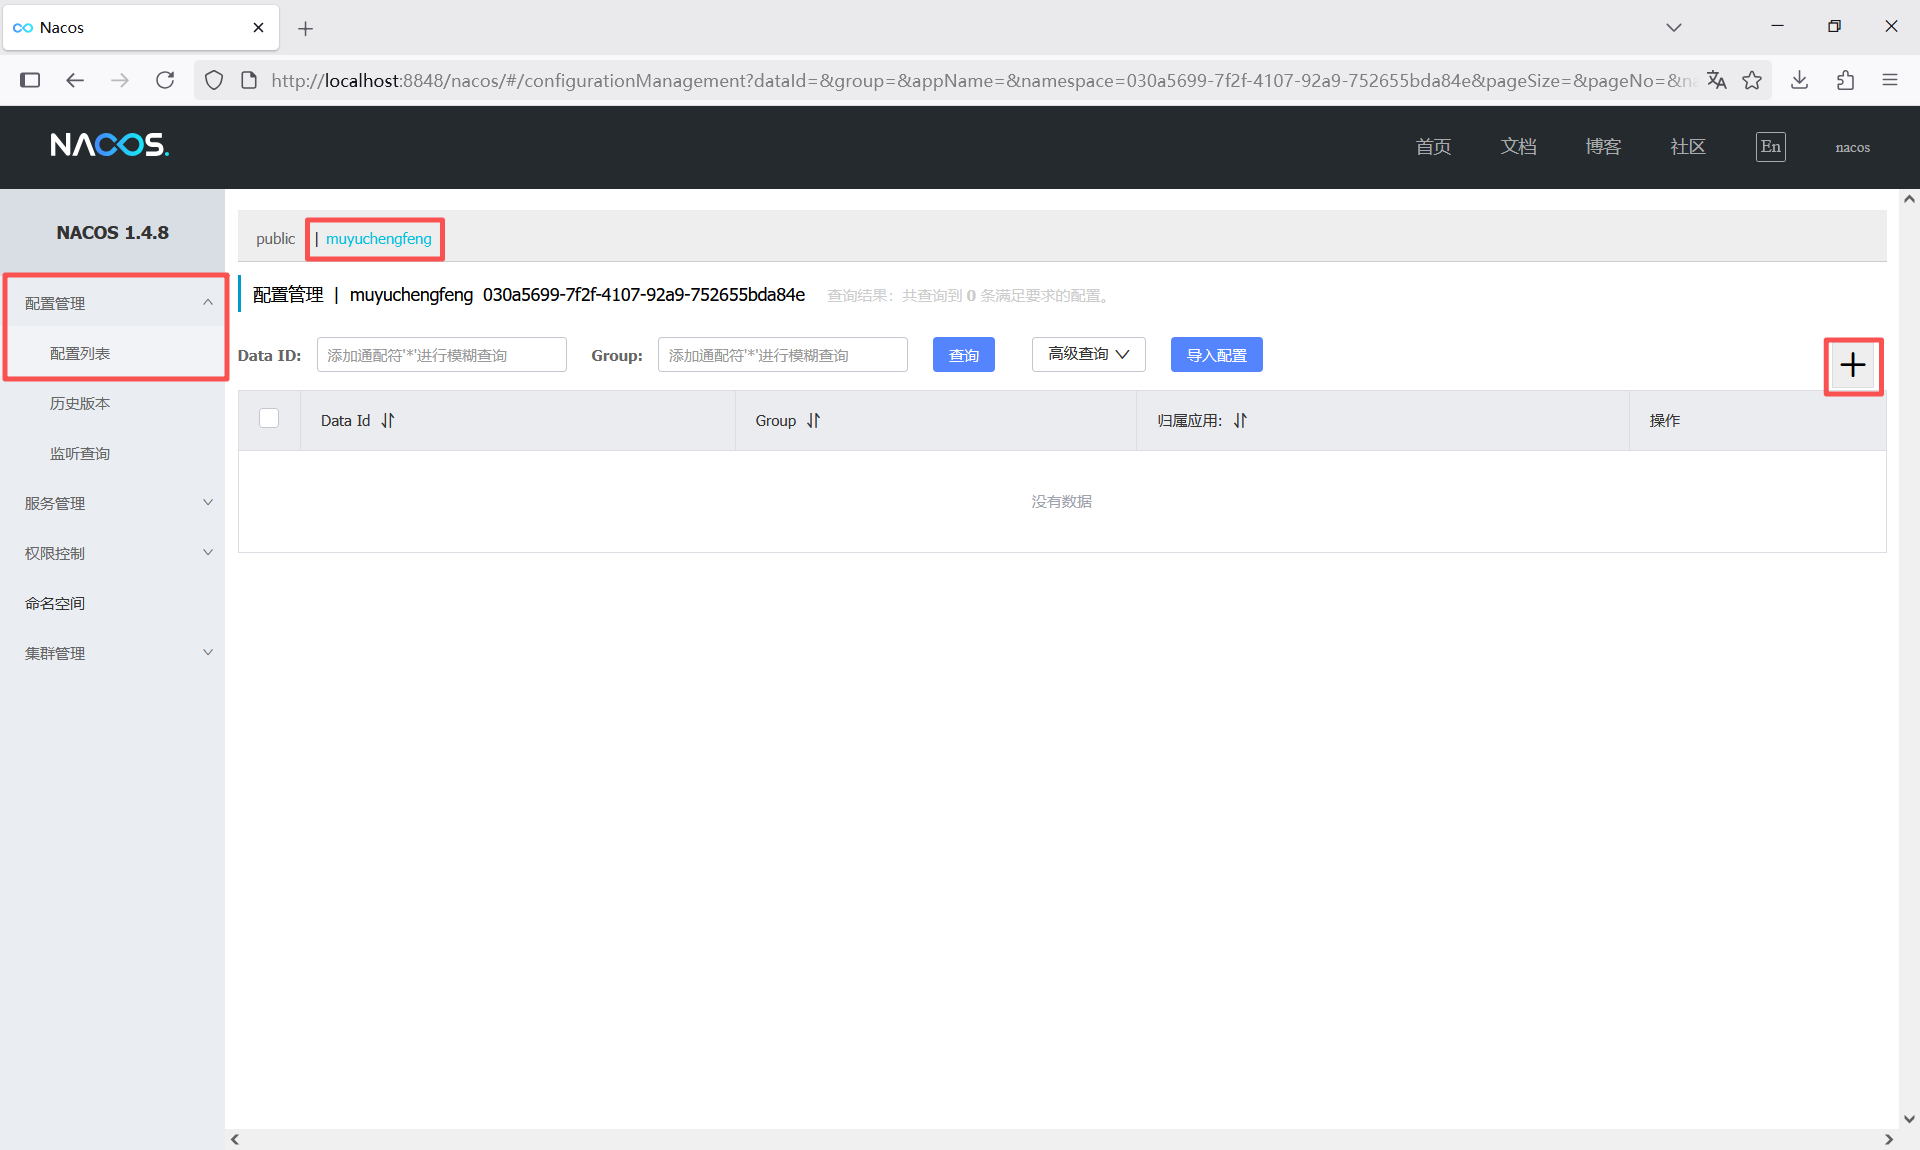
2、创建配置文件
点击【配置管理】=>【配置列表】,切换到刚刚创建的命名空间,点击右上角的+创建配置文件。
创建一个yaml格式的配置文件
- Data ID:springboot-nacos.yml
- 配置格式:YAML
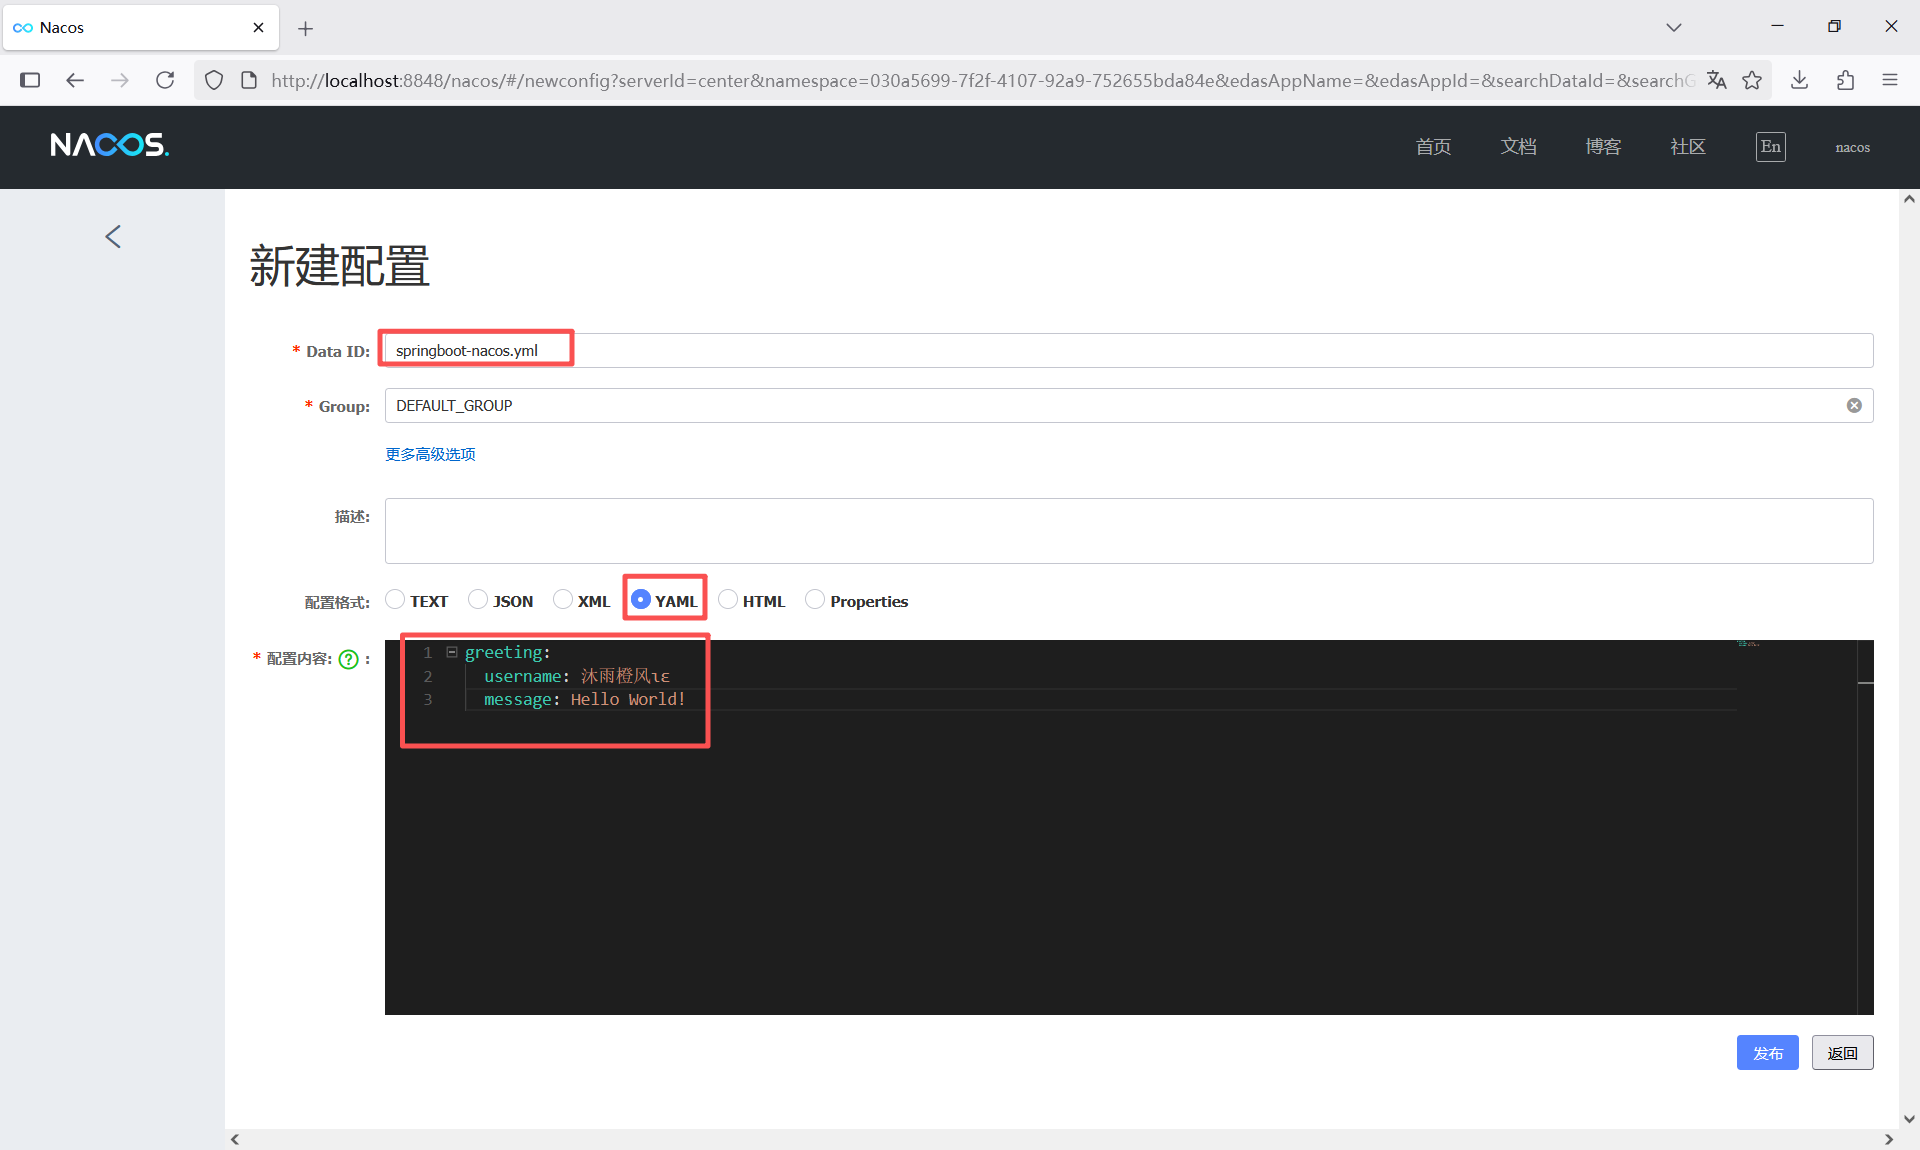
文件的内容如下,直接复制粘贴到配置内容后面的代码框中。
greeting:
  username: 沐雨橙风ιε
  message: Hello World!
然后点击发布按钮保存配置文件,点击弹出的确认框的【确定】按钮。
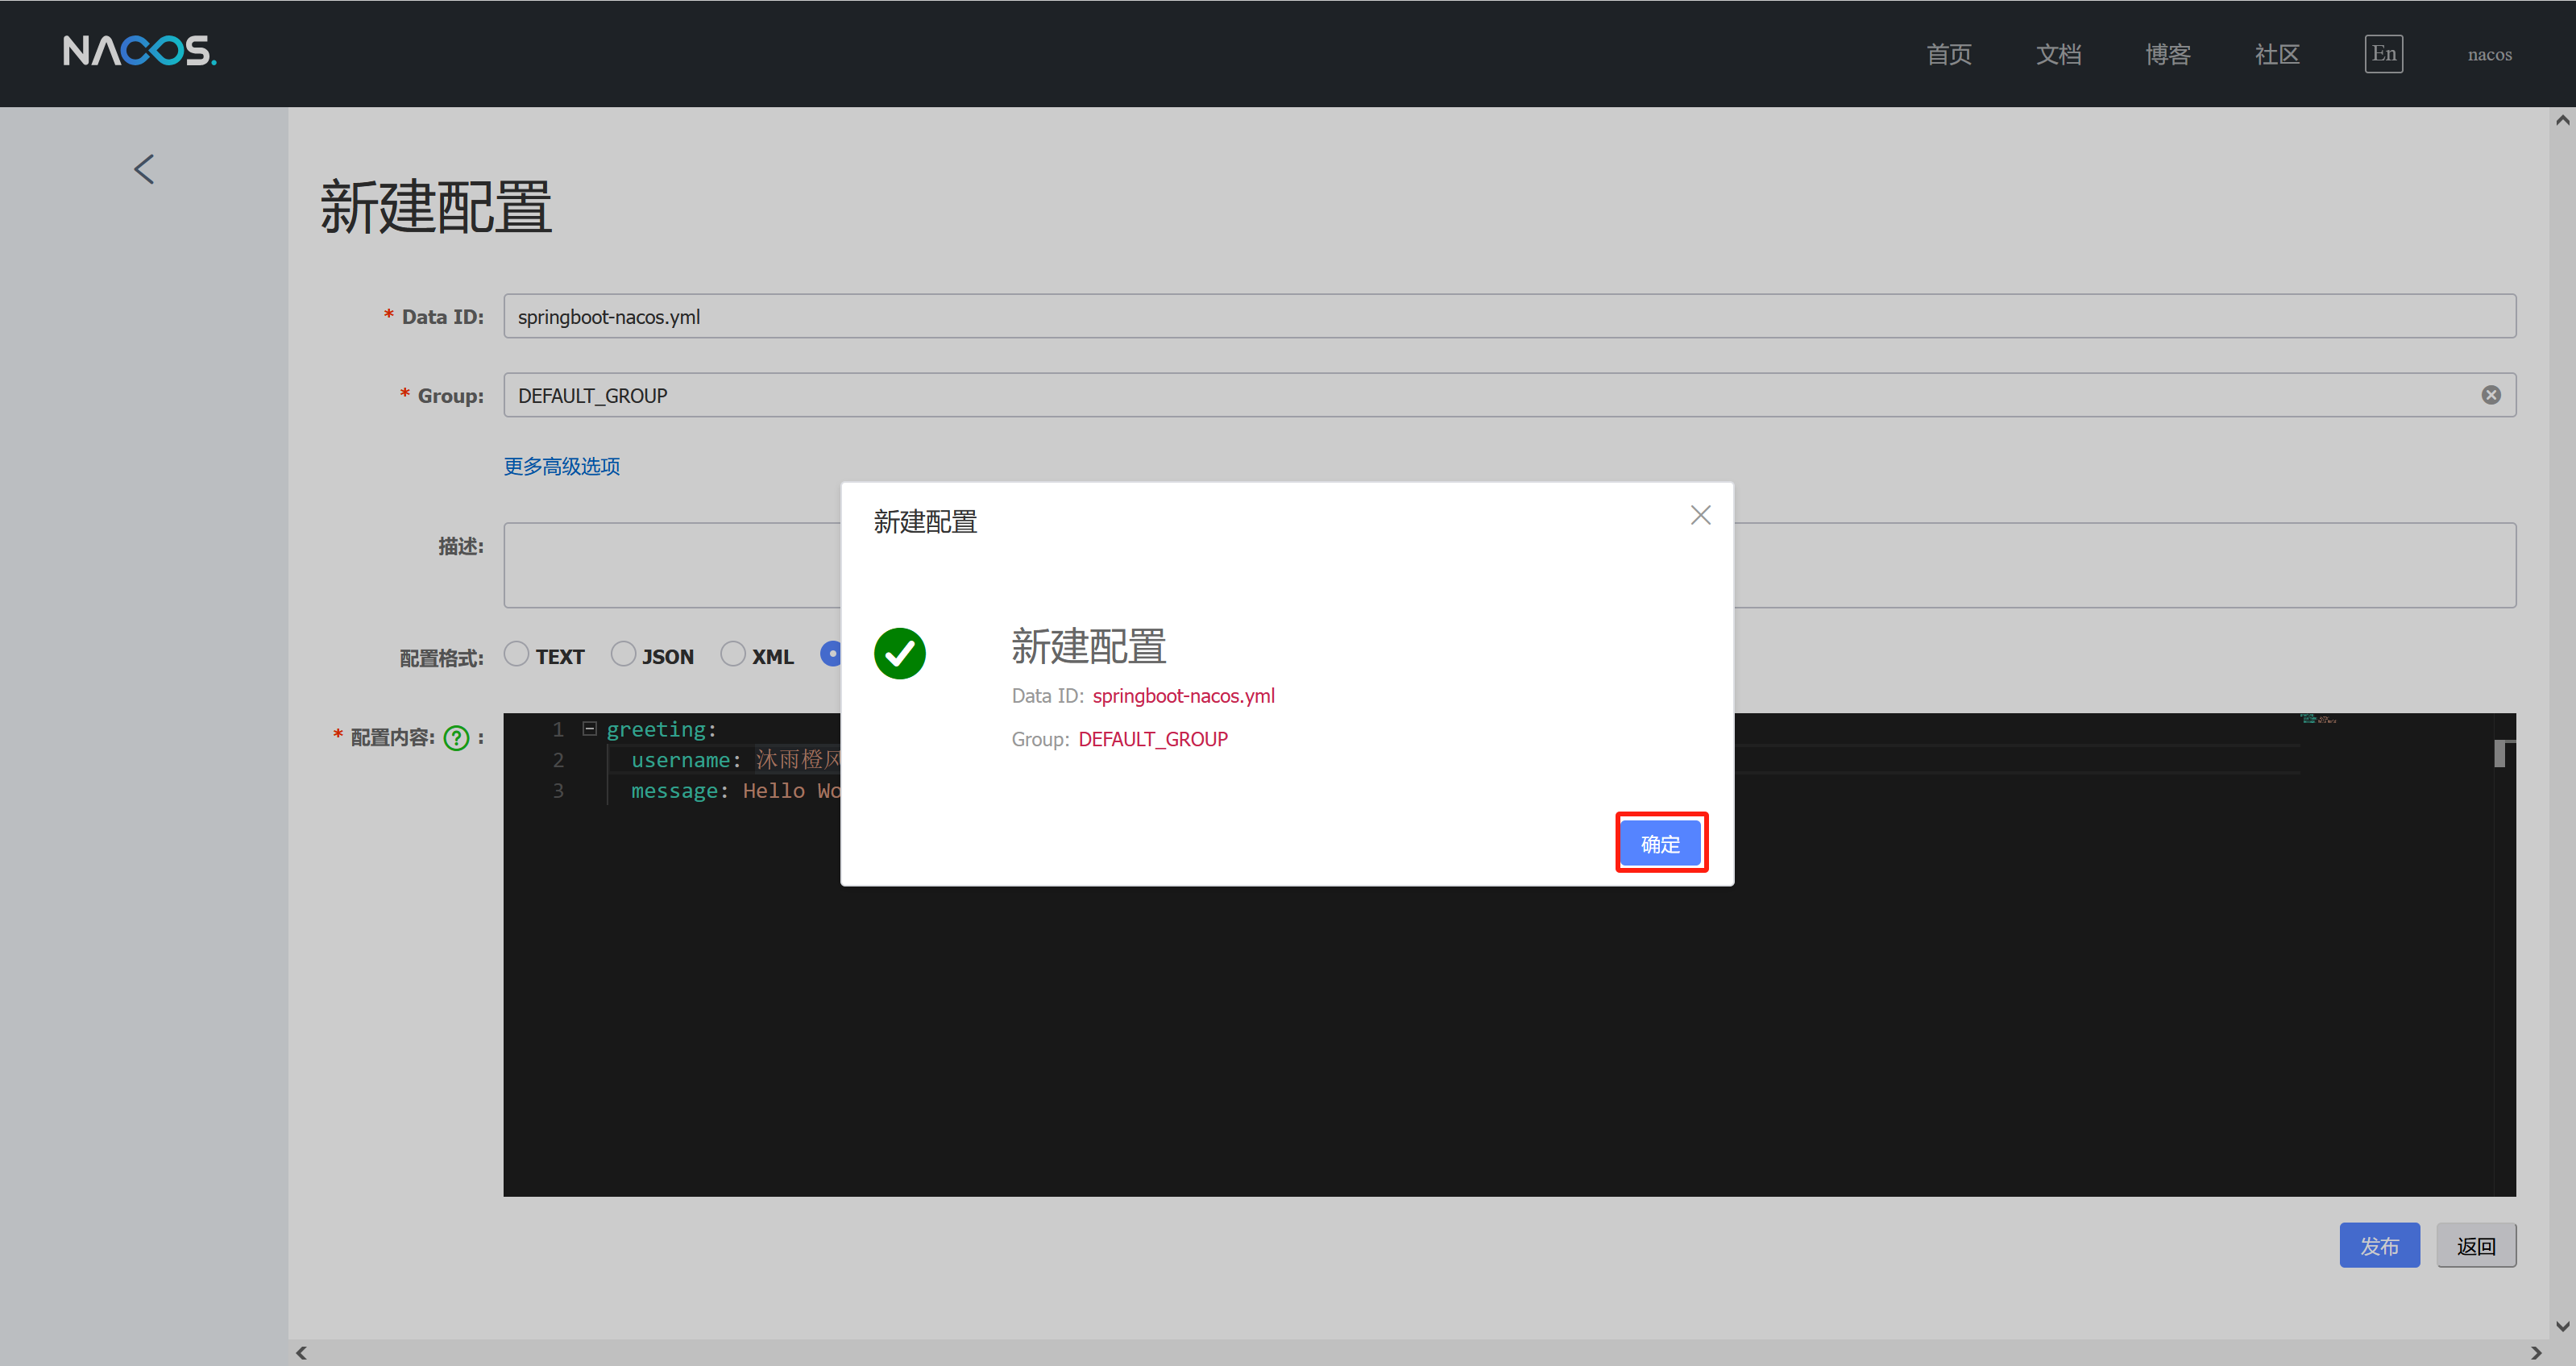
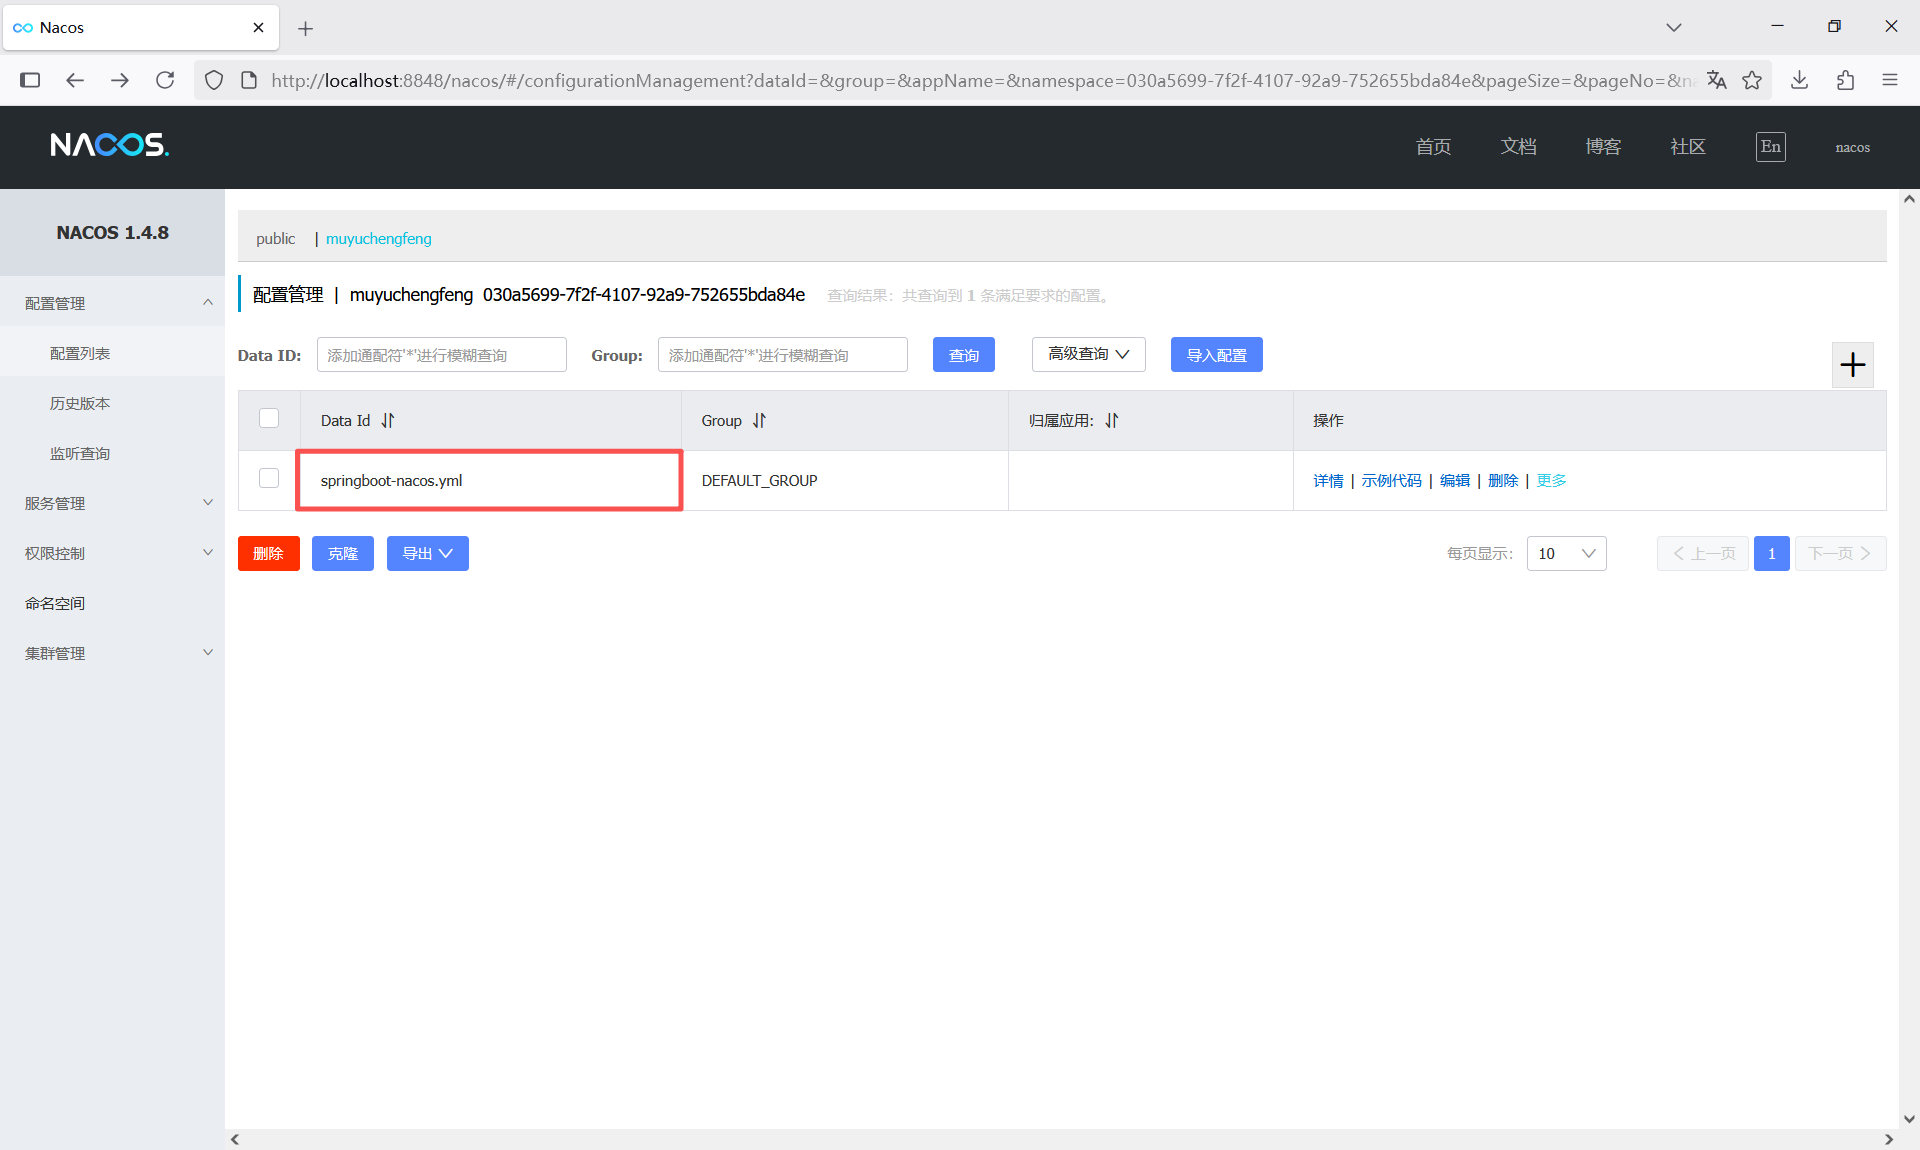
最后点击左上角的<返回,这时候能看到刚刚创建的配置文件。
第五步:读取配置文件内容
1、创建配置文件
在src/main/resources目录下创建配置文件bootstrap.yml
server:
  port: 8080

spring:
  application:
    name: springboot-nacos
  cloud:
    nacos:
      discovery:
        register-enabled: true
        server-addr: ${nacos.server}
        namespace: ${nacos.namespace}
      config:
        file-extension: yml
        server-addr: ${nacos.server}
        namespace: ${nacos.namespace}

nacos:
  server: localhost:8848
  namespace: 030a5699-7f2f-4107-92a9-752655bda84e
2、创建配置读取类
在项目根包下创建config.GreetingProperties类,用于读取配置文件的内容
package cn.edu.sgu.www.nacos.config;

import org.springframework.boot.context.properties.ConfigurationProperties;
import org.springframework.context.annotation.Configuration;

/**
 * @author 沐雨橙风ιε
 * @version 1.0
 */
@Configuration
@ConfigurationProperties(prefix = "greeting")
public class GreetingProperties {

    private String username;

    private String message;

    public String getUsername() {
        return username;
    }

    public void setUsername(String username) {
        this.username = username;
    }

    public String getMessage() {
        return message;
    }

    public void setMessage(String message) {
        this.message = message;
    }

}
3、创建控制器接口
在项目根包下创建controller.HelloController,定义一个控制器接口/hello/greet
package cn.edu.sgu.www.nacos.controller;

import cn.edu.sgu.www.nacos.config.GreetingProperties;
import org.springframework.beans.factory.annotation.Autowired;
import org.springframework.web.bind.annotation.GetMapping;
import org.springframework.web.bind.annotation.RequestMapping;
import org.springframework.web.bind.annotation.RestController;

/**
 * @author 沐雨橙风ιε
 * @version 1.0
 */
@RestController
@RequestMapping("/hello")
public class HelloController {

    private final GreetingProperties greetingProperties;

    @Autowired
    public HelloController(GreetingProperties greetingProperties) {
        this.greetingProperties = greetingProperties;
    }

    @GetMapping("/greet")
    public String greet() {
        String username = greetingProperties.getUsername();
        String message = greetingProperties.getMessage();

        return "用户" + username + "向你打了一个招呼:"+ message;
    }

}
4、启动当前的项目
点击左上角的两个图标中任意一个,启动当前项目,下面红框是打印的成功注册到nacos的日志。

5、访问控制器接口
在浏览器上访问http://localhost:8080/hello/greet,如果能看到下面的内容,就是nacos整合完成了
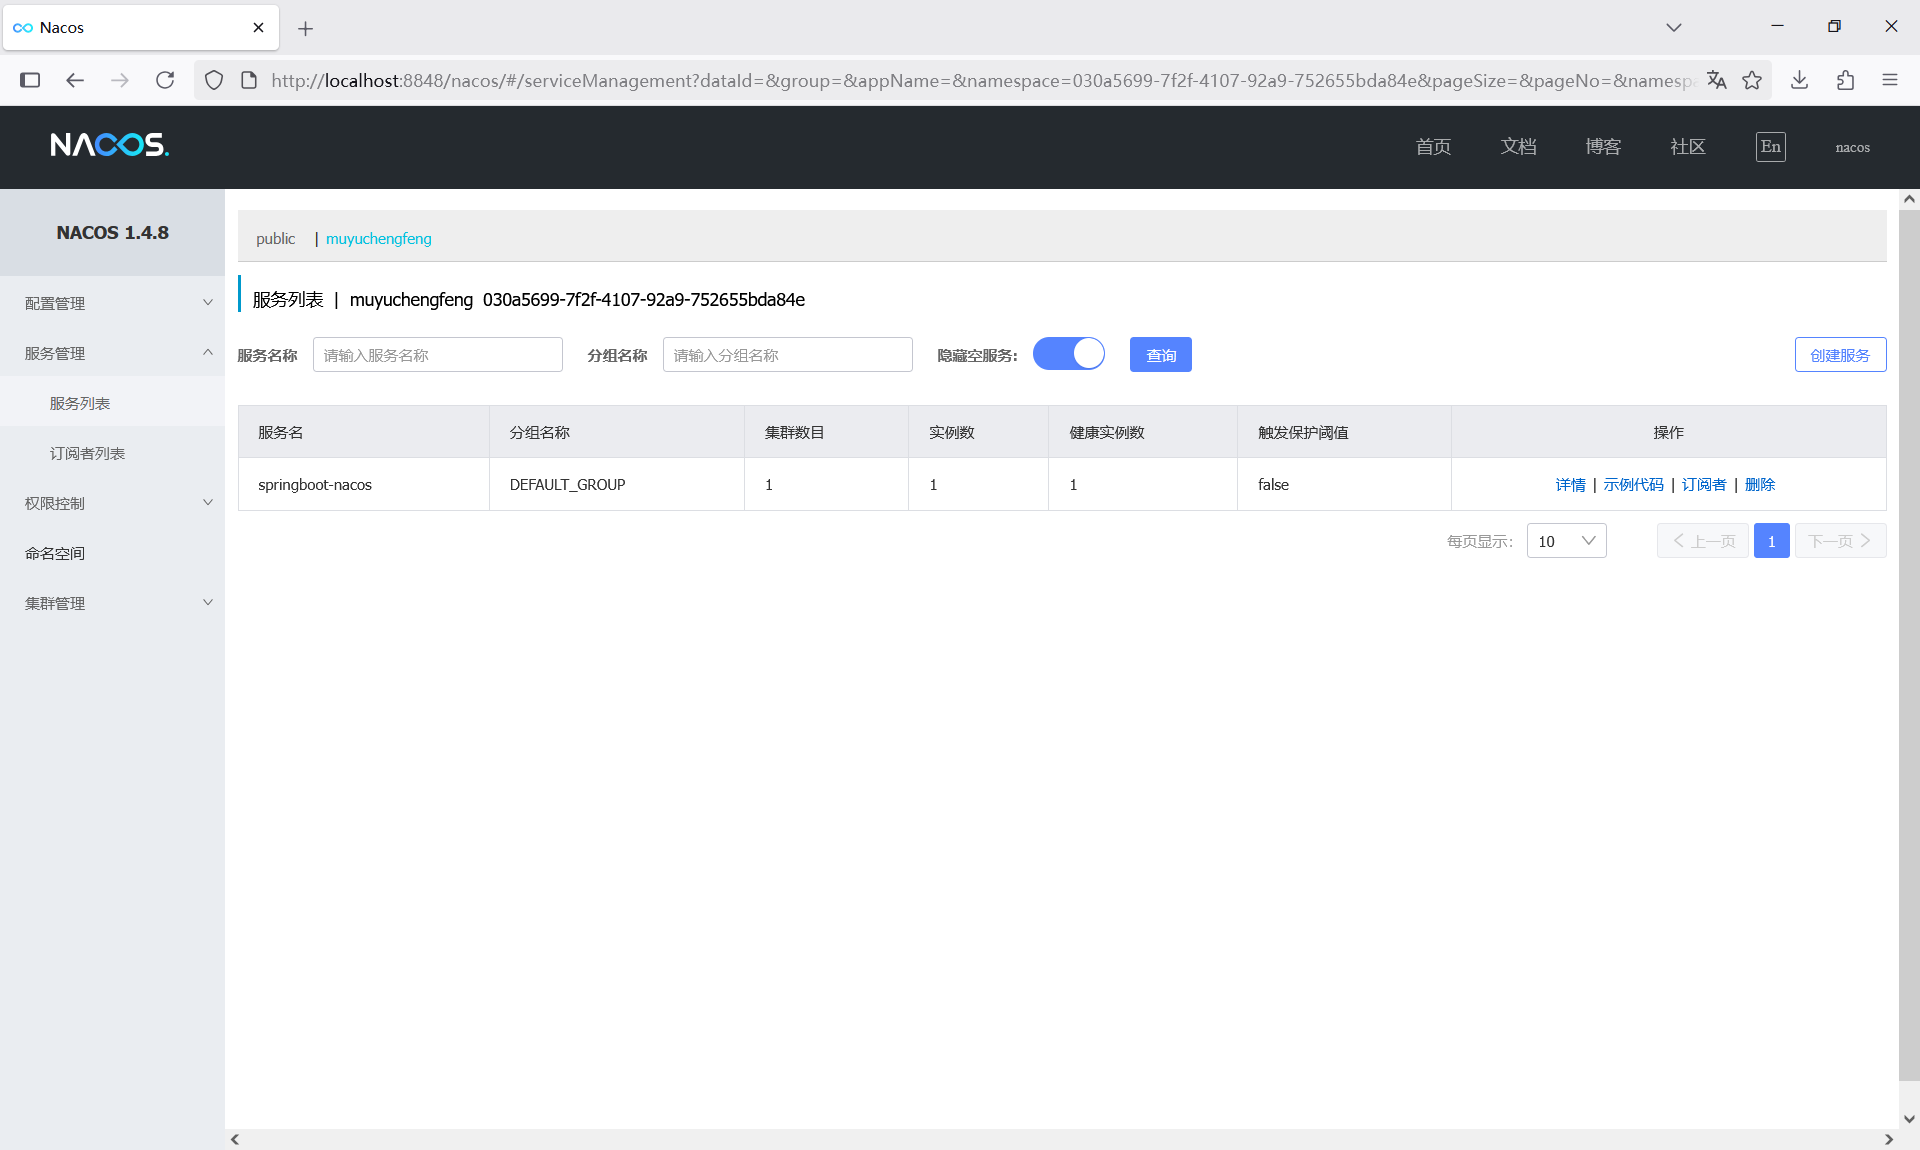
点击【服务管理】=>【服务列表】,可以看到启动的服务(应用)已经注册上来了。
至此,文章内容就已经结束了。
文章涉及的项目已上传到gitee,可按需获取~
Spring Boot整合Nacos案例项目![]() https://gitee.com/muyu-chengfeng/springboot-nacos.git
https://gitee.com/muyu-chengfeng/springboot-nacos.git


 1413
1413

 被折叠的 条评论
为什么被折叠?
被折叠的 条评论
为什么被折叠?
 到【灌水乐园】发言


