


JavaScript笔记
第一章 初识JavaScript
1.JavaScript的特点
1.JavaScript是一种脚本语言
2.JavaScript可以跨平台
3.JavaScript支持面向对象
2.JavaScript的组成
3.输入输出语句
| 语句 | 说明 |
|---|---|
| alter(‘msg’) | 浏览器弹出警告框 |
| console.log(‘msg’) | 浏览器控制台输出信息 |
| promote | 浏览器弹出输入框,用户可以输入信息 |
4.JavaScript变量
var age; //声明一个名称为age的变量
第二章 JavaScript基础(上)
1.数据类型分类
2.数据类型检测
console.log(typeof null); //输出结果:object
typeof检测null值时返回的是object,而不是null.
3.数据类型转换
1.转换成字符串型
null和undefined无法使用toString()方式进行转换
var num=3.14;
//方法1.利用"+"拼接
var str=num+'+';
console.log(str,typeof str) //输出结果:3.14 string
//方法2.利用toString()转换成字符串
var str=num.toString();
console.log(str,typeof str) //输出结果:3.14 string
//方法3:利用String()转换成字符串
var str=String(num);
console.log(str,typeof str) //输出结果:3.14 string
//Ps:toString()可以将传入的参数进行进制转化
var num=5;
num.toString(2); //将5转化为二进制,结果为101
2.转换为数字型
//方法1.使用parseInt()将字符串转为整数
console.log(parseInt('69'); //输出结果:69
console.log(parseInt('03.14'); //输出结果:3
console.log(parseInt('12px'); //输出结果:12
console.log(parseInt('-12px'); //输出结果:-12
console.log(parseInt('a12'); //输出结果:NaN
console.log(parseInt('F',16); //输出结果:15 将F转化为16进制数
//方法2.使用parseFloat()将字符串转为浮点数
console.log(parseFloat('12.34'); //输出结果:12.34
//方法3.使用Number()将字符串转为数字型
console.log(Number('1.23'); //输出结果:1.23
//方法4.利用算术运算符(-、*、/)隐式转换
cosole.log('12'-1); //输出结果:11
3.三元运算符
条件表达式 ? 表达式1: 表达式2
var age=prompt('请输入需要判断的年龄:');
var s=age>=18? '已成年':'未成年';
console.log(s);
第三章 JavaScript基础(下)
1.数组
1.使用new Array()创造数组
var arr1=new Array();
var arr2=new Array(123,'狗',null);
2.使用字面量来创造数组
var arr1=[123,'狗',null];
var arr2=[];
第四章 JavaScript函数
1.初识函数
function 函数名(){
	//函数体代码
}

var fun=function(a){
	console.log('我是谁');
	console.log(a);
}
fun('人');
2.函数参数的数量
function getSum(num1,num2){
	console.log(num1,num2);
}
getSum(1,2); //实参数量等于形参数量,输出结果:1,2
getSum(1) //实参数量小于形参数量,输出结果:1 undefined
3.arguments使用
function fn(){
	console.log(arguments); //结果输出:Arguments(3)[1,2,3]
	console.log(arguments.length); //结果输出:3
	console.log(arguments[1]); //结果输出:2
}
fn(1,2,3);
//特性
//1.伪数组
//2.具有length属性
//3.他没有数组一些方法pop() push() 等
4.作用域链
  var a=1;
    function fn1() {
        var a=2;
        var b='22'
        fn2();
        function fn2() {
            var a=3;
            fn3();
            function fn3(){
                var a=4;
                console.log(a);
                console.log(b);
            }
        }
    }
fn1();//输出结果为:4 22
//就近原则
5.预解析
预解析 js引擎会把js所有的var还有function提升到作用域最前面
1.
console.log(num); //输出结果:undefined
var num=10;
// 相当于执行了以下代码
	var num;
	console.log(num);
	num=10;
2.
fun(); //输出结果:undefined
var fun=function(){
	console.log(22);
}
// 相当于执行了以下代码
	var fun;
	fun();
	fun=function(){
		console.log(22);
	}
第五章 JavaScript对象
1.利用字面量创建对象
//创建一个空对象
var obj={};
//创建一个学生对象
var stu1={
	name:'电棍',
	age:24,
	sex:'男',
	sayHi:function(){
		console.log('大家好,我是电棍');
	};
}
	console.log(stu1.name);//写法1
	console.log(stu1['name']);//写法2
	stu1.sayHi();//写法1
	stu1['sayHi']();//写法2
	//为obj添加成员
	obj.name='炫狗';
	obj.sayHi=function(){
		alert('我是'+this.name);
	}
	alert(obj.name); //输出结果:炫狗
	obj.sayHi();//调用方法:我是炫狗
	console.log(sex);//输出结果:undefined
2.利用new Object 创建(普通的)对象
var obj=new Object();
obj.name='电棍';
obj.age='24';
obj.sex='男';
obj.talking=function(){
	console.log('欧西给欧西给');
}
3.利用构造函数创建对象(类似Java的类)
function People(name,age){
	this.name=name;
	this.age=age;
	this.talking=function(){
		console.log('大家好我叫'+this.name);
	};
}
//创建一个静态方法
function Student(){
}
var one1=new People('电棍',24)
console.log(one1.name);//输出结果:电棍
console.log(one1.talking());//输出结果:大家好我叫电棍
var one2=new People('炫狗',21)
console.log(one2.name);//输出结果:炫狗
console.log(one2.talking());//输出结果:大家好我叫炫狗

Student.school='福州十六中';
Student.talking=function(){
	console.log('许昊龙被踩头');
};
console.log(Student.school);
Student.talking();
4.遍历对象的属性和方法
//准备一个待遍历的对象
var obj={
name:'炫狗',
age:21,
talk:'汪汪汪汪汪'
};
for(var k in obj){
	console.log(k);//依次输出:name age talk(键)
	console.log(obj[k]);//依次输出:炫狗 21 汪汪汪汪汪(值)
}

//判断对象成员是否存在
console.log('sex' in obj) //输出结果:false
console.log('name' in obj) //输出结果:true
5.内置对象
var myMath={
	Pi:3.1415926
	max:function(){
		var max=arguments[0];
		for(var i=1;i<arguments.length;i++){
			if(arguments[i]>max){
				max=arguments[i];
			}
		}
		return max;
	}
};
console.log(myMath.Pi); //输出结果:3.1415926
console.log(myMath.max(10,30,40)); //输出结果:40
6.Math对象
【案例】猜数字游戏
function getRandom(min,max){
	return Math.floor(Math.random()*(max-min+1)+min);
}
//		min	≤	返回结果	< max
var random=new getRandom(1,10);
while(true){
	var num=prompt('猜一个1~10的数字');
	if(num>random){
		alert('猜大了');
	}
	else if(num<random){
		alert('猜小了');
	}
	else{
		alert('猜对了');
		break;
	}
}
7.日期对象
【案例】倒计时
function countDown(time){
	var nowTime =+ new Date(); //返回当前时间总毫秒数
	var inputTime =+ new Date(time); //返回的是用户输入时间总毫秒数
	var times= (inputTime-nowTime)/1000; //times是剩余时间总的秒数
	var d= parseInt(times / 60 / 60 /24);
	d = d < 10? '0' +d :d; //使其更美观
	var h= parseInt(times / 60 / 60 %24);
	h = h < 10? '0' +h :h;
	var m= parseInt(times / 60 % 60);
	m = m < 10? '0' +m :m;
	var s= parseInt(times % 60);
	s = s < 10? '0' +s :s;
	return d +'天'+h+'时'+m+'分'+s+'秒';
}

console.log(countDown('2021-1-1 10:10:10'))
8.数组对象
数组类型检测
var arr=[];
var obj={};
	console.log(arr instanceof Array);//结果返回true
	console.log(obj instanceof Array);//结果返回false
	console.log(Array.isArray(arr));//结果返回true
	console.log(Array.isArray(obj));//结果返回false
一些数组对象的方法
| 方法名 | 功能描述 |
|---|---|
| push(参数) | 数组末尾添加一个或多个元素,会修改原数组 |
| unshift(参数) | 数组开头添加一个或多个元素,会修改原数组 |
| pop() | 删除数组的最后一个元素,若是空数组则返回undefined,会修改原数组 |
| shift() | 删除数组的第一个元素,若是空数组则返回undefined,会修改原数组 |
| reverse() | 颠倒数组中的元素的位置,该方法会改变原数组,返回新数组 |
| sort() | 对数组元素进行排序,该方法会改变原数组,返回新数组 |
| indexOf() | 返回数组中可以找到的定制的第一个索引,如果不存在返回-1 |
| lastindexOf() | 返回数组中可以找到的定制的最后一个索引,如果不存在返回-1 |
| toString() | 把数组转化成字符串,逗号分隔每一项 |
| join(‘分隔符’) | 将数组的所有元素链接到一个字符串中 |
| fill() | 用一个固定值填充数组中指定下标范围内的全部元素 |
| splice() | 数组删除,参数为splice(第几个开始,要输出的个数),返回被删除项目的新数组 |
| slice() | 数组截取,参数为slice(begin,end),返回呗截取项目的新数组 |
| concat() | 链接两个或多个数组,不影响原数组,返回一个新数组 |
1.筛选数组
var arr=[1000,1500,3000,3500,4000];
var newArr=[];
for(var i=0;i<arr.length;i++){
	if(arr[i]<2000){
		newArr.push(arr[i]);
	}
}
console.log(newArr); //输出结果:[1000,1500]
2.数组排序
var arr[100,500,300];
arr.reverse();
console.log(arr); //输出结果:[300,500,100]

arr.sort(function(a,b)){
	return b-a; //按降序排序
});
console.log(arr); //输出结果:[500,300,100]
3.数组索引(从0开始索引)
var arr[100,500,300,400,100];
console(arr.indexOf(100)); //输出结果:0
console(arr.lastindexOf(100)); //输出结果:4
4.数组转换为字符串
var arr=['a','b','c'];
console.log(arr.toString());//输出结果:a,b,c

console.log(arr.join('')); //输出结果:abc
console.log(arr.join('-')); //输出结果:a-b-c
5.其他方法
var arr=['a','b','c','d'];
arr.splice(2,2); //索引为2的位置开始 删除2个元素
console.log(arr); //输出结果:['a','b']
arr.splice(1,1,'e');//索引为1的位置开始 删除1个元素后 再添加元素e
console.log(arr); //输出结果:['a','e']
arr.splice(1,0,'f','g'); //索引为1的位置开始 添加元素
console.log(arr); //输出结果:['a','f','g','e']
9.字符串对象
var str=new String('apple');
console.log(str);//输出结果:String{"apple"}
console.log(str.length);//输出结果:5
console.log(typeof str);//输出结果:object
console.log(str instanceof String);//输出结果:true

var str2='hello'
console.log(typeof str2);//输出结果:string
console.log(str2 instanceof String);//输出结果:false
//使用new String()返回的str是一个对象 但普通的字符串变量并不是一个对象
| 成员 | 功能描述 |
|---|---|
| indexOf(searchValue) | 获取searchValue在字符串中首次出现的位置 |
| lastindexOf(searchValue) | 获取searchValue在字符串中最后出现的位置 |
| charAt(index) | 获取index位置的字符,位置从0开始计算 |
| charCodeAt(index) | 获取index位置的ASCII码 |
| str(index) | 获取指定位置处的字符 |
| concat(str1,str2…) | 连接多个字符串 |
| slice(start,[end]) | 截取从start位置到end位置之间的一个子字符串 |
| substring(start,[end]) | 截取从start位置到end位置之间的一个子字符串,基本和slice相同但不接收负值 |
| substr(start,[length]) | 截取从start位置开始到length长度的子字符串 |
| toLowerCase() | 获取字符串的小写模式 |
| toUpperCase() | 获取字符串的大写模式 |
| split([separator[,limit]) | 使用separator分隔符将字符串分隔成数组,limit用于限制数量 |
| replace(str1,str2) | 使用str2替换字符串中的str1,返回替换结果,只会替换第一个字符 |
1.根据字符返回位置
var str='hello';
str.indexOf('l'); //输出结果:2
str.lastindexOf('l'); //输出结果:3
2.根据位置返回字符
var str='hello';
console.log(str.charAt(1)); //输出结果:e
console.log(str.charCodeAt(1)); //输出结果:69(字符e的ASCII码为69)
console.log(str[0]); //输出结果:h
3.字符串操作方法
var str='helloworld';
str.concat('!'); //输出结果:helloworld!
str.slice(1,3); //输出结果:el
str.substring(5); //输出结果:world
str.substring(5,7) //输出结果:wo
str.substr(5) //输出结果:world
str.substr(5,7) //输出结果:wo
str.toLowerCase(); //输出结果:helloworld
str.toUpperCase(); //输出结果:HELLOWORLD
str.split('l'); //输出结果:["he","","owor","d"]
str.split('l',3); //输出结果:["he","","owor"]
str,replace('world','!'); //输出结果:"hello!"
10.值类型和引用对象
var obj1={name:'炫狗',age:'21'};
var obj2=obj1;
console.log(obj2==obj1);//输出结果:true
obj2.name='电棍';
console.log(obj1.name);//输出结果:电棍
//由于obj1 obj2引用同一个对象 无论两个变量操作对象 实际都是操作同一个对象
var obj1={name:'炫狗',age:'21'};
var obj2=obj1;
//此时obj1新创建一个对象
obj1={name:'电棍',age:'24'};
console.log(obj2.name); //输出结果:炫狗
function change(obj){
	obj.name='炫狗';
}
var dog={name:'电棍',age:24};
change(dog);
console.log(dog.name); //输出结果:炫狗
第六章 DOM(上)
1.获取元素
1.根据id获取元素
<body>
    <div id="box">哈哈</div>
    <script>
        var obox=document.getElementById('box');
        console.log(obox);
        //结果为:<div id="box">哈哈</div>
        console.log(typeof obox);
        //结果为:object
        console.dir(obox);
        // 结果为:div#box
    </script>
</body>
2.根据标签获取元素
<body>
    <ul>
        <li>苹果</li>
        <li>西瓜</li>
        <li>葡萄</li>
    </ul>
    <ol id="ol">
        <li>红色</li>
        <li>绿色</li>
        <li>紫色</li>
    </ol>
    <script>
        var lis=document.getElementsByTagName('li');
        // 结果为:HTMLCollection(6) [li,li,li,li,li,li]
        console.log(lis);
        // 查看集合中索引为0的元素,结果为:<li>苹果</li>
        console.log(lis[0]);
        // 遍历集合中的所有元素
        for(var i=0;i<lis.length;i++){
            console.log[i];
        }
        // 通过元素对象获取元素
        var ol=document.getElementById('ol');
        // 结果为:HTMLCollection(3) [li,li,li]
        console.log(ol.getElementsByTagName('li'));
    </script>
</body>
3.根据name获取元素
<p>请选择你最喜欢的水果(多选)</p>
<label><input type="checkbox" name="fruit" value="苹果">苹果</label>
<label><input type="checkbox" name="fruit" value="西瓜">西瓜</label>
<label><input type="checkbox" name="fruit" value="香蕉">香蕉</label>
<script>
    var fruits=document.getElementsByName('fruit');
    fruits[0].checked=true;
</script>
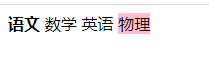
4.根据类名获取(HTML5新增)
<body>
    <span class="one">语文</span>
    <span class="two">数学</span>
    <span class="one">英语</span>
    <span class="two">物理</span>
<script>
    var ospan1=document.getElementsByClassName('one');
    var ospan2=document.getElementsByClassName('two');
    ospan1[0].style.fontWeight='bold';
    ospan2[1].style.background='pink';
</script>
</body>
5.querySelector()和querySelectorAll()
<body>
<div class="box">盒子1</div>
<div class="box">盒子2</div>
<div id="nav">
    <ul>
        <li>首页</li>
        <li>产品</li>
    </ul>
</div>
<script>
    var firstbox=document.querySelector('.box');
    console.log(firstbox); //获取class为box的第一个div
    var nav=document.querySelector('#nav');
    console.log(nav); //获取id为nav的第一个div
    var li=document.querySelector('li');
    console.log(li); //获取匹配到的第一个li
    var allbox=document.querySelectorAll('.box');
    console.log(allbox); //获取class为box的所有div
    var allli=document.querySelectorAll('li');
    console.log(allli); //获取匹配到的所有li
</script>
</body>
6.document对象的属性
| 属性 | 说明 |
|---|---|
| document.body | 返回文档的body元素 |
| document.title | 返回文档的title元素 |
| document.documentElement | 返回文档的html元素 |
| document.forms | 返回对文档中所有Form对象的引用 |
| document.images | 返回对文档中所有Image对象的引用 |
<body>
<script>
    var bodyEle=document.body;
    console.dir(bodyEle);
    var htmlEle=document.documentElement;
    console.log(htmlEle);
</script>
</body>
2.事件基础
事件三要素
1.事件源:触发事件的元素。(谁触发了事件)
2.事件类型:如click单击事件。(触发了什么事件)
3.事件处理程序:事件触发后要执行的代码,也称事件处理函数。(触发事件后要做什么)
<body>
<button id="btn">点击起飞</button>
<script>
    var btn=document.getElementById('btn'); //1.获取事件源
    //2.注册事件btn.onclick
    btn.onclick=function(){
        alert('芜湖');
    };
</script>
</body>
3.操作元素
| 属性 | 说明 |
|---|---|
| element.innerHTML | 设置或返回元素开始和结束标签之间的HTML,包括HTML标签,同时保留空格和换行 |
| element.innerText | 设置或返回元素的文本内容,在返回的时候会去除HTML标签和多余的空格、换行,在设置的时候回进行特殊字符转义 |
| element.textContent | 设置或返回指定节点的文本内容,同时保留空格和换行 |
1.innerText和innerHTML的区别
<body>
<div></div>
<script>
    var div=document.querySelector('div');
    div.innerText='<strong>今天是:</strong>2019年'; //会不识别<strong>标签
    div.innerHTML='<strong>今天是:</strong>2019年';
</script>
</body>
2.操作元素属性
<body>
<button>刘德华</button>
<button>张学友</button><br>
<img src="ldh.jpg" alt="刘德华">
<script>
    var ldh=document.getElementById('ldh');
    var zxy=document.getElementById('zxy');

    ldh.onclick=function(){
        img.src=ldh.jpg;
        img.title='刘德华';
    };
    zxy.onclick=function(){
        img.src=zxy.jpg;
        img.title='张学友';
    };
</script>
</body>

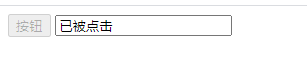
3.表单input元素的属性操作
<body>
<button>按钮</button>
<input type="text" value="输入内容">
<script>
    var btn=document.querySelector('button');
    var input=document.querySelector('input');
    btn.onclick=function(){
        input.value='已被点击';
        this.disabled=true; //this指向事件函数的调用者btn
    }
</script>
</body>

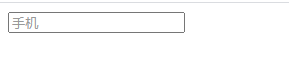
4.操作元素样式
<body>
<input type="text" value="手机" style="color: #999;">
<script>
    var text=document.querySelector('input');
    //获得焦点事件 onfocus
    text.onfocus=function(){
        if(this.value==='手机'){
            this.value='';
        }
        this.style.color='#333';
    };
    //失去焦点 onblur
    text.onblur=function(){
        if(this.value===''){
            this.value='手机';
        }
        this.style.color='#999';
    }
</script>
</body>
第七章 DOM(下)
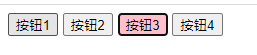
1.排他操作
<body>
<button>按钮1</button>
<button>按钮2</button>
<button>按钮3</button>
<button>按钮4</button>
<script>
    var btns=document.getElementsByTagName('button');
    for(var i=0;i<btns.length;i++){
        btns[i].onclick=function(){
            for(var i=0;i<btns.length;i++){
                btns[i].style.backgroundColor='';
            }
            this.style.backgroundColor='pink';
        }
    }
</script>
</body>
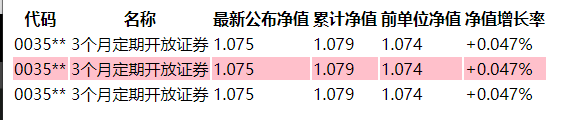
【案例】鼠标指针经过时背景变色
<body>
<table>
    <thead>
        <tr>
            <th>代码</th>
            <th>名称</th>
            <th>最新公布净值</th>
            <th>累计净值</th>
            <th>前单位净值</th>
            <th>净值增长率</th>
        </tr>
    </thead>
    <tbody>
        <tr>
            <td>0035**</td>
            <td>3个月定期开放证券</td>
            <td>1.075</td>
            <td>1.079</td>
            <td>1.074</td>
            <td>+0.047%</td>
        </tr>
        <tr>
            <td>0035**</td>
            <td>3个月定期开放证券</td>
            <td>1.075</td>
            <td>1.079</td>
            <td>1.074</td>
            <td>+0.047%</td>
        </tr>
        <tr>
            <td>0035**</td>
            <td>3个月定期开放证券</td>
            <td>1.075</td>
            <td>1.079</td>
            <td>1.074</td>
            <td>+0.047%</td>
        </tr>
    </tbody>
</table>
<script>
    var trs=document.querySelector('tbody').querySelectorAll('tr');
    for(var i=0;i<trs.length;i++){
        trs[i].onmouseover=function(){
            this.style.backgroundColor='pink'; //此处也可提前style样式来调色
        };
        trs[i].onmouseout=function(){
            this.style.backgroundColor='';
        };
    }
</script>
</body>
2.属性操作
1.获取属性值
<body>
<div id="demo" index="1" class="nav"></div>
<script>
    var div=document.querySelector('div');
    console.log(div.id);//结果为:demo
    console.log(div.getAttribute('id'));//结果为:demo
    console.log(div.getAttribute('index'));//结果为:1
</script>
</body>
2.设置属性值
<body>
<div></div>
<script>
    var div=document.querySelector('div');
    div.id='test';
    div.className='navs';
    div.setAttribute('index',2);
    /* div.setAttribute('class','footer'); 设置元素类名*/
</script>
</body>

3.移除属性
<body>
<div id="test" class="footer" index="2"></div>
<script>
    var div=document.querySelector('div');
    div.removeAttribute('id');
    div.removeAttribute('class');
    div.removeAttribute('name');
</script>
</body>
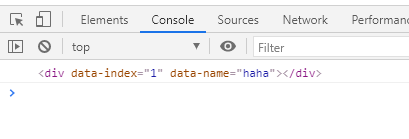
3.自定义属性
1.在HTML/JavaScript中设置自定义属性
<body>
    <div data-index="2"></div> //"data-*"开发者习惯自定义属性名前缀
    <script>
        var div=document.querySelector('div');
        div.dataset.index='1';
        div.setAttribute('data-name','haha');//设置属性值
        console.log(div);
    </script>
</body>
2.获取属性值
<body>
    <div gettime="20" data-index="2" data-list-name="haha"></div>
    <script>
        var div=document.querySelector('div');
        console.log(div.getAttribute('data-index'));    // 输出结果:2
        console.log(div.getAttribute('data-list-name'));    //输出结果:haha
        // 使用HTML5获取自定义属性方法,只能获取"data-"开头的属性
        console.log(div.dataset); //DOMStringMap{index="2",listName:"haha"}
        console.log(div.dataset.index); //输出结果:2
        console.log(div.dataset['index']); //第二种写法
        console.log(div.dataset.listName);  //有多个-相连时 使用驼峰命名法
        console.log(div.dataset['listName']);   //输出结果:haha
    </script>
</body>
4.节点基础
1.节点层级

2.获取父级节点
<body>
<div class="demo">
    <div class="box">
        <span class="child">123</span>
    </div>
</div>
<script>
    var child=document.querySelector('.child');
    console.log(child.parentNode);
    //返回最近的一个父节点 若无返回null
</script>
</body>
3.获取子级节点
(1) childNodes
使用该方法会获取文本节点 因此略
(2) children
<ol>
    <li>我是1</li>
    <li>我是1</li>
    <li>我是1</li>
</ol>
<script>
    var ol=document.querySelector('ol');
    var lis=ol.querySelectorAll('li');
    console.log(ol.children);
</script>
</body>
(3)获取第一个子元素和最后一个子元素
<body>
<ol>
    <li>我是1</li>
    <li>我是1</li>
    <li>我是1</li>
</ol>
<script>
    var ol=document.querySelector('ol');
    // 1.此处会返回文本节点(空格)
    console.log(ol.firstChild);
    console.log(ol.lastChild);
    // 2.firstElementChild 返回第一个子元素节点(有兼容性问题)
    console.log(ol.firstElementChild);
    console.log(ol.lastElementChild);
    // 3.实际开发使用
    console.log(ol.children[0]);
    console.log(ol.children[ol.children.length-1]);
</script>
</body>
4.获取兄弟节点
<body>
    <div>1</div>
    <span>2</span>
<script>
    var div=document.querySelector('div');
    // 1.nextSibling和previousSibling 返回值包含其他节点
    console.log(div.nextSibling);
    console.log(div.previousSibling);
    /* 2.nextElementSibling返回当前元素下一个兄弟元素节点
       previousElementSibling则返回上一个兄弟元素节点 兼容性问题 */
    console.log(div.nextElementSibling);
    console.log(div.previousElementSibling);
    // 实际开发使用封装一个兼容性的函数
    function getNextElementSibling (element) {
        var el=element;
        while(el=el.nextSibling){
            if(el.nodeType===1){ //判断是否为节点
                return el;
            }
        }
        return null;
    }
</script>
</body>
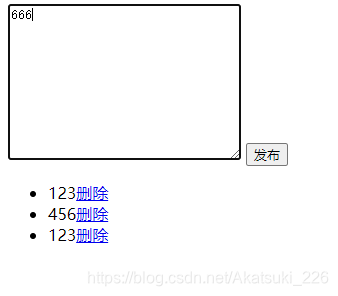
5.节点操作
1.创建 添加 删除 节点案例(简易留言板)
<body>
   <textarea name="" id="" cols="30" rows="10"></textarea>
   <button>发布</button>
   <ul></ul>
<script>
    // 1.获取元素
    var btn=document.querySelector('button');
    var text=document.querySelector('textarea');
    var ul=document.querySelector('ul');
    // 2.注册事件
    btn.onclick=function(){
        if (text.value==''){
            alert('没有输入内容');
            return false;
        }else{
        // 1.创建元素
        var li=document.createElement('li');
        //阻止链接跳转可以使用'javascript:;'
        li.innerHTML=text.value+"<a href='javascript:;'>删除</a>"
        //
        // 2.添加元素
        ul.insertBefore(li,ul.children[0]);
        }
        // 3.删除元素
        var as=document.querySelectorAll('a');
        for(var i=0;i<as.length;i++){
            as[i].onclick=function(){
                // node.removeChild(child); 删除的是li 当前a所在的li 此时this指a
                ul.removeChild(this.parentNode);
            }
        }
    }
</script>
</body>
2.复制节点
<body>
    <ul>
        <li>1</li>
        <li>2</li>
        <li>3</li>
    </ul>
    <script>
        var ul=document.querySelector('ul');
        // 1.node.cloneNode() 括号为空或者为flase 浅拷贝 只复制标签不复制内容
        // 2.node.cloneNode(true) 括号为true 深拷贝 复制标签里面的内容
        var lili=ul.children[0].cloneNode(true);
        ul.appendChild(lili);
    </script>
</body>

6.事件进阶
1.注册事件
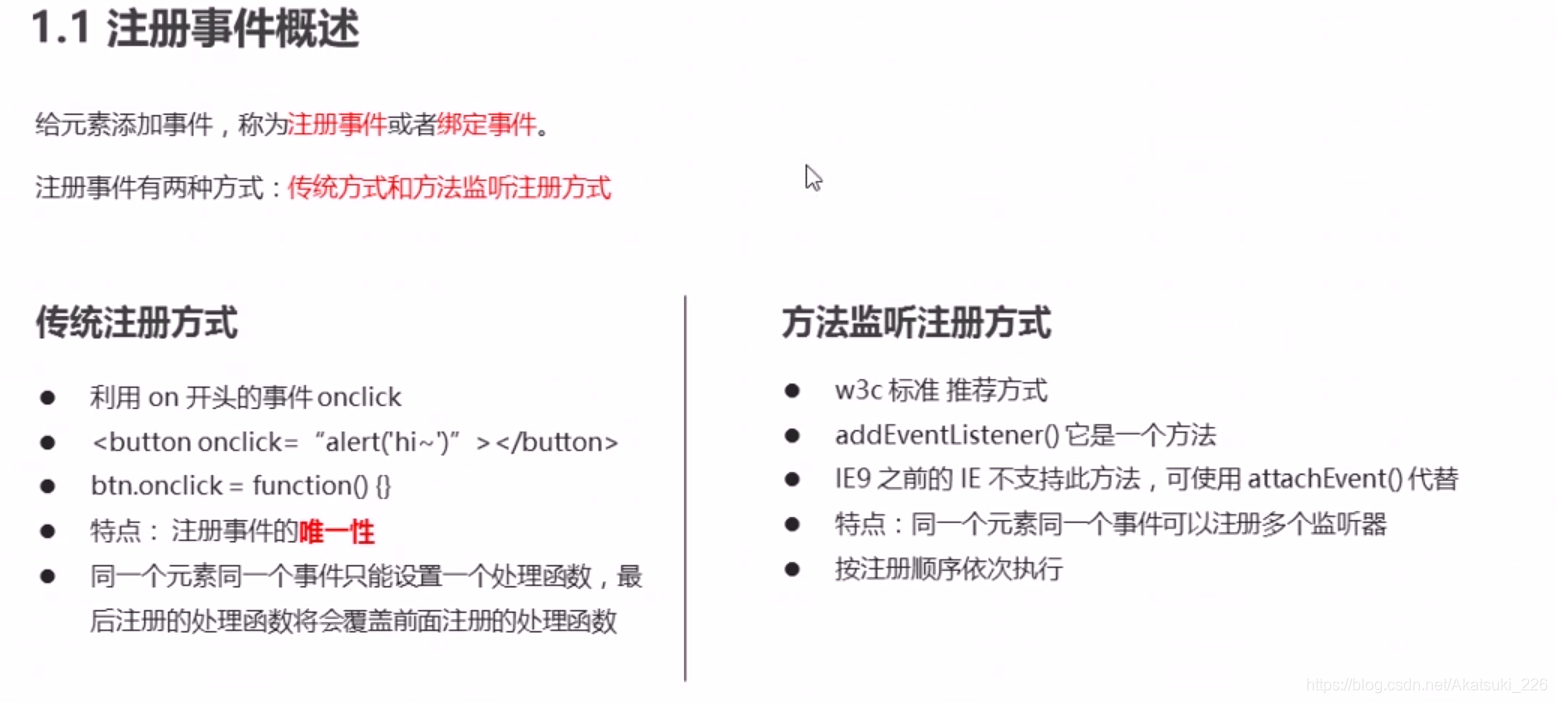
<body>
    <button>传统</button>
    <button>事件监听</button>
    <button>before ie9</button>
    <script>
        var btns=document.querySelectorAll('button');
        // 1.传统方式注册事件
        btns[0].onclick=function(){
            alert('123');
        }
        // 由于被下面的覆盖 所以只会弹出456
        btns[0].onclick=function(){
            alert('456');
        }
        // 2.事件监听注册事件addEventListener
        // (1) 因为里面的事件类型是字符型 所有加引号 而且不带on
        // (2) 同一个元素 同一个事件可以添加多个监听器 因此显示123后在显示456
        btns[1].addEventListener('click',function(){
            alert(123);
        })
        btns[1].addEventListener('click',function(){
            alert(456);
        })
        // 3.attachEvent ie9以前的版本支持
        btns[2].attachEvent('onclick',function(){
            alert(123);
        })
    </script>
</body>
2.删除事件
<body>

    <div>1</div>
    <div>2</div>
    <div>3</div>
    <script>
        var divs=document.querySelectorAll('div');
        divs[0].onclick=function(){
            alert(123);
            // 1.传统方式删除事件
            divs[0].onclick=null;
        }
            // 2. removeEventListener删除事件
        divs[1].addEventListener('click',fn) //里面的fn不需要加小括号
        function fn(){
            alert(456);
           divs[1].removeEventListener('click',fn);
        }
            // 3.datachEvent IE9之前使用的删除事件
        divs[2].datachEvent('onclick',fn1);
        function fn1(){
            alert(789);
        }
    </script>
</body>
3.DOM事件流

7.事件对象
1.事件对象的使用
var 事件对象=window.event //早期IE内核浏览器
DOM对象 .事件=function(event){} //现在
2.e.target和this的区别
<body>
    <div>1</div>
    <ul>
        <li>a</li>
        <li>a</li>
        <li>a</li>
    </ul>
   <script>
    // 1.e.target 返回的是触发事件返回的对象(元素) this返回的是绑定事件的对象(元素)
    // 区别:e.target点击哪个元素就返回哪个元素
    // 谁绑定this 就返回谁
       var div=document.querySelector('div');
       div.addEventListener('click',function(e){
        //    均输出div
           console.log(e.target);
           console.log(this);
       })
       var ul=document.querySelector('ul');
       ul.addEventListener('click',function(e){
        // 输出li
           console.log(e.target);
        //  输出ul
           console.log(this);
       })
   </script>
</body>
3.阻止默认行为
<body>
    <div>
        <a href="www.baidu.com">百度</a>
    </div>
    <script>
        var a=document.querySelector('a');
        a.addEventListener('click',function(e){
            e.preventDefault(); //DOM标准写法
        });

        // 传统方法
        a.onclick=function(e){
            e.preventDefault();
            e.returnValue;
        }
    </script>
</body>
4.阻止事件冒泡
stopPropagation() //标准浏览器
cancelBubble=ture //早期浏览器
5.事件委托
<body>
   <ul>
       <li>1</li>
       <li>1</li>
       <li>1</li>
       <li>1</li>
   </ul>
   <script>
       //事件委托原理:给父节点添加监听器 利用事件冒泡影响每一个子节点
       // 也可以用排他思想做
       var ul=document.querySelector('ul');
       ul.addEventListener('click',function(e){
        e.target.style.backgroundColor='blue';
    })
   </script>
</body>
8.鼠标事件
1.常用的鼠标事件
<body>
    123456
    <script>
        // 禁止鼠标右击菜单
        document.addEventListener('contextmenu',function(e){
            e.preventDefault();
        });
        // 禁止鼠标选中
        document.addEventListener('selectstart',function(e){
            e.preventDefault();
        });
    </script>
</body>
2.图片跟随鼠标移动案例
<style>
    img{
        position: absolute;

    }
</style>
<body>
    <img src="a.png">
    <script>
        var pic=document.querySelector('img');
        document.addEventListener('mousemove',function(e){
            var x=e.pageX;
            var y=e.pageY;
            pic.style.left=x-205+'px';  //图片长度%2为205
            pic.style.top=y-211+'px';	//图片长度%2为211
        })
    </script>
</body>
9.键盘事件
1.常用的键盘事件
<body>
  <script>
      document.addEventListener('keyup',function(){
          console.log('弹起');
      })
      document.addEventListener('keydown',function(){
          console.log('按下');
      })
    //   keypress不识别ctrl shift ←→等键
      document.addEventListener('keydpress',function(){
          console.log('按下press');
      })
    //   执行顺序keydown->keypress->keyup
  </script>
</body>
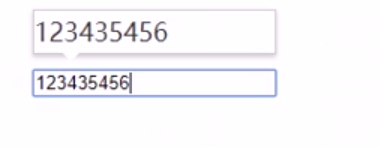
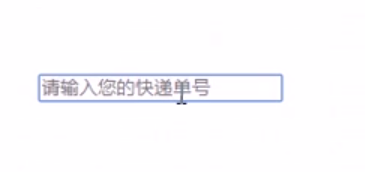
2.文本提示信息
 <script>
      var con=document.querySelector('.con');
      var jd=document.querySelector('.jd');
      jd.addEventListener('keyup',function(){
          if(this.value=''){
              con.style.display='none';
          }else{
          con.style.display='block';
          con.innerText=this.value;
        }
      });
    //   当失去焦点时,隐藏con盒子
      jd.addEventListener('blur',function(){
        con.style.display='none';
      })
    //   当获得焦点,显示con盒子
    jd.addEventListener('focus',function(){
        if(this.value!==''){
            con.style.display='block';
        }
      })
  </script>
</body>
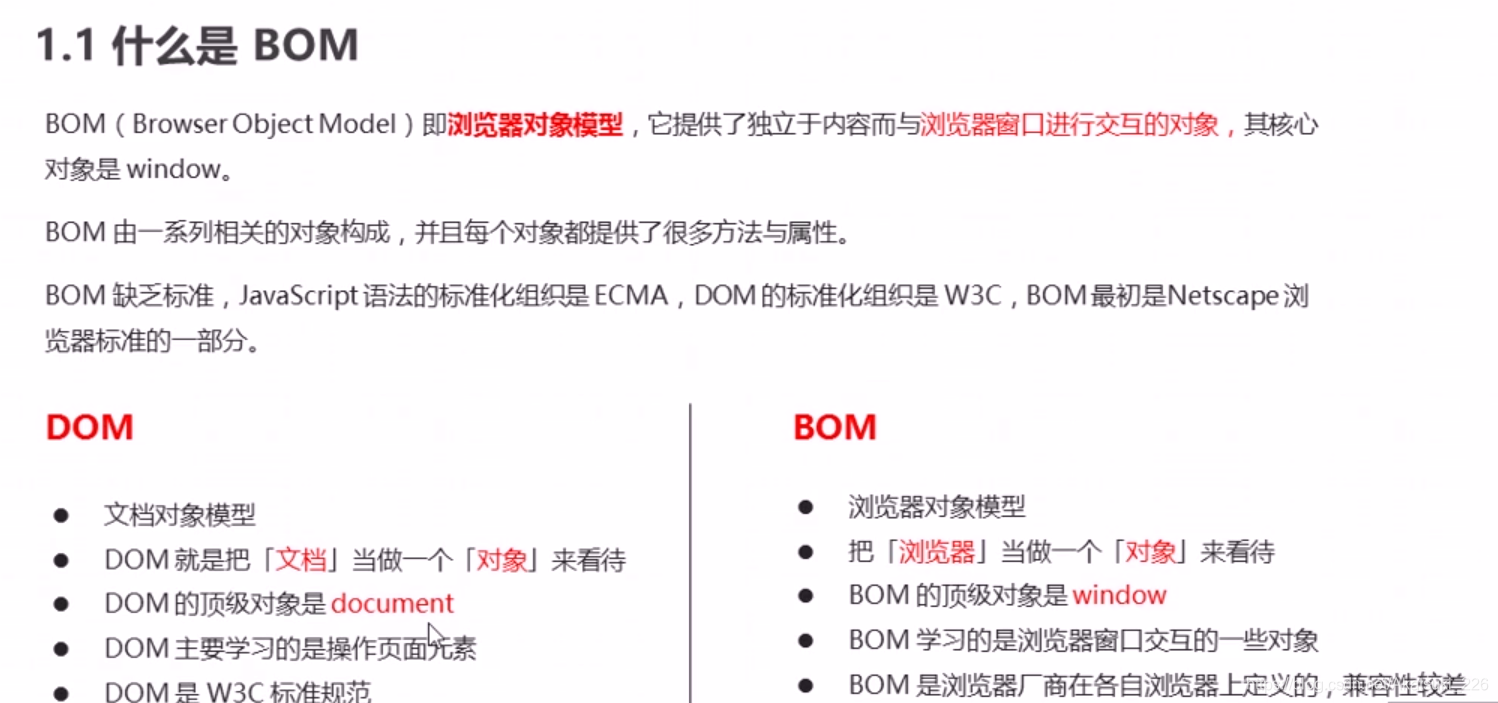
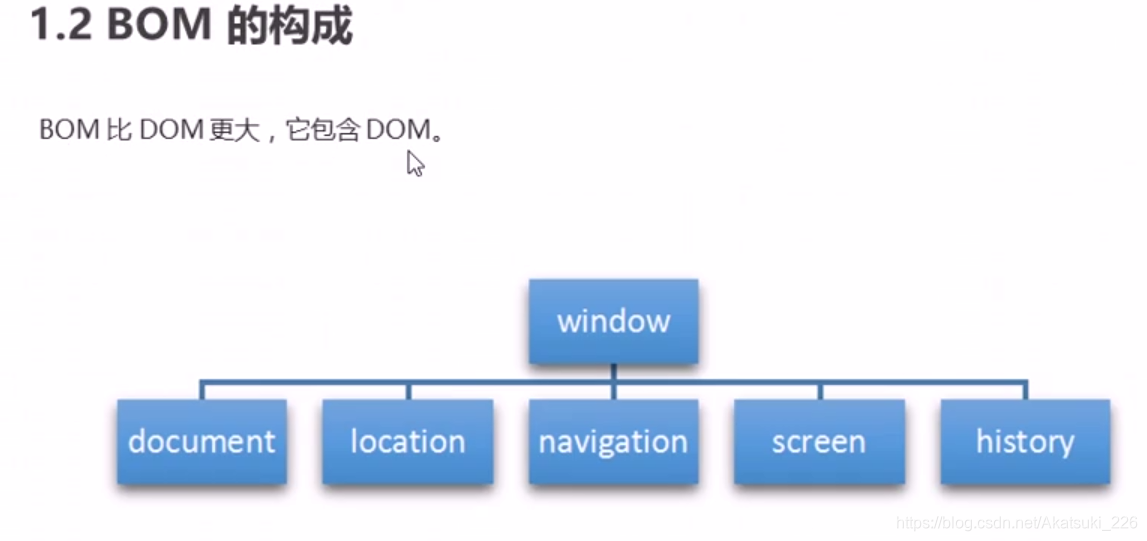
第八章 BOM
1.BOM简介
2.窗口加载事件
    <script>
      // 传统
      window.onload=function(){
        var btn=document.querySelector('button');
        btn.addEventListener('click',function(){
          alert('点击我');
        })
      }
      // 新
      window.addEventListener('load',function(){
        var btn=document.querySelector('button');
        btn.addEventListener('click',function(){
          alert('点击我');
        })
      })

      window.addEventListener('load',function(){
          alert('load该注册事件可写多次但传统事件只能写一次');
      })

      document.addEventListener('DOMContentLoaded',function(){
        alert('DOMContentLoaded先加载');
      })
      // load等页面内容全部加载完毕 包含页面dom元素 图片 flash
      // DOMContentLoaded是 DOM加载完毕,不包含flash css等就可以先执行 加载比load更快
    </script>
</head>
<body>
  <button>点击</button>
</body>
3.调整窗口大小事件
<body>
  <script>
    window.addEventListener('load',function(){
      var div=document.querySelector('div');
      window.addEventListener('resize',function(){
        if(window.innerHeight<500){
          div.style.display='none';
        }else{
          div.style.display='block';
        }
      })
    })
  </script>
  <div style="width: 100px;height: 100px;background-color: red;"></div>
</body>
4.定时器
1.setTimeout定时器
<body>
 <script>
  //  1.用字符串表示一串代码
   setTimeout('alert("2s弹出该方框");',2000);
  //  2.传入一个匿名参数
    setTimeout(function()  {
      alert('3s弹出该方款');
    }, 3000);
    // 3.传入函数名
    setTimeout(fn,4000);
    function fn(){
      alert('4s弹出该方款');
    }
 </script>
</body>
2.clearTimeout停止定时器
<body>
<button>点击停止爆炸</button>
<script>
  var btn=document.querySelector('button');
  var boomtime=setTimeout(function(){
    alert('爆炸了');
  },5000)
  btn.addEventListener('click',function(){
    clearTimeout(boomtime);
  })
</script>
</body>
3.setInterval定时器
<body>
<script>
  // 每隔一秒调用一次函数
  setInterval(function(){
    alert('被使用了');
  },1000)
</script>
</body>
4.clearterval清除定时器
<body>
<button class="begin">开启</button>
<button class="stop">关闭</button>
<script>
  var begin=document.querySelector('.begin');
  var stop=document.querySelector('.stop');
  var timer=null; //全局变量
  begin.addEventListener('click',function(){
    timer=setInterval(function(){
      alert('开启');
    },5000)
  })
  stop.addEventListener('click',function(){
    clearInterval(timer);
  })
</script>
</body>
5.验证码定时器
<body>
手机号:<input type="number"><button>发送</button>
<script>
  var btn=document.querySelector('button');
  var time=5; //定义剩下的秒数
  btn.addEventListener('click',function(){
    btn.disabled=true;
  var timer = setInterval(function(){
      if(time==0){
        // 清除定时器和复原按钮
        clearInterval(time);
        btn.disabled=false;
        btn.innerHTML='发送';
      }else{
        btn.innerHTML='还剩下'+ time +'秒';
        time--;
      }
    },1000)
  })
</script>
</body>

5.this指向问题
<body>
  <script>
    // 1.在全局作用域或普通函数中 this指向全局window
    console.log(this); //指向window
    function fn(){
      console.log(this);
    }
    window.fn(); //this指向window
    // 2.在方法中 谁调用方法 this就指向谁
    var o={
      sayHi:function(){
        console.log(this);
      }
    };
    o.sayHi(); //sayHi中的this指向的是o这个对象
    // 3.构造函数中的this指向的是新创建的实例
    function fun(){
      console.log(this);
    }
    var funs=new fun(); // fun中中的this指向的是新创建的实例funs
  </script>
</body>
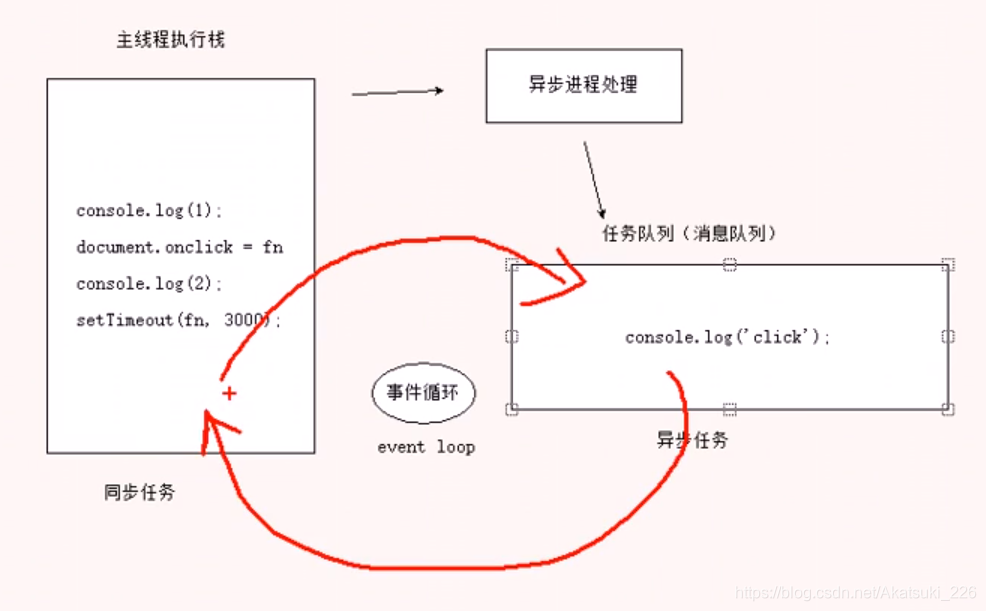
6.JavaScript执行机制
1.单线程:同一时间只能做一件事
2.同步和异步:同步则前一个任务结束后执行后一个任务(水开之后再去切菜炒菜)
异步则做一件事件的同时可以去处理其他事(烧水的同时切菜炒菜)
3.执行机制:先执行执行栈中同步任务再执行异步任务。
7.location对象
1.案例 5s后跳转页面
<body>
<div></div>
<script>
  var div=document.querySelector('div');
  var time=5;
  setInterval(function(){
    if(time==0){
      location.href='http://www.baidu.com';
    }else{
      div.innerHTML='你将在'+time+'秒后跳转到首页';
      time--;
    }
  },1000)
</script>
</body>
2.获取URL参数
login.html
<body>
<form action="index.html">
  用户名:<input type="text" name="uname">
  <input type="submit" value="登录">
</form>

</body>
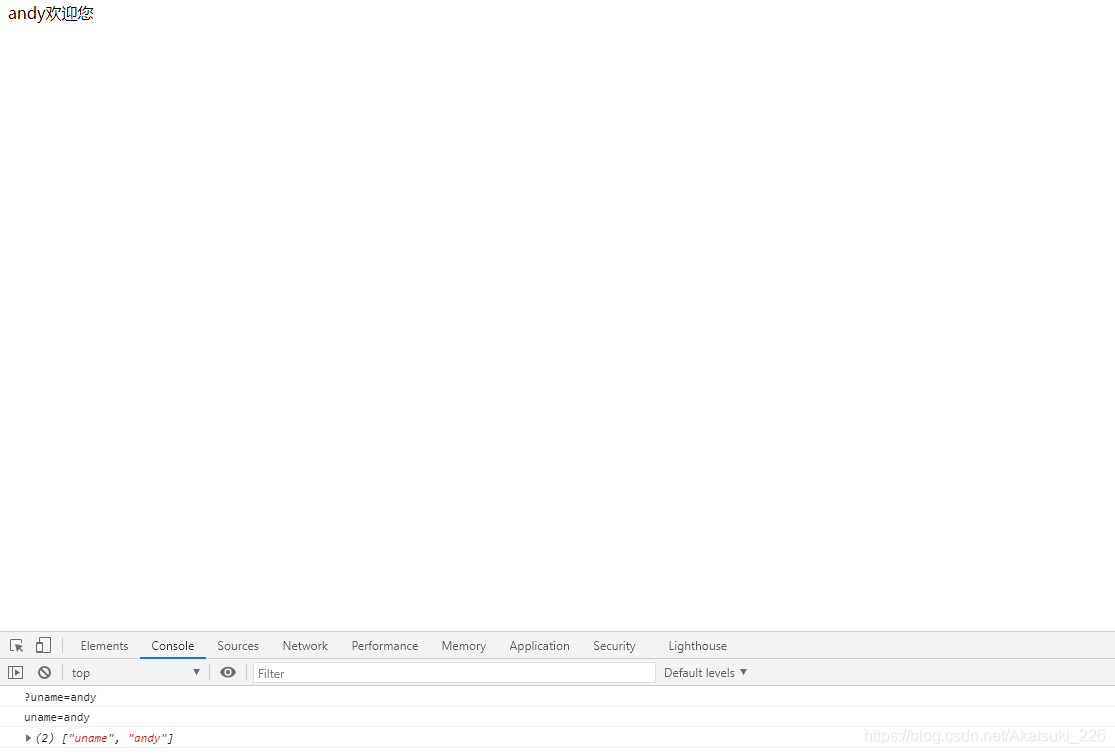
index.html
<body>
    <div></div>
    <script>
        console.log(location.search); //结果为:?uname=andy
        // 1.去掉search中的问号
        var params=location.search.substr(1);
        console.log(params); //结果为:uname=andy
        // 2.把字符串分割为数组
        var arr=params.split('=');
        console.log(arr); //结果为:["uname","andy"]
        // 3.把数据写入div中
        var div=document.querySelector('div');
        div.innerHTML=arr[1]+'欢迎您';
    </script>
</body>
在这里插入代码片

3.location的常用方法
| 方法 | 返回值 |
|---|---|
| location.assign() | 跟href一样,可以跳转页面 |
| location.replace() | 替换当前页面,因为不记录历史,所以不能后退页面 |
| location.reload() | 重新加载页面,相当于刷新按钮或者F5如果参数为true强制刷新ctrl+F5 |
8.navigator对象
一般通过window.navigator.userAgent来返回客户User-Agent头部的值
9.history对象
| history对象方法 | 作用 |
|---|---|
| back() | 可以后退功能 |
| forward() | 前进功能 |
| go(参数) | 前进后退功能 参数如果是1前进1个页面 如果是-1后退1个页面 |
第十章 jQuery(上)
1.jQuery的入口函数
<body>
  <script>
    // 1.等着DOM加载完毕在执行js代码
  $(document).ready(function(){
    $('div').hide();
  })
  // 2.等着DOM加载完毕在执行js代码 (简)
  $(function(){
    $('div').hide();
  })
  </script>
  <div></div>
</body>
2.jQuery与DOM
<body>
<video src="123.mp4"></video>
<script>
  // 1.DOM对象转换为jQuery对象
  // (1)直接获取视频 得到的是jQuery对象
    $('video');
  // 用原生js获取DOM对象
  var myvideo=document.querySelector('video');
  // $(myvideo.play()); jQuery没有play这个方法
  // 2.jQuery对象转换为DOM对象
  $('video')[0].play()
  $('video').get(0).play()
</script>
</body>
3.jQuery选择器
<body>
<div class="nav">nava</div>
<ul>
  <li>我是li</li>
  <li>我是li</li>
</ul>
<script>
  $(function(){
    console.log($(".nav")); //获取nav
    console.log($("ul li")); //获取ul里的li
  })
</script>
</body>
4.隐式迭代
遍历内部DOM元素的过程叫做隐式迭代
<body>
<div>哈哈</div>
<div>哈哈</div>
<div>哈哈</div>
<script>
  $("div").css("background","green"); //对所有div操作
</script>
</body>
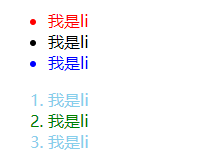
5.jQuery筛选选择器
<body>
  <ul>
    <li>我是li</li>
    <li>我是li</li>
    <li>我是li</li>
  </ul>
  <ol>
    <li>我是li</li>
    <li>我是li</li>
    <li>我是li</li>
  </ol>
  <script>
    $(function(){
      // 索引都从0开始
      $("ul li:first").css("color","red"); //ul里的li第一个变红
      $("ul li:eq(2)").css("color","blue"); //ul里第三个li变蓝
      $("ol li:odd").css("color","green");  //ol里索引为奇数的li变绿
      $("ol li:even").css("color","skyblue"); //ol里索引为偶数的li变天空蓝
    })
  </script>
  </body>
<body>
 <div class="father">
   <div class="son">子</div>
 </div>
  <script>
    $(function(){
      console.log($(".son").parent()); //查找son的父亲
      console.log($(".father").find("div")); //查找所有后代div
    })
  </script>
  </body>
6.排他思想
<body>
<button>1</button>
<button>2</button>
<button>3</button>
<script>
    // 1.隐式迭代 给所有按钮绑定点击事件
    $("button").click(function(){
        // 2.当前元素变化背景颜色
        $(this).css("background","pink");
        // 3.其余兄弟去掉背景颜色
        $(this).siblings("button").css("background","");
    });
</script>
</body>
7.链式编程
<body>
<button>1</button>
<button>2</button>
<button>3</button>
<script>
    $("button").click(function(){
        // 链式编程
        // 我的颜色为粉 兄弟颜色为空
        $(this).css("background","pink").siblings().css("color","");
        // 我的颜色为空 兄弟颜色为红
        $(this).siblings().css('color','red');
    });
</script>
</body>
8.jQuery样式操作
    <style>
        div{
            width:  200px;
            height: 200px;
            background-color: pink;
        }
    </style>
</head>
<body>
<div></div>
<script>
    $(function(){
        $("div").css({
            width:400,
            height:400,
            backgroundColor: "red"
        })
    })
</script>
</body>
1.类操作
    <style>
        div{
            width:  200px;
            height: 200px;
            background-color: pink;
        }
        .current{
            background-color: red;
        }
    </style>
</head>
<body>
<div class="current"></div>
<script>
    $(function(){
        // 1.添加类 addClass()
        $("div").click(function(){
            $(this).addClass("current");
        });
        // 2.删除类 removeClass()
        $("div").click(function(){
            $(this).removeClass("current");
        })
        // 3.切换类 toggleClass()
        $("div").click(function(){
            $(this).toggleClass("current");
        })
    })
</script>
</body>
9.jQuery动画
1.显示与隐藏效果
| 方法 | 说明 |
|---|---|
| show([speed],[easing],fn[]]) | 显示与被隐藏的匹配元素 |
| hide([speed],[easing],fn[]]) | 隐藏已显示的匹配元素 |
| toggle([speed],[easing],fn[]]) | 元素显示与隐藏切换 |
2.滑动效果
| 方法 | 说明 |
|---|---|
| slideDown([speed],[easing],fn[]]) | 向下滑动显示匹配元素 |
| hideUp([speed],[easing],fn[]]) | 向上滑动显示匹配元素 |
| toggleToggle([speed],[easing],fn[]]) | 在slideUp()和slideDown()两种效果间切换 |
3.停止动画
stop()方法
$(selector).stop(stopAll,gotoEnd)
4.淡入淡出
| 方法 | 说明 |
|---|---|
| fadeIn([speed],[easing],fn[]]) | 淡入淡出显示匹配元素 |
| fadeOut([speed],[easing],fn[]]) | 淡入淡出隐藏匹配元素 |
| fadeTo([speed],opacity,[easing],fn[]]) | 在淡入淡出方式将元素调整到指定的透明度 |
| fadeToggle([speed],[easing],fn[]]) | 在fadeIn()和fadeout()两种效果间切换 |
5.自定义动画
$(selector).animate(params[, speed],[, easing],[, fn])


 7108
7108


 被折叠的 条评论
为什么被折叠?
被折叠的 条评论
为什么被折叠?
 到【灌水乐园】发言


