


经过一段时间的折腾,我的Android Studio终于可以正常工作了,期间遇到的坑记录在了文章《创建Android Studio 3.5第一个工程遇到的坑》。
我们在《Android蓝牙开发系列文章-策划篇》中对蓝牙专题的内容进行了大概的描述,现在开始a2dp的第一篇:a2dp设备的配对和连接。
目录
首先介绍一下我的小伙伴,一个不知道牌子的蓝牙音响、华为荣耀7手机还有一个花了我9000大洋的thinkPadT480。
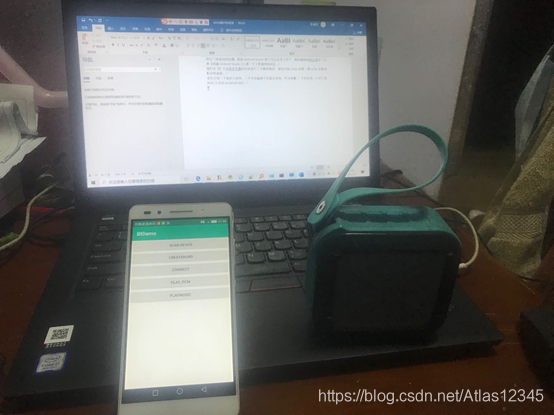
蓝牙音箱连接过程概述:首先,手机端需要发起扫描,扫描到设备后需要将目标设备也就是我的蓝牙音箱甄别出来,然后对蓝牙音箱发起配对,在配对成功后发起对设备的连接。
即大体需要三个流畅:(1)扫描,(2)配对,(3)连接。
一般来说,配对和连接流程在用户场景下是连贯性的动作,也就是配对成功后会自动发送对音箱的连接(音箱也只有一个提示音:蓝牙配对成功)。
1.设备扫描
现在AndroidManifest.xml中申请如下两个权限:
    <uses-permission android:name="android.permission.BLUETOOTH" />
    <uses-permission android:name="android.permission.BLUETOOTH_ADMIN" />
我创建了5个Button,用于手动的将相关的流程串接起来,其中PLAY_PCM和PLAY_MUSIC用户后面的文章使用。
<Button
        android:id="@+id/bt_scan"
        android:layout_width="match_parent"
        android:layout_height="wrap_content"
        android:text="scan device" />

    <Button
        android:id="@+id/bt_createbond"
        android:layout_width="match_parent"
        android:layout_height="wrap_content"
        android:text="createbond" />

    <Button
        android:id="@+id/bt_connect"
        android:layout_width="match_parent"
        android:layout_height="wrap_content"
        android:text="connect" />

    <Button
        android:id="@+id/bt_playpcm"
        android:layout_width="match_parent"
        android:layout_height="wrap_content"
        android:text="play_pcm" />

    <Button
        android:id="@+id/bt_playmusic"
        android:layout_width="match_parent"
        android:layout_height="wrap_content"
        android:text="play_music" />
在应用启动后,首先执行的逻辑如下:
初始化广播接收器,目的是将流程串接起来,下面会一一进行描述。
初始化蓝牙,拿到BluetoothAdater对象。
获取到BluetoothA2dp service的代理对象。
扫描设备
         //初始化View
        initView();

        //初始化广播接收器
        mBtReceiver = new BtReceiver();
        IntentFilter intent = new IntentFilter();
        intent.addAction(BluetoothDevice.ACTION_FOUND);
        intent.addAction(BluetoothDevice.ACTION_BOND_STATE_CHANGED);
        intent.addAction(BluetoothA2dp.ACTION_CONNECTION_STATE_CHANGED);
        registerReceiver(mBtReceiver, intent);
        //初始化蓝牙
        initBt();

        //初始化profileProxy
        initProfileProxy();
        //开始扫描
        scanDevice();
首先我们看一下initBt():
尝试获取BluetoothAdpter对象,如果获取不到,说明不支持蓝牙。当前,更正式的方式是看设备是否支持蓝牙feature,通过调用PackageManager的接口来判断,但是效果是一样的。
    private void initBt() {
        mBluetoothAdapter = BluetoothAdapter.getDefaultAdapter();
        Log.d(TAG, "mBluetothAdapter = " + mBluetoothAdapter);
        if (mBluetoothAdapter == null) {
            Log.d(TAG, "do't support bt,return");
        }
    }
在看一下initProfileProxy():
目的是获取调用BluetoothA2dp的connect()方法实现对音箱的连接。我看到很多例子,甚至是原生设置中是在设备配对成功后再去获取,这样会有个问题:如果下面onServiceConnected()返回的慢,会影响后面的连接逻辑,即需要延迟等待一段时间才能发起对设备的连接。
其实该接口的调用可以在蓝牙打开后就去调用,可以省去上面说的等待时间。
private int initProfileProxy() {
        mBluetoothAdapter.getProfileProxy(this,mProfileListener, BluetoothProfile.A2DP);
        return 0;
}

private BluetoothProfile.ServiceListener mProfileListener = new BluetoothProfile.ServiceListener() {
        @Override
        public void onServiceConnected(int profile, BluetoothProfile proxy) {
            Log.d(TAG, "onServiceConnected, profile = " + profile);
            if(profile == BluetoothProfile.A2DP) {
                mBluetoothA2dpProfile = (BluetoothA2dp)proxy;
            }
        }

        @Override
        public  void  onServiceDisconnected(int profile) {
            Log.d(TAG, "onServiceDisconnected, profile = " + profile);
        }
    };
然后,可以发起蓝牙扫描:
扫描的前提是手机的蓝牙是打开的,所以,我们这里先调用了BluetoothAdapter::isEnable()方法判断蓝牙是否已经打开了,如果打开了就调用BluetoothAdapter::startDiscovery()方法发起设备扫描。
private void scanDevice() {
        if(opentBt()) {
            if (mBluetoothAdapter.isDiscovering()) {
                Log.d(TAG, "scanDevice is already run");
                return;
            }
            boolean ret = mBluetoothAdapter.startDiscovery();
            Log.d(TAG, "scanDevice ret = " + ret);
        } else {
            Log.d(TAG, "bt is not open,wait");
        }

    }
private boolean opentBt() {
        if(mBluetoothAdapter.isEnabled()) {
            Log.d(TAG, "bt is aleady on,return");
            return true;
        } else {
            mBluetoothAdapter.enable();
            mHandler.sendEmptyMessageAtTime(MSG_SCAN, DELAYT_TIMES);
            return false;
        }
    }
如果蓝牙没有打开,我们就先去打开蓝牙,然后延迟发送一个消息出去,该消息到了之后再次触发扫描的逻辑。
mHandler = new Handler(){
            @Override
            public void dispatchMessage(Message msg) {
                    Log.d(TAG, "dispatchMessage, msg.what = " + msg.what);
                    switch (msg.what) {
                        case MSG_SCAN:
                            scanDevice();
                            break;
                        case MSG_PAIR:
                            pairDevice();
                            break;
                        case MSG_CONNECT:
                            connectDevice();
                            break;
                        default:
                            break;
                    }
            }
        };
这里有2个问题需要回答一下:
第一个问题:为什么调用BluetoothAdapter::startDiscovery()发起扫描,而不是调用其他接口?
因为我们音箱设备是经典蓝牙设备,也就是BR/EDR类型设备,还有一种蓝牙设备类型叫低功耗蓝牙设备,即BLE设备。
startDiscovery()接口能扫描到这两种类型的设备,而其他接口只能扫描BLE类型设备。
关于这些设备接口的区别以及如何快速搜索到目标设备,我会单独写一个文章进行总结。
第二个问题:为什么要延迟一段时间来再次调用扫描,而不是调用了打开蓝牙接着就去调用?
原因是因为,蓝牙的打开需要一段时间(当前正常情况下也是1s以内),再者蓝牙协议栈一个时间内只能处理一个指令,如果连续调用两个接口,会导致蓝牙底层出现问题。
那对于我们应用层来说,怎么知道扫描到的设备呢?
蓝牙协议栈通过回调的方式上报扫描到的蓝牙设备到framework层,framework层会发送BluetoothDeive.ACTION_FOUND广播出来。应用层注册接收该广播,接收到后从intent中获取到设备的信息。
            //onReceive()方法
            final String action = intent.getAction();
            Log.d(TAG, "onReceive intent = " + action);
            if(action.equals(BluetoothDevice.ACTION_FOUND)) {
                BluetoothDevice btdevice = intent.getParcelableExtra(BluetoothDevice.EXTRA_DEVICE);
                final String address = btdevice.getAddress();
                final String deviceName = btdevice.getName();
                Log.d(TAG, "onReceive found device, deivce address = " + address + ",deviceName = " + deviceName);
                if(isTargetDevice(btdevice)) {
                    stopScan();
                    mHandler.sendEmptyMessageDelayed(MSG_PAIR, DELAYT_TIMES);
                }
            }
接收到广播后,我们需要对搜索到的设备进行判断,看是否是我们的目标设备。判断目标设备的方法就是就是进行一系列的判读,将干扰设备剔除出来。在这里,我进用设备的名词进行判断。
    //可以根据多个限制条件来设定目标设备,例如,信号强度,设备类型,设备名称等。
    //此处我们只用了设备名称来判断
    private boolean isTargetDevice(BluetoothDevice device) {
        if(device.getName() != null && device.getName().equals("S7")) {
            Log.d(TAG, "deivce :" + device.getName() + "is target device");
            mTargetDevice = device;
            return true;
        }
        Log.d(TAG, "deivce :" + device.getName() + "is not target device");
        return false;
    }
2.设备配对:
蓝牙设备的配对都是调用:BluetoothDevice::createBond()方法,
    private void pairDevice() {
        Log.d(TAG,"start pair device = " + mTargetDevice);
        if(mTargetDevice.getBondState() != BluetoothDevice.BOND_NONE){
            Log.d(TAG, "targetdevice is already bonded,return");
            return;
        }
        mTargetDevice.createBond();
    }
应用层注册接收BluetoothDevice.ACTION_BOND_STATE_CHANGED广播,接收到之后进行配对状态变化的判断。
我们从intent中获取到BluetoothDevice对象,也就是是哪个设备的配对状态发生了改变。
preBondState是前一个配对状态,newBondState是新状态,一个成功的配对流程是:
BluetoothDevice.BOND_NONE(10)-->BluetoothDevice.BOND_BONDING(11)-->BluetoothDevice.BOND_BONDED(12),如果是其他状态变化,则说明配对失败了~
在收到11--->12的配对状态变化时,即可认为设备配对成功了。我们需要再判断一下这个配对成功的设备是否是目标设备,只有是目标设备(也就是我们发起配对的设备)才能进行下一步的流程:连接。
if (action.equals(BluetoothDevice.ACTION_BOND_STATE_CHANGED)) {
                BluetoothDevice btdevice = intent.getParcelableExtra(BluetoothDevice.EXTRA_DEVICE);
                int preBondState = intent.getIntExtra(BluetoothDevice.EXTRA_PREVIOUS_BOND_STATE, BluetoothDevice.ERROR);
                int newBondState = intent.getIntExtra(BluetoothDevice.EXTRA_BOND_STATE, BluetoothDevice.ERROR);
                Log.d(TAG, "btdeivice = " + btdevice.getName() + "bond state change, preBondState = " + preBondState
                        + ", newBondState = " + newBondState);
                if(preBondState == BluetoothDevice.BOND_BONDING && newBondState == BluetoothDevice.BOND_BONDED) {
                    //判断一下是否是目标设备
                    if(isTargetDevice(btdevice)) {
                        connectDevice();
                    }

                }
3.设备连接:
设备的连接是通过不同的profile,A2DP设备需要通过a2dp profile来连接,hid设备(例如鼠标)需要通过input profile来连接。
我会单独写一篇文章讲解如何区分设备类型。
    private void connectDevice() {
        if(mBluetoothA2dpProfile == null) {
            Log.d(TAG, "don't get a2dp profile,can not run connect");
        } else {
            try {
                //通过反射获取BluetoothA2dp中connect方法
                Method connectMethod = BluetoothA2dp.class.getMethod("connect",
                        BluetoothDevice.class);
                Log.d(TAG, "connectMethod = " + connectMethod);
                connectMethod.invoke(mBluetoothA2dpProfile, mTargetDevice);
            } catch (Exception e) {
                e.printStackTrace();
            }
        }
    }
因为BluetoothA2dp的connect()方法是hide的,需要通过反射的方式来获取调用,当然你可以自己在源码中编译,这样就不需要用反射了。
/**
209     * Initiate connection to a profile of the remote bluetooth device.
210     *
211     * <p> Currently, the system supports only 1 connection to the
212     * A2DP profile. The API will automatically disconnect connected
213     * devices before connecting.
214     *
215     * <p> This API returns false in scenarios like the profile on the
216     * device is already connected or Bluetooth is not turned on.
217     * When this API returns true, it is guaranteed that
218     * connection state intent for the profile will be broadcasted with
219     * the state. Users can get the connection state of the profile
220     * from this intent.
221     *
222     * <p>Requires {@link android.Manifest.permission#BLUETOOTH_ADMIN}
223     * permission.
224     *
225     * @param device Remote Bluetooth Device
226     * @return false on immediate error,
227     *               true otherwise
228     * @hide
229     */
230    public boolean connect(BluetoothDevice device) {
231        if (DBG) log("connect(" + device + ")");
232        if (mService != null && isEnabled() &&
233            isValidDevice(device)) {
234            try {
235                return mService.connect(device);
236            } catch (RemoteException e) {
237                Log.e(TAG, "Stack:" + Log.getStackTraceString(new Throwable()));
238                return false;
239            }
240        }
241        if (mService == null) Log.w(TAG, "Proxy not attached to service");
242        return false;
243    }
连接状态的变化可以通过监听BluetoothA2dp.ACTION_CONNECTION_STATE_CHANGED来实现,preConnectionState表示前一个连接状态,newConnectionState表示后一个连接状态。
一个正常的连接状态流程为:BluetoothProfile.STATE_DISCONNECTED(0)-->BluetoothProfile.STATE_CONNECTING(1)-->
BluetoothProfile.STATE_CONNCTED(2)。
如果出现0-->1-->0的状态变化,则说明连接失败了,需要根据蓝牙log进行分析了。
一个正常的断开流程为:BluetoothProfile.STATE_CONNECTED(2)-->BluetoothProfile.STATE_DISCONNECTING(3)-->BluetoothProfile.STATE_DISCONNECTED(0)。
 if (action.equals(BluetoothA2dp.ACTION_CONNECTION_STATE_CHANGED)) {
                BluetoothDevice btdevice = intent.getParcelableExtra(BluetoothDevice.EXTRA_DEVICE);
                int preConnectionState = intent.getIntExtra(BluetoothProfile.EXTRA_PREVIOUS_STATE, 0);
                int newConnectionState = intent.getIntExtra(BluetoothProfile.EXTRA_STATE, 0);
                Log.d(TAG, "btdevice = " + btdevice.getName() + ", preConnectionState = "
                        + preConnectionState + ", newConnectionState" + newConnectionState);
                if(newConnectionState == BluetoothProfile.STATE_CONNECTED && preConnectionState == BluetoothProfile.STATE_CONNECTING) {
                    Log.d(TAG, "target device connect success");
                }
            }
4.总结
本文主要从应用层的角度分析了经典蓝牙设备的配对、连接流程。大致为:扫描设备--监听DEVICE_FOUND广播-->直到找到目标设备-->对目标设备发起配对-->监听到设备配对成功-->发起设备连接-->监听连接状态的广播,连接成功。
在后面的文章中,会对如下内容进行分析:
(1)如何进行设备区分,即设备分类;
(2)如何快速扫描设备;
如果想持续关注本博客内容,请扫描关注个人微信公众号,或者微信扫描:万物互联技术。


 448
448


 被折叠的 条评论
为什么被折叠?
被折叠的 条评论
为什么被折叠?
 到【灌水乐园】发言


