


IDEA利用spring.profiles.active启动Eureka集群
在我们进行微服务开发的过程中,为了保证服务的高可用,经常会使用到集群,已Eureka为例,我们为了保证Eureka的高可用,经常会搭建3个节点的Eureka集群,而为了测试,我们需要再本机启动Eureka的集群,很多视频或者博客教程中,都采用的是将Eureka工程进行复制多个,然后修改端口号进行启动,或者打成jar包,修改配置文件启动多个。此篇文章,笔者将通过IDEA配置,引用不同的配置文件即可简单方便的启动我们的服务集群。
开始之前
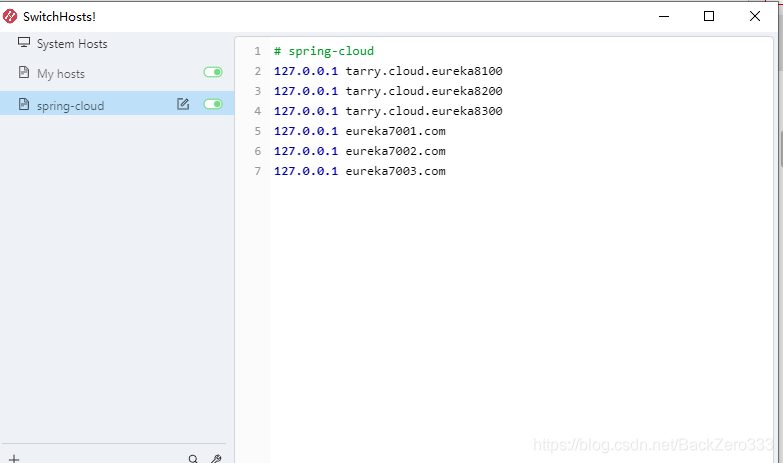
在文章开始之前,介绍一个实用的工具SwitchHosts。
SwitchHosts是一个管理、快速切换Hosts小工具,开源软件,一键切换Hosts配置,非常实用,高效。
修改本机hosts文件添加如下hostname映射。
修改Eureka application.yml
spring:
  application:
    name: tarry-cloud-center
  profiles:
    active: 8100
添加3个application-XXX.yml文件
在application.yml文件同级目录添加如下三个文件:
application-8100.yml
application-8200.yml
application-8300.yml
server:
  port: 8100
spring:
  security:
    user:
      name: tarrycloud
      password: XXX

eureka:
  instance:
    prefer-ip-address: true
    hostname: tarry.cloud.eureka8100
    instance-id: ${eureka.instance.hostname}:${server.port}
  client:
    register-with-eureka: true
    fetch-registry: true
    service-url:
      defaultZone: http://${spring.security.user.name}:${spring.security.user.password}@tarry.cloud.eureka8200:8200/eureka/,http://${spring.security.user.name}:${spring.security.user.password}@tarry.cloud.eureka8300:8300/eureka/
  server:
    #清理无效时间节点
    eviction-interval-timer-in-ms: 5000
    # 此处不开启缓存,针对 response cache 的问题,可以根据情况考虑关闭 readOnlyCacheMap
    use-read-only-response-cache: false
    # 设置read Write CacheMap的expire After Write参数,指定写入多长时间后过期
    # 有效防止的问题是:应用实例下线时有告知Eureka server下线,但是由于Eureka server的REST API有response cache,因此需要等待缓存过期才能更新
    response-cache-auto-expiration-in-seconds: 60
    # 指定每分钟需要收到的续约次数的阈值,默认值就是:0.85
    renewal-percent-threshold: 0.1
    #关闭自我保护功能
    enable-self-preservation: true
    #在Eureka服务器获取不到集群里对等服务器上的实例时,需要等待的时间,单位为毫秒
    wait-time-in-ms-when-sync-empty: 6000
以上是application-8100.yml文件配置,application-8200.yml和application-8300.yml只用修改defaultZone的配置即可。
server:
  port: 8200
eureka:
  instance:
    prefer-ip-address: true
    hostname: tarry.cloud.eureka8200
    instance-id: ${eureka.instance.hostname}:${server.port}
  client:
    register-with-eureka: true
    fetch-registry: true
    service-url:
      defaultZone: http://${spring.security.user.name}:${spring.security.user.password}@tarry.cloud.eureka8100:8100/eureka/,http://${spring.security.user.name}:${spring.security.user.password}@tarry.cloud.eureka8300:8300/eureka/
server:
  port: 8300
eureka:
  instance:
    prefer-ip-address: true
    hostname: tarry.cloud.eureka8300
    instance-id: ${eureka.instance.hostname}:${server.port}
  client:
    register-with-eureka: true
    fetch-registry: true
    service-url:
      defaultZone: http://${spring.security.user.name}:${spring.security.user.password}@tarry.cloud.eureka8200:8200/eureka/,http://${spring.security.user.name}:${spring.security.user.password}@tarry.cloud.eureka8100:8100/eureka/
然后配置多个SpringApplication启动项

复制多个springBootApplication,然后在VM option项中填入:
-Dspring.profiles.active=application-XXX.yml文件的“-”后面的名称
如-Dspring.profiles.active=8100
然后,勾选上右上角的Allow parallel run 保存即可。
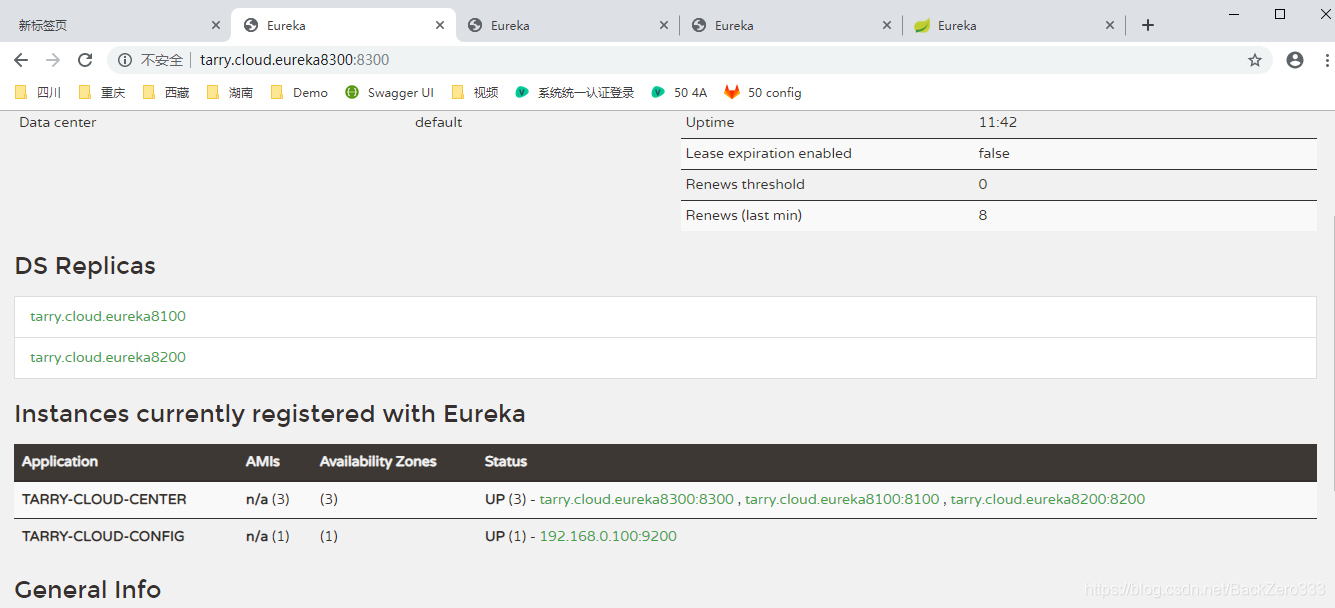
最后逐个启动即可实现Eureka集群的启动。
最后
主要原理:使用了SpringBoot多环境配置spring.profiles.active来激活不同的配置文件。
在配置的时候,我们需要满足application-{profile}.properties的格式。
如:
application-dev.properties:开发环境
application-test.properties:测试环境
application-prod.properties:生产环境
更多参考Spring Boot中5种方式激活指定profile


 1628
1628


 被折叠的 条评论
为什么被折叠?
被折叠的 条评论
为什么被折叠?
 到【灌水乐园】发言


