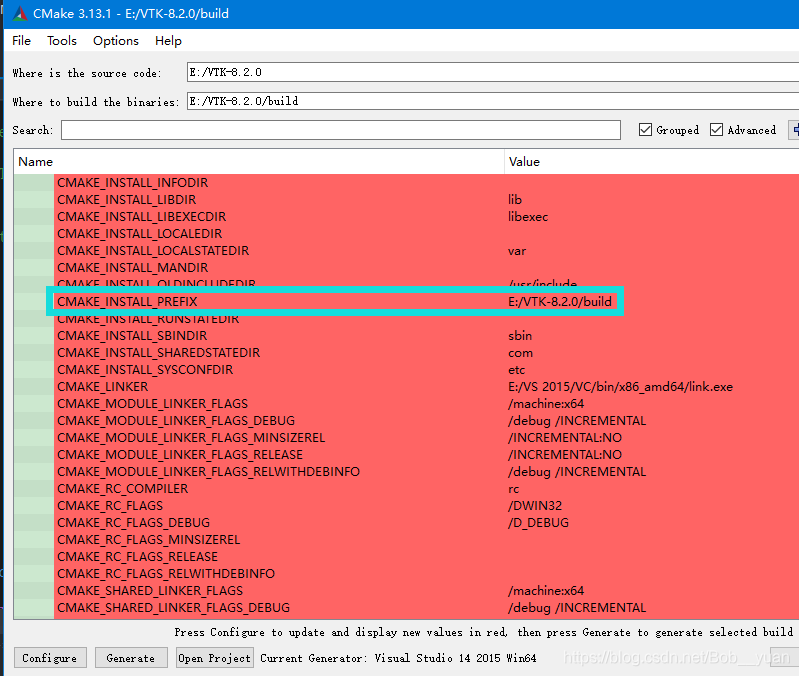
从 https://vtk.org/download/ 下载 VTK-8.2.0.zip 并解压,用 cmake 打开文件夹(包含 CMakeLists.txt 的文件夹),选择 Visual Studio 14 2015 win64,并且一定要修改 CMAKE_INSTALL_PREFIX,只要不是在C盘路径下就可以,否则之后编译生成 INSTALL 的时候会有权限问题。

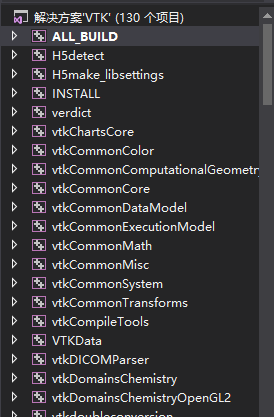
Configure、Generate、Open Project 应该都没有问题,打开项目之后,默认启动项为ALL_BUILD,先 “重新生成” ALL_BUILD,应该是128个成功。

然后再右键INSTALL,设为启动项,生成(不用重新生成),我的 CMAKE_INSTALL_PREFIX 设的是 build 文件夹,那么 INSTALL 生成之后,build 文件夹下应该有包含 .dll 的 bin 文件夹,包含 .h 的 include 文件夹,还有包含 .lib 的 lib 文件夹。
新建一个vs2015的控制台空项目,添加一个 .cpp 把如下代码复制进去:
/*=========================================================================

Program:   Visualization Toolkit
Module:    Cone6.cxx

Copyright (c) Ken Martin, Will Schroeder, Bill Lorensen
All rights reserved.
See Copyright.txt or http://www.kitware.com/Copyright.htm for details.

This software is distributed WITHOUT ANY WARRANTY; without even
the implied warranty of MERCHANTABILITY or FITNESS FOR A PARTICULAR
PURPOSE.  See the above copyright notice for more information.

=========================================================================*/
//
// This example introduces 3D widgets. 3D widgets take advantage of the
// event/observer design pattern introduced previously. They typically
// have a particular representation in the scene which can be interactively
// selected and manipulated using the mouse and keyboard. As the widgets
// are manipulated, they in turn invoke events such as StartInteractionEvent,
// InteractionEvent, and EndInteractionEvent which can be used to manipulate
// the scene that the widget is embedded in. 3D widgets work in the context
// of the event loop which was set up in the previous example.
//
// Note: there are more 3D widget examples in VTK/Examples/GUI/.
//

// First include the required header files for the VTK classes we are using.
#include "vtkConeSource.h"
#include "vtkPolyDataMapper.h"
#include "vtkRenderWindow.h"
#include "vtkRenderWindowInteractor.h"
#include "vtkCamera.h"
#include "vtkActor.h"
#include "vtkRenderer.h"
#include "vtkCommand.h"
#include "vtkBoxWidget.h"
#include "vtkTransform.h"
#include "vtkInteractorStyleTrackballCamera.h"

#include <vtkAutoInit.h>
VTK_AUTOINIT_DECLARE(vtkRenderingOpenGL2) static struct vtkRenderingOpenGL2_ModuleInit
{
	vtkRenderingOpenGL2_ModuleInit() { VTK_AUTOINIT_CONSTRUCT(vtkRenderingOpenGL2) }
	~vtkRenderingOpenGL2_ModuleInit() { VTK_AUTOINIT_DESTRUCT(vtkRenderingOpenGL2) }
} vtkRenderingOpenGL2_ModuleInit_Instance;;
// VTK_MODULE_INIT(vtkRenderingOpenGL2);
VTK_MODULE_INIT(vtkInteractionStyle);

//
// Similar to Cone2.cxx, we define a callback for interaction.
//
class vtkMyCallback : public vtkCommand
{
public:
	static vtkMyCallback *New()
	{
		return new vtkMyCallback;
	}
	void Execute(vtkObject *caller, unsigned long, void*) VTK_OVERRIDE
	{
		vtkTransform *t = vtkTransform::New();
		vtkBoxWidget *widget = reinterpret_cast<vtkBoxWidget*>(caller);
		widget->GetTransform(t);
		widget->GetProp3D()->SetUserTransform(t);
		t->Delete();
	}
};

int main()
{
	// Next we create an instance of vtkConeSource and set some of its properties.
	// The instance of vtkConeSource "cone" is part of a visualization pipeline (it is a source process object);
	// it produces data (output type is vtkPolyData) which other filters may process.
	vtkConeSource *cone = vtkConeSource::New();
	cone->SetHeight(3.0);
	cone->SetRadius(1.0);
	cone->SetResolution(10);

	// In this example we terminate the pipeline with a mapper process object.
	// (Intermediate filters such as vtkShrinkPolyData could be inserted in
	// between the source and the mapper.)  We create an instance of
	// vtkPolyDataMapper to map the polygonal data into graphics primitives. We
	// connect the output of the cone souece to the input of this mapper.
	vtkPolyDataMapper *coneMapper = vtkPolyDataMapper::New();
	coneMapper->SetInputConnection(cone->GetOutputPort());

	// Create an actor to represent the cone. The actor orchestrates rendering
	// of the mapper's graphics primitives. An actor also refers to properties
	// via a vtkProperty instance, and includes an internal transformation
	// matrix. We set this actor's mapper to be coneMapper which we created above.
	vtkActor *coneActor = vtkActor::New();
	coneActor->SetMapper(coneMapper);

	// Create the Renderer and assign actors to it. A renderer is like a
	// viewport. It is part or all of a window on the screen and it is
	// responsible for drawing the actors it has.  We also set the background color here.
	vtkRenderer *ren1 = vtkRenderer::New();
	ren1->AddActor(coneActor);
	ren1->SetBackground(0.1, 0.2, 0.4);

	// Finally we create the render window which will show up on the screen.
	// We put our renderer into the render window using AddRenderer.
	// We also set the size to be 300 pixels by 300.
	vtkRenderWindow *renWin = vtkRenderWindow::New();
	renWin->AddRenderer(ren1);
	renWin->SetSize(300, 300);

	// The vtkRenderWindowInteractor class watches for events (e.g., keypress,
	// mouse) in the vtkRenderWindow. These events are translated into
	// event invocations that VTK understands (see VTK/Common/vtkCommand.h
	// for all events that VTK processes). Then observers of these VTK events can process them as appropriate.
	vtkRenderWindowInteractor *iren = vtkRenderWindowInteractor::New();
	iren->SetRenderWindow(renWin);

	// By default the vtkRenderWindowInteractor instantiates an instance
	// of vtkInteractorStyle. vtkInteractorStyle translates a set of events
	// it observes into operations on the camera, actors, and/or properties
	// in the vtkRenderWindow associated with the vtkRenderWinodwInteractor.
	// Here we specify a particular interactor style.
	vtkInteractorStyleTrackballCamera *style =
		vtkInteractorStyleTrackballCamera::New();
	iren->SetInteractorStyle(style);

	// Here we use a vtkBoxWidget to transform the underlying coneActor (by
	// manipulating its transformation matrix). Many other types of widgets
	// are available for use, see the documentation for more details.
	//
	// The SetInteractor method is how 3D widgets are associated with the render
	// window interactor. Internally, SetInteractor sets up a bunch of callbacks
	// using the Command/Observer mechanism (AddObserver()). The place factor
	// controls the initial size of the widget with respect to the bounding box of the input to the widget.
	vtkBoxWidget *boxWidget = vtkBoxWidget::New();
	boxWidget->SetInteractor(iren);
	boxWidget->SetPlaceFactor(1.25);

	// Place the interactor initially. The input to a 3D widget is used to
	// initially position and scale the widget. The EndInteractionEvent is
	// observed which invokes the SelectPolygons callback.
	boxWidget->SetProp3D(coneActor);
	boxWidget->PlaceWidget();
	vtkMyCallback *callback = vtkMyCallback::New();
	boxWidget->AddObserver(vtkCommand::InteractionEvent, callback);

	// Normally the user presses the "i" key to bring a 3D widget to life.
	// Here we will manually enable it so it appears with the cone.
	boxWidget->On();

	// Start the event loop.
	iren->Initialize();
	iren->Start();

	// Free up any objects we created. All instances in VTK are deleted by using the Delete() method.
	cone->Delete();
	coneMapper->Delete();
	coneActor->Delete();
	callback->Delete();
	boxWidget->Delete();
	ren1->Delete();
	renWin->Delete();
	iren->Delete();
	style->Delete();

	return 0;
}
解决方案配置和平台一定要和生成 ALL_BUILD 时候的一样,我的是 debug 和 x64,这时就需要配置 .dll,.lib,.h 了。
.h 配置:在附加包含目录中,添加 “E:\VTK-8.2.0\build\include\vtk-8.2”,注意不是 include 文件夹,而是下边的 vtk-8.2 文件夹;
.lib 配置:在附加库目录中添加 “E:\VTK-8.2.0\build\lib”,不知道会用到哪些 lib 就都放进来,在 lib 文件夹下写一个脚本(转自 https://blog.csdn.net/sinat_25923849/article/details/78889674),创建一个txt文件,修改后缀名为 .bat,里边编辑一行:
DIR *.lib /B >LIBLIST.TXT
然后双击执行,会得到一个 LIBLIST.TXT,里边是该文件夹下所有以 .lib 为后缀的文件的名称,复制粘贴到 “链接器 -> 输入 -> 附加依赖项” 里边即可;
.dll 配置:配置完上边两个,项目应该可以生成了,把 build 文件夹中的 bin 文件夹中的所有 dll 文件放到生成出的 exe 所在文件夹下。
还需要最后一步,在头文件部分加入如下代码:
#include <vtkAutoInit.h>
VTK_MODULE_INIT(vtkRenderingOpenGL2);
VTK_MODULE_INIT(vtkInteractionStyle);
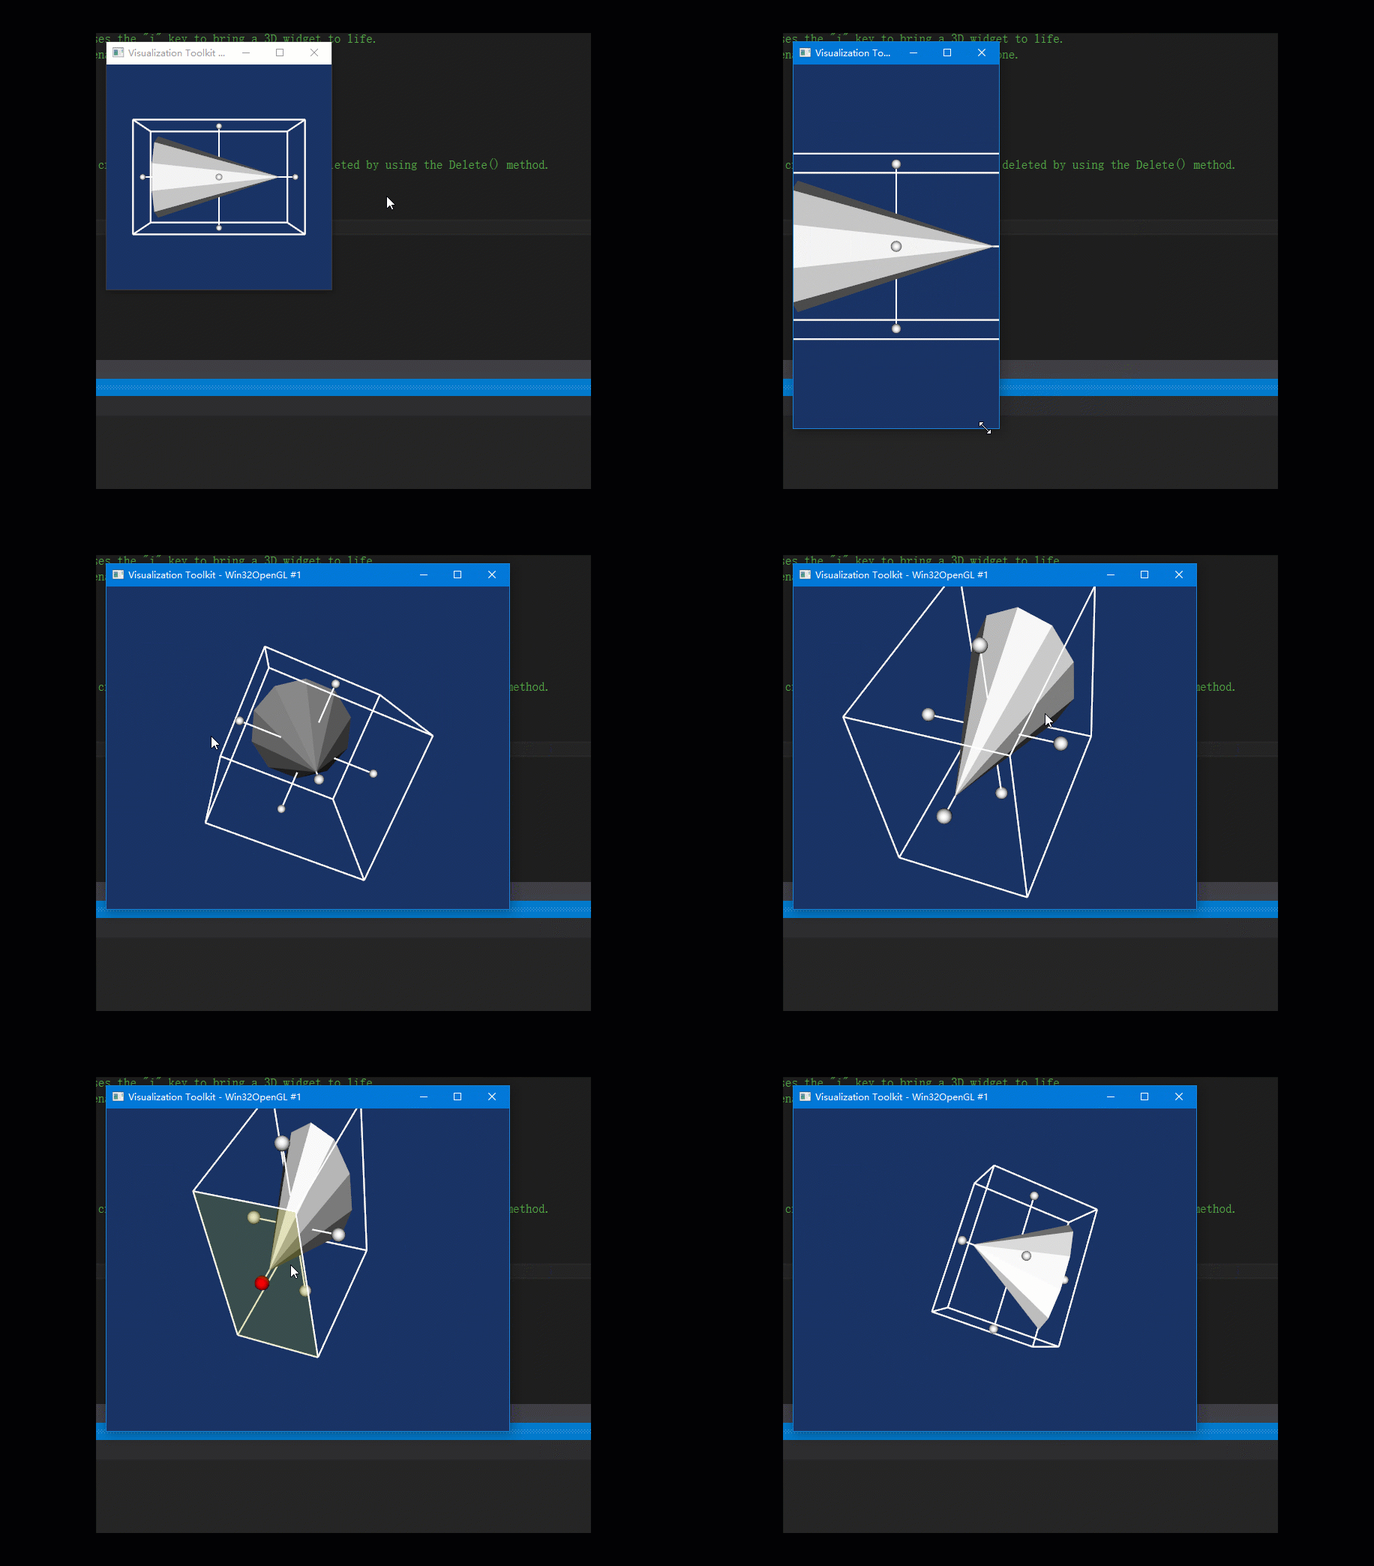
结果如下:


 1567
1567


 被折叠的 条评论
为什么被折叠?


