


-
路由跳转
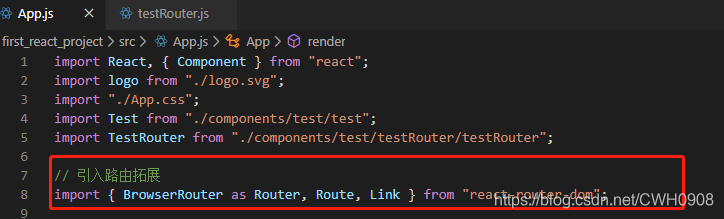
首先在项目中引入react-router的拓展
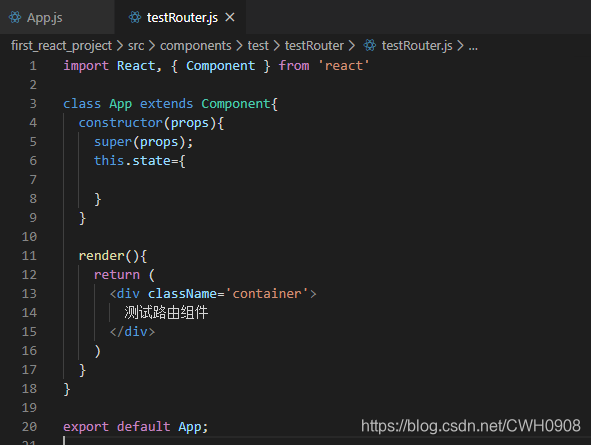
npm install --save react-router-dom然后写一个组件作为跳转路由时需要显示的组件
然后在使用路由跳转的地方引入
然后在标签里通过 Router和Route放置组件
建议使用 render 进行路由组件的渲染
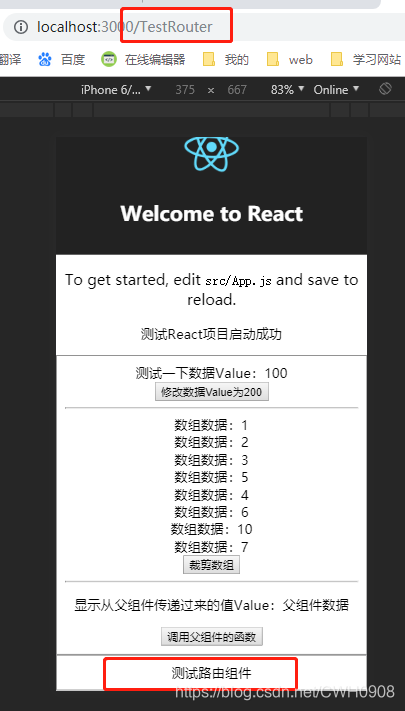
修改路由地址,即可显示对应组件
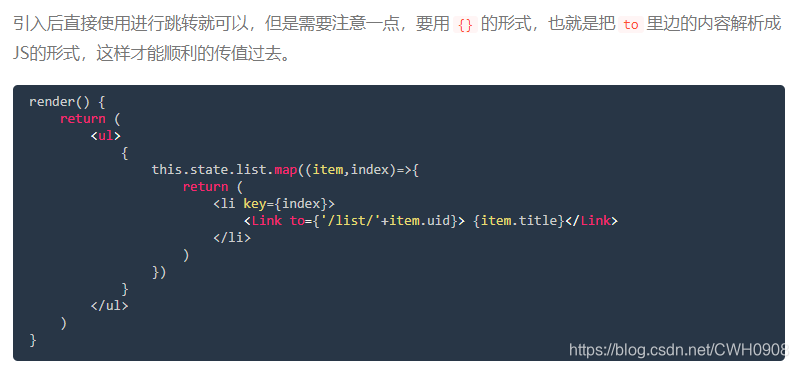
也可以使用 <Link> 标签里的to属性之间进行跳转(<Link>标签跳转路由)
与Vue对比,Vue的<router-link> 在React里面变成了 <Link> , Vue的 <router-view> 在React里面变成了<Route>,且React的路由标签需要包裹在<Router>标签里面。
如果需要动态的拼接路由,可以在to里面使用{ } 换成JS表达式
使用函数跳转路由
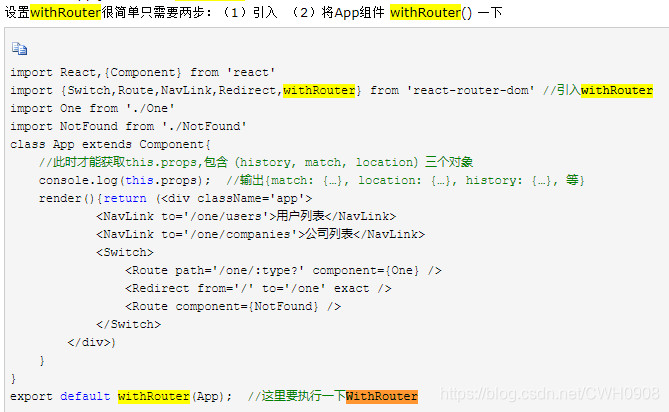
withRouter
有时候遇到在this.props 对象中没有history字段的,是因为history等一些路由属性,是路由跳转得到的组件才会有的,比如App.js一般是组件入口,不是路由跳转过去的,这时候就需要从react-route-dom中引入 withRouter
作用:
把不是通过路由切换过来的组件中,将react-router 的 history、location、match 三个对象传入props对象上
默认情况下必须是经过路由匹配渲染的组件才存在this.props,才拥有路由参数,才能使用编程式导航的写法,执行this.props.history.push('/detail')跳转到对应路由的页面
然而不是所有组件都直接与路由相连(通过路由跳转到此组件)的,当这些组件需要路由参数时,使用withRouter就可以给此组件传入路由参数,此时就可以使用this.props。
比如app.js这个组件,一般是首页,不是通过路由跳转过来的,而是直接从浏览器中输入地址打开的,如果不使用withRouter此组件的this.props为空,没法执行props中的history、location、match等方法。
应用:
设置withRouter很简单只需要两步:(1)引入 (2)将App组件 withRouter() 一下


-
路由传参
与Vue三种路由传参方式类似。
params传参
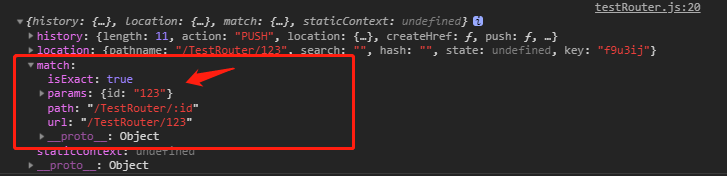
<Route path='/path/:name' component={Path}/>

<link to="/path/2">xxx</Link>

this.props.history.push({pathname:"/path/" + name});

读取参数用:this.props.match.params.name
query传参
刷新参数会丢失
<Route path='/path' component={component}/>

<Link to={{ path : ' /path' , query : { name : 'sunny' }}}>

this.props.history.push({pathname:"/path",query: { name : 'sunny' }});

读取参数用: this.props.location.query.name
state传参
刷新不会丢失
<Route path='/sort ' component={Sort}/>

<Link to={ { path : ' /sort ' , state : { name : 'sunny' }   } }>

this.props.history.push({pathname:"/sort ",state : { name : 'sunny' }});

获取参数用: this.props.location.state.name
search传参
和原生js获取到一样 需要解析对应参数
<Route path='/web/departManange ' component={DepartManange}/>

<link to="web/departManange?tenantId=12121212">xxx</Link>

this.props.history.push({pathname:"/web/departManange?test=123"});

读取参数用: this.props.location.search.test    //?test=123
实例:
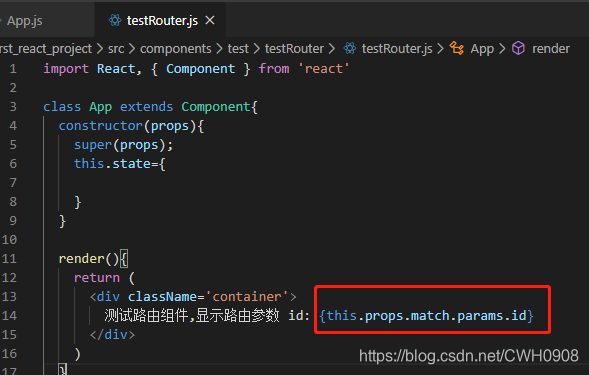
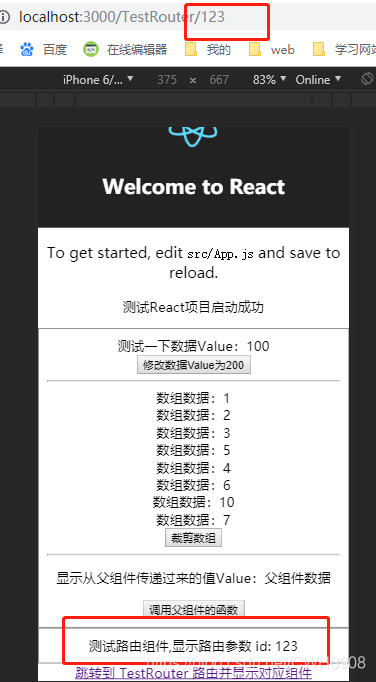
在路径path上添加参数名,在跳转路由时候带上参数即可,通过this.props.match.params可以拿到路由传递的参数。
-
路由重定向
- 方式一(麻烦,不推荐):<Redirect>标签式导航
路由重定向需要从react-router-dom额外引入 <Redirect >标签
注意,<Route>,<Link>,<Redirect> 标签都需要在<Router>标签的包裹下才能使用。
home路由下加载的组件
- 方式2(推荐):编程式重定向
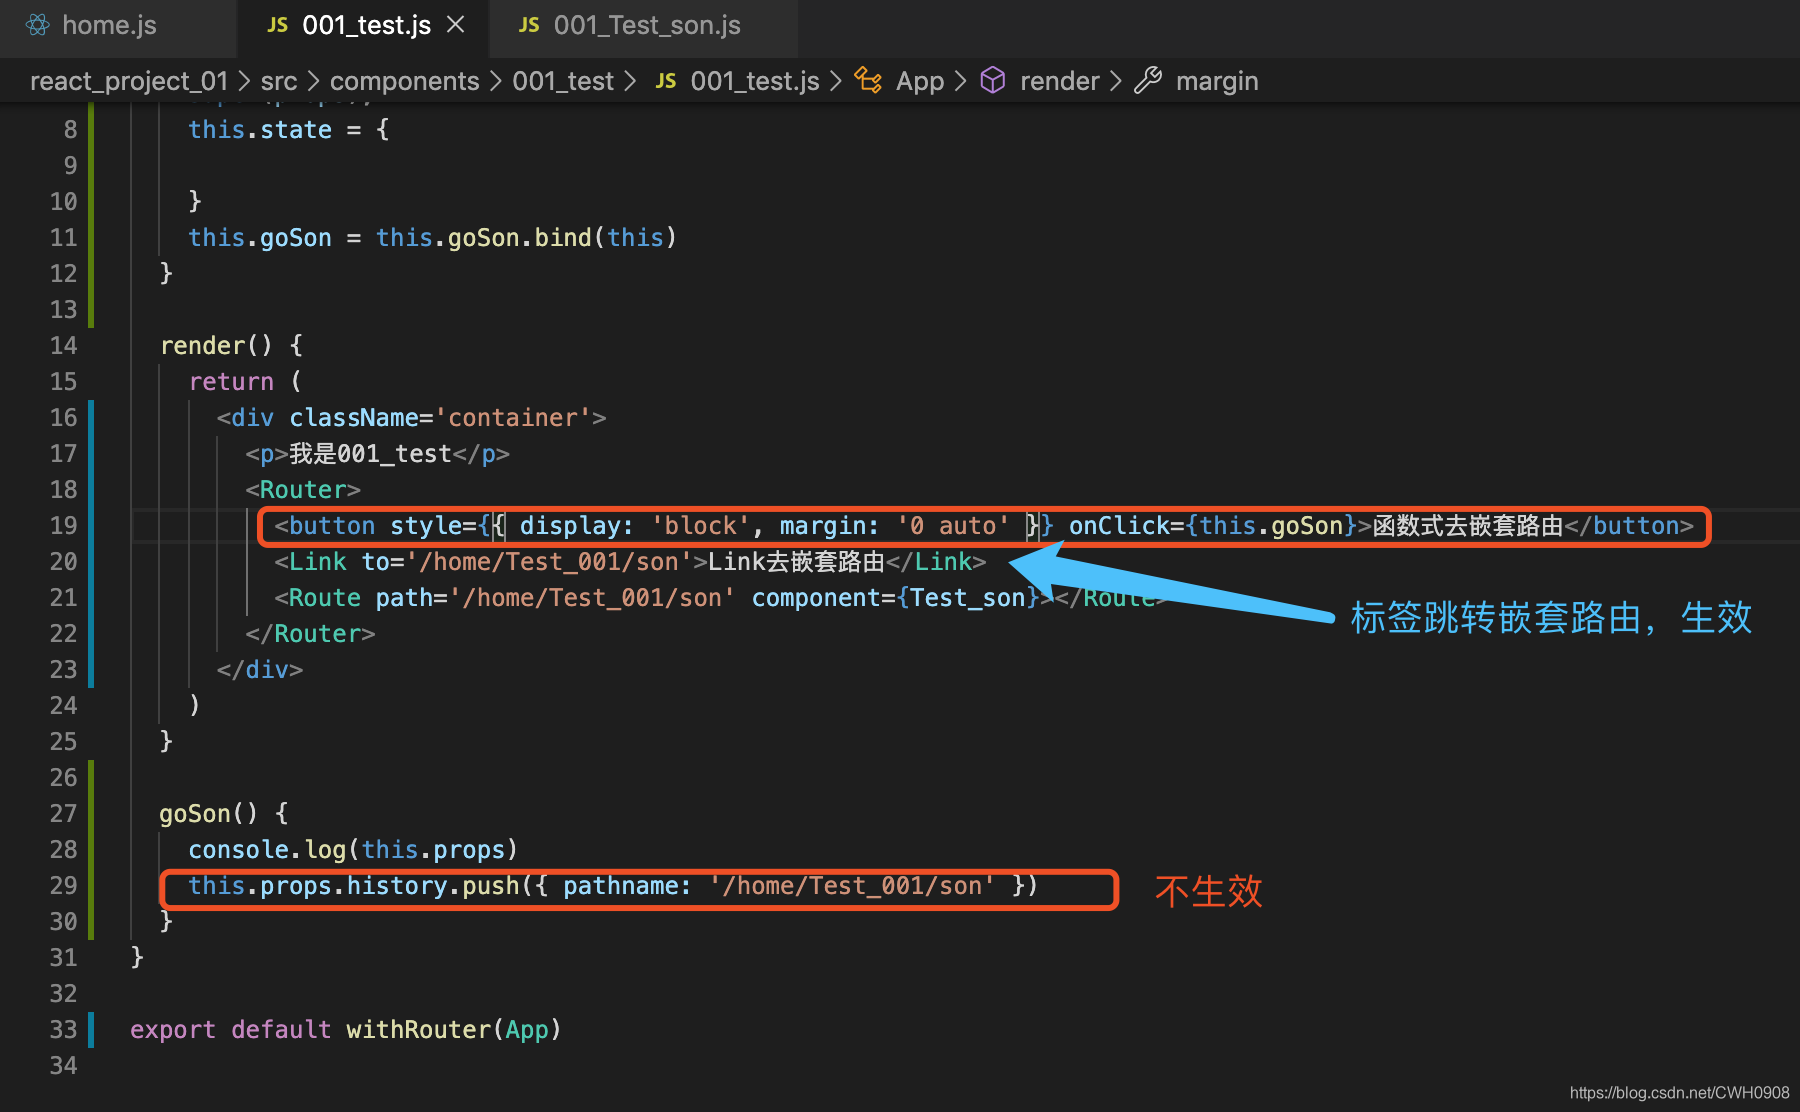
直接在需要重定向的组件js文件的构造函数中执行语句 this.props.history.push('路由地址')
注意,此时无法找到history属性
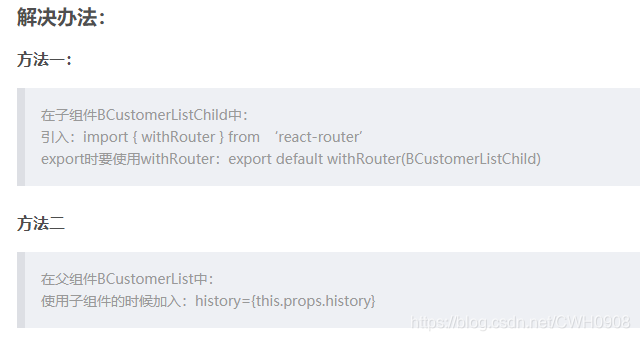
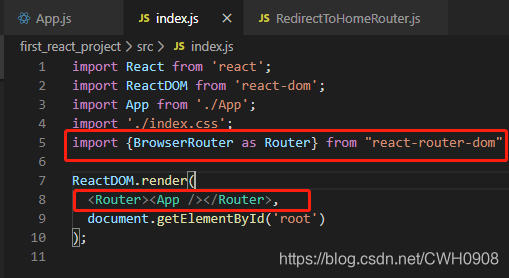
方法一细节:
如果只是简单的引入withRouter,然后暴露的时候使用widthRouter(组件名)的方式,会报错
解决办法:用Router包装App组件,具体如下
此时就能使用编程式导航实现路由重定向以及其他的编程式路由跳转。


-
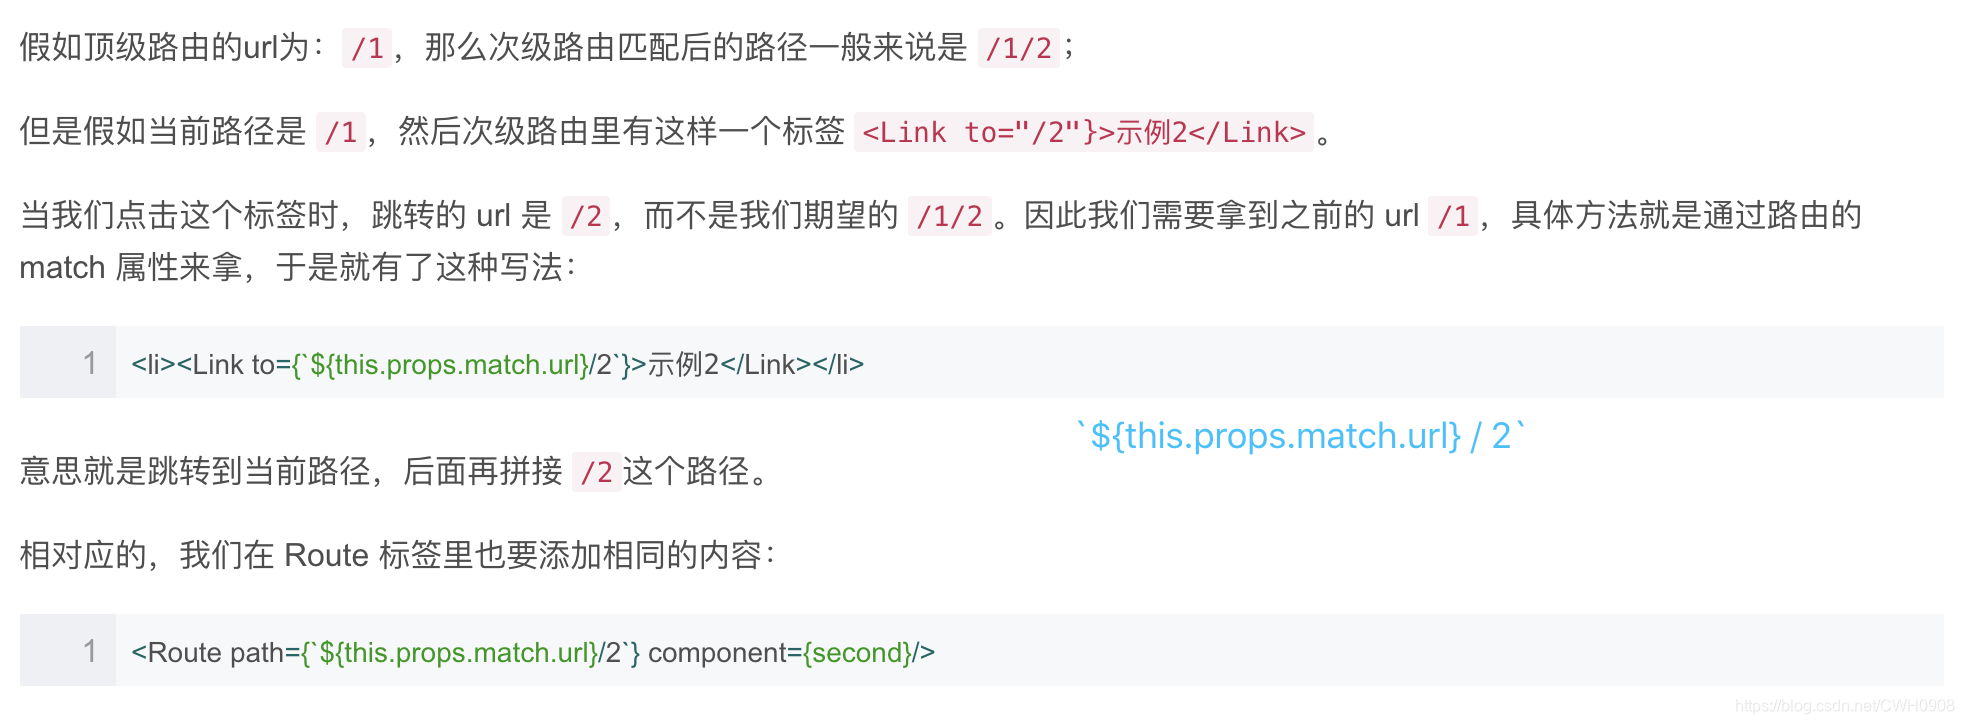
嵌套路由
‘
在 <Link> 标签中还可以通过 this.props.match.url 来拼接之前页面的路由
BrowserRouter 和 HashRouter
什么叫 hash 地址,hash 地址就是指 # 号后面的 url。
假如有一个 Link 标签,点击后跳转到 /abc/def。
BrowserRouter: http://localhost:8080/abc/def
HashRouter: http://localhost:8080/#/abc/def如果有服务器端的动态支持,建议使用 BrowserRouter,否则建议使用 HashRouter。
原因在于,如果是单纯的静态文件,假如路径从 / 切换到 /a 后,此时刷新页面,页面将无法正常访问。
二者的替换方法很简单,我们在引入 react-router-dom 时,如以下:
import {
    BrowserRouter as Router,
    Route,
    Link
} from 'react-router-dom'
将 BrowserRouter 修改为 HashRouter 就可以了,基本不需要修改其他东西。
因为写服务器文件还比较麻烦,因此在之后的 DEMO 中,我们将主要使用 HashRouter 而不是 BrowserRouter。
原文链接
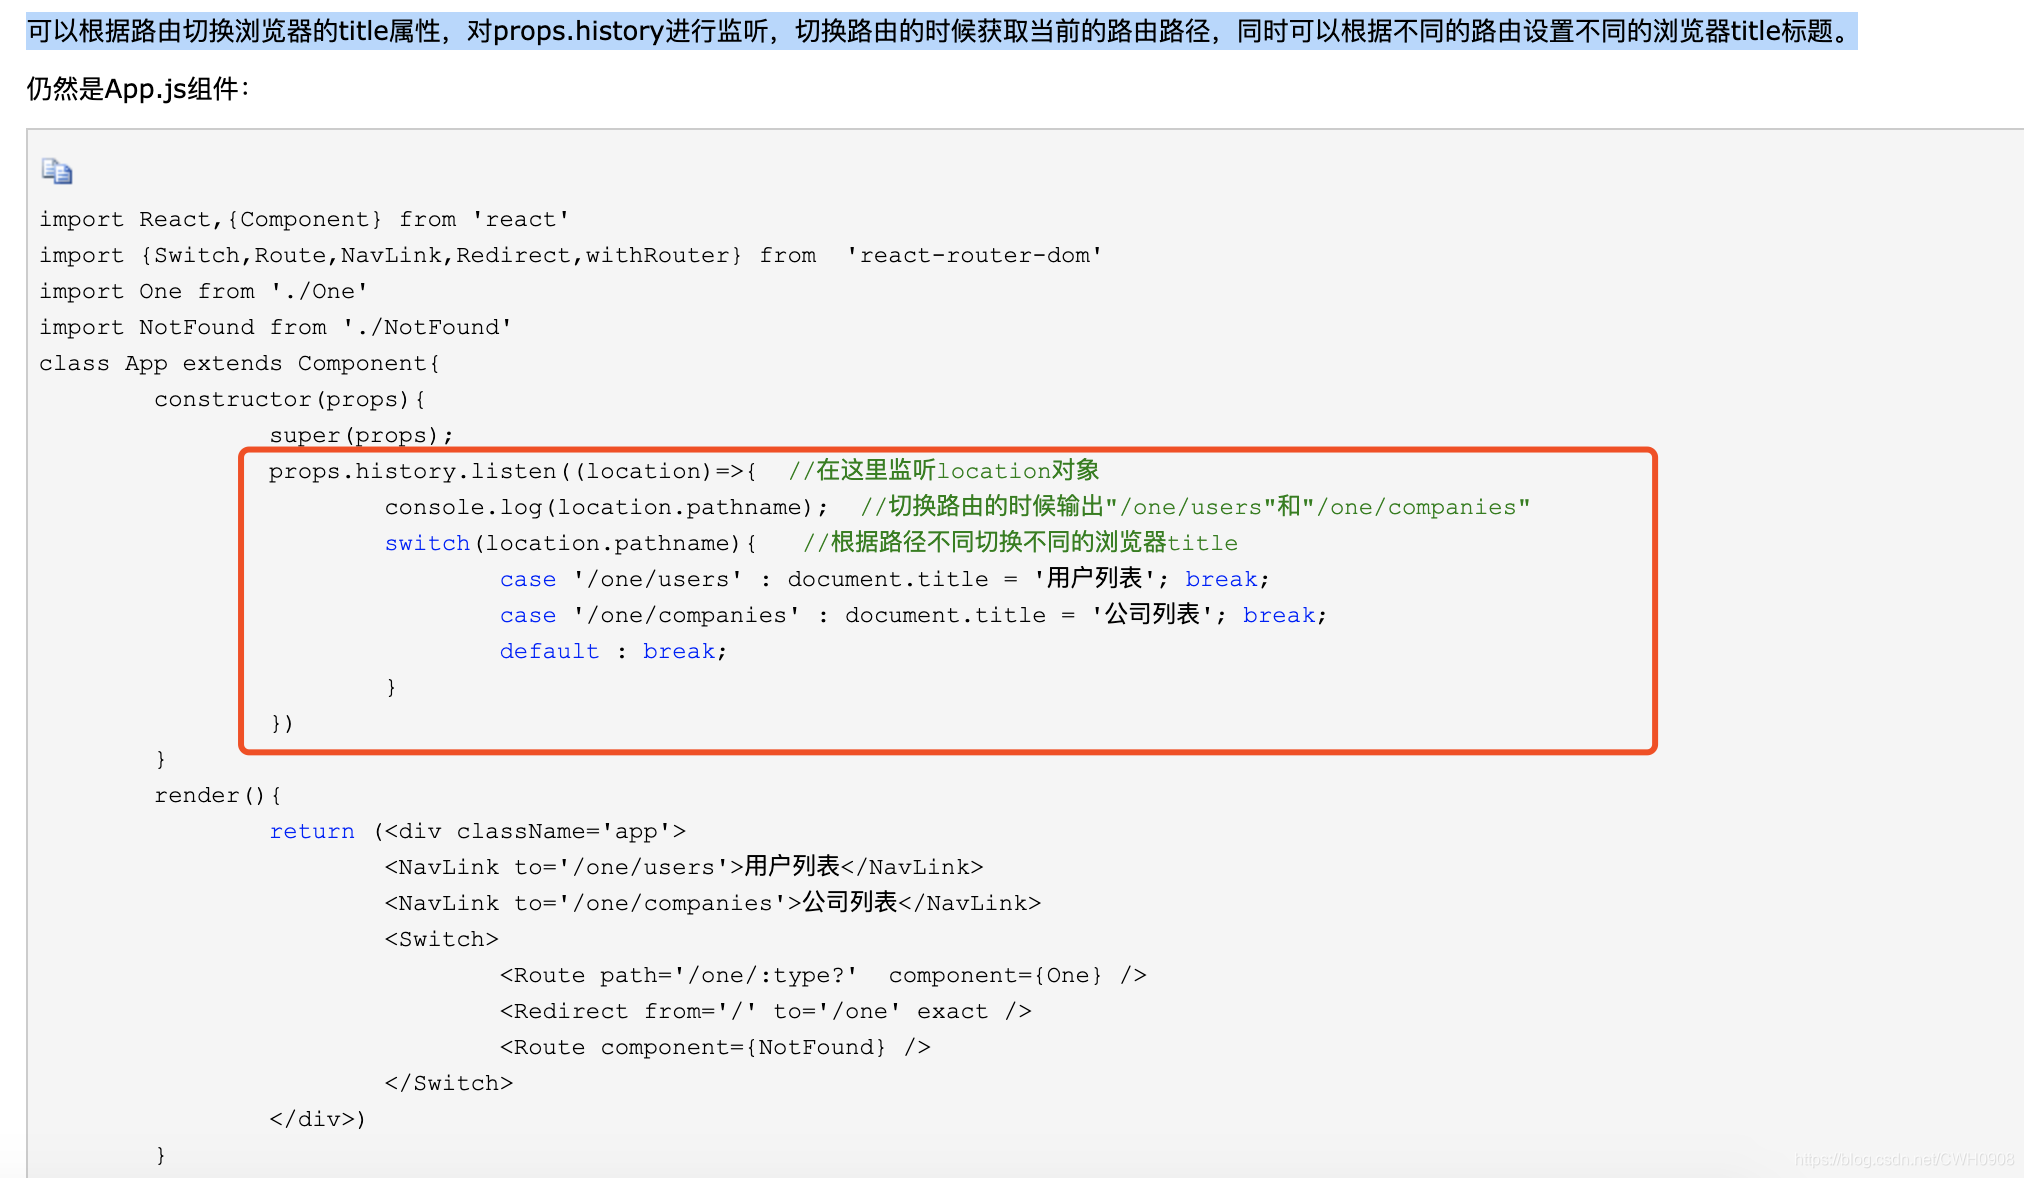
监听路由


 2万+
2万+


 被折叠的 条评论
为什么被折叠?
被折叠的 条评论
为什么被折叠?
 到【灌水乐园】发言


