


 本文详细介绍了如何在iOS、Android与Web平台上预览通话效果,通过MacOS搭建服务器并解决常见问题,以及在Flutter中实现客户端的P2P通话。从服务器配置到客户端接入,一步步教你完成实时通信开发。
一 概述
- 各平台通话预览效果
- 服务器端搭建
- 客户端搭建
- 发起通话
二 各平台通话预览效果
| IPhone-Android | IPhone-Web | Android-web |
|---|---|---|
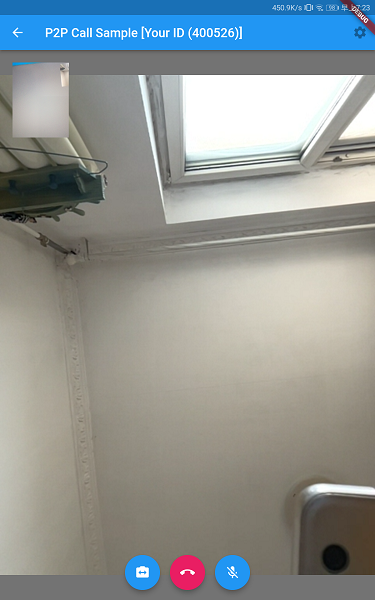 | 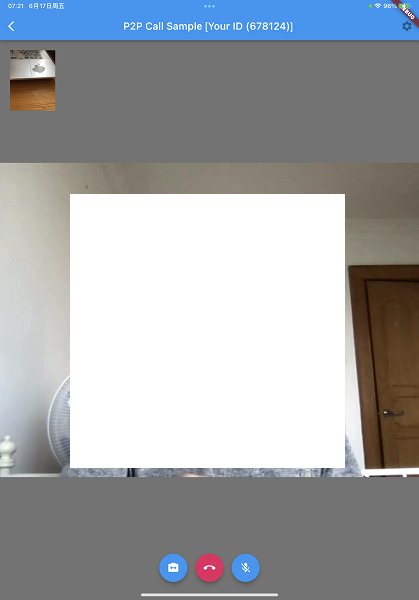 | 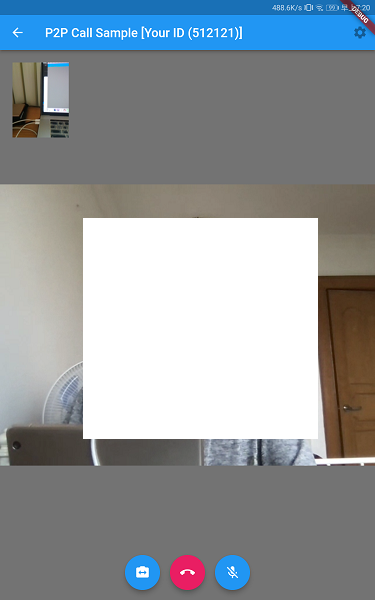 |
三 服务器端搭建
3.1 搭建清单
- flutter-webrtc-server:https://github.com/flutter-webrtc/flutter-webrtc-server
- 系统:macOS:12.4
- 软件:VsCode:1.68.0
3.2 搭建过程
克隆服务器端代码仓库
git clone https://github.com/flutter-webrtc/flutter-webrtc-server.git
cd flutter-webrtc-server
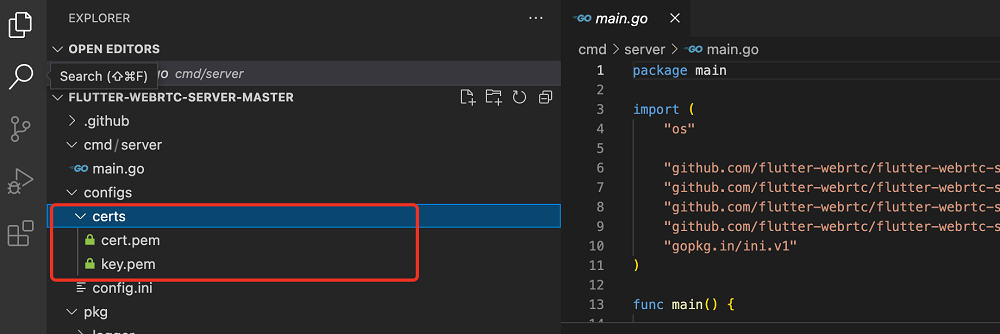
使用 mkcert 创建自签名证书
brew update
brew install mkcert
mkcert -key-file configs/certs/key.pem -cert-file configs/certs/cert.pem  localhost 127.0.0.1 ::1 0.0.0.0
指令执行后,自签名证书重新生成
运行项目
brew install golang
go run cmd/server/main.go
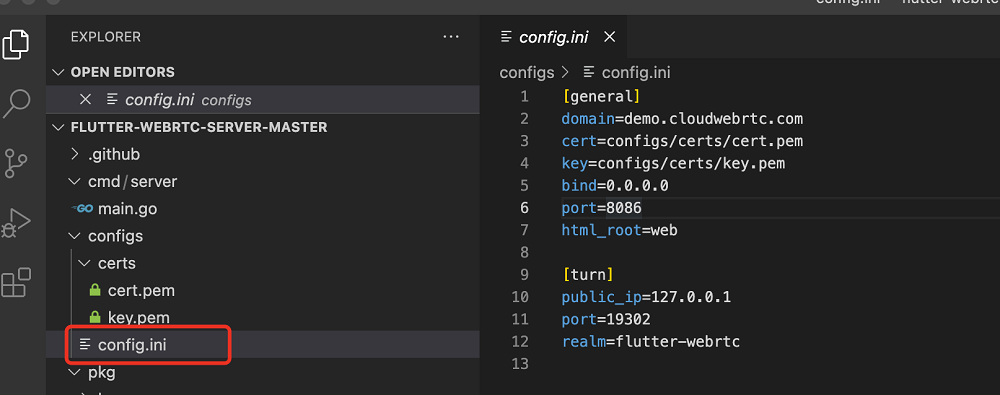
查看config.init配置
3.3 搭建过程中可能出现的问题及解决办法
执行brew指令失败
现象:
dumb http transport does not support shallow capabilities
解决办法
cd /usr/local/Homebrew/Library/Taps/homebrew/
rm -rf homebrew-core
git clone https://github.com/Homebrew/homebrew-core.git
参考:stack overflow-How to remove the shallow clone warning from HomeBrew
dial tcp 172.217.160.113:443: i/o timeout
现象:无法启动服务
dial tcp 172.217.160.113:443: i/o timeout
解决办法
自动下载
go env -w GO111MODULE=on
设置环境为国内代理
go env -w GOPROXY=https://goproxy.cn,direct
执行上述指令后,重新执行go run cmd/server/main.go启动项目
INF Flutter WebRTC Server listening on: 0.0.0.0:8086
3.4 本地Flutter Web demo
打开 https://0.0.0.0:8086,访问本地WebRTC
| Web demo | service address | P2P Call |
|---|---|---|
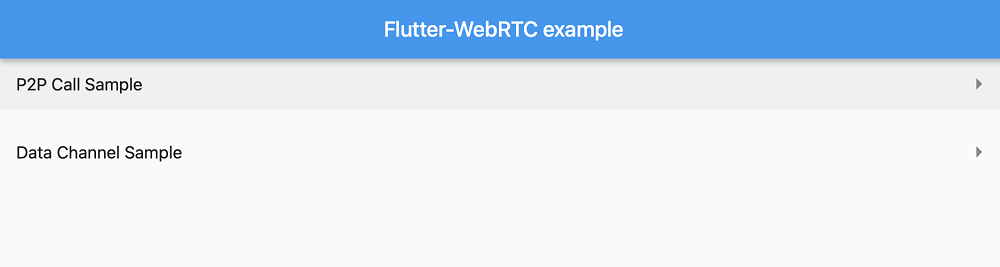 | 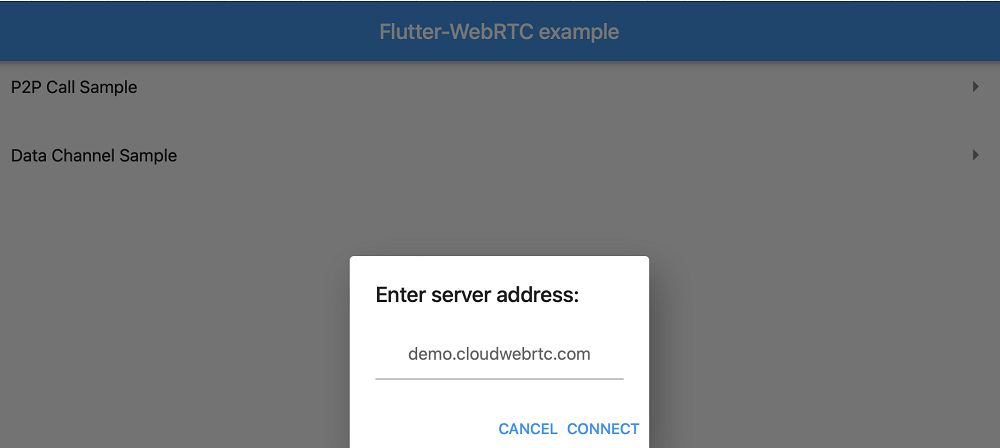 |  |
四 客户端搭建
4.1 Flutter搭建-flutter-webrtc-demo
项目地址:https://github.com/flutter-webrtc/flutter-webrtc-demo
4.2 使用Intellij或VSCode打开上述项目
五 发起通话
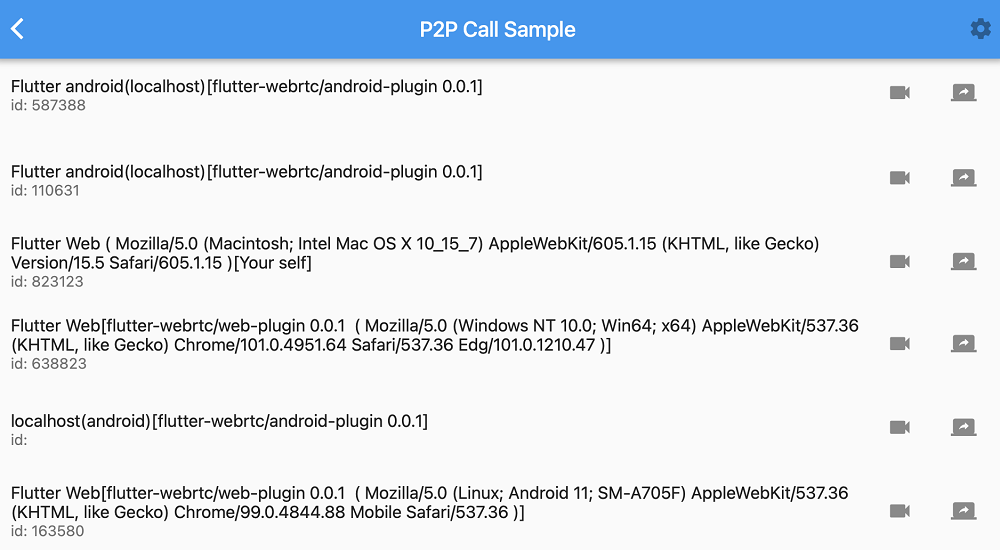
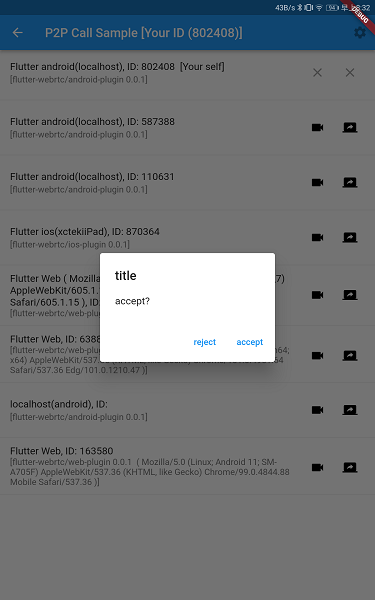
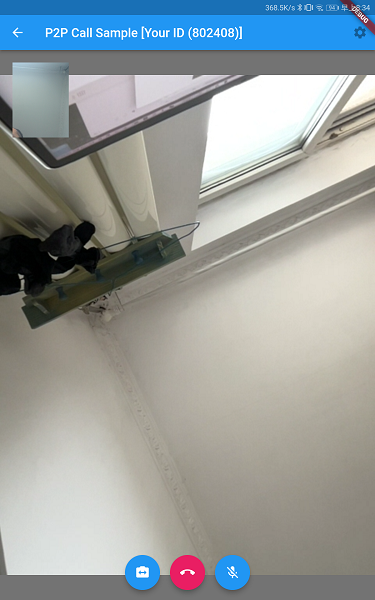
5.1 移动端通话界面
| Android P2P Call列表 | Android接受到连接请求 | 连接成功界面 |
|---|---|---|
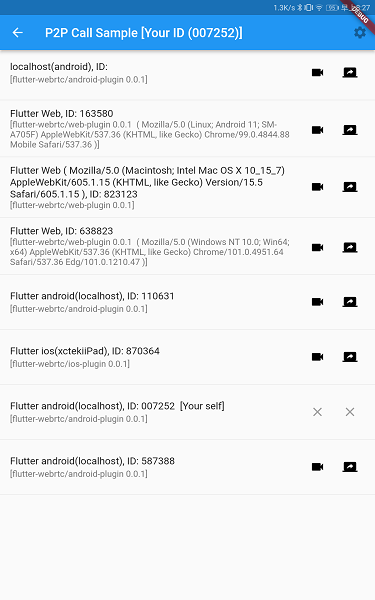 |  |  |
5.2 界面说明
Android P2P Call列表
- Flutter-android(localhost),ID:007252[your self],是当前设备
- Flutter iOS(xctkiiPad),ID:870364是IPAD设备
- Flutter Web(AppleWebKit/605…)是Web示例
Android接受到连接请求
当有其他设备发起连接时,弹出对话框让用户选择是否连接
连接成功界面
- 左上角是当前设备采集到的画面
- 中间画面是发起设备传送过来的画面(IPhone Ipad)
- 底部的按钮依次是:切换摄像头/挂断/静音


 1万+
1万+

 被折叠的 条评论
为什么被折叠?
被折叠的 条评论
为什么被折叠?
 到【灌水乐园】发言


