


目录
1.1、@Configuration配置spring并启动spring容器
1.2、@Configuration启动容器+@Bean注册Bean,@Bean下管理bean的生命周期
1.3、@Configuration启动容器+@Component注册Bean
1、springboot介绍
大家知道springboot是基于spring研发出来的,但是要知道springboot其实并不是对spring功能的增强,而是提供了一种快速使用spring的方式或者说是工具。
springboot集合了大量的第三方库,Spring Boot应用中这些第三方库几乎可以是零配置的开箱即用,大部分的 Spring Boot 应用都只需要非常少量的配置代码(基于 Java 的配置),开发者能够更加专注于业务逻辑。
优点
1.springboot本身就是基于spring诞生的,可以说只要spring能实现的功能,springboot都能实现,功能强大。
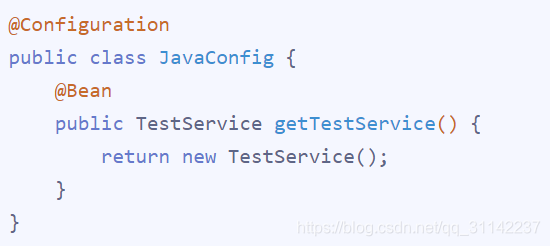
2.方便构建项目,我们都知道以前在使用spring框架构建项目的时候,免不了很多的配置文件,各种装配bean,现在springboot几乎实现了0配置文件,它采用了java config的方式,对spring进行配置,采用注解配置的方式,简化了原先的繁多的配置文件,极高的提高了工作效率。通过@Configuration 和@Bean 两个注解完成配置文件。
3.简化了maven配置,虽然spring4.0的出现似乎也已经做到了无xml配置,但是却需要繁多的maven配置,甚至达到了数百行,如今springboot集合了大量的第三方库,将大量的依赖配置集成简单的maven配置,
springboot项目在创建的时候就会自带一些maven配置,这些配置就已经集成了大量的依赖,不在需要开发者耗时耗力的去添加依赖配置了。
4 简化部署
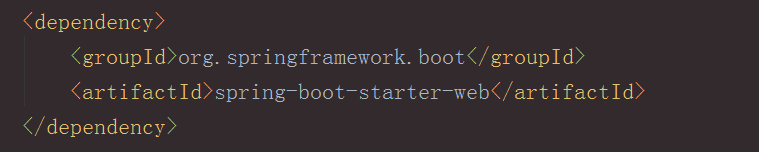
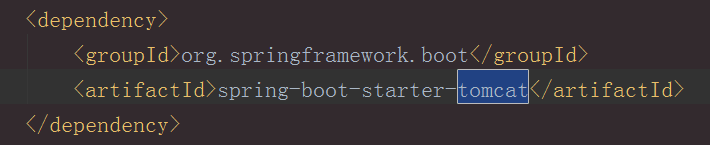
springboot内部嵌入了tomcat,在spring-boot-starter-web里可以找到,
这样在研发过程中就不在需要tomcat服务器,并且springboot项目在打完jar之后,可以直接启动也不需要另外的本地tomcat。也就是说拿到springboot项目jar之后,完全可以在一台只有jdk的机器上启动了。
2、springboot启动
上面说过了springboot项目自带了tomcat,所以项目启动和部署不需要额外的tomcat服务器了,这里关键的是springboot项目会有一个启动类,这个是springboot项目的入口,

上面可以看出启动类需要一个关键的注解@SpringBootApplication,看下改注解背后的内容,
@Target(ElementType.TYPE)            // 注解的适用范围,其中TYPE用于描述类、接口(包括包注解类型)或enum声明
@Retention(RetentionPolicy.RUNTIME)  // 注解的生命周期,保留到class文件中(三个生命周期)
@Documented                          // 表明这个注解应该被javadoc记录
@Inherited                           // 子类可以继承该注解
@SpringBootConfiguration             // 继承了Configuration,表示当前是注解类
@EnableAutoConfiguration             // 开启springboot的注解功能,springboot的四大神器之一,其借助@import的帮助
@ComponentScan(excludeFilters = {    // 扫描路径设置(具体使用待确认)
        @Filter(type = FilterType.CUSTOM, classes = TypeExcludeFilter.class),
        @Filter(type = FilterType.CUSTOM, classes = AutoConfigurationExcludeFilter.class) })
public @interface SpringBootApplication {
...
}
可以看出@SpringBootApplication使用了多个注解,其中最为重要的就是
- @Configuration 使用javaconfig方式进行配置,形式的Spring Ioc容器的配置类
- @EnableAutoConfiguration 比较重要的,这里不做解释了
- @ComponentScan 扫描注解,自动扫描并加载符合条件的组件
其实可以说,你可以使用@SpringBootApplication,你也可以使用以上三个注解都一样。
详细介绍https://www.cnblogs.com/shamo89/p/8184960.html
有个这些,你就可以简单的理解,启动一个springboot项目,会从启动类入口进去,通过@SpringBootApplication注解之后自动的去扫描加载一些javaconfig 配置,启动内置tomcat将项目运行起来。
3、springboot项目部署
我们以前在部署web项目的时候基本山都是打成war包放到tomcat的webapp下面,启动tomcat。这种方式不仅仅耗时耗力,还需要要求部署项目的服务器事先就要有能够部署的环境。有时候还需要手动修改tomcat配置文件。springboot就是极大的简化了项目的部署。我们只需要将项目打成jar包,然后放在只需要有jdk的服务器上,java -jar ***就能启动项目了。
那么问题来了,以往我们对于web项目都是war包的形式进行部署的,为啥springboot项目却能想启动java应用程序一样部署呢?
上面也已经说过了,springboot是内置tomcat了的,所以项目启动的时候回自动启动tomcat,但是我们都知道启动jar文件都是需要有主类(main),没错,它是就是我们的启动类,既然是主类,那肯定就会有启动弄类配置的吧,就是这个maven-shade-plugin,去找找看。
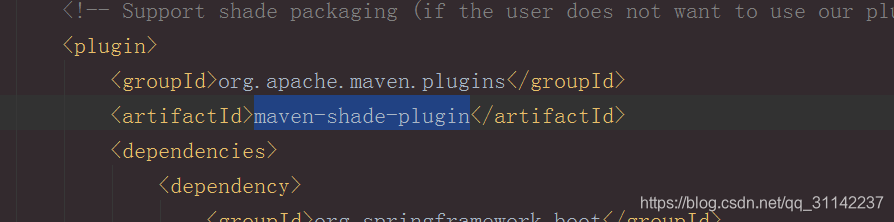
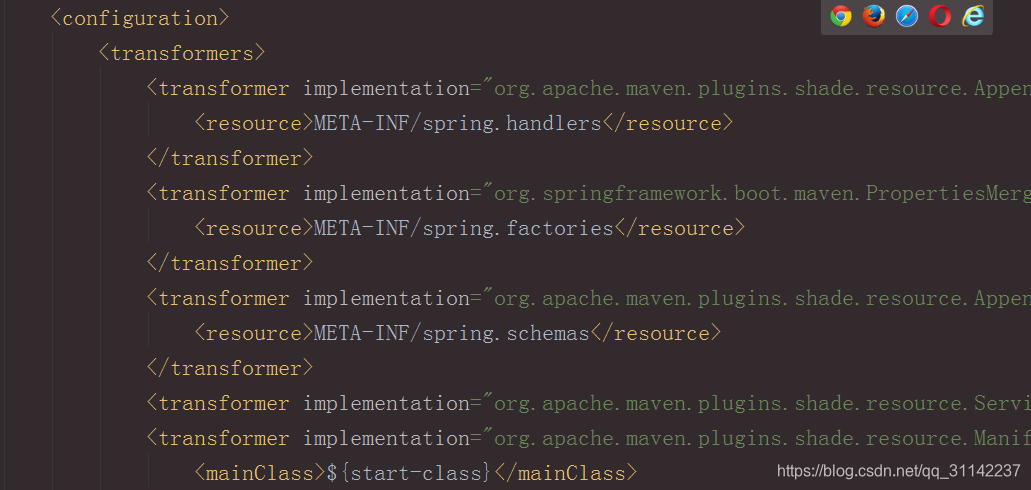
果然是有的,所以说现在问题都解决了,springboot通过maven插件配置了启动类,所以就可以java -jar的形式启动项目,启动类被启动之后就会扫描加载配置,启动内置的tomcat等,最后完成了项目的启动部署了。
4、@Configuration和@Bean的用法和理解
1、第一种自己写的类,Controller,Service。 用@controller @service即可
2、第二种,集成其它框架,比如集成shiro权限框架,集成mybatis分页插件PageHelper,第三方框架的核心类都要交于Spring大管家管理
@Configuration可理解为用spring的时候xml里面的<beans>标签
@Bean可理解为用spring的时候xml里面的<bean>标签
Spring Boot不是spring的加强版,所以@Configuration和@Bean同样可以用在普通的spring项目中,而不是Spring Boot特有的,只是在spring用的时候,注意加上扫包配置
<context:component-scan base-package="com.xxx.xxx" />,普通的spring项目好多注解都需要扫包,才有用,有时候自己注解用的挺6,但不起效果,就要注意这点。
Spring Boot则不需要,主要你保证你的启动Spring Boot main入口,在这些类的上层包就行。就像这样,DemoApplication是启动类,关于启动类的位置放置,在另一篇博客有专门的去分析。
package com.test.demo;

import org.springframework.context.annotation.Bean;
import org.springframework.context.annotation.Configuration;
import org.springframework.web.servlet.config.annotation.InterceptorRegistry;
import org.springframework.web.servlet.config.annotation.WebMvcConfigurerAdapter;

/**
 * 拦截器
 * <Description> <br>
 * @author lyfi<br>
 * @taskId <br>
 * @CreateDate 2018年07月27日 <br>
 */
@Configuration
public class TestConfiguration extends WebMvcConfigurerAdapter {


    /**
     * Description: <br>
     * @author shaokangwei<br>
     * @taskId <br>
     * @return <br>
     */
    @Bean
    WxAuthInterceptor getWxInterceptor() {
        return new WxAuthInterceptor();
    }


    /**
     * Description: 添加拦截器<br>
     *
     * @author lyf<br>
     * @taskId <br>
     * @param registry <br>
     */
    @Override
    public void addInterceptors(InterceptorRegistry registry) {

        //微信
        registry.addInterceptor(getWxInterceptor()).addPathPatterns("/wx/**");
    }
}
@Configuration和@Bean的Demo类
这样,在项目中
@Autowired
private DataSource dataSource;
时,这个dataSource就是我们在ExampleConfiguration中配的DataSource
附加资料:
从Spring3.0,@Configuration用于定义配置类,可替换xml配置文件,被注解的类内部包含有一个或多个被@Bean注解的方法,这些方法将会被AnnotationConfigApplicationContext或AnnotationConfigWebApplicationContext类进行扫描,并用于构建bean定义,初始化Spring容器。
注意:@Configuration注解的配置类有如下要求:
@Configuration不可以是final类型;
@Configuration不可以是匿名类;
嵌套的configuration必须是静态类。
@Configuation加载Spring方法
1.1、@Configuration配置spring并启动spring容器
@Configuration标注在类上,相当于把该类作为spring的xml配置文件中的<beans>,作用为:配置spring容器(应用上下文)
package com.dxz.demo.configuration;

import org.springframework.context.annotation.Configuration;

@Configuration
public class TestConfiguration {
    public TestConfiguration() {
        System.out.println("TestConfiguration容器启动初始化。。。");
    }
}
相当于:
<?xml version="1.0" encoding="UTF-8"?>
<beans xmlns="http://www.springframework.org/schema/beans" xmlns:xsi="http://www.w3.org/2001/XMLSchema-instance"
    xmlns:context="http://www.springframework.org/schema/context" xmlns:jdbc="http://www.springframework.org/schema/jdbc"
    xmlns:jee="http://www.springframework.org/schema/jee" xmlns:tx="http://www.springframework.org/schema/tx"
    xmlns:util="http://www.springframework.org/schema/util" xmlns:task="http://www.springframework.org/schema/task" xsi:schemaLocation="
        http://www.springframework.org/schema/beans http://www.springframework.org/schema/beans/spring-beans-4.0.xsd
        http://www.springframework.org/schema/context http://www.springframework.org/schema/context/spring-context-4.0.xsd
        http://www.springframework.org/schema/jdbc http://www.springframework.org/schema/jdbc/spring-jdbc-4.0.xsd
        http://www.springframework.org/schema/jee http://www.springframework.org/schema/jee/spring-jee-4.0.xsd
        http://www.springframework.org/schema/tx http://www.springframework.org/schema/tx/spring-tx-4.0.xsd
        http://www.springframework.org/schema/util http://www.springframework.org/schema/util/spring-util-4.0.xsd
        http://www.springframework.org/schema/task http://www.springframework.org/schema/task/spring-task-4.0.xsd" default-lazy-init="false">


</beans>
主方法进行测试:
package com.dxz.demo.configuration;

import org.springframework.context.ApplicationContext;
import org.springframework.context.annotation.AnnotationConfigApplicationContext;

public class TestMain {
    public static void main(String[] args) {

        // @Configuration注解的spring容器加载方式,用AnnotationConfigApplicationContext替换ClassPathXmlApplicationContext
        ApplicationContext context = new AnnotationConfigApplicationContext(TestConfiguration.class);

        // 如果加载spring-context.xml文件:
        // ApplicationContext context = new
        // ClassPathXmlApplicationContext("spring-context.xml");
    }
}
从运行主方法结果可以看出,spring容器已经启动了:

1.2、@Configuration启动容器+@Bean注册Bean,@Bean下管理bean的生命周期
@Bean标注在方法上(返回某个实例的方法),等价于spring的xml配置文件中的<bean>,作用为:注册bean对象
bean类:
package com.dxz.demo.configuration;

public class TestBean {

    private String username;
    private String url;
    private String password;

    public void sayHello() {
        System.out.println("TestBean sayHello...");
    }

    public String toString() {
        return "username:" + this.username + ",url:" + this.url + ",password:" + this.password;
    }

    public void start() {
        System.out.println("TestBean 初始化。。。");
    }

    public void cleanUp() {
        System.out.println("TestBean 销毁。。。");
    }
}
配置类:
package com.dxz.demo.configuration;

import org.springframework.context.annotation.Bean;
import org.springframework.context.annotation.Configuration;
import org.springframework.context.annotation.Scope;

@Configuration
public class TestConfiguration {
    public TestConfiguration() {
        System.out.println("TestConfiguration容器启动初始化。。。");
    }

    // @Bean注解注册bean,同时可以指定初始化和销毁方法
    // @Bean(name="testBean",initMethod="start",destroyMethod="cleanUp")
    @Bean
    @Scope("prototype")
    public TestBean testBean() {
        return new TestBean();
    }
}
主方法测试类:
package com.dxz.demo.configuration;

import org.springframework.context.ApplicationContext;
import org.springframework.context.annotation.AnnotationConfigApplicationContext;

public class TestMain {
    public static void main(String[] args) {

        // @Configuration注解的spring容器加载方式,用AnnotationConfigApplicationContext替换ClassPathXmlApplicationContext
        ApplicationContext context = new AnnotationConfigApplicationContext(TestConfiguration.class);

        // 如果加载spring-context.xml文件:
        // ApplicationContext context = new
        // ClassPathXmlApplicationContext("spring-context.xml");

         //获取bean
        TestBean tb = (TestBean) context.getBean("testBean");
        tb.sayHello();
    }
}
结果:
注:
(1)、@Bean注解在返回实例的方法上,如果未通过@Bean指定bean的名称,则默认与标注的方法名相同;
(2)、@Bean注解默认作用域为单例singleton作用域,可通过@Scope(“prototype”)设置为原型作用域;
(3)、既然@Bean的作用是注册bean对象,那么完全可以使用@Component、@Controller、@Service、@Ripository等注解注册bean,当然需要配置@ComponentScan注解进行自动扫描。
@Bean下管理bean的生命周期
可以使用基于 Java 的配置来管理 bean 的生命周期。@Bean 支持两种属性,即 initMethod 和destroyMethod,这些属性可用于定义生命周期方法。在实例化 bean 或即将销毁它时,容器便可调用生命周期方法。生命周期方法也称为回调方法,因为它将由容器调用。使用 @Bean 注释注册的 bean 也支持 JSR-250 规定的标准 @PostConstruct 和 @PreDestroy 注释。如果您正在使用 XML 方法来定义 bean,那么就应该使用 bean 元素来定义生命周期回调方法。以下代码显示了在 XML 配置中通常使用 bean 元素定义回调的方法。
@Configuration
@ComponentScan(basePackages = "com.dxz.demo.configuration")
public class TestConfiguration {
    public TestConfiguration() {
        System.out.println("TestConfiguration容器启动初始化。。。");
    }

    //@Bean注解注册bean,同时可以指定初始化和销毁方法
    @Bean(name="testBean",initMethod="start",destroyMethod="cleanUp")
    @Scope("prototype")
    public TestBean testBean() {
        return new TestBean();
    }
}
启动类:
public class TestMain {
    public static void main(String[] args) {

        ApplicationContext context = new AnnotationConfigApplicationContext(TestConfiguration.class);

        TestBean tb = (TestBean) context.getBean("testBean");
        tb.sayHello();
        System.out.println(tb);

        TestBean tb2 = (TestBean) context.getBean("testBean");
        tb2.sayHello();
        System.out.println(tb2);
    }
}
结果:

分析:
结果中的1:表明initMethod生效
结果中的2:表明@Scope("prototype")生效
1.3、@Configuration启动容器+@Component注册Bean
bean类:
package com.dxz.demo.configuration;

import org.springframework.stereotype.Component;

//添加注册bean的注解
@Component
public class TestBean {

    private String username;
    private String url;
    private String password;

    public void sayHello() {
        System.out.println("TestBean sayHello...");
    }

    public String toString() {
        return "username:" + this.username + ",url:" + this.url + ",password:" + this.password;
    }

    public void start() {
        System.out.println("TestBean 初始化。。。");
    }

    public void cleanUp() {
        System.out.println("TestBean 销毁。。。");
    }
}
配置类:
package com.dxz.demo.configuration;

import org.springframework.context.annotation.Bean;
import org.springframework.context.annotation.ComponentScan;
import org.springframework.context.annotation.Configuration;
import org.springframework.context.annotation.Scope;

@Configuration
//添加自动扫描注解,basePackages为TestBean包路径
@ComponentScan(basePackages = "com.dxz.demo.configuration")
public class TestConfiguration {
    public TestConfiguration() {
        System.out.println("TestConfiguration容器启动初始化。。。");
    }

    /*// @Bean注解注册bean,同时可以指定初始化和销毁方法
    // @Bean(name="testNean",initMethod="start",destroyMethod="cleanUp")
    @Bean
    @Scope("prototype")
    public TestBean testBean() {
        return new TestBean();
    }*/
}
主方法测试获取bean对象:
package com.dxz.demo.configuration;

import org.springframework.context.ApplicationContext;
import org.springframework.context.annotation.AnnotationConfigApplicationContext;

public class TestMain {
    public static void main(String[] args) {

        // @Configuration注解的spring容器加载方式,用AnnotationConfigApplicationContext替换ClassPathXmlApplicationContext
        ApplicationContext context = new AnnotationConfigApplicationContext(TestConfiguration.class);

        // 如果加载spring-context.xml文件:
        // ApplicationContext context = new
        // ClassPathXmlApplicationContext("spring-context.xml");

         //获取bean
        TestBean tb = (TestBean) context.getBean("testBean");
        tb.sayHello();
    }
}
sayHello()方法都被正常调用。

1.4、@Configuation总结
@Configuation等价于<Beans></Beans>
@Bean等价于<Bean></Bean>
@ComponentScan等价于<context:component-scan base-package="com.dxz.demo"/>


 2316
2316


 被折叠的 条评论
为什么被折叠?
被折叠的 条评论
为什么被折叠?
 到【灌水乐园】发言


