


环境:python3.7、PyQt5.11.3、OpenCV-python4.0.0.21、Pycharm 2018.2.2
1.通过PyQt与OpenCV显示图片
import sys
import cv2
import numpy as np
from PyQt5.QtGui import QImage, QPixmap
from PyQt5.QtWidgets import QApplication, QDialog, QFileDialog, QGridLayout, QLabel, QPushButton


class win(QDialog):
    def __init__(self):
        # 初始化一个img的ndarry,用于存储图像
        self.img = np.ndarray(())
        super().__init__()
        self.initUI()

    def initUI(self):
        self.resize(400, 300)
        self.btnOpen = QPushButton('Open', self)
        self.btnSave = QPushButton('Save', self)
        self.btnProcess = QPushButton('Process', self)
        self.btnQuit = QPushButton('Quit', self)
        self.label = QLabel()

        # 布局设定
        layout = QGridLayout(self)
        layout.addWidget(self.label, 0, 1, 3, 4)
        layout.addWidget(self.btnOpen, 4, 1, 1, 1)
        layout.addWidget(self.btnSave, 4, 2, 1, 1)
        layout.addWidget(self.btnProcess, 4, 3, 1, 1)
        layout.addWidget(self.btnQuit, 4, 4, 1, 1)

        # 信号与槽进行连接,信号可绑定普通成员函数
        self.btnOpen.clicked.connect(self.openSlot)
        self.btnSave.clicked.connect(self.saveSlot)
        self.btnProcess.clicked.connect(self.processSlot)
        self.btnQuit.clicked.connect(self.close)

    def openSlot(self):
        # 调用存储文件
        fileName, tmp = QFileDialog.getOpenFileName(self, 'Open Image', 'Image', '*.png *.jpg *.bmp')
        if fileName is '':
            return
        # 采用OpenCV函数读取数据
        self.img = cv2.imread(fileName, -1)
        if self.img.size == 1:
            return
        self.refreshShow()

    def saveSlot(self):
        # 调用存储文件dialog
        fileName, tmp = QFileDialog.getSaveFileName(self, 'Save Image', 'Image', '*.png *.jpg *.bmp')
        if fileName is '':
            return
        if self.img.size == 1:
            return
        # 调用OpenCV写入函数
        cv2.imwrite(fileName, self.img)

    def processSlot(self):
        if self.img.size == 1:
            return
        # 对图像做模糊处理,窗口设定为5*5
        self.img = cv2.blur(self.img, (5, 5))
        self.refreshShow()

    def refreshShow(self):
        # 提取图像的通道和尺寸,用于将OpenCV下的image转换成Qimage
        height, width, channel = self.img.shape
        bytesPerline = 3 * width
        self.qImg = QImage(self.img.data, width, height, bytesPerline, QImage.Format_RGB888).rgbSwapped()
        # 将QImage显示出来
        self.label.setPixmap(QPixmap.fromImage(self.qImg))


if __name__ == '__main__':
    a = QApplication(sys.argv)
    w = win()
    w.show()
    sys.exit(a.exec_())
显示效果如图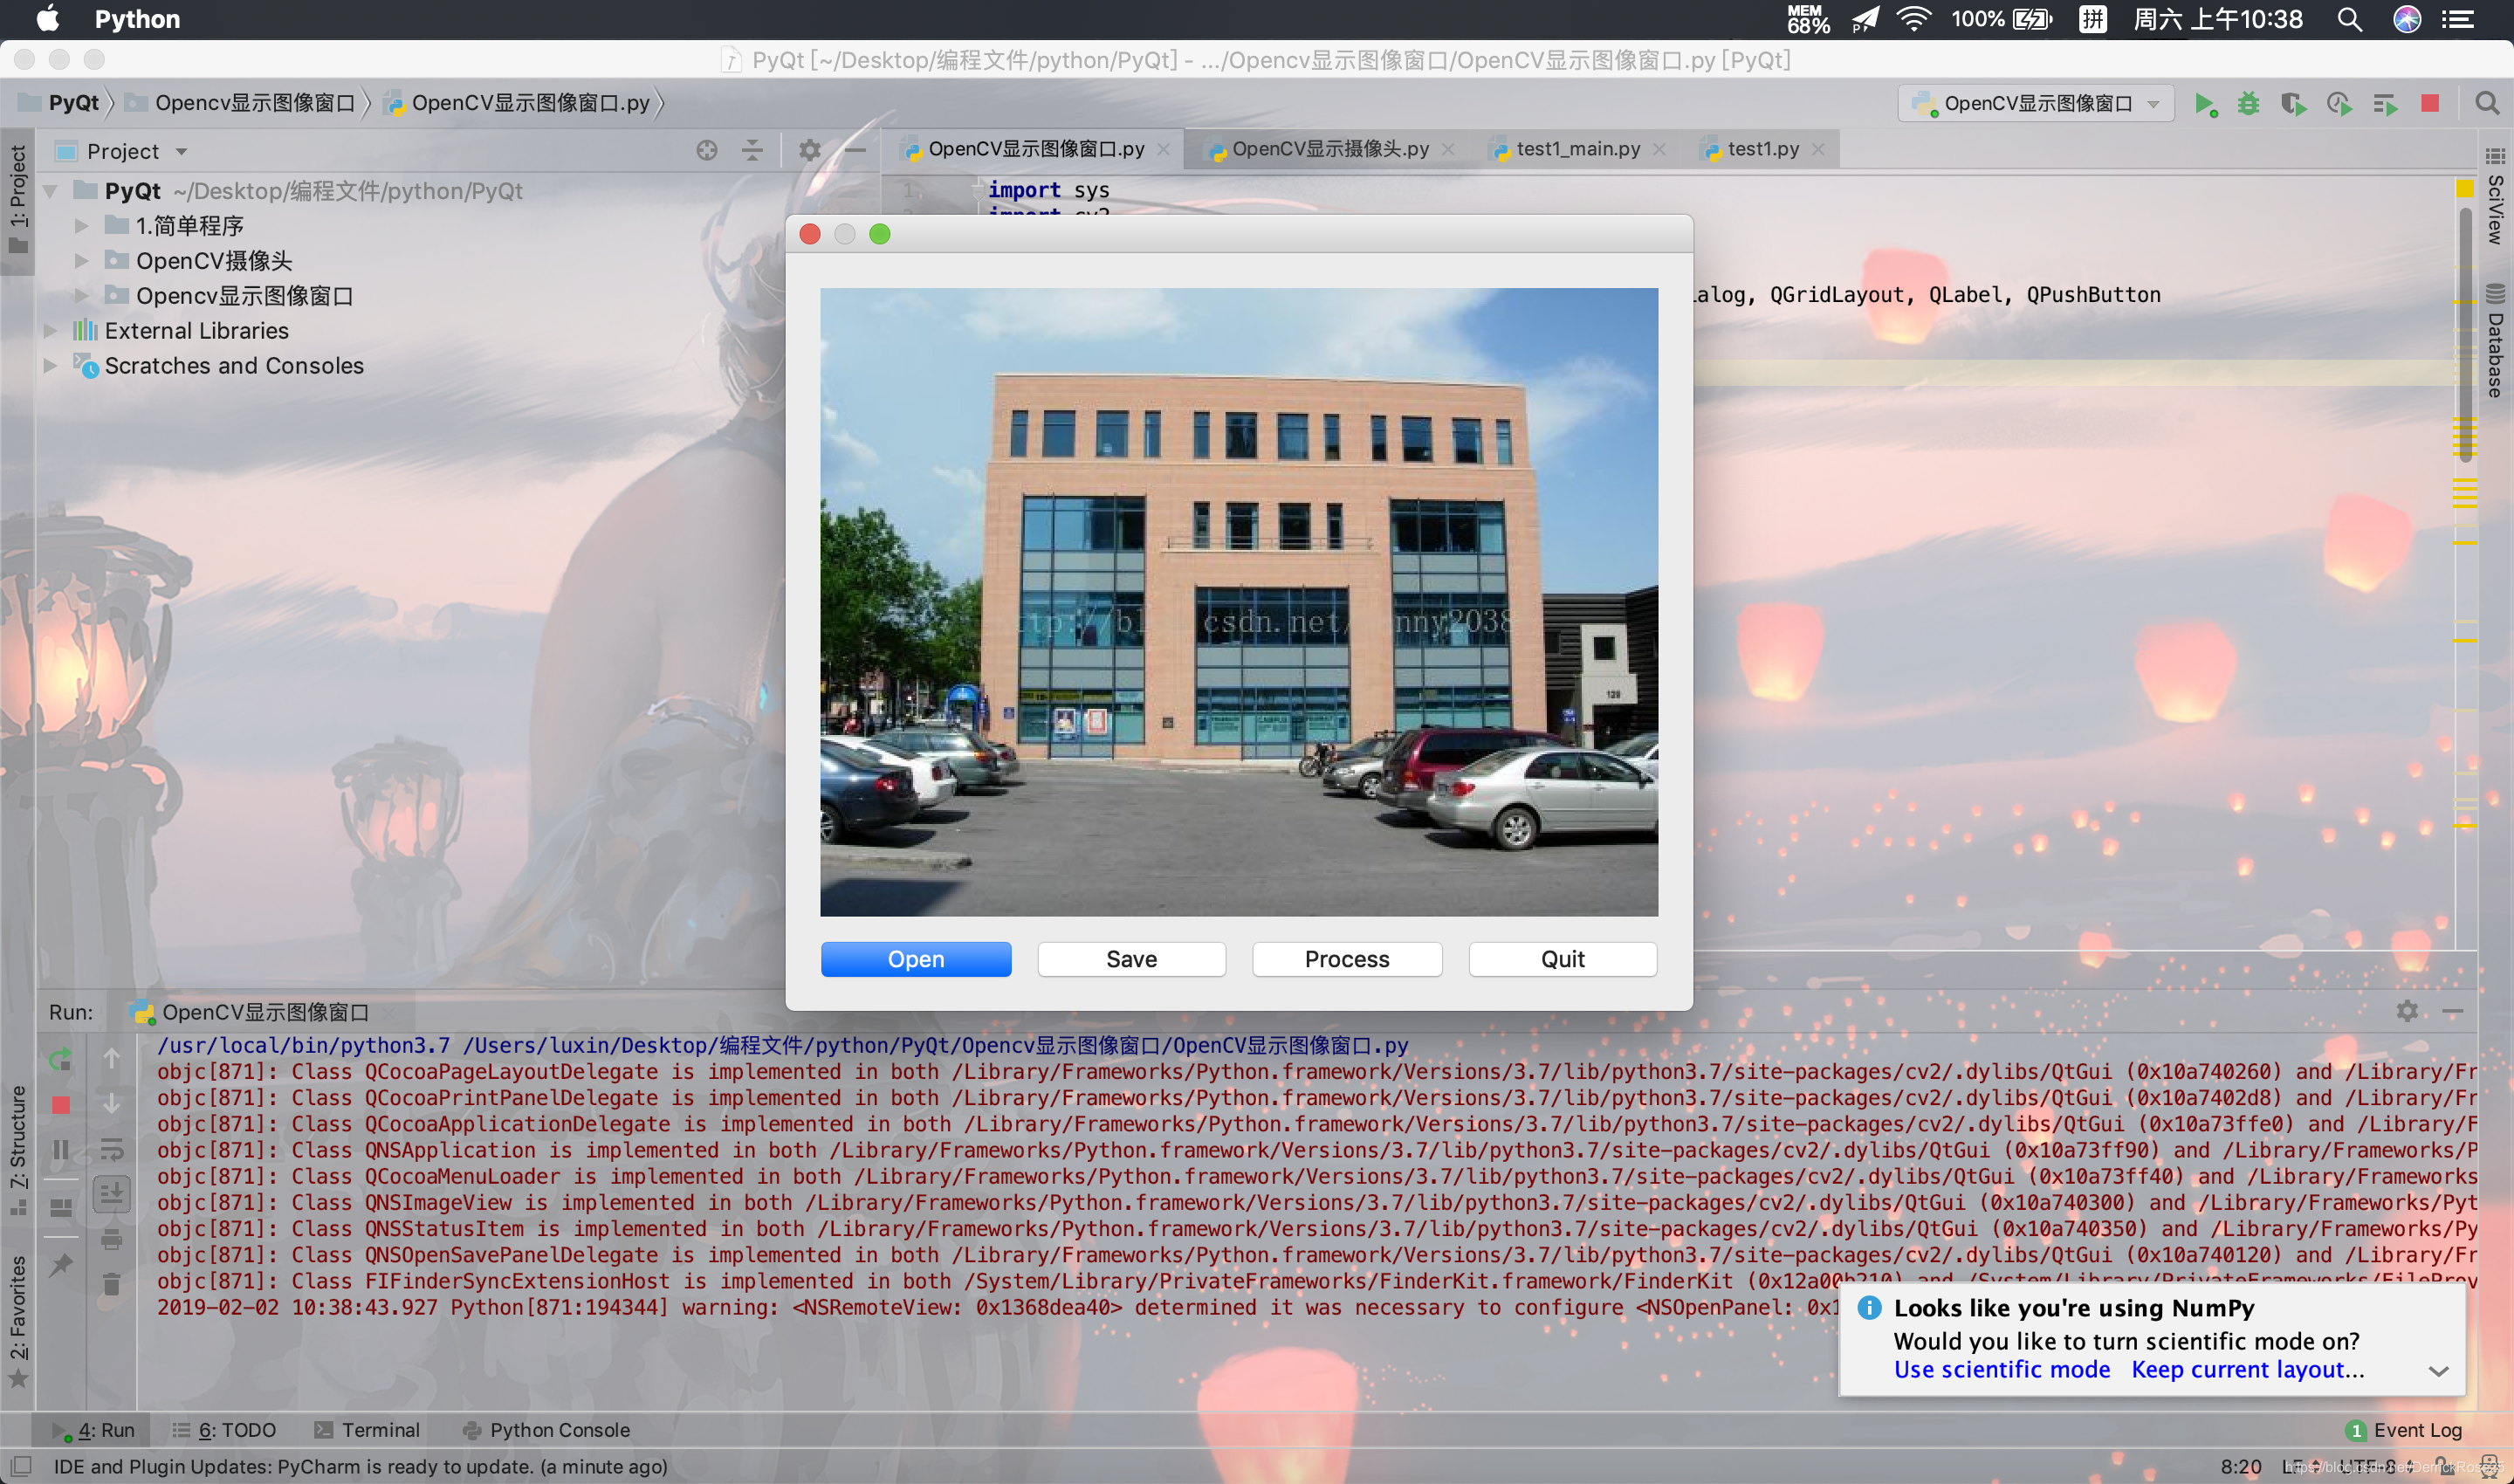
点击open打开设置目录文件夹下,save进行保存,process进行平滑滤波,quit退出
2.通过PyQt和OpenCV显示摄像头视频
先写个简单版,参照这位博主写的
https://blog.csdn.net/oscar_liu/article/details/81210301
但是只能显示摄像头的视频,没有更多的控制功能,会在上面进行修改
import cv2
import numpy as np
import sys
from PyQt5.QtGui import *
from PyQt5.QtCore import *
from PyQt5.QtWidgets import *


class Video():
    def __init__(self, capture):
        self.capture = capture
        self.currentFrame = np.array([])

    def captureFrame(self):
        ret, readFrame = self.capture.read()
        return readFrame

    def captureNextFrame(self):
        ret, readFrame = self.capture.read()
        if (ret == True):
            self.currentFrame = cv2.cvtColor(readFrame, cv2.COLOR_BGR2RGB)

    def convertFrame(self):
        try:
            height, width = self.currentFrame.shape[:2]
            img = QImage(self.currentFrame, width, height, QImage.Format_RGB888)
            img = QPixmap.fromImage(img)
            self.previousFrame = self.currentFrame
            return img
        except:
            return None


class win(QMainWindow):
    def __init__(self, parent=None):
        super().__init__()
        self.setGeometry(250, 80, 800, 600)  # 从屏幕(250,80)开始建立一个800*600的界面
        self.setWindowTitle('camera')
        self.video = Video(cv2.VideoCapture(0))
        self._timer = QTimer(self)
        self._timer.timeout.connect(self.play)
        self._timer.start(27)
        self.update()
        self.videoFrame = QLabel('VideoCapture')
        self.videoFrame.setAlignment(Qt.AlignCenter)
        self.setCentralWidget(self.videoFrame)
        self.ret, self.capturedFrame = self.video.capture.read()

    def play(self):
        try:
            self.video.captureNextFrame()
            self.videoFrame.setPixmap(self.video.convertFrame())
            self.videoFrame.setScaledContents(True)
        except TypeError:
            print('No Frame')


if __name__ == '__main__':
    app = QApplication(sys.argv)
    win = win()
    win.show()
    sys.exit(app.exec_())
加了控件之后的代码:
import sys
import os
import cv2

from PyQt5 import QtCore, QtGui, QtWidgets
from PyQt5.QtWidgets import *
from PyQt5.QtCore import *
from PyQt5.QtGui import QPalette, QBrush, QPixmap


class Ui_MainWindow(QtWidgets.QWidget):
    def __init__(self, parent=None):
        super(Ui_MainWindow, self).__init__(parent)

        self.timer_camera = QtCore.QTimer()  # 初始化定时器
        self.cap = cv2.VideoCapture()  # 初始化摄像头
        self.CAM_NUM = 0
        self.set_ui()
        self.slot_init()
        self.__flag_work = 0
        self.x = 0
        self.count = 0

    def set_ui(self):
        self.__layout_main = QtWidgets.QHBoxLayout()  # 采用QHBoxLayout类,按照从左到右的顺序来添加控件
        self.__layout_fun_button = QtWidgets.QHBoxLayout()
        self.__layout_data_show = QtWidgets.QVBoxLayout()  # QVBoxLayout类垂直地摆放小部件

        self.button_open_camera = QtWidgets.QPushButton(u'打开相机')
        self.button_close = QtWidgets.QPushButton(u'退出')

        # button颜色修改
        button_color = [self.button_open_camera, self.button_close]
        for i in range(2):
            button_color[i].setStyleSheet("QPushButton{color:black}"
                                           "QPushButton:hover{color:red}"
                                           "QPushButton{background-color:rgb(78,255,255)}"
                                           "QpushButton{border:2px}"
                                           "QPushButton{border_radius:10px}"
                                           "QPushButton{padding:2px 4px}")

        self.button_open_camera.setMinimumHeight(50)
        self.button_close.setMinimumHeight(50)

        # move()方法是移动窗口在屏幕上的位置到x = 500,y = 500的位置上
        self.move(500, 500)

        # 信息显示
        self.label_show_camera = QtWidgets.QLabel()
        self.label_move = QtWidgets.QLabel()
        self.label_move.setFixedSize(100, 100)

        self.label_show_camera.setFixedSize(641, 481)
        self.label_show_camera.setAutoFillBackground(False)

        self.__layout_fun_button.addWidget(self.button_open_camera)
        self.__layout_fun_button.addWidget(self.button_close)
        self.__layout_fun_button.addWidget(self.label_move)

        self.__layout_main.addLayout(self.__layout_fun_button)
        self.__layout_main.addWidget(self.label_show_camera)

        self.setLayout(self.__layout_main)
        self.label_move.raise_()
        self.setWindowTitle(u'摄像头')

        '''
        # 设置背景颜色
        palette1 = QPalette()
        palette1.setBrush(self.backgroundRole(),QBrush(QPixmap('background.jpg')))
        self.setPalette(palette1)
        '''

    def slot_init(self):  # 建立通信连接
        self.button_open_camera.clicked.connect(self.button_open_camera_click)
        self.timer_camera.timeout.connect(self.show_camera)
        self.button_close.clicked.connect(self.close)

    def button_open_camera_click(self):
        if self.timer_camera.isActive() == False:
            flag = self.cap.open(self.CAM_NUM)
            if flag == False:
                msg = QtWidgets.QMessageBox.Warning(self, u'Warning', u'请检测相机与电脑是否连接正确',
                                                    buttons=QtWidgets.QMessageBox.Ok,
                                                    defaultButton=QtWidgets.QMessageBox.Ok)
                # if msg==QtGui.QMessageBox.Cancel:
                #                     pass
            else:
                self.timer_camera.start(30)
                self.button_open_camera.setText(u'关闭相机')
        else:
            self.timer_camera.stop()
            self.cap.release()
            self.label_show_camera.clear()
            self.button_open_camera.setText(u'打开相机')

    def show_camera(self):
        flag, self.image = self.cap.read()
        show = cv2.resize(self.image, (640, 480))
        show = cv2.cvtColor(show, cv2.COLOR_BGR2RGB)
        showImage = QtGui.QImage(show.data, show.shape[1], show.shape[0], QtGui.QImage.Format_RGB888)
        self.label_show_camera.setPixmap(QtGui.QPixmap.fromImage(showImage))

    def closeEvent(self, event):
        ok = QtWidgets.QPushButton()
        cancel = QtWidgets.QPushButton()
        msg = QtWidgets.QMessageBox(QtWidgets.QMessageBox.Warning, u'关闭', u'是否关闭!')
        msg.addButton(ok, QtWidgets.QMessageBox.ActionRole)
        msg.addButton(cancel, QtWidgets.QMessageBox.RejectRole)
        ok.setText(u'确定')
        cancel.setText(u'取消')
        if msg.exec_() == QtWidgets.QMessageBox.RejectRole:
            event.ignore()
        else:
            if self.cap.isOpened():
                self.cap.release()
            if self.timer_camera.isActive():
                self.timer_camera.stop()
            event.accept()


if __name__ == '__main__':
    App = QApplication(sys.argv)
    win = Ui_MainWindow()
    win.show()
    sys.exit(App.exec_())


 2万+
2万+


 被折叠的 条评论
为什么被折叠?
被折叠的 条评论
为什么被折叠?
 到【灌水乐园】发言


