


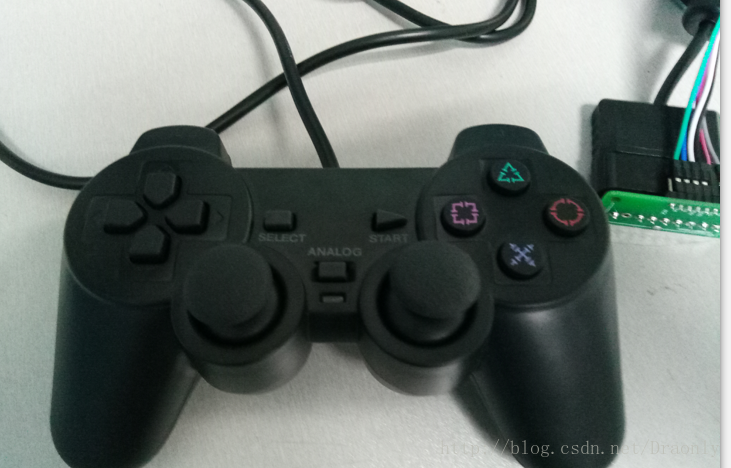
使用手柄遥控小车是经常要用到的,看到PS2手柄很6,就拿来尝试一下。
PS2手柄是索尼的PlayStation2游戏机的遥控手柄,因为这款手柄性价比较高,按键丰富,方便扩展到其它应用中,后来有人将其通讯协议破解,使得手柄可以用在遥控其他电器上,比如遥控控制机器人小车。
最主要的是这款手柄,拿来就可以用,有人已经将其通讯协议破解了。
具体可以参考极客工坊。 其PS2X_lib库,可以参见Github.
这种摇杆有无线的和有线的,都是连接到Arduino上,我用的是有线的。
1. 手柄测试
将库文件放入Arduino IDE的安装的libaries文件夹中。 然后可以使用其中的example 例程测试一下。
程序如下:
#include <PS2X_lib.h>  //for v1.6

/******************************************************************
 * set pins connected to PS2 controller:
 *   - 1e column: original
 *   - 2e colmun: Stef?
 * replace pin numbers by the ones you use
 ******************************************************************/
#define PS2_DAT        13  //14
#define PS2_CMD        11  //15
#define PS2_SEL        10  //16
#define PS2_CLK        12  //17

/******************************************************************
 * select modes of PS2 controller:
 *   - pressures = analog reading of push-butttons
 *   - rumble    = motor rumbling
 * uncomment 1 of the lines for each mode selection
 ******************************************************************/
//#define pressures   true
#define pressures   false
//#define rumble      true
#define rumble      false

PS2X ps2x; // create PS2 Controller Class

//right now, the library does NOT support hot pluggable controllers, meaning
//you must always either restart your Arduino after you connect the controller,
//or call config_gamepad(pins) again after connecting the controller.

int error = 0;
byte type = 0;
byte vibrate = 0;

// Reset func
void (* resetFunc) (void) = 0;

void setup(){

  Serial.begin(115200);

  delay(500);  //added delay to give wireless ps2 module some time to startup, before configuring it

  //CHANGES for v1.6 HERE!!! **************PAY ATTENTION*************

  //setup pins and settings: GamePad(clock, command, attention, data, Pressures?, Rumble?) check for error
  error = ps2x.config_gamepad(PS2_CLK, PS2_CMD, PS2_SEL, PS2_DAT, pressures, rumble);

  if(error == 0){
    Serial.print("Found Controller, configured successful ");
    Serial.print("pressures = ");
    if (pressures)
      Serial.println("true ");
    else
      Serial.println("false");
    Serial.print("rumble = ");
    if (rumble)
      Serial.println("true)");
    else
      Serial.println("false");
    Serial.println("Try out all the buttons, X will vibrate the controller, faster as you press harder;");
    Serial.println("holding L1 or R1 will print out the analog stick values.");
    Serial.println("Note: Go to www.billporter.info for updates and to report bugs.");
  }
  else if(error == 1)
    Serial.println("No controller found, check wiring, see readme.txt to enable debug. visit www.billporter.info for troubleshooting tips");

  else if(error == 2)
    Serial.println("Controller found but not accepting commands. see readme.txt to enable debug. Visit www.billporter.info for troubleshooting tips");

  else if(error == 3)
    Serial.println("Controller refusing to enter Pressures mode, may not support it. ");

  type = ps2x.readType();
  switch(type) {
    case 0:
      Serial.println("Unknown Controller type found ");
      break;
    case 1:
      Serial.println("DualShock Controller found ");
      break;
    case 2:
      Serial.println("GuitarHero Controller found ");
      break;
    case 3:
      Serial.println("Wireless Sony DualShock Controller found ");
      break;
   }
}

void loop() {
  /* You must Read Gamepad to get new values and set vibration values
     ps2x.read_gamepad(small motor on/off, larger motor strenght from 0-255)
     if you don't enable the rumble, use ps2x.read_gamepad(); with no values
     You should call this at least once a second
   */
  if(error == 1){ //skip loop if no controller found
    resetFunc();
  }

  if(type == 2){ //Guitar Hero Controller
    ps2x.read_gamepad();          //read controller

    if(ps2x.ButtonPressed(GREEN_FRET))
      Serial.println("Green Fret Pressed");
    if(ps2x.ButtonPressed(RED_FRET))
      Serial.println("Red Fret Pressed");
    if(ps2x.ButtonPressed(YELLOW_FRET))
      Serial.println("Yellow Fret Pressed");
    if(ps2x.ButtonPressed(BLUE_FRET))
      Serial.println("Blue Fret Pressed");
    if(ps2x.ButtonPressed(ORANGE_FRET))
      Serial.println("Orange Fret Pressed");

    if(ps2x.ButtonPressed(STAR_POWER))
      Serial.println("Star Power Command");

    if(ps2x.Button(UP_STRUM))          //will be TRUE as long as button is pressed
      Serial.println("Up Strum");
    if(ps2x.Button(DOWN_STRUM))
      Serial.println("DOWN Strum");

    if(ps2x.Button(PSB_START))         //will be TRUE as long as button is pressed
      Serial.println("Start is being held");
    if(ps2x.Button(PSB_SELECT))
      Serial.println("Select is being held");

    if(ps2x.Button(ORANGE_FRET)) {     // print stick value IF TRUE
      Serial.print("Wammy Bar Position:");
      Serial.println(ps2x.Analog(WHAMMY_BAR), DEC);
    }
  }
  else { //DualShock Controller
    ps2x.read_gamepad(false, vibrate); //read controller and set large motor to spin at 'vibrate' speed

    if(ps2x.Button(PSB_START))         //will be TRUE as long as button is pressed
      Serial.println("Start is being held");
    if(ps2x.Button(PSB_SELECT))
      Serial.println("Select is being held");

    if(ps2x.Button(PSB_PAD_UP)) {      //will be TRUE as long as button is pressed
      Serial.print("Up held this hard: ");
      Serial.println(ps2x.Analog(PSAB_PAD_UP), DEC);
    }
    if(ps2x.Button(PSB_PAD_RIGHT)){
      Serial.print("Right held this hard: ");
      Serial.println(ps2x.Analog(PSAB_PAD_RIGHT), DEC);
    }
    if(ps2x.Button(PSB_PAD_LEFT)){
      Serial.print("LEFT held this hard: ");
      Serial.println(ps2x.Analog(PSAB_PAD_LEFT), DEC);
    }
    if(ps2x.Button(PSB_PAD_DOWN)){
      Serial.print("DOWN held this hard: ");
      Serial.println(ps2x.Analog(PSAB_PAD_DOWN), DEC);
    }

    vibrate = ps2x.Analog(PSAB_CROSS);  //this will set the large motor vibrate speed based on how hard you press the blue (X) button
    if (ps2x.NewButtonState()) {        //will be TRUE if any button changes state (on to off, or off to on)
      if(ps2x.Button(PSB_L3))
        Serial.println("L3 pressed");
      if(ps2x.Button(PSB_R3))
        Serial.println("R3 pressed");
      if(ps2x.Button(PSB_L2))
        Serial.println("L2 pressed");
      if(ps2x.Button(PSB_R2))
        Serial.println("R2 pressed");
      if(ps2x.Button(PSB_TRIANGLE))
        Serial.println("Triangle pressed");
    }

    if(ps2x.ButtonPressed(PSB_CIRCLE))               //will be TRUE if button was JUST pressed
      Serial.println("Circle just pressed");
    if(ps2x.NewButtonState(PSB_CROSS))               //will be TRUE if button was JUST pressed OR released
      Serial.println("X just changed");
    if(ps2x.ButtonReleased(PSB_SQUARE))              //will be TRUE if button was JUST released
      Serial.println("Square just released");

    if(ps2x.Button(PSB_L1) || ps2x.Button(PSB_R1)) { //print stick values if either is TRUE
      Serial.print("Stick Values:");
      Serial.print(ps2x.Analog(PSS_LY), DEC); //Left stick, Y axis. Other options: LX, RY, RX
      Serial.print(",");
      Serial.print(ps2x.Analog(PSS_LX), DEC);
      Serial.print(",");
      Serial.print(ps2x.Analog(PSS_RY), DEC);
      Serial.print(",");
      Serial.println(ps2x.Analog(PSS_RX), DEC);
    }
  }
  delay(50);
}
在IDE中编译后下载到Arduino中,打开串口监视器,如果顺利,会看到显示下列提示:
如果提示未发现控制器,那就需要检查自己的连线等是不是有问题了,我在用的时候,因为杜邦线的问题,一直提示找不到控制器,我还怀疑是不是买的手柄有问题,又拿Stm32的板子来测试,折腾了半天竟然是线的问题。
连接后,按下手柄上的各个键都会有相应提示,可以看出哪个按键定义的什么名字。
在上述代码中,左边的四个按键只是显示按键按下,不会根据力的大小输出相应数值的,如果想要,就需要修改下列代码:
上述程序第20行到23行将注释调换一下条改为:
#define pressures   true
//#define pressures   false
#define rumble      true
//#define rumble      false
这样就可以实现通过按左侧”上下左右“按键的力度,输出不同的模拟值。
2. 小车电机控制
电机:有刷直流电机
驱动器:L298n逻辑
控制器:Arduino Mega2560
程序功能实现:
- 按下START键,开始前进;
- 通过按PS2手柄左边的“上下左右”键实现前进 、后退、左转、右转。
- 按SELECT键停止;
#include <PS2X_lib.h>  //for v1.6

/******************************************************************
 * set pins connected to PS2 controller:
 *   - 1e column: original
 *   - 2e colmun: Stef?
 * replace pin numbers by the ones you use
 ******************************************************************/
//PS2手柄引脚;
#define PS2_DAT        13  //14
#define PS2_CMD        11  //15
#define PS2_SEL        10  //16
#define PS2_CLK        12  //17

// 电机控制引脚;
#define IN1 4
#define IN2 5
#define IN3 6
#define IN4 7

 //PWM控制引脚;
  int speedPinA = 8;
  int speedPinB = 9;

int speed;

/******************************************************************
 * select modes of PS2 controller:
 *   - pressures = analog reading of push-butttons
 *   - rumble    = motor rumbling
 * uncomment 1 of the lines for each mode selection
 ******************************************************************/
#define pressures   true
//#define pressures   false
#define rumble      true
//#define rumble      false

PS2X ps2x; // create PS2 Controller Class

//right now, the library does NOT support hot pluggable controllers, meaning
//you must always either restart your Arduino after you connect the controller,
//or call config_gamepad(pins) again after connecting the controller.

int error = 0;
byte type = 0;
byte vibrate = 0;

 void setup(){

   pinMode(IN1, OUTPUT);
   pinMode(IN2, OUTPUT);
   pinMode(IN3, OUTPUT);
   pinMode(IN4, OUTPUT);

   speed =200;

   Serial.begin(57600);
   delay(300) ; //added delay to give wireless ps2 module some time to startup, before configuring it
   //CHANGES for v1.6 HERE!!! **************PAY ATTENTION*************

  //setup pins and settings: GamePad(clock, command, attention, data, Pressures?, Rumble?) check for error
  error = ps2x.config_gamepad(PS2_CLK, PS2_CMD, PS2_SEL, PS2_DAT, pressures, rumble);

  if(error == 0){
    Serial.print("Found Controller, configured successful ");
    Serial.print("pressures = ");
  if (pressures)
    Serial.println("true ");
  else
    Serial.println("false");
  Serial.print("rumble = ");
  if (rumble)
    Serial.println("true)");
  else
    Serial.println("false");
    Serial.println("Try out all the buttons, X will vibrate the controller, faster as you press harder;");
    Serial.println("holding L1 or R1 will print out the analog stick values.");
    Serial.println("Note: Go to www.billporter.info for updates and to report bugs.");
  }
  else if(error == 1)
    Serial.println("No controller found, check wiring, see readme.txt to enable debug. visit www.billporter.info for troubleshooting tips");

  else if(error == 2)
    Serial.println("Controller found but not accepting commands. see readme.txt to enable debug. Visit www.billporter.info for troubleshooting tips");

  else if(error == 3)
    Serial.println("Controller refusing to enter Pressures mode, may not support it. ");

 //  Serial.print(ps2x.Analog(1), HEX);

  type = ps2x.readType();
  switch(type) {
    case 0:
      Serial.print("Unknown Controller type found ");
      break;
    case 1:
      Serial.print("DualShock Controller found ");
      break;
    case 2:
      Serial.print("GuitarHero Controller found ");
      break;
  case 3:
      Serial.print("Wireless Sony DualShock Controller found ");
      break;
   }
}

 void turnLeft(){
   digitalWrite(IN1,HIGH);
   digitalWrite(IN2, LOW);
   digitalWrite(IN3, LOW);
   digitalWrite(IN4,HIGH);
}
 void turnRight(){
  digitalWrite(IN1, LOW);
  digitalWrite(IN2, LOW);
  digitalWrite(IN3, HIGH);
  digitalWrite(IN4, LOW);
}

 void forward(){
  digitalWrite(IN1, HIGH);
  digitalWrite(IN2, LOW);
  digitalWrite(IN3, HIGH);
  digitalWrite(IN4, LOW);
}

 void back(){
  digitalWrite(IN1, LOW);
  digitalWrite(IN2, HIGH);
  digitalWrite(IN3, LOW);
  digitalWrite(IN4, HIGH);
}

 void loop(){
   /* You must Read Gamepad to get new values and set vibration values
     ps2x.read_gamepad(small motor on/off, larger motor strenght from 0-255)
     if you don't enable the rumble, use ps2x.read_gamepad(); with no values
     You should call this at least once a second
   */
  if(error == 1) //skip loop if no controller found
    return;

  if(type == 2) {//Guitar Hero Controller
  return;
  }
  else  { //DualShock Controller
    ps2x.read_gamepad(false, vibrate); //read controller and set large motor to spin at 'vibrate' speed


//start 开始运行,电机初PWM为120;
    if(ps2x.Button(PSB_START))  {
       Serial.println("Start is being held");
       speed = 120;
       analogWrite(speedPinA, speed);
       analogWrite(speedPinB, speed);
       forward();
    }
// 电机正转;
    if(ps2x.Button(PSB_PAD_UP)){
      Serial.println("Up held this hard: ");
      speed= 200;
      analogWrite(speedPinA, speed);
      analogWrite(speedPinB, speed);
      forward();
    }

// 电机反转;
    if(ps2x.Button(PSB_PAD_DOWN)){
      Serial.print("Down held this hard: ");
      speed= 200;
      analogWrite(speedPinA, speed);
      analogWrite(speedPinB, speed);
      back();
    }

 //左转;
    if(ps2x.Button(PSB_PAD_LEFT)){
       Serial.println("turn left ");
       analogWrite(speedPinA, speed);
       analogWrite(speedPinB, 0);
      turnLeft();
    }

//右转;
   if(ps2x.Button(PSB_PAD_RIGHT)){
    Serial.println("turn right");
    analogWrite(speedPinA, 0);
    analogWrite(speedPinB, speed);
    turnRight();
   }
// Stop
   if(ps2x.Button(PSB_SELECT)){
   Serial.println("stop");
   speed = 0;
   analogWrite(speedPinA,speed);
   analogWrite(speedPinB,speed);
   }

  }
}
目前是拿来尝试一下,还是基于按键的实现,后面用摇杆来控制方向的速度。
3. 摇杆控制
功能实现:
- 通过按PS2摇杆的“上下左右”移动实现前进 、后退、左转、右转。
- 速度随摇杆位置变化而变化;
/* 功能:通过按PS2摇杆的“上下左右”移动实现前进 、后退、左转、右转。
 *
 * 作者:lcl;
 */
#include <PS2X_lib.h>  //for v1.6
/******************************************************************
 * set pins connected to PS2 controller:
 *   - 1e column: original
 *   - 2e colmun: Stef?
 * replace pin numbers by the ones you use
 ******************************************************************/
//PS2手柄引脚;
#define PS2_DAT        13  //14
#define PS2_CMD        11  //15
#define PS2_SEL        10  //16
#define PS2_CLK        12  //17
// 电机控制引脚;
#define IN1 4
#define IN2 5
#define IN3 6
#define IN4 7
  int speedPinA = 8;
  int speedPinB = 9;
int speed;
//speed =200;
/******************************************************************
 * select modes of PS2 controller:
 *   - pressures = analog reading of push-butttons
 *   - rumble    = motor rumbling
 * uncomment 1 of the lines for each mode selection
 ******************************************************************/
#define pressures   true
//#define pressures   false
#define rumble      true
//#define rumble      false
PS2X ps2x; // create PS2 Controller Class
//right now, the library does NOT support hot pluggable controllers, meaning
//you must always either restart your Arduino after you connect the controller,
//or call config_gamepad(pins) again after connecting the controller.
int error = 0;
byte type = 0;
byte vibrate = 0;
 void setup(){

   pinMode(IN1, OUTPUT);
   pinMode(IN2, OUTPUT);
   pinMode(IN3, OUTPUT);
   pinMode(IN4, OUTPUT);


   Serial.begin(57600);
   delay(300) ; //added delay to give wireless ps2 module some time to startup, before configuring it
   //CHANGES for v1.6 HERE!!! **************PAY ATTENTION*************

  //setup pins and settings: GamePad(clock, command, attention, data, Pressures?, Rumble?) check for error
  error = ps2x.config_gamepad(PS2_CLK, PS2_CMD, PS2_SEL, PS2_DAT, pressures, rumble);

  if(error == 0){
    Serial.print("Found Controller, configured successful ");
    Serial.print("pressures = ");
  if (pressures)
    Serial.println("true ");
  else
    Serial.println("false");
  Serial.print("rumble = ");
  if (rumble)
    Serial.println("true)");
  else
    Serial.println("false");
    Serial.println("Try out all the buttons, X will vibrate the controller, faster as you press harder;");
    Serial.println("holding L1 or R1 will print out the analog stick values.");
    Serial.println("Note: Go to www.billporter.info for updates and to report bugs.");
  }
  else if(error == 1)
    Serial.println("No controller found, check wiring, see readme.txt to enable debug. visit www.billporter.info for troubleshooting tips");

  else if(error == 2)
    Serial.println("Controller found but not accepting commands. see readme.txt to enable debug. Visit www.billporter.info for troubleshooting tips");
  else if(error == 3)
    Serial.println("Controller refusing to enter Pressures mode, may not support it. ");

 //  Serial.print(ps2x.Analog(1), HEX);

  type = ps2x.readType();
  switch(type) {
    case 0:
      Serial.print("Unknown Controller type found ");
      break;
    case 1:
      Serial.print("DualShock Controller found ");
      break;
    case 2:
      Serial.print("GuitarHero Controller found ");
      break;
  case 3:
      Serial.print("Wireless Sony DualShock Controller found ");
      break;
   }
}
 void turnLeft() //左转
 {
  digitalWrite(IN1,HIGH);
  digitalWrite(IN2, LOW);
  digitalWrite(IN3, LOW);
  digitalWrite(IN4,LOW);
  delay(20);
}
 void turnRight()//右转
 {
   digitalWrite(IN1, LOW);
   digitalWrite(IN2, LOW);
   digitalWrite(IN3, HIGH);
   digitalWrite(IN4, LOW);
  delay(20);
}
 void forward() // 前进
 {
  digitalWrite(IN1, HIGH);
  digitalWrite(IN2, LOW);
  digitalWrite(IN3, HIGH);
  digitalWrite(IN4, LOW);
  delay(20);
}
void stop() // 停止;
 {
  digitalWrite(IN1, LOW);
  digitalWrite(IN2, LOW);
  digitalWrite(IN3, LOW);
  digitalWrite(IN4, LOW);
  delay(20);
}
 void back()  //后退
 {
  digitalWrite(IN1, LOW);
  digitalWrite(IN2, HIGH);
  digitalWrite(IN3, LOW);
  digitalWrite(IN4, HIGH);
}
 void loop(){
   /* You must Read Gamepad to get new values and set vibration values
     ps2x.read_gamepad(small motor on/off, larger motor strenght from 0-255)
     if you don't enable the rumble, use ps2x.read_gamepad(); with no values
     You should call this at least once a second
   */
  if(error == 1) //skip loop if no controller found
    return;

  if(type == 2) {//Guitar Hero Controller
  return;
     }
  else  { //DualShock Controller
    ps2x.read_gamepad(false, vibrate); //read controller and set large motor to spin at 'vibrate' speed
    if(ps2x.Button(PSB_L1) || ps2x.Button(PSB_R1)) { //print stick values if either is TRUE
           Serial.print("Stick Values:");
           Serial.print(ps2x.Analog(PSS_LY), DEC); //Left stick, Y axis. Other options: LX, RY, RX
           Serial.print(",");
           Serial.print(ps2x.Analog(PSS_LX), DEC);
           Serial.print(",");
           Serial.print(ps2x.Analog(PSS_RY), DEC);
           Serial.print(",");
           Serial.println(ps2x.Analog(PSS_RX), DEC);

             int LY=ps2x.Analog(PSS_LY);
             int LX=ps2x.Analog(PSS_LX);
             int RY=ps2x.Analog(PSS_RY);
             int RX=ps2x.Analog(PSS_RX);

             if (LY<128)  //前进
             {

                    speed = 2*(127-LY);
                    //speed = LY;
                    analogWrite(speedPinA, speed);
                    analogWrite(speedPinB, speed);
                    forward();
             }
             //后退
             if (LY>128)
             {
                    speed=2*(LY-128);
                    analogWrite(speedPinA, speed);
                    analogWrite(speedPinB, speed);
                    back();
             }
             //左转
             if (LX<128)
             {
                    speed = 2*(127-LX);
                    analogWrite(speedPinA, speed);
                    analogWrite(speedPinB, speed);
                    turnLeft();
             }
             //右转
             if (LX>128)
             {
                    speed=2*(LX -128);
                    analogWrite(speedPinA, speed);
                    analogWrite(speedPinB, speed);
                    turnRight();
             }
             //如果摇杆居中
             if (LY>=128 && LY<=128 && LX>=128 && LX<=128)
             {
             stop();
             }
    }
  }
相关参考:
1. http://yfrobot.com/forum.php?mod=viewthread&tid=11561&highlight=ps2
2. Sony PS2游戏手柄遥控智能小车https://sanwen8.cn/p/375swwM.html
3. SONY PS2电玩手柄遥控乐高小车


 1万+
1万+


 被折叠的 条评论
为什么被折叠?
被折叠的 条评论
为什么被折叠?
 到【灌水乐园】发言


