


文章目录
1、启动 Elasticsearch
请参考:启动 Elasticsearch(Windows 环境)
2、查询测试
2.1 解压 Kibana
下载:官网下载
解压并启动:
首先要启动你的 Elasticsearch 服务。然后开始启动 kibana。
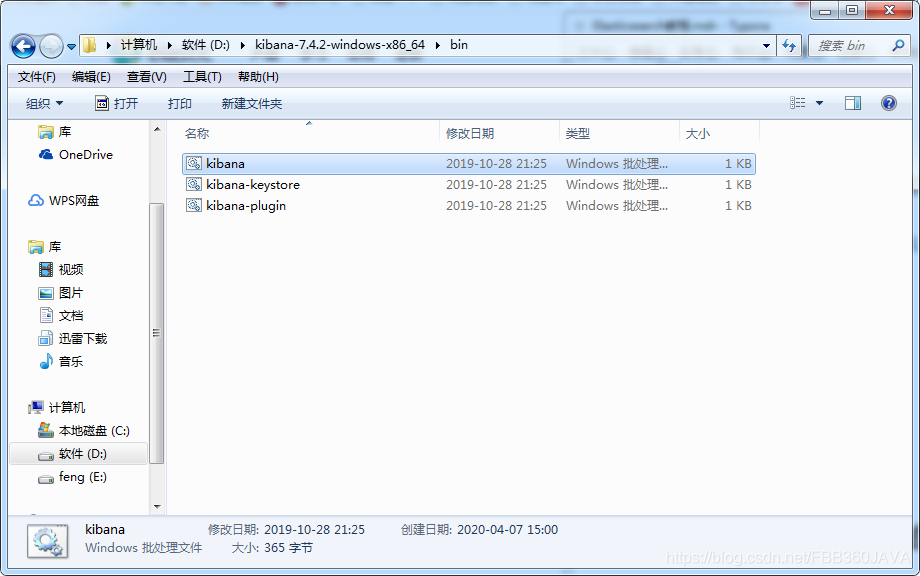
在解压路径下,直接双击 kibana。
2.2 使用 kibana 进行测试
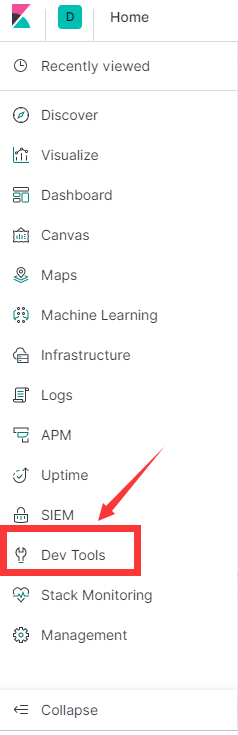
访问 http://localhost:5601/app/kibana#/home?_g=() ,进入 kibana 的主页。然后点击左侧的开发工具(Dev Tools)。
或者直接访问: http://localhost:5601/app/kibana#/dev_tools/console?_g=()
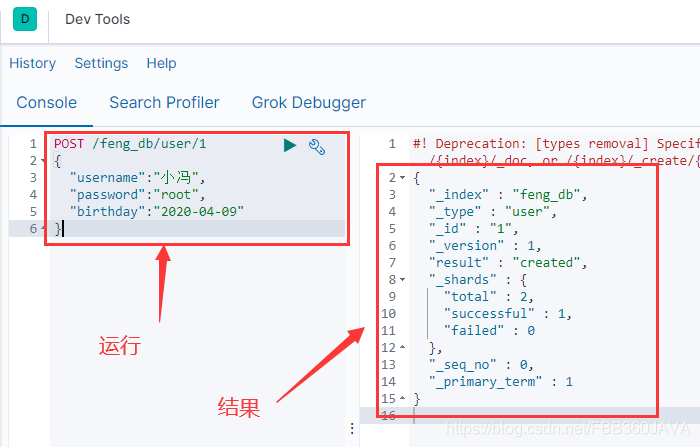
2.2.1 存储数据(POST)
POST /feng_db/user/1
{
  "username":"小冯",
  "password":"root",
  "birthday":"2020-04-09"
}
2.2.2 查询数据(GET)
GET /feng_db/user/_search
{
  "query": {
    "match_all": {}
  }
}

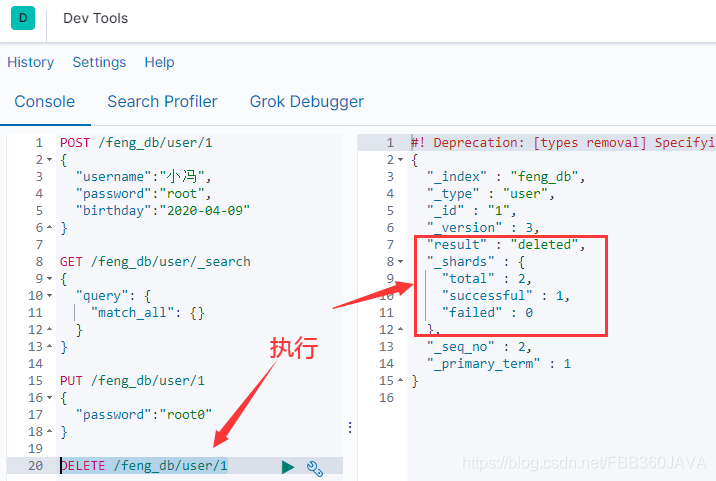
2.2.3 修改数据(PUT)
修改上面的数据,将 password 改为 root0。这一步修改完成后,读者可自行使用查询语句来查询,参考 2.2.2 查询数据(PUT)。
PUT /feng_db/user/1
{
  "password":"root0"
}

2.2.4 删除数据(DELETE)
当删除数据时:
DELETE /feng_db/user/1
当需要删除节点时:DELETE /feng_db。这里就不做演示了。
3、Elasticsearch 的结果字段含义
参考: https://www.elastic.co/guide/en/elasticsearch/reference/7.6/getting-started-search.html
在 Kibana 的开发者工具中,先删除节点(这一步是为了测试,清除之前的操作痕迹,方便演示)
DELETE /feng_db
此时的结果是:
{
  "acknowledged" : true
}
然后在存储新的数据:
POST /feng_db/user/1
{
  "username":"小冯",
  "password":"root",
  "birthday":"2020-04-09"
}
POST /feng_db/user/2
{
  "username":"小李",
  "password":"root",
  "birthday":"2020-04-07"
}
查询(按照 birthday 的升序查询所有信息):
GET /feng_db/user/_search
{
  "query": { "match_all": {} },
  "sort": [
    { "birthday": "asc" }
  ]
}
查询的结果是:
#! Deprecation: [types removal] Specifying types in search requests is deprecated.
{
  "took" : 593,
  "timed_out" : false,
  "_shards" : {
    "total" : 1,
    "successful" : 1,
    "skipped" : 0,
    "failed" : 0
  },
  "hits" : {
    "total" : {
      "value" : 2,
      "relation" : "eq"
    },
    "max_score" : null,
    "hits" : [
      {
        "_index" : "feng_db",
        "_type" : "user",
        "_id" : "2",
        "_score" : null,
        "_source" : {
          "username" : "小李",
          "password" : "root",
          "birthday" : "2020-04-07"
        },
        "sort" : [
          1586217600000
        ]
      },
      {
        "_index" : "feng_db",
        "_type" : "user",
        "_id" : "1",
        "_score" : null,
        "_source" : {
          "username" : "小冯",
          "password" : "root",
          "birthday" : "2020-04-09"
        },
        "sort" : [
          1586390400000
        ]
      }
    ]
  }
}
查询结果字段的含义:
| 字段 | 含义 |
|---|---|
| took | 查询花费的时间,毫秒 |
| time_out | 查询是否超时 |
| _shards | 搜索了多少个碎片(shards),以及成功、失败或跳过了多个个碎片的细目分类。 |
| max_score | 找到的最相关文档的分数 |
| hits.total.value | 发现了多少个匹配的文档 |
| hits.sort | 文档的排序位置(不按相关性得分排序时) |
| hits._score | 文档的相关性得分(使用match_all时不适用) |
4、数据类型的指定
参考: https://www.elastic.co/guide/en/elasticsearch/reference/current/number.html#number
- 字符串类型 text 、 keyword
- 数值类型 long, integer, short, byte, double, float, half_float, scaled_float
- 日期类型 date
- te布尔值类型 boolean
- 二进制类型 binary
- 范围类型 integer_range , float_range, long_range, double_range, date_range
4.1 官方案例演示
以日期类型为例:指定 my_index 节点下的 date 字段数据类型为 date 。之后再插入数据,最终查询其结果。
PUT my_index
{
  "mappings": {
    "properties": {
      "date": {
        "type": "date"
      }
    }
  }
}

PUT my_index/_doc/1
{ "date": "2015-01-01" }

PUT my_index/_doc/2
{ "date": "2015-01-01T12:10:30Z" }

PUT my_index/_doc/3
{ "date": 1420070400001 }

GET my_index/_search
{
  "sort": { "date": "asc"}
}
查询结果:
{
  "took" : 612,
  "timed_out" : false,
  "_shards" : {
    "total" : 1,
    "successful" : 1,
    "skipped" : 0,
    "failed" : 0
  },
  "hits" : {
    "total" : {
      "value" : 3,
      "relation" : "eq"
    },
    "max_score" : null,
    "hits" : [
      {
        "_index" : "my_index",
        "_type" : "_doc",
        "_id" : "1",
        "_score" : null,
        "_source" : {
          "date" : "2015-01-01"
        },
        "sort" : [
          1420070400000
        ]
      },
      {
        "_index" : "my_index",
        "_type" : "_doc",
        "_id" : "3",
        "_score" : null,
        "_source" : {
          "date" : 1420070400001
        },
        "sort" : [
          1420070400001
        ]
      },
      {
        "_index" : "my_index",
        "_type" : "_doc",
        "_id" : "2",
        "_score" : null,
        "_source" : {
          "date" : "2015-01-01T12:10:30Z"
        },
        "sort" : [
          1420114230000
        ]
      }
    ]
  }
}
5、配置 IK 分词器
下载: https://github.com/medcl/elasticsearch-analysis-ik/releases
直接下载解压版,不用自己进行编译。
在 Elasticsearch 安装路径下,找到plugins,把下载的IK 分词器的压缩包解压成名为analysis-ik的文件夹。
之后就可进行测试了。(使用 Kibana 发送请求)
POST test/_analyze?pretty=true
{
	"message":"我是中国人",
	"tokenizer”:“ik_smart”
}
参考与致谢
windows下elasticsearch6.X安装IK分词器
astic.co/guide/en/elasticsearch/reference/7.6/getting-started-search.html)
windows下elasticsearch6.X安装IK分词器
另,以上如有侵权,请告知!


 510
510


 被折叠的 条评论
为什么被折叠?
被折叠的 条评论
为什么被折叠?
 到【灌水乐园】发言


