


转自:https://www.cnblogs.com/ylcms/p/7418239.html
1.直播是现在最热门的,尤其是电竞的发展成功的带动的直播的发展,各种游戏直播月入XXX,经常听到的一句话:某主播XXX月入百万,不知道是真是假暂且不管,看看直播到底是怎么实现的,直播使用的是RTMP协议(实时消息传输协议),实现这个协议的方式有很多种,这里使用nginx(一个超级强大的服务器)的rtmp-moudle模块来实现。
首先准备nginx安装包和nginx-rtmp-module模块的安装包
nginx安装包:http://nginx.org/,请自行下载
wget http://nginx.org/download/nginx-1.11.3.tar.gz
nginx-rtmp-module模块下载
wget https://github.com/arut/nginx-rtmp-module/archive/master.zip
下载完毕解压
tar -zxvf nginx-1.11.3.tar.gz
unzip master.zip
解压完毕进入nginx-1.11.3文件夹
./configure --add-module=../arut-nginx-rtmp-module
make && make install
安装完毕!
运行nginx:
/usr/local/nginx/sbin/nginx
运行:ifconfig查看ubantu的ip地址:
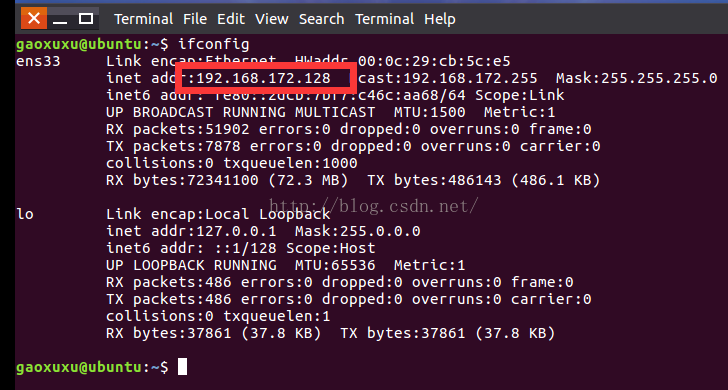
打开浏览器输入:你本机的ip看到nginx的欢迎页面,说明安装成功,如图:

然后:
cd /usr/local/nginx/conf
nginx的配置文件可能没有修改的权限
修改权限:
sudo chmod 777conf/
编辑nginx.conf文件,我贴出整个配置文件:
#user  nobody;
worker_processes  1;

#error_log  logs/error.log;
#error_log  logs/error.log  notice;
#error_log  logs/error.log  info;

#pid        logs/nginx.pid;


events {
    worker_connections  1024;
}


http {
    include       mime.types;
    default_type  application/octet-stream;

    #log_format  main  '$remote_addr - $remote_user [$time_local] "$request" '
    #                  '$status $body_bytes_sent "$http_referer" '
    #                  '"$http_user_agent" "$http_x_forwarded_for"';

    #access_log  logs/access.log  main;

    sendfile        on;
    #tcp_nopush     on;

    #keepalive_timeout  0;
    keepalive_timeout  65;

    #gzip  on;

    server {
        listen       80;
        server_name  localhost;

        #charset koi8-r;

        #access_log  logs/host.access.log  main;

        location / {
            root   html;
            index  index.html index.htm;
        }

        #error_page  404              /404.html;

        # redirect server error pages to the static page /50x.html
        #
        error_page   500 502 503 504  /50x.html;
    #==========浏览器监视直播流信息配置==============
    location /stat { #第二处添加的location字段。
        rtmp_stat all;
        rtmp_stat_stylesheet stat.xsl;
       }

        location /stat.xsl { #第二处添加的location字段。
       root /usr/local/nginx/nginx-rtmp-module/; #nginx-rtmp-module是模块下载的位置
        }
#==========浏览器监视直播流信息配置结束============== location = /50x.html { root html; } # proxy the PHP scripts to Apache listening on 127.0.0.1:80 # #location ~ \.php$ { # proxy_pass http://127.0.0.1; #} # pass the PHP scripts to FastCGI server listening on 127.0.0.1:9000 # #location ~ \.php$ { # root html; # fastcgi_pass 127.0.0.1:9000; # fastcgi_index index.php; # fastcgi_param SCRIPT_FILENAME /scripts$fastcgi_script_name; # include fastcgi_params; #} # deny access to .htaccess files, if Apache's document root # concurs with nginx's one # #location ~ /\.ht { # deny all; #} } # another virtual host using mix of IP-, name-, and port-based configuration # #server { # listen 8000; # listen somename:8080; # server_name somename alias another.alias; # location / { # root html; # index index.html index.htm; # } #} # HTTPS server # #server { # listen 443 ssl; # server_name localhost; # ssl_certificate cert.pem; # ssl_certificate_key cert.key; # ssl_session_cache shared:SSL:1m; # ssl_session_timeout 5m; # ssl_ciphers HIGH:!aNULL:!MD5; # ssl_prefer_server_ciphers on; # location / { # root html; # index index.html index.htm; # } #} } rtmp { server { listen 1935; chunk_size 4096; application live { live on; publish_notify on; on_publish http://192.168.0.199/rtmp/index.php; //授权验证地址 record off; } } }index.php<?php /* $_POST返回数组值 array ( 'app' => 'live', 'flashver' => 'FMLE/3.0 (compatible; FMSc/1.0)', 'swfurl' => 'rtmp://192.168.0.115/live', 'tcurl' => 'rtmp://192.168.0.115/live', 'pageurl' => '', 'addr' => '192.168.0.199', 'clientid' => '79', 'call' => 'publish', 'name' => 'test3', 'type' => 'live', 'pass' => '123456', ) */ $name = $_POST['name']; #$name = test3 $pass = $_POST['pass']; $pass = 123456 if(empty($name) || empty($pass)){ echo "串码流不正确"; // 这个是thinkphp5的返回头信息的函数 header("HTTP/1.1 404 Not Found"); header("Status: 404 Not Found"); exit; } echo "正常"; ?>用ffmpeg推流方式: ffmpeg -re -i 1255199778_3032750917_20170326113341.mp4 -c copy -f flv rtmp://192.168.0.115/live/test4?pass=123456 用obs推流方式:

test3相当于账号,pass相当于密码
检测直播流信息 nginx.conf配置方式 location /stat { #第二处添加的location字段。
rtmp_stat all;
rtmp_stat_stylesheet stat.xsl;
}
location /stat.xsl { #第二处添加的location字段。
root /usr/local/nginx/nginx-rtmp-module/; #nginx-rtmp-module是模块下载的位置
配置完成后,在浏览器输入:http://192.168.0.115/stat

关于nginx-stmp模块的回调接口参考:http://www.ptbird.cn/nginx-rtmp-multi-channel.html
关于ffmpeg相关命令 :http://www.xuebuyuan.com/1740527.html


 被折叠的 条评论
为什么被折叠?
被折叠的 条评论
为什么被折叠?
 到【灌水乐园】发言


