


声明:本文转自 Spring Cloud 从入门到精通_spring_蔚1-DevPress官方社区 (csdn.net)
由于原文排版问题导致阅读不方便,故重新整理,格式化代码,加大代码框以更清晰展示。
Spring Cloud 是什么?
Spring Cloud 是一系列框架的有序集合,它利用 Spring Boot 的开发便利性简化了分布式系统的开发,比如服务发现、服务网关、服务路由、链路追踪等。Spring Cloud 并不重复造轮子,而是将市面上开发得比较好的模块集成进去,进行封装,从而减少了各模块的开发成本。换句话说:Spring Cloud 提供了构建分布式系统所需的“全家桶”。
Spring Cloud 现状
目前,国内使用 Spring Cloud 技术的公司并不多见,不是因为 Spring Cloud 不好,主要原因有以下几点:
Spring Cloud 中文文档较少,出现问题网上没有太多的解决方案。
国内创业型公司技术老大大多是阿里系员工,而阿里系多采用 Dubbo 来构建微服务架构。
大型公司基本都有自己的分布式解决方案,而中小型公司的架构很多用不上微服务,所以没有采用 Spring Cloud 的必要性。
但是,微服务架构是一个趋势,而 Spring Cloud 是微服务解决方案的佼佼者,这也是作者写本系列课程的意义所在。
Spring Cloud 优缺点
其主要优点有:
集大成者,Spring Cloud 包含了微服务架构的方方面面。
约定优于配置,基于注解,没有配置文件。
轻量级组件,Spring Cloud 整合的组件大多比较轻量级,且都是各自领域的佼佼者。
开发简便,Spring Cloud 对各个组件进行了大量的封装,从而简化了开发。
开发灵活,Spring Cloud 的组件都是解耦的,开发人员可以灵活按需选择组件。
接下来,我们看下它的缺点:
项目结构复杂,每一个组件或者每一个服务都需要创建一个项目。
部署门槛高,项目部署需要配合 Docker 等容器技术进行集群部署,而要想深入了解 Docker,学习成本高。
Spring Cloud 的优势是显而易见的。因此对于想研究微服务架构的同学来说,学习 Spring Cloud 是一个不错的选择。
Spring Cloud 和 Dubbo 对比
Dubbo 只是实现了服务治理,而 Spring Cloud 实现了微服务架构的方方面面,服务治理只是其中的一个方面。下面通过一张图对其进行比较:
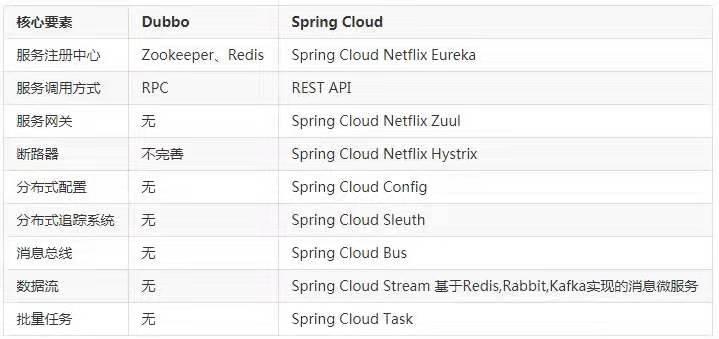
(图片引自:程序猿DD,作者:翟永超)
可以看出,Spring Cloud 比较全面,而 Dubbo 由于只实现了服务治理,需要集成其他模块,需要单独引入,增加了学习成本和集成成本。
Spring Cloud 学习
Spring Cloud 基于 Spring Boot,因此在研究 Spring Cloud 之前,本课程会首先介绍 Spring Boot 的用法,方便后续 Spring Cloud 的学习。
本课程不会讲解 Spring MVC 的用法,因此学习本课程需要读者对 Spring 及 Spring MVC 有过研究。
本课程共分为四个部分:
第一部分初识 Spring Boot,掌握 Spring Boot 基础知识,为后续入门 Spring Cloud 打好基础 。
第二部分 Spring Cloud 入门篇,主要介绍 Spring Cloud 常用模块,包括服务发现、服务注册、配置中心、链路追踪、异常处理等。
第三部分 Spring Cloud 进阶篇,介绍大型分布式系统中事务处理、线程安全等问题,并以一个实例项目手把手教大家搭建完整的微服务系统。
第四部分 Spring Cloud 高级篇,解析 Spring Cloud 源码,并讲解如何部署基于 Spring Cloud 的大型分布式系统。
本课程的所有示例代码均可在: https://github.com/lynnlovemin/SpringCloudLesson 下载。
第01课:Spring Boot 入门
什么是 Spring Boot
Spring Boot 是由 Pivotal 团队提供的基于 Spring 的全新框架,其设计目的是为了简化 Spring 应用的搭建和开发过程。该框架遵循“约定大于配置”原则,采用特定的方式进行配置,从而使开发者无需定义大量的 XML 配置。通过这种方式,Spring Boot 致力于在蓬勃发展的快速应用开发领域成为领导者。
Spring Boot 并不重复造轮子,而且在原有 Spring 的框架基础上封装了一层,并且它集成了一些类库,用于简化开发。换句话说,Spring Boot 就是一个大容器。
下面几张图展示了官网上提供的 Spring Boot 所集成的所有类库:


Spring Boot 官方推荐使用 Maven 或 Gradle 来构建项目,本教程采用 Maven。
第一个 Spring Boot 项目
大多数教程都是以 Hello World 入门,本教程也不例外,接下来,我们就来搭建一个最简单的 Spring Boot 项目。
1.创建一个 Maven 工程,请看下图:
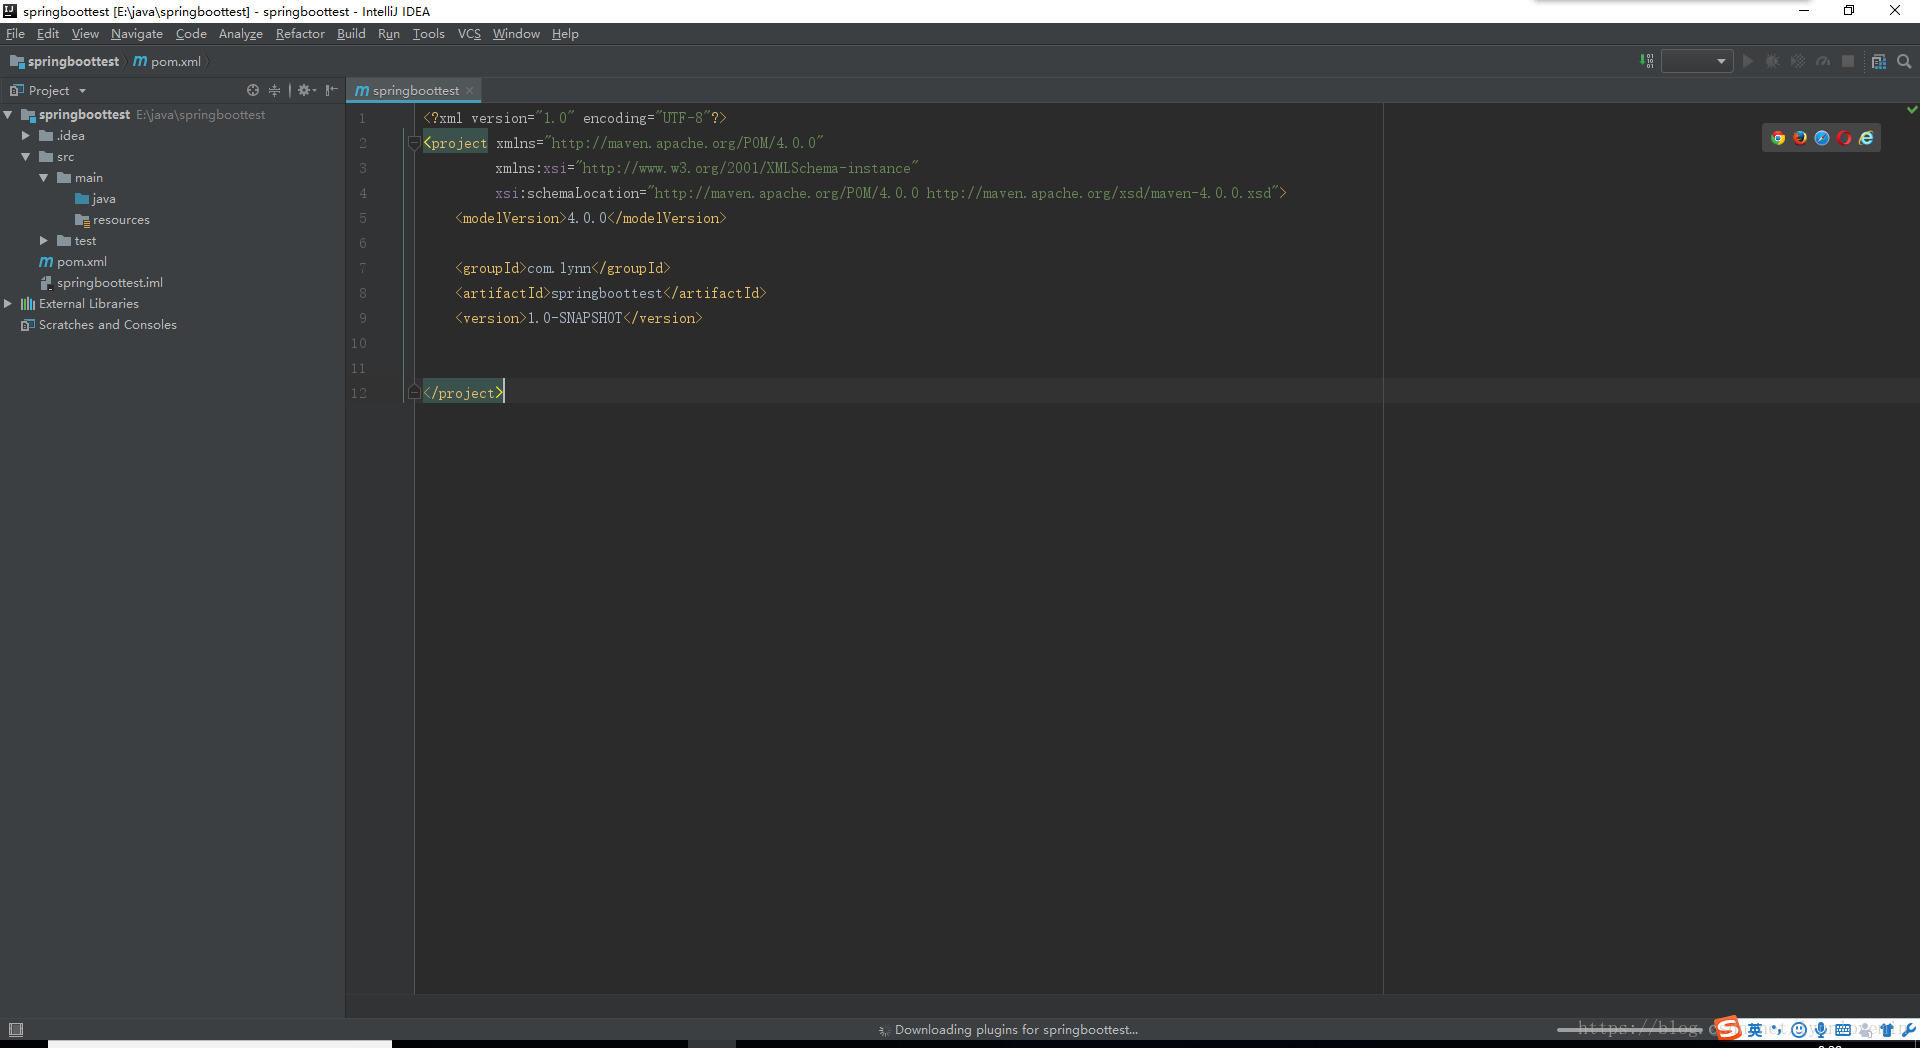
在 pom.xml 加入 Spring Boot 依赖:
<parent>
    <groupId>org.springframework.boot</groupId>
    <artifactId>spring-boot-starter-parent</artifactId>
    <version>2.1.3.RELEASE</version>
</parent>
<dependencies>
    <dependency>
        <groupId>org.springframework.boot</groupId>
        <artifactId>spring-boot-starter-web</artifactId>
    </dependency>
</dependencies>
创建应用程序启动类 DemoApplication,并编写以下代码
import org.springframework.boot.SpringApplication;
import org.springframework.boot.autoconfigure.SpringBootApplication;
@SpringBootApplicationpublicclassDemoApplication {
    publicstaticvoidmain(String[] args) {
        SpringApplication.run(DemoApplication.class, args);
    }
}
4.创建一个 Controller 类 HelloController,用以测试我们的第一个基于 Spring Boot 的 Web 应用:
import org.springframework.web.bind.annotation.RequestMapping;
import org.springframework.web.bind.annotation.RestController;
@RestController
publicclassHelloController {
@RequestMapping("hello")
String hello() {
return "Hello World!";
}
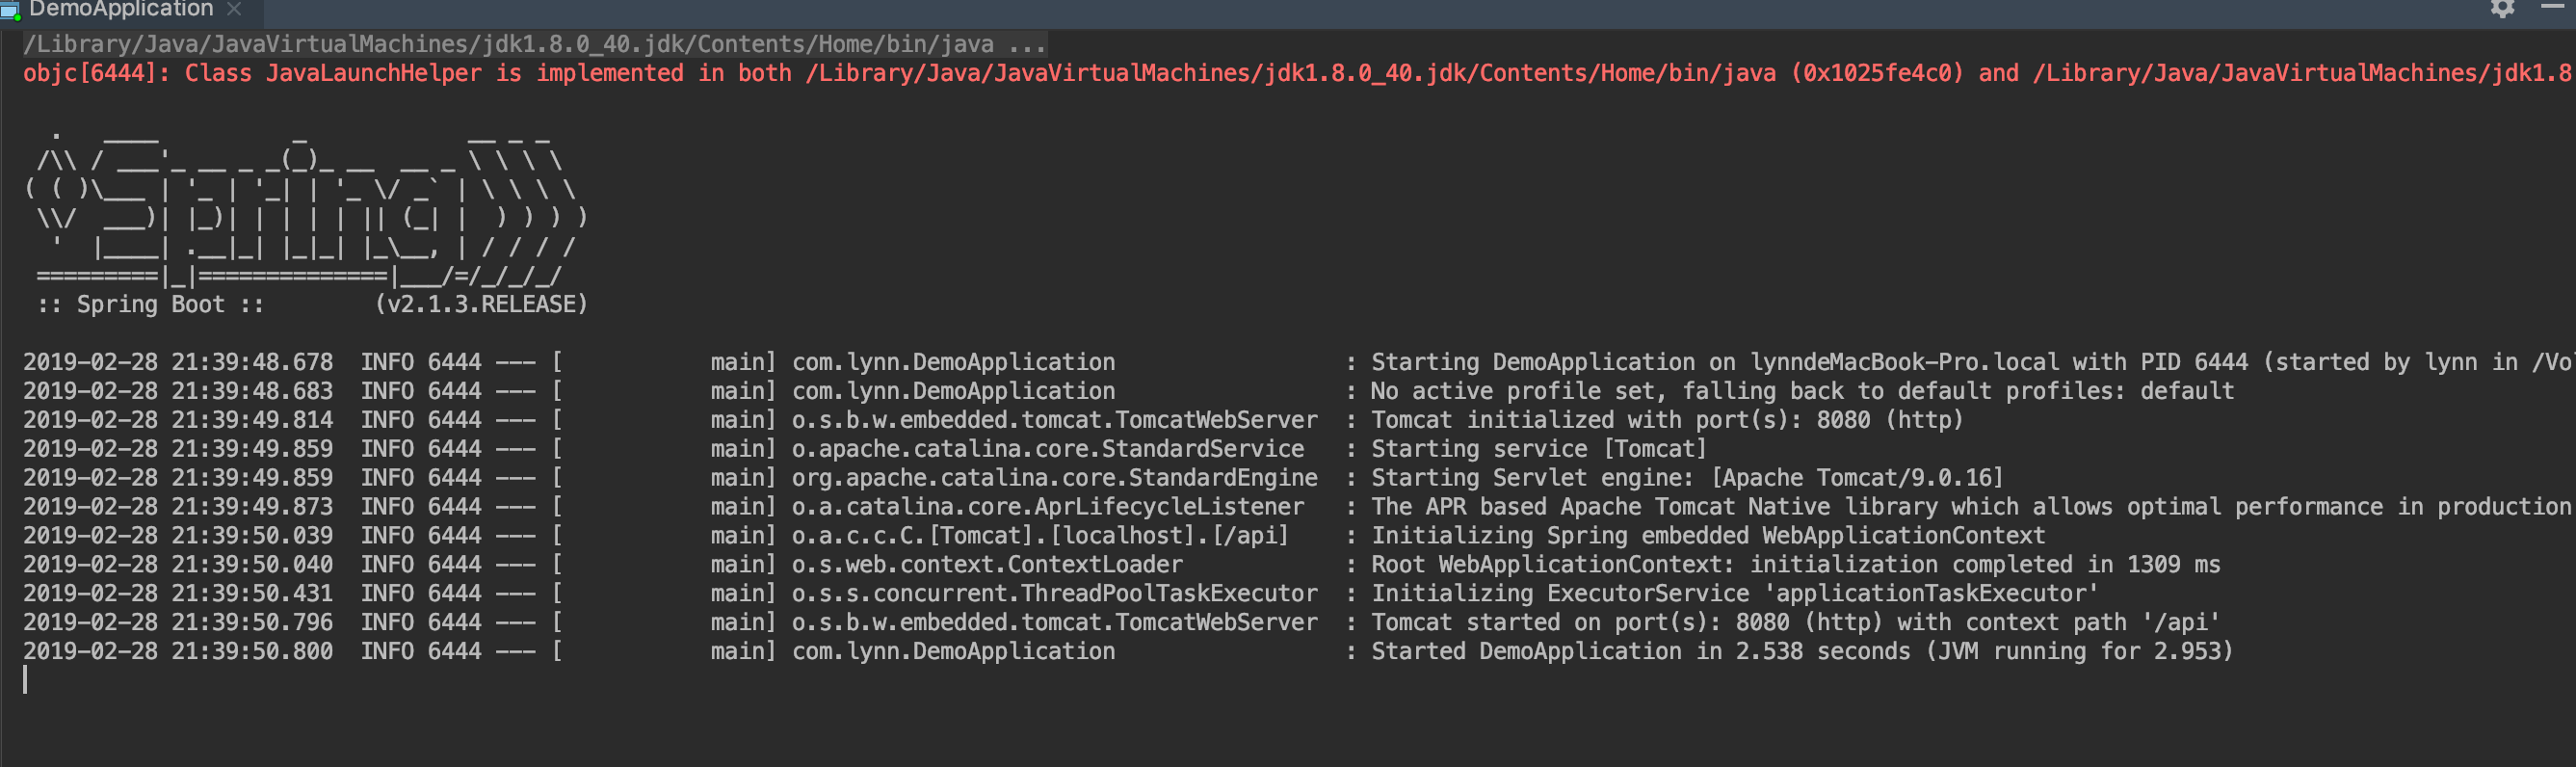
}5.运行 DemoApplication 类中的 main 方法,看到下图所示内容说明应用启动成功:
6.浏览器访问:http://localhost:8080/hello,则会看到下图所示界面:
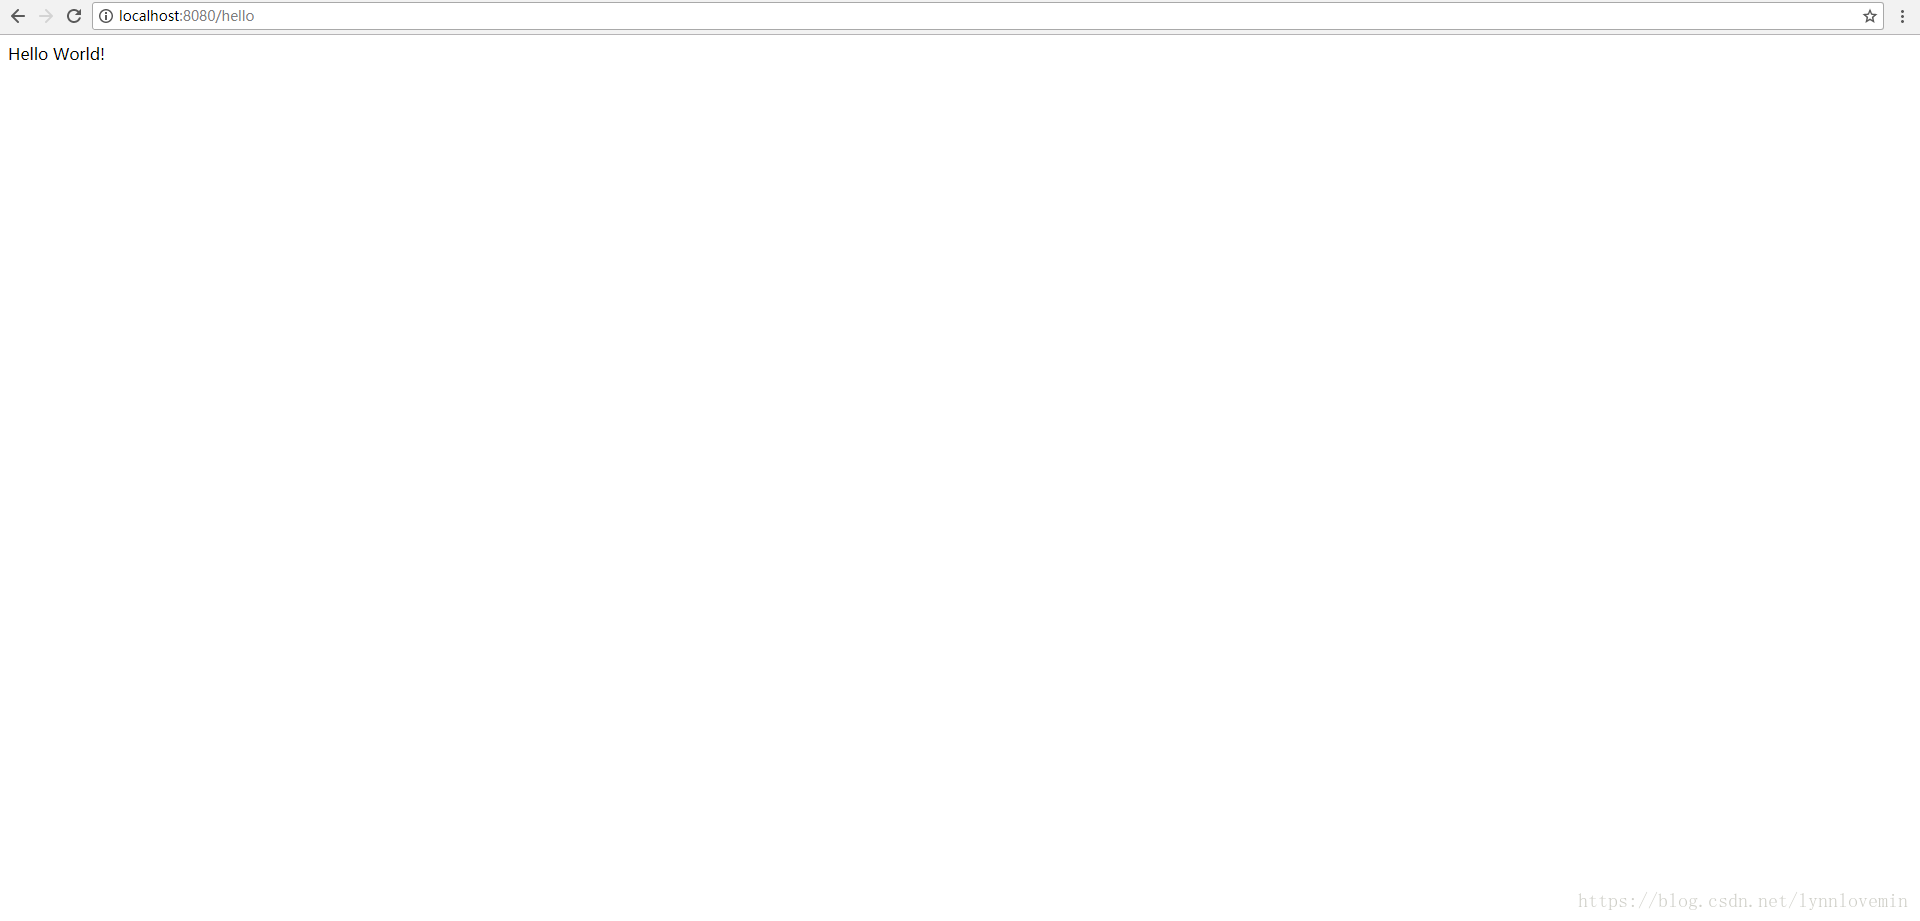
我们可以注意到,没有写任何的配置文件,更没有显示使用任何容器,只需要启动 Main 方法即可开启 Web 服务,从而访问到 HelloController 类里定义的路由地址。
这就是 Spring Boot 的强大之处,它默认集成了 Tomcat 容器,通过 Main 方法编写的 SpringApplication.run 方法即可启动内置 Tomcat。
它是如何启动的,内部又是如何运行的呢?具体原理我将在《第03课:Spring Boot 启动原理》一节中具体分析。
在上面的示例中,我们没有定义应用程序启动端口,可以看到控制台,它开启了 8080 端口,这是 Spring Boot 默认的启动端口。Spring Boot 提供了默认的配置,我们也可以改变这些配置,具体方法将在后面介绍。
我们在启动类里加入 @SpringBootApplication 注解,则这个类就是整个应用程序的启动类。如果不加这个注解,启动程序将会报错,读者可以尝试一下。
Spring Boot 还有一个特点是利用注解代码繁琐的 XML 配置,整个应用程序只有一个入口配置文件,那就是 application.yml 或 application.properties。接下来,我将介绍其配置文件的用法。
properties 和 yaml
在前面的示例代码中,我们并没有看到该配置文件,那是因为 Spring Boot 对每个配置项都有默认值。当然,我们也可以添加配置文件,用以覆盖其默认值,这里以 .properties 文件为例,首先在 resources 下新建一个名为 application.properties(注意:文件名必须是 application)的文件,键入内容为:
server.port=8081
server.servlet.context-path=/api
并且启动 Main 方法,这时程序请求地址则变成了:http://localhost:8081/api/hello。
Spring Boot 支持 properties 和 yaml 两种格式的文件,文件名分别对应 application.properties 和 application.yml,下面贴出 yaml 文件格式供大家参考:
server:
 port: 8080
  servlet:
   context-path: /api
可以看出 properties 是以逗号隔开,而 yaml 则换行+ 两个空格 隔开,这里需要注意的是冒号后面必须空格,否则会报错。yaml 文件格式更清晰,更易读,这里作者建议大家都采用 yaml 文件来配置。
以上示例只是小试牛刀,更多的配置将在后面的课程中讲解。
本教程的所有配置均采用 yaml 文件。
打包、运行
Spring Boot 打包分为 war 和 jar 两个格式,下面将分别演示如何构建这两种格式的启动包。
在 pom.xml 加入如下配置:
<packaging>war</packaging>
<build>
    <finalName>api</finalName>
    <resources>
        <resource>
            <directory>src/main/resources</directory>
            <filtering>true</filtering>
        </resource>
    </resources>
    <plugins>
        <plugin>
            <groupId>org.springframework.boot</groupId>
            <artifactId>spring-boot-maven-plugin</artifactId>
        </plugin>
        <plugin>
            <artifactId>maven-resources-plugin</artifactId>
            <version>2.5</version>
            <configuration>
                <encoding>UTF-8</encoding>
            </configuration>
        </plugin>
        <plugin>
            <groupId>org.apache.maven.plugins</groupId>
            <artifactId>maven-surefire-plugin</artifactId>
            <version>2.18.1</version>
            <configuration>
                <skipTests>true</skipTests>
            </configuration>
        </plugin>
    </plugins>
</build>
这个时候运行 mvn package 就会生成 war 包,然后放到 Tomcat 当中就能启动,但是我们单纯这样配置在 Tomcat 是不能成功运行的,会报错,需要通过编码指定 Tomcat 容器启动,修改 DemoApplication 类:
import org.springframework.boot.SpringApplication;
import org.springframework.boot.autoconfigure.SpringBootApplication;
import org.springframework.boot.builder.SpringApplicationBuilder;
import org.springframework.boot.web.servlet.support.SpringBootServletInitializer;
@SpringBootApplication
public class DemoApplication extends SpringBootServletInitializer {
    public static void main(String[] args) {
        SpringApplication.run(DemoApplication.class, args);
    }
    @Override
    protected SpringApplicationBuilder configure(SpringApplicationBuilder application) {
        return application.sources(DemoApplication.class);
    }
}
这时再打包放到 Tomcat,启动就不会报错了。
在上述代码中,DemoApplication 类继承了 SpringBootServletInitializer,并重写 configure 方法,目的是告诉外部 Tomcat,启动时执行该方法,然后在该方法体内指定应用程序入口为 DemoApplication 类,如果通过外部 Tomcat 启动 Spring Boot 应用,则其配置文件设置的端口和 contextPath 是无效的。这时,应用程序的启动端口即是 Tomcat 的启动端口,contextPath 和 war 包的文件名相同。
接下来我们继续看如果达成 jar 包,在 pom.xml 加入如下配置:
<!-- 需要将包类型改为 jar 包 -->
<packaging>jar</packaging>
<build>
    <finalName>api</finalName>
    <resources>
        <resource>
            <directory>src/main/resources</directory>
            <filtering>true</filtering>
        </resource>
    </resources>
    <plugins>
        <plugin>
            <groupId>org.springframework.boot</groupId>
            <artifactId>spring-boot-maven-plugin</artifactId>
            <configuration>
                <fork>true</fork>
                <!-- 指定 Main 方法所在类 -->
                <mainClass>com.lynn.DemoApplication</mainClass>
            </configuration>
            <executions>
                <execution>
                    <goals>
                        <goal>repackage</goal>
                    </goals>
                </execution>
            </executions>
        </plugin>
        <plugin>
            <artifactId>maven-resources-plugin</artifactId>
            <version>2.5</version>
            <configuration>
                <encoding>UTF-8</encoding>
                <useDefaultDelimiters>true</useDefaultDelimiters>
            </configuration>
        </plugin>
        <plugin>
            <groupId>org.apache.maven.plugins</groupId>
            <artifactId>maven-surefire-plugin</artifactId>
            <version>2.18.1</version>
            <configuration>
                <skipTests>true</skipTests>
            </configuration>
        </plugin>
        <plugin>
            <groupId>org.apache.maven.plugins</groupId>
            <artifactId>maven-compiler-plugin</artifactId>
            <version>2.3.2</version>
            <configuration>
                <source>1.8</source>
                <target>1.8</target>
            </configuration>
        </plugin>
    </plugins>
</build>
然后通过 mvn package 打包,最后通过 java 命令启动:
java -jar api.jar如果是 Linux 服务器,上述命令是前台进程,点击 Ctrl+C 进程就会停止,可以考虑用 nohup 命令开启守护进程,这样应用程序才不会自动停止。
这样,最简单的 Spring Boot 就完成了,但是对于一个大型项目,这是远远不够的,Spring Boot 的详细操作可以参照官网。
下面展示一个最基础的企业级 Spring Boot 项目的结构:

其中,Application.java 是程序的启动类,Startup.java 是程序启动完成前执行的类,WebConfig.java 是配置类,所有 Bean 注入、配置、拦截器注入等都放在这个类里面。
以上实例只是最简单的 Spring Boot 项目入门实例,后面会深入研究 Spring Boot。
第02课:Spring Boot 进阶
上一篇带领大家初步了解了如何使用 Spring Boot 搭建框架,通过 Spring Boot 和传统的 SpringMVC 架构的对比,我们清晰地发现 Spring Boot 的好处,它使我们的代码更加简单,结构更加清晰。
从这一篇开始,我将带领大家更加深入的认识 Spring Boot,将 Spring Boot 涉及到东西进行拆解,从而了解 Spring Boot 的方方面面。学完本文后,读者可以基于 Spring Boot 搭建更加复杂的系统框架。
我们知道,Spring Boot 是一个大容器,它将很多第三方框架都进行了集成,我们在实际项目中用到哪个模块,再引入哪个模块。比如我们项目中的持久化框架用 MyBatis,则在 pom.xml 添加如下依赖:
<dependency>
    <groupId>org.mybatis.spring.boot</groupId>
    <artifactId>mybatis-spring-boot-starter</artifactId>
    <version>1.1.1</version>
</dependency>
<dependency>
    <groupId>mysql</groupId>
    <artifactId>mysql-connector-java</artifactId>
    <version>5.1.40</version>
</dependency>
yaml/properties 文件
我们知道整个 Spring Boot 项目只有一个配置文件,那就是 application.yml,Spring Boot 在启动时,就会从 application.yml 中读取配置信息,并加载到内存中。上一篇我们只是粗略的列举了几个配置项,其实 Spring Boot 的配置项是很多的,本文我们将学习在实际项目中常用的配置项(注:为了方便说明,配置项均以 properties 文件的格式写出,后续的实际配置都会写成 yaml 格式)。
配置项 | 说明 | 举例 |
server.port | 应用程序启动端口 | server.port=8080,定义应用程序启动端口为 8080 |
server.servlet.context-path | 应用程序上下文 | server.servlet.context-path=/api,则访问地址为:http://ip:port/api |
spring.servlet.multipart.maxFileSize | 最大文件上传大小,-1为不限制 | spring.servlet.multipart.maxFileSize=-1 |
spring.jpa.database | 数据库类型 | spring.jpa.database=MYSQL,指定数据库为mysql |
spring.jpa.properties.hibernate.dialect | hql方言 | spring.jpa.properties.hibernate.dialect=org.hibernate.dialect.MySQL5Dialect |
spring.datasource.url | 数据库连接字符串 | spring.datasource.url=jdbc:mysql://localhost:3306/database?useUnicode=true&characterEncoding=UTF-8&useSSL=true |
spring.datasource.username | 数据库用户名 | spring.datasource.username=root |
spring.datasource.password | 数据库密码 | spring.datasource.password=root |
spring.datasource.driverClassName | 数据库驱动 | spring.datasource.driverClassName=com.mysql.jdbc.Driver |
spring.jpa.showSql | 控制台是否打印 SQL 语句 | spring.jpa.showSql=true |
下面是我参与的某个项目的 application.yml 配置文件内容:(这个转换完有问题。。。)
server:
 port: 8080
  servlet:
   context-path: /api
  tomcat:
   basedir: /data/tmp
    max-threads: 1000
    min-spare-threads: 50
connection-timeout: 5000
spring:
 profiles:
   active: dev
 servlet:
   multipart:
     maxFileSize: -1
  datasource:
   url:
jdbc:
 mysql: //localhost:3306/database?useUnicode=true&characterEncoding=UTF-8&useSSL=true
   username: root
   password: root
   driverClassName: com.mysql.jdbc.Driver
 jpa:
   database: MYSQL
    showSql: true
    hibernate:
     namingStrategy: org.hibernate.cfg.ImprovedNamingStrategy
    properties:
     hibernate:
       dialect: org.hibernate.dialect.MySQL5Dialect
mybatis:
 configuration:
    #配置项:开启下划线到驼峰的自动转换. 作用:将数据库字段根据驼峰规则自动注入到对象属性     map-underscore-to-camel-case: true
以上列举了常用的配置项,所有配置项信息都可以在官网中找到,本课程就不一一列举了。
多环境配置
在一个企业级系统中,我们可能会遇到这样一个问题:开发时使用开发环境,测试时使用测试环境,上线时使用生产环境。每个环境的配置都可能不一样,比如开发环境的数据库是本地地址,而测试环境的数据库是测试地址。那我们在打包的时候如何生成不同环境的包呢?
这里的解决方案有很多:
每次编译之前手动把所有配置信息修改成当前运行的环境信息。这种方式导致每次都需要修改,相当麻烦,也容易出错。
利用 Maven,在 pom.xml 里配置多个环境,每次编译之前将 settings.xml 里面修改成当前要编译的环境 ID。这种方式会事先设置好所有环境,缺点就是每次也需要手动指定环境,如果环境指定错误,发布时是不知道的。
第三种方案就是本文重点介绍的,也是作者强烈推荐的方式。
首先,创建 application.yml 文件,在里面添加如下内容:
spring:
 profiles:
   active: dev
含义是指定当前项目的默认环境为 dev,即项目启动时如果不指定任何环境,Spring Boot 会自动从 dev 环境文件中读取配置信息。我们可以将不同环境都共同的配置信息写到这个文件中。
然后创建多环境配置文件,文件名的格式为:application-{profile}.yml,其中,{profile} 替换为环境名字,如 application-dev.yml,我们可以在其中添加当前环境的配置信息,如添加数据源:
spring:
 datasource:
   url: jdbc:mysql://localhost:3306/database?useUnicode=true&characterEncoding=UTF-8&useSSL=true
   username: root
   password: root
   driverClassName: com.mysql.jdbc.Driver
这样,我们就实现了多环境的配置,每次编译打包我们无需修改任何东西,编译为 jar 文件后,运行命令:
java -jar api.jar --spring.profiles.active=dev其中 --spring.profiles.active 就是我们要指定的环境。
常用注解
我们知道,Spring Boot 主要采用注解的方式,在《第01课:Spring Boot 入门》一节的入门实例中,我们也用到了一些注解。
本文,我将详细介绍在实际项目中常用的注解。
@SpringBootApplication
我们可以注意到 Spring Boot 支持 main 方法启动,在我们需要启动的主类中加入此注解,告诉 Spring Boot,这个类是程序的入口。如:
@SpringBootApplication
public class DemoApplication {
    public static void main(String[] args) {
        SpringApplication.run(DemoApplication.class, args);
    }
}
如果不加这个注解,程序是无法启动的。
我们查看下 SpringBootApplication 的源码,源码如下:
@Target(ElementType.TYPE)
@Retention(RetentionPolicy.RUNTIME)
@Documented
@Inherited
@SpringBootConfiguration
@EnableAutoConfiguration
@ComponentScan(excludeFilters = {@Filter(type = FilterType.CUSTOM, classes = TypeExcludeFilter.class), @Filter(type = FilterType.CUSTOM, classes = AutoConfigurationExcludeFilter.class)
})
public @interface SpringBootApplication {
/**
* Exclude specific auto-configuration classes such that they will never be applied.       * @return the classes to exclude
*/
@AliasFor(annotation = EnableAutoConfiguration.class, attribute = "exclude")
Class <? > [] exclude() default {};
/**
* Exclude specific auto-configuration class names such that they will never be
* applied.
* @return the class names to exclude
* @since 1.3.0
*/
@AliasFor(annotation = EnableAutoConfiguration.class, attribute = "excludeName")
String[] excludeName() default {};
/**
* Base packages to scan for annotated components. Use {@link #scanBasePackageClasses}
* for a type-safe alternative to String-based package names.
* @return base packages to scan
* @since 1.3.0
*/ @AliasFor(annotation = ComponentScan.class, attribute = "basePackages")
String[] scanBasePackages() default {};
/**
* Type-safe alternative to {@link #scanBasePackages} for specifying the packages to
* scan for annotated components. The package of each class specified will be scanned.
* <p>
* Consider creating a special no-op marker class or interface in each package that
* serves no purpose other than being referenced by this attribute.
* @return base packages to scan
* @since 1.3.0
*/
@AliasFor(annotation = ComponentScan.class, attribute = "basePackageClasses")
Class <? > [] scanBasePackageClasses() default {};
}
在这个注解类上有 3 个注解,如下:
@SpringBootConfiguration
@EnableAutoConfiguration
@ComponentScan(excludeFilters = {
     @Filter(type = FilterType.CUSTOM, classes = TypeExcludeFilter.class),
     @Filter(type = FilterType.CUSTOM, classes = AutoConfigurationExcludeFilter.class) })
因此,我们可以用这三个注解代替 SpringBootApplication,如:
@SpringBootConfiguration
@EnableAutoConfiguration
@ComponentScan
public class Application {
    public static void main(String[] args) {
        SpringApplication.run(Application.class, args);
    }}
其中,SpringBootConfiguration 表示 Spring Boot 的配置注解,EnableAutoConfiguration 表示自动配置,ComponentScan 表示 Spring Boot 扫描 Bean 的规则,比如扫描哪些包。
@Configuration
加入了这个注解的类被认为是 Spring Boot 的配置类,我们知道可以在 application.yml 设置一些配置,也可以通过代码设置配置。
如果我们要通过代码设置配置,就必须在这个类上标注 Configuration 注解。如下代码:
@Configuration
public class WebConfig extends WebMvcConfigurationSupport{
    @Override
    protected void addInterceptors(InterceptorRegistry registry) {
        super.addInterceptors(registry);
        registry.addInterceptor(newApiInterceptor());
    }}
不过 Spring Boot 官方推荐 Spring Boot 项目用 SpringBootConfiguration 来代替 Configuration。
@Bean
这个注解是方法级别上的注解,主要添加在 @Configuration 或 @SpringBootConfiguration 注解的类,有时也可以添加在 @Component 注解的类。它的作用是定义一个Bean。
请看下面代码:
@Bean
public ApiInterceptor interceptor(){
        return new ApiInterceptor();
    }
那么,我们可以在 ApiInterceptor 里面注入其他 Bean,也可以在其他 Bean 注入这个类。
@Value
通常情况下,我们需要定义一些全局变量,都会想到的方法是定义一个 public static 变量,在需要时调用,是否有其他更好的方案呢?答案是肯定的。下面请看代码:
    @Value("${server.port}")
    String port;
    @RequestMapping("/hello")
    public String home(String name) {
        return "hi "+name+",i am from port:" +port;
    }
其中,server.port 就是我们在 application.yml 里面定义的属性,我们可以自定义任意属性名,通过 @Value 注解就可以将其取出来。
它的好处不言而喻:
定义在配置文件里,变量发生变化,无需修改代码。
变量交给Spring来管理,性能更好。
注: 本课程默认针对于对 SpringMVC 有所了解的读者,Spring Boot 本身基于 Spring 开发的,因此,本文不再讲解其他 Spring 的注解。
注入任何类
本节通过一个实际的例子来讲解如何注入一个普通类,并且说明这样做的好处。
假设一个需求是这样的:项目要求使用阿里云的 OSS 进行文件上传。
我们知道,一个项目一般会分为开发环境、测试环境和生产环境。OSS 文件上传一般有如下几个参数:appKey、appSecret、bucket、endpoint 等。不同环境的参数都可能不一样,这样便于区分。按照传统的做法,我们在代码里设置这些参数,这样做的话,每次发布不同的环境包都需要手动修改代码。
这个时候,我们就可以考虑将这些参数定义到配置文件里面,通过前面提到的 @Value 注解取出来,再通过 @Bean 将其定义为一个 Bean,这时我们只需要在需要使用的地方注入该 Bean 即可。
首先在 application.yml 加入如下内容:
oss:
 appKey: 1
 appSecret: 1
 bucket: lynn
 endPoint: https://www.aliyun.com
其次创建一个普通类:
public class Aliyun {
    private String appKey;
    private String appSecret;
    private String bucket;
    private String endPoint;
    public static class Builder {
        private String appKey;
        private String appSecret;
        private String bucket;
        private String endPoint;
        public Builder setAppKey(String appKey) {
            this.appKey = appKey;
            return this;
        }
        public Builder setAppSecret(String appSecret) {
            this.appSecret = appSecret;
            return this;
        }
        public Builder setBucket(String bucket) {
            this.bucket = bucket;
            return this;
        }
        public Builder setEndPoint(String endPoint) {
            this.endPoint = endPoint;
            return this;
        }
        public Aliyun build() {
            return new Aliyun(this);
        }
    }
    public static Builder options() {
        return new Aliyun.Builder();
    }
    private Aliyun(Builder builder) {
        this.appKey = builder.appKey;
        this.appSecret = builder.appSecret;
        this.bucket = builder.bucket;
        this.endPoint = builder.endPoint;
    }
    public String getAppKey() {
        return appKey;
    }
    public String getAppSecret() {
        return appSecret;
    }
    public String getBucket() {
        return bucket;
    }
    public String getEndPoint() {
        return endPoint;
    }
}
然后在 @SpringBootConfiguration 注解的类添加如下代码:
@Value("${oss.appKey}")
private String appKey;
@Value("${oss.appSecret}")
private String appSecret;
@Value("${oss.bucket}")
private String bucket;
@Value("${oss.endPoint}")
private String endPoint;
@Bean
public Aliyun aliyun() {
    return Aliyun.options().setAppKey(appKey).setAppSecret(appSecret).setBucket(bucket).setEndPoint(endPoint).build();
}
最后在需要的地方注入这个 Bean 即可:
@Autowired
private Aliyun aliyun;
以上代码其实并不完美,如果增加一个属性,就需要在 Aliyun 类新增一个字段,还需要在 Configuration 类里注入它,扩展性不好,那么我们有没有更好的方式呢?
答案是肯定的,我们可以利用 ConfigurationProperties 注解更轻松地将配置信息注入到实体中。
1.创建实体类 AliyunAuto,并编写以下代码:
import org.springframework.boot.context.properties.ConfigurationProperties;
import org.springframework.stereotype.Component;
@Component
@ConfigurationProperties(prefix = "oss")
public class AliyunAuto {
    privateString appKey;
    privateString appSecret;
    privateString bucket;
    privateString endPoint;
    public String getAppKey() {
        return appKey;
    }
    public void setAppKey(String appKey) {
        this.appKey = appKey;
    }
    public String getAppSecret() {
        return appSecret;
    }
    public void setAppSecret(String appSecret) {
        this.appSecret = appSecret;
    }
    public String getBucket() {
        return bucket;
    }
    public void setBucket(String bucket) {
        this.bucket = bucket;
    }
    public String getEndPoint() {
        return endPoint;
    }
    public void setEndPoint(String endPoint) {
        this.endPoint = endPoint;
    }
@Override
public String toString() {
        return "AliyunAuto{" + "appKey='" + appKey + '\'' + ", appSecret='" + appSecret + '\'' + ", bucket='" + bucket + '\'' + ", endPoint='" + endPoint + '\'' + '}';
    }
}
其中,ConfigurationProperties 指定配置文件的前缀属性,实体具体字段和配置文件字段名一致,如在上述代码中,字段为 appKey,则自动获取 oss.appKey 的值,将其映射到 appKey 字段中,这样就完成了自动的注入。如果我们增加一个属性,则只需要修改 Bean 和配置文件即可,不用显示注入。
拦截器
我们在提供 API 的时候,经常需要对 API 进行统一的拦截,比如进行接口的安全性校验。
本节,我会讲解 Spring Boot 是如何进行拦截器设置的,请看接下来的代码。
创建一个拦截器类:ApiInterceptor,并实现 HandlerInterceptor 接口:
public class ApiInterceptor implements HandlerInterceptor {
    //请求之前
    @Override
    public boolean preHandle(HttpServletRequest httpServletRequest, HttpServletResponse httpServletResponse, Object o) throws Exception {
        System.out.println("进入拦截器");
        return true;
    }
    //请求时
    @Override
    public void postHandle(HttpServletRequest httpServletRequest, HttpServletResponse httpServletResponse, Object o, ModelAndView modelAndView) throws Exception {
    }
    //请求完成
    @Override
    public void afterCompletion(HttpServletRequest httpServletRequest, HttpServletResponse httpServletResponse, Object o, Exception e) throws Exception {
    }}
@SpringBootConfiguration 注解的类继承 WebMvcConfigurationSupport 类,并重写 addInterceptors 方法,将 ApiInterceptor 拦截器类添加进去,代码如下:
@SpringBootConfiguration
public class WebConfig extends WebMvcConfigurationSupport{
    @Override
    protected void addInterceptors(InterceptorRegistry registry) {
        super.addInterceptors(registry);
        registry.addInterceptor(newApiInterceptor());
    }}
异常处理
我们在 Controller 里提供接口,通常需要捕捉异常,并进行友好提示,否则一旦出错,界面上就会显示报错信息,给用户一种不好的体验。最简单的做法就是每个方法都使用 try catch 进行捕捉,报错后,则在 catch 里面设置友好的报错提示。如果方法很多,每个都需要 try catch,代码会显得臃肿,写起来也比较麻烦。
我们可不可以提供一个公共的入口进行统一的异常处理呢?当然可以。方法很多,这里我们通过 Spring 的 AOP 特性就可以很方便的实现异常的统一处理。实现方法很简单,只需要在 Controller 类添加以下代码即可。
@ExceptionHandler
public String doError(Exception ex)throws Exception{
        ex.printStackTrace();
        return ex.getMessage();
    }
其中,在 doError 方法上加入 @ExceptionHandler 注解即可,这样,接口发生异常会自动调用该方法。
这样,我们无需每个方法都添加 try catch,一旦报错,则会执行 handleThrowing 方法。
优雅的输入合法性校验
为了接口的健壮性,我们通常除了客户端进行输入合法性校验外,在 Controller 的方法里,我们也需要对参数进行合法性校验,传统的做法是每个方法的参数都做一遍判断,这种方式和上一节讲的异常处理一个道理,不太优雅,也不易维护。
其实,SpringMVC 提供了验证接口,下面请看代码:
@GetMapping("authorize")
public void authorize(@Valid AuthorizeIn authorize, BindingResult ret){
    if(result.hasFieldErrors()){
            List<FieldError> errorList = result.getFieldErrors();
            //通过断言抛出参数不合法的异常
            errorList.stream().forEach(item -> Assert.isTrue(false,item.getDefaultMessage()));
        }
}
public class AuthorizeIn extends BaseModel{
    @NotBlank(message = "缺少response_type参数")
    private String responseType;
    @NotBlank(message = "缺少client_id参数")
    private String ClientId;
    private String state;
    @NotBlank(message = "缺少redirect_uri参数")
    private String redirectUri;
    public String getResponseType() {
        return responseType;
    }
    public void setResponseType(String responseType) {
        this.responseType = responseType;
    }
    public String getClientId() {
        return ClientId;
    }
    public void setClientId(String clientId) {
        ClientId = clientId;
    }
    public String getState() {
        return state;
    }
    public void setState(String state) {
        this.state = state;
    }
    public String getRedirectUri() {
        return redirectUri;
    }
    public void setRedirectUri(String redirectUri) {
        this.redirectUri = redirectUri;
    }
}
我们再把验证的代码单独封装成方法:
protected void validate(BindingResult result){
        if(result.hasFieldErrors()){
            List<FieldError> errorList = result.getFieldErrors();
            errorList.stream().forEach(item -> Assert.isTrue(false,item.getDefaultMessage()));
        }
    }
这样每次参数校验只需要调用 validate 方法就行了,我们可以看到代码的可读性也大大提高了。
接口版本控制
一个系统上线后会不断迭代更新,需求也会不断变化,有可能接口的参数也会发生变化,如果在原有的参数上直接修改,可能会影响线上系统的正常运行,这时我们就需要设置不同的版本,这样即使参数发生变化,由于老版本没有变化,因此不会影响上线系统的运行。
一般我们可以在地址上带上版本号,也可以在参数上带上版本号,还可以再 header 里带上版本号,这里我们在地址上带上版本号,大致的地址如:http://api.example.com/v1/test,其中,v1 即代表的是版本号。具体做法请看代码:
@Target({ElementType.METHOD,ElementType.TYPE})
@Retention(RetentionPolicy.RUNTIME)
@Documented
@Mappingpublic
@interface ApiVersion {
    /**
     * 标识版本号
     * @return
     */
    int value();
}
public class ApiVersionCondition implements RequestCondition<ApiVersionCondition> {
    // 路径中版本的前缀, 这里用 /v[1-9]/的形式
    private final static PatternVERSION_PREFIX_PATTERN = Pattern.compile("v(\\d+)/");
    private int apiVersion;
    public ApiVersionCondition(int apiVersion){
        this.apiVersion = apiVersion;
    }
    @Override
    public ApiVersionCondition combine(ApiVersionCondition other) {
        // 采用最后定义优先原则,则方法上的定义覆盖类上面的定义
        return new ApiVersionCondition(other.getApiVersion());
    }
    @Override
    public ApiVersionCondition getMatchingCondition(HttpServletRequest request) {
        Matcher m = VERSION_PREFIX_PATTERN.matcher(request.getRequestURI());
        if(m.find()){
            Integer version = Integer.valueOf(m.group(1));
            if(version >= this.apiVersion)
            {
                return this;
            }
        }
        return null;
    }
    @Override
    public int compareTo(ApiVersionCondition other, HttpServletRequest request) {
        // 优先匹配最新的版本号
        return other.getApiVersion() - this.apiVersion;
    }
    public int getApiVersion() {
        return apiVersion;
    }
}
public class CustomRequestMappingHandlerMapping extends RequestMappingHandlerMapping {
    @Override
    protected RequestCondition<ApiVersionCondition> getCustomTypeCondition(Class<?> handlerType) {
        ApiVersion apiVersion = AnnotationUtils.findAnnotation(handlerType, ApiVersion.class);
        return createCondition(apiVersion);
    }
    @Override
    protected RequestCondition<ApiVersionCondition> getCustomMethodCondition(Method method) {
        ApiVersion apiVersion = AnnotationUtils.findAnnotation(method, ApiVersion.class);
        return createCondition(apiVersion);
    }
    private RequestCondition<ApiVersionCondition> createCondition(ApiVersion apiVersion) {
        return apiVersion == null ? null : new ApiVersionCondition(apiVersion.value());
    }
}
@SpringBootConfiguration
public class WebConfig extends WebMvcConfigurationSupport {
    @Bean
    public AuthInterceptor interceptor(){
        return new AuthInterceptor();
    }
    @Override
    public void addInterceptors(InterceptorRegistry registry) {
        registry.addInterceptor(new AuthInterceptor());
    }
@Override
@Bean
public RequestMappingHandlerMapping requestMappingHandlerMapping() {
        RequestMappingHandlerMapping handlerMapping = new CustomRequestMappingHandlerMapping();
        handlerMapping.setOrder(0);
        handlerMapping.setInterceptors(getInterceptors());
        return handlerMapping;    }
}
Controller 类的接口定义如下:
@ApiVersion(1)
@RequestMapping("{version}/dd")
public class HelloController{}
这样我们就实现了版本控制,如果增加了一个版本,则创建一个新的 Controller,方法名一致,ApiVersion 设置为2,则地址中 v1 会找到 ApiVersion 为1的方法,v2 会找到 ApiVersion 为2的方法。
自定义 JSON 解析
Spring Boot 中 RestController 返回的字符串默认使用 Jackson 引擎,它也提供了工厂类,我们可以自定义 JSON 引擎,本节实例我们将 JSON 引擎替换为 fastJSON,首先需要引入 fastJSON:
<dependency>
    <groupId>com.alibaba</groupId>
    <artifactId>fastjson</artifactId>
    <version>${fastjson.version}</version>
</dependency>
其次,在 WebConfig 类重写 configureMessageConverters 方法:
@Override
public void configureMessageConverters(List<HttpMessageConverter<?>> converters) {
        super.configureMessageConverters(converters);
        /*
        1.需要先定义一个 convert 转换消息的对象;
        2.添加 fastjson 的配置信息,比如是否要格式化返回的 JSON 数据
        3.在 convert 中添加配置信息
        4.将 convert 添加到 converters 中
         */
        //1.定义一个 convert 转换消息对象
        FastJsonHttpMessageConverter fastConverter=new FastJsonHttpMessageConverter();
        //2.添加 fastjson 的配置信息,比如是否要格式化返回 JSON 数据
        FastJsonConfig fastJsonConfig=new FastJsonConfig();
        fastJsonConfig.setSerializerFeatures(
                SerializerFeature.PrettyFormat
        );
        fastConverter.setFastJsonConfig(fastJsonConfig);
        converters.add(fastConverter);
    }
单元测试
Spring Boot 的单元测试很简单,直接看代码:
@SpringBootTest(classes = DemoApplication.class)
@RunWith(SpringJUnit4ClassRunner.class)
public class TestDB {
    @Test
    public void test(){
    }
}
模板引擎
在传统的 SpringMVC 架构中,我们一般将 JSP、HTML 页面放到 webapps 目录下面,但是 Spring Boot 没有 webapps,更没有 web.xml,如果我们要写界面的话,该如何做呢?
Spring Boot 官方提供了几种模板引擎:FreeMarker、Velocity、Thymeleaf、Groovy、mustache、JSP。
这里以 FreeMarker 为例讲解 Spring Boot 的使用。
首先引入 FreeMarker 依赖:
<dependency>
    <groupId>org.springframework.boot</groupId>
    <artifactId>spring-boot-starter-freemarker</artifactId>
</dependency>
在 resources 下面建立两个目录:static 和 templates,如图所示:

其中 static 目录用于存放静态资源,譬如 CSS、JS、HTML 等,templates 目录存放模板引擎文件,我们可以在 templates 下面创建一个文件:index.ftl(freemarker 默认后缀为 .ftl),并添加内容:
<!DOCTYPE html>
<html>
    <head></head>
    <body>
        <h1>Hello World!</h1>
    </body>
</html>
然后创建 PageController 并添加内容:
@Controller
public class PageController {
    @RequestMapping("index.html")
    public String index(){
        return"index";
    }
}
启动 Application.java,访问:http://localhost:8081/api/index.html,就可以看到如图所示:

注:后面的内容就需要购买了,如有需要的请到原创处点击购买链接
Spring Cloud 从入门到精通_spring_蔚1-DevPress官方社区 (csdn.net)


 2639
2639


 被折叠的 条评论
为什么被折叠?
被折叠的 条评论
为什么被折叠?
 到【灌水乐园】发言


