由于开发一个简陋的权限管理系统,用一篇文章记录我的所思所想,会导致篇幅太长,不易观看,所以我索性一分为三,做成三篇文章。这篇博文承接上一篇文章——Filter(过滤器)常见应用(三)——权限管理系统(一)。
在上一篇文章中,我们已经开发好了domain层、dao层、service层,现在我们来开发web层。
权限管理系统的设计和分析
开发web层
我们使用权限管理系统,一般是在后台管理页面,因此我们首先在WebRoot根目录下新建一个后台管理页面——manager.jsp,为了能让该页面显示的更加优美,我们可以采用分帧技术来设计。
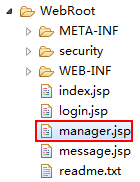
这样的页面的内容是:
<%@ page language="java" contentType="text/html; charset=UTF-8"
    pageEncoding="UTF-8"%>
<!DOCTYPE html PUBLIC "-//W3C//DTD HTML 4.01 Transitional//EN" "http://www.w3.org/TR/html4/loose.dtd">
<html>
<head>
<meta http-equiv="Content-Type" content="text/html; charset=UTF-8">
<title>后台管理页面(采用分帧技术)</title>
</head>
<frameset rows="22%,*">
    <frame name="head" src="${pageContext.request.contextPath }/security/head.jsp">
    <frameset cols="15%,*">
        <frame name="left" src="${pageContext.request.contextPath }/security/left.jsp">
        <frame name="right" src="#">
    </frameset>
</frameset>
</html>
接下来我们就在WebRoot根目录下的security目录下新建一个表示页头的页面——head.jsp。
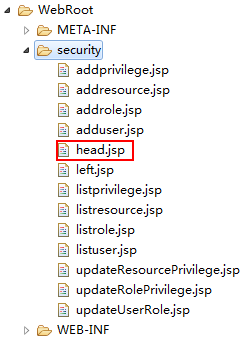
这样的页面的内容很简单,如下:
<%@ page language="java" contentType="text/html; charset=UTF-8"
    pageEncoding="UTF-8"%>
<!DOCTYPE html PUBLIC "-//W3C//DTD HTML 4.01 Transitional//EN" "http://www.w3.org/TR/html4/loose.dtd">
<html>
<head>
<meta http-equiv="Content-Type" content="text/html; charset=UTF-8">
<title>页头</title>
</head>
<body style="text-align: center;">
    <h1>XXX后台管理</h1>
</body>
</html>
再接下来我们还要在WebRoot根目录下的security目录下新建一个代表左侧导航栏的页面——left.jsp。
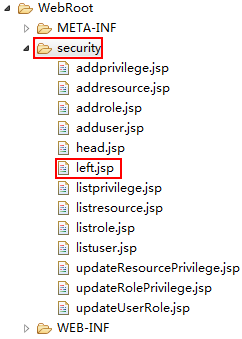
这样的页面的内容是:
<%@ page language="java" contentType="text/html; charset=UTF-8"
    pageEncoding="UTF-8"%>
<!DOCTYPE html PUBLIC "-//W3C//DTD HTML 4.01 Transitional//EN" "http://www.w3.org/TR/html4/loose.dtd">
<html>
<head>
<meta http-equiv="Content-Type" content="text/html; charset=UTF-8">
<title>左侧导航栏</title>
</head>
<body>
    <br/><br/>
    <a href="${pageContext.request.contextPath }/PrivilegeServlet?method=getAll" target="right">权限管理</a>
    <br/><br/>
    <a href="${pageContext.request.contextPath }/ResourceServlet?method=getAll" target="right">资源管理</a>
    <br/><br/>
    <a href="${pageContext.request.contextPath }/RoleServlet?method=getAll" target="right">角色管理</a>
    <br/><br/>
    <a href="${pageContext.request.contextPath }/UserServlet?method=getAll" target="right">用户管理</a>
    <br/><br/>
</body>
</html>
- 1
- 2
- 3
- 4
- 5
- 6
- 7
- 8
- 9
- 10
- 11
- 12
- 13
- 14
- 15
- 16
- 17
- 18
- 19
- 20
管理员点击权限管理超链接时,本应交给一个诸如ListPrivilegeServlet这样的Servlet去处理,即获取所有权限。随之而来的代码就应该是这样的:
<a href="${pageContext.request.contextPath }/ListPrivilegeServlet" target="right">权限管理</a>
上面的代码隐形地规定了每一个请求对应一个Servlet,这样做并不好。就以权限管理模块为例
- 管理员点击权限管理超链接时,该请求就要有一个对应的Servlet来处理,诸如ListPrivilegeServlet。
- 管理员点击添加权限超链接时,该请求就要有一个对应的Servlet来处理,以此提供一个添加权限的页面,诸如AddPrivilegeUIServlet。
- 管理员点击添加权限按钮时,该请求就要有一个对应的Servlet来处理,诸如AddPrivilegeServlet。
以此类推,那么资源管理模块、角色管理模块以及用户管理模块等等都要有大量的相应处理的Servlet。试问你在cn.itcast.web.controller包写几十个Servlet,你恶心不恶心啊!所以为了避免这种情况的发生,我们可以这样来写:
<a href="${pageContext.request.contextPath }/PrivilegeServlet?method=getAll" target="right">权限管理</a>
就用一个Servlet,诸如PrivilegeServlet来处理所有与权限相关的请求,如若这样,那么每一个模块就只对应一个Servlet,也就说我们只需要在cn.itcast.web.controller包写4个Servlet就够了,你说这样爽不爽呢?
同样以权限管理模块为例,如果就用一个PrivilegeServlet来处理所有与权限相关的请求,只须在相应请求URL后面跟上method参数,然后在PrivilegeServlet中根据相应请求URL后面的method参数的值,将请求派发给对应的方法去处理。
如,left.jsp页面中有这样的一个超链接:
<a href="${pageContext.request.contextPath }/PrivilegeServlet?method=getAll" target="right">权限管理</a>
那么在PrivilegeServlet中的代码就应是这样的:
public class PrivilegeServlet extends HttpServlet {
private SecurityService service = new SecurityService();
protected void doGet(HttpServletRequest request, HttpServletResponse response)
throws ServletException, IOException {
String method = request.getParameter("method");
if ("getAll".equals(method)) {
getAll(request, response);
}
}
private void getAll(HttpServletRequest request, HttpServletResponse response) throws ServletException, IOException {
获取所有权限的相关代码......
}
protected void doPost(HttpServletRequest request, HttpServletResponse response)
throws ServletException, IOException {
doGet(request, response);
}
}
- 1
- 2
- 3
- 4
- 5
- 6
- 7
- 8
- 9
- 10
- 11
- 12
- 13
- 14
- 15
- 16
- 17
- 18
- 19
- 20
- 21
- 22
- 23
- 24
- 25
- 26
- 27
- 28
- 29
到这里,权限管理这一模块的设计终于该登上历史舞台了。
权限管理模块的设计
当我们点击权限管理这一超链接时,就应将请求交给PrivilegeServlet。
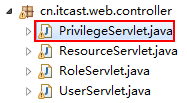
又由于请求URL后面的method参数的值是getAll,因此要把请求派发给getAll方法处理,这样PrivilegeServlet的代码就应该为:
public class PrivilegeServlet extends HttpServlet {
private SecurityService service = new SecurityService();
protected void doGet(HttpServletRequest request, HttpServletResponse response)
throws ServletException, IOException {
String method = request.getParameter("method");
if ("getAll".equals(method)) {
getAll(request, response);
}
}
private void getAll(HttpServletRequest request, HttpServletResponse response) throws ServletException, IOException {
List<Privilege> list = service.getAllPrivilege();
request.setAttribute("list", list);
request.getRequestDispatcher("/security/listprivilege.jsp").forward(request, response);
}
protected void doPost(HttpServletRequest request, HttpServletResponse response)
throws ServletException, IOException {
doGet(request, response);
}
}
- 1
- 2
- 3
- 4
- 5
- 6
- 7
- 8
- 9
- 10
- 11
- 12
- 13
- 14
- 15
- 16
- 17
- 18
- 19
- 20
- 21
- 22
- 23
- 24
- 25
- 26
- 27
- 28
- 29
- 30
- 31
顺其自然地,我们接下来应在WebRoot根目录下的security目录下新建一个展示权限列表的页面——listprivilege.jsp。
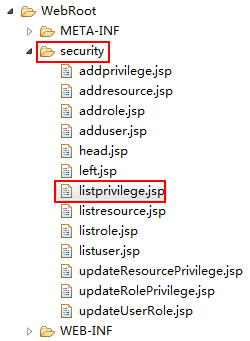
这样的页面的内容为:
<%@ page language="java" contentType="text/html; charset=UTF-8"
    pageEncoding="UTF-8"%>
<%@ taglib uri="http://java.sun.com/jsp/jstl/core" prefix="c" %>
<!DOCTYPE html PUBLIC "-//W3C//DTD HTML 4.01 Transitional//EN" "http://www.w3.org/TR/html4/loose.dtd">
<html>
<head>
<meta http-equiv="Content-Type" content="text/html; charset=UTF-8">
<title>权限列表</title>
</head>
<body style="text-align: center;">
    <br/><br/>
    <table width="60%" align="center">
        <tr>
            <td></td>
            <td></td>
            <td align="right">
                <a href="${pageContext.request.contextPath }/PrivilegeServlet?method=addUI">添加权限</a>
            </td>
        </tr>
    </table>
    <br/>
    <table width="60%" border="1" align="center">
        <tr>
            <td>权限名称</td>
            <td>权限描述</td>
            <td>操作</td>
        </tr>
        <c:forEach var="p" items="${list }">
            <tr>
                <td>${p.name }</td>
                <td>${p.description }</td>
                <td>
                    <a href="#">删除</a>
                    <a href="#">修改</a>
                </td>
            </tr>
        </c:forEach>
    </table>
</body>
</html>
- 1
- 2
- 3
- 4
- 5
- 6
- 7
- 8
- 9
- 10
- 11
- 12
- 13
- 14
- 15
- 16
- 17
- 18
- 19
- 20
- 21
- 22
- 23
- 24
- 25
- 26
- 27
- 28
- 29
- 30
- 31
- 32
- 33
- 34
- 35
- 36
- 37
- 38
- 39
- 40
我们要添加一个权限,就应该点击添加权限的超链接,接着给我们提供一个添加权限的页面,同样地该请求也要交给PrivilegeServlet,又由于请求URL后面的method参数的值是addUI,因此要把请求派发给addUI方法处理,这样PrivilegeServlet的代码就应该为:
@WebServlet("/PrivilegeServlet")
public class PrivilegeServlet extends HttpServlet {
private SecurityService service = new SecurityService();
protected void doGet(HttpServletRequest request, HttpServletResponse response)
throws ServletException, IOException {
String method = request.getParameter("method");
if ("getAll".equals(method)) {
getAll(request, response);
}
if ("addUI".equals(method)) {
addUI(request, response);
}
}
private void getAll(HttpServletRequest request, HttpServletResponse response) throws ServletException, IOException {
List<Privilege> list = service.getAllPrivilege();
request.setAttribute("list", list);
request.getRequestDispatcher("/security/listprivilege.jsp").forward(request, response);
}
private void addUI(HttpServletRequest request, HttpServletResponse response) throws ServletException, IOException {
request.getRequestDispatcher("/security/addprivilege.jsp").forward(request, response);
}
protected void doPost(HttpServletRequest request, HttpServletResponse response)
throws ServletException, IOException {
doGet(request, response);
}
}
- 1
- 2
- 3
- 4
- 5
- 6
- 7
- 8
- 9
- 10
- 11
- 12
- 13
- 14
- 15
- 16
- 17
- 18
- 19
- 20
- 21
- 22
- 23
- 24
- 25
- 26
- 27
- 28
- 29
- 30
- 31
- 32
- 33
- 34
- 35
- 36
- 37
- 38
- 39
- 40
- 41
- 42
接下来,我们应在WebRoot根目录下的security目录下新建一个添加权限的页面——addprivilege.jsp。
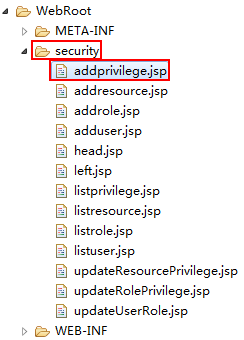
这样的页面的内容为:
<%@ page language="java" contentType="text/html; charset=UTF-8"
    pageEncoding="UTF-8"%>
<!DOCTYPE html PUBLIC "-//W3C//DTD HTML 4.01 Transitional//EN" "http://www.w3.org/TR/html4/loose.dtd">
<html>
<head>
<meta http-equiv="Content-Type" content="text/html; charset=UTF-8">
<title>添加权限界面</title>
</head>
<body>
    <form action="${pageContext.request.contextPath }/PrivilegeServlet?method=add" method="post">
        <table>
            <tr>
                <td>权限名称</td>
                <td>
                    <input type="text" name="name">
                </td>
            </tr>
            <tr>
                <td>权限描述</td>
                <td>
                    <textarea rows="5" cols="50" name="description"></textarea>
                </td>
            </tr>
            <tr>
                <td></td>
                <td>
                    <input type="submit" value="添加权限">
                </td>
            </tr>
        </table>
    </form>
</body>
</html>
- 1
- 2
- 3
- 4
- 5
- 6
- 7
- 8
- 9
- 10
- 11
- 12
- 13
- 14
- 15
- 16
- 17
- 18
- 19
- 20
- 21
- 22
- 23
- 24
- 25
- 26
- 27
- 28
- 29
- 30
- 31
- 32
- 33
当我们在以上页面填写完一个权限的详细信息之后,点击添加权限按钮,请求也应交给PrivilegeServlet,又由于请求URL后面的method参数的值是add,因此要把请求派发给add方法处理,这样PrivilegeServlet的代码就应该为:
public class PrivilegeServlet extends HttpServlet {
private SecurityService service = new SecurityService();
protected void doGet(HttpServletRequest request, HttpServletResponse response)
throws ServletException, IOException {
String method = request.getParameter("method");
if ("getAll".equals(method)) {
getAll(request, response);
}
if ("add".equals(method)) {
add(request, response);
}
if ("addUI".equals(method)) {
addUI(request, response);
}
}
private void getAll(HttpServletRequest request, HttpServletResponse response) throws ServletException, IOException {
List<Privilege> list = service.getAllPrivilege();
request.setAttribute("list", list);
request.getRequestDispatcher("/security/listprivilege.jsp").forward(request, response);
}
private void addUI(HttpServletRequest request, HttpServletResponse response) throws ServletException, IOException {
request.getRequestDispatcher("/security/addprivilege.jsp").forward(request, response);
}
private void add(HttpServletRequest request, HttpServletResponse response) throws ServletException, IOException {
try {
Privilege p = WebUtils.request2Bean(request, Privilege.class);
p.setId(UUID.randomUUID().toString());
service.addPrivilege(p);
request.setAttribute("message", "添加成功!!!");
} catch (Exception e) {
e.printStackTrace();
request.setAttribute("message", "添加失败!!!");
}
request.getRequestDispatcher("/message.jsp").forward(request, response);
}
protected void doPost(HttpServletRequest request, HttpServletResponse response)
throws ServletException, IOException {
doGet(request, response);
}
}
- 1
- 2
- 3
- 4
- 5
- 6
- 7
- 8
- 9
- 10
- 11
- 12
- 13
- 14
- 15
- 16
- 17
- 18
- 19
- 20
- 21
- 22
- 23
- 24
- 25
- 26
- 27
- 28
- 29
- 30
- 31
- 32
- 33
- 34
- 35
- 36
- 37
- 38
- 39
- 40
- 41
- 42
- 43
- 44
- 45
- 46
- 47
- 48
- 49
- 50
- 51
- 52
- 53
- 54
- 55
- 56
- 57
- 58
- 59
- 60
可能小伙伴心里要不爽了,妈的,add()方法中怎么又多出了一个WebUtils类,这是从哪个缝里蹦出来的,不要担心,我来慢慢讲解,WebUtils类是一个工具类,它的职责就是将请求参数给封装到一个JavaBean中,应在cn.itcast.utils包下新建该类。

WebUtils类的具体代码如下:
public class WebUtils {

    public static <T> T request2Bean(HttpServletRequest request, Class<T> beanClass) {

        try {
            T t = beanClass.newInstance();
            Map map = request.getParameterMap();

            BeanUtils.populate(t, map);
            return t;
        } catch (Exception e) {
            throw new RuntimeException(e);
        }

    }
}
千万不要忘了在WebRoot根目录下新建一个全局消息显示页面——message.jsp。
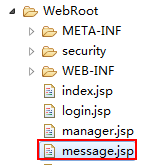
message.jsp页面的内容如下:
<%@ page language="java" contentType="text/html; charset=UTF-8"
    pageEncoding="UTF-8"%>
<!DOCTYPE html PUBLIC "-//W3C//DTD HTML 4.01 Transitional//EN" "http://www.w3.org/TR/html4/loose.dtd">
<html>
<head>
<meta http-equiv="Content-Type" content="text/html; charset=UTF-8">
<title>Insert title here</title>
</head>
<body>
    ${message }
</body>
</html>
至此,我们的权限管理模块就设计完毕了。如果大家想要测试的话,千万不要忘了解决全站中文乱码,因为我在PrivilegeServlet没有写代码解决全站中文乱码,所以就应该给全站配一个解决全站中文乱码的过滤器。

提示:这样的过滤器我写过很多遍了,实在无心再写了,你若是第一次编写,可参考我前面的文章。
这样的过滤器写好之后,还要在web.xml中配置哟!
<filter>
    <filter-name>CharacterEncodingFilter</filter-name>
    <filter-class>cn.itcast.web.filter.CharacterEncodingFilter</filter-class>
</filter>
<filter-mapping>
    <filter-name>CharacterEncodingFilter</filter-name>
    <url-pattern>/*</url-pattern>
</filter-mapping>
写到这里,那你放心大胆去测试吧!接下来我们就要设计资源管理模块了。
资源管理模块的设计
当我们点击资源管理这一超链接时,就应将请求交给ResourceServlet。
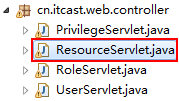
又由于请求URL后面的method参数的值是getAll,因此要把请求派发给getAll方法处理,这样ResourceServlet的代码就应该为:
public class ResourceServlet extends HttpServlet {

    private SecurityService service = new SecurityService();

    protected void doGet(HttpServletRequest request, HttpServletResponse response)
            throws ServletException, IOException {

        String method = request.getParameter("method");
        if ("getAll".equals(method)) {
            getAll(request, response);
        }

    }

    private void getAll(HttpServletRequest request, HttpServletResponse response) throws ServletException, IOException {

        List<Resource> list = service.getAllResource();
        request.setAttribute("list", list);
        request.getRequestDispatcher("/security/listresource.jsp").forward(request, response);

    }

    protected void doPost(HttpServletRequest request, HttpServletResponse response)
            throws ServletException, IOException {
        doGet(request, response);
    }

}
- 1
- 2
- 3
- 4
- 5
- 6
- 7
- 8
- 9
- 10
- 11
- 12
- 13
- 14
- 15
- 16
- 17
- 18
- 19
- 20
- 21
- 22
- 23
- 24
- 25
- 26
- 27
- 28
顺其自然地,我们接下来应在WebRoot根目录下的security目录下新建一个展示资源列表的页面——listresource.jsp。
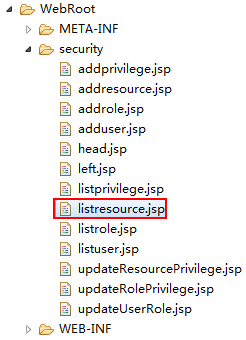
这样的页面的内容为:
<%@ page language="java" contentType="text/html; charset=UTF-8"
    pageEncoding="UTF-8"%>
<%@ taglib uri="http://java.sun.com/jsp/jstl/core" prefix="c" %>
<!DOCTYPE html PUBLIC "-//W3C//DTD HTML 4.01 Transitional//EN" "http://www.w3.org/TR/html4/loose.dtd">
<html>
<head>
<meta http-equiv="Content-Type" content="text/html; charset=UTF-8">
<title>资源列表</title>
</head>
<body>
    <br/><br/>
    <table width="80%" align="center">
        <tr>
            <td></td>
            <td></td>
            <td align="right">
                <a href="${pageContext.request.contextPath }/ResourceServlet?method=addUI">添加资源</a>
            </td>
        </tr>
    </table>
    <br/>
    <table width="80%" border="1" align="center">
        <tr>
            <td>资源uri</td>
            <td>控制资源的权限</td>
            <td>资源描述</td>
            <td>操作</td>
        </tr>
        <c:forEach var="r" items="${list }">
            <tr>
                <td>${r.uri }</td>
                <td>${r.privilege.name }</td>
                <td>${r.description }</td>
                <td>
                    <a href="${pageContext.request.contextPath }/ResourceServlet?method=forUpdatePrivilegeUI&id=${r.id }">修改资源的权限</a>
                    <a href="#">删除</a>
                </td>
            </tr>
        </c:forEach>
    </table>
</body>
</html>
- 1
- 2
- 3
- 4
- 5
- 6
- 7
- 8
- 9
- 10
- 11
- 12
- 13
- 14
- 15
- 16
- 17
- 18
- 19
- 20
- 21
- 22
- 23
- 24
- 25
- 26
- 27
- 28
- 29
- 30
- 31
- 32
- 33
- 34
- 35
- 36
- 37
- 38
- 39
- 40
- 41
- 42
我们要添加一个资源,就应该点击添加资源的超链接,接着给我们提供一个添加资源的页面,同样地该请求也要交给ResourceServlet,又由于请求URL后面的method参数的值是addUI,因此要把请求派发给addUI方法处理,这样ResourceServlet的代码就应该为:
public class ResourceServlet extends HttpServlet {

    private SecurityService service = new SecurityService();

    protected void doGet(HttpServletRequest request, HttpServletResponse response)
            throws ServletException, IOException {

        String method = request.getParameter("method");
        if ("getAll".equals(method)) {
            getAll(request, response);
        }
        if ("addUI".equals(method)) {
            addUI(request, response);
        }
    }

    private void getAll(HttpServletRequest request, HttpServletResponse response) throws ServletException, IOException {

        List<Resource> list = service.getAllResource();
        request.setAttribute("list", list);
        request.getRequestDispatcher("/security/listresource.jsp").forward(request, response);

    }

    private void addUI(HttpServletRequest request, HttpServletResponse response) throws ServletException, IOException {

        request.getRequestDispatcher("/security/addresource.jsp").forward(request, response);

    }

    protected void doPost(HttpServletRequest request, HttpServletResponse response)
            throws ServletException, IOException {
        doGet(request, response);
    }

}
- 1
- 2
- 3
- 4
- 5
- 6
- 7
- 8
- 9
- 10
- 11
- 12
- 13
- 14
- 15
- 16
- 17
- 18
- 19
- 20
- 21
- 22
- 23
- 24
- 25
- 26
- 27
- 28
- 29
- 30
- 31
- 32
- 33
- 34
- 35
- 36
接下来,我们应在WebRoot根目录下的security目录下新建一个添加资源的页面——addresource.jsp。
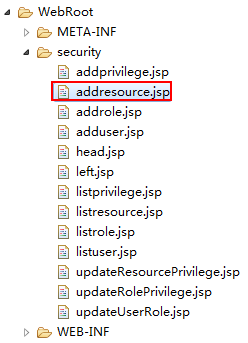
这样的页面的内容为:
<%@ page language="java" contentType="text/html; charset=UTF-8"
    pageEncoding="UTF-8"%>
<!DOCTYPE html PUBLIC "-//W3C//DTD HTML 4.01 Transitional//EN" "http://www.w3.org/TR/html4/loose.dtd">
<html>
<head>
<meta http-equiv="Content-Type" content="text/html; charset=UTF-8">
<title>添加资源界面</title>
</head>
<body>
    <form action="${pageContext.request.contextPath }/ResourceServlet?method=add" method="post">
        <table>
            <tr>
                <td>资源URI</td>
                <td>
                    <input type="text" name="uri">
                </td>
            </tr>
            <tr>
                <td>资源描述</td>
                <td>
                    <textarea rows="5" cols="50" name="description"></textarea>
                </td>
            </tr>
            <tr>
                <td></td>
                <td>
                    <input type="submit" value="添加资源">
                </td>
            </tr>
        </table>
    </form>
</body>
</html>
- 1
- 2
- 3
- 4
- 5
- 6
- 7
- 8
- 9
- 10
- 11
- 12
- 13
- 14
- 15
- 16
- 17
- 18
- 19
- 20
- 21
- 22
- 23
- 24
- 25
- 26
- 27
- 28
- 29
- 30
- 31
- 32
- 33
当我们在以上页面填写完一个资源的详细信息之后,点击添加资源按钮,请求也应交给ResourceServlet,又由于请求URL后面的method参数的值是add,因此要把请求派发给add方法处理,这样ResourceServlet的代码就应该为:
public class ResourceServlet extends HttpServlet {

    private SecurityService service = new SecurityService();

    protected void doGet(HttpServletRequest request, HttpServletResponse response)
            throws ServletException, IOException {

        String method = request.getParameter("method");
        if ("getAll".equals(method)) {
            getAll(request, response);
        }
        if ("addUI".equals(method)) {
            addUI(request, response);
        }
        if ("add".equals(method)) {
            add(request, response);
        }
    }

    private void getAll(HttpServletRequest request, HttpServletResponse response) throws ServletException, IOException {

        List<Resource> list = service.getAllResource();
        request.setAttribute("list", list);
        request.getRequestDispatcher("/security/listresource.jsp").forward(request, response);

    }

    private void addUI(HttpServletRequest request, HttpServletResponse response) throws ServletException, IOException {

        request.getRequestDispatcher("/security/addresource.jsp").forward(request, response);

    }

    private void add(HttpServletRequest request, HttpServletResponse response) throws ServletException, IOException {

        try {
            Resource r = WebUtils.request2Bean(request, Resource.class);
            r.setId(UUID.randomUUID().toString());
            service.addResource(r);

            request.setAttribute("message", "添加成功!!!");
        } catch (Exception e) {
            e.printStackTrace();
            request.setAttribute("message", "添加失败!!!");
        }
        request.getRequestDispatcher("/message.jsp").forward(request, response);

    }

    protected void doPost(HttpServletRequest request, HttpServletResponse response)
            throws ServletException, IOException {
        doGet(request, response);
    }

}
- 1
- 2
- 3
- 4
- 5
- 6
- 7
- 8
- 9
- 10
- 11
- 12
- 13
- 14
- 15
- 16
- 17
- 18
- 19
- 20
- 21
- 22
- 23
- 24
- 25
- 26
- 27
- 28
- 29
- 30
- 31
- 32
- 33
- 34
- 35
- 36
- 37
- 38
- 39
- 40
- 41
- 42
- 43
- 44
- 45
- 46
- 47
- 48
- 49
- 50
- 51
- 52
- 53
- 54
- 55
当添加完一个资源后,就要给其授予一个权限,我们可以在listresource.jsp页面点击修改资源的权限超链接,这时,请求也应交给ResourceServlet,该请求URL后面不仅要携带method参数,而且还要携带要修改资源的id。由于请求URL后面的method参数的值是forUpdatePrivilegeUI,因此要把请求派发给forUpdatePrivilegeUI方法处理,这样ResourceServlet的代码就应该为:
public class ResourceServlet extends HttpServlet {
private SecurityService service = new SecurityService();
protected void doGet(HttpServletRequest request, HttpServletResponse response)
throws ServletException, IOException {
String method = request.getParameter("method");
if ("getAll".equals(method)) {
getAll(request, response);
}
if ("addUI".equals(method)) {
addUI(request, response);
}
if ("add".equals(method)) {
add(request, response);
}
if ("forUpdatePrivilegeUI".equals(method)) {
forUpdatePrivilegeUI(request, response);
}
}
private void getAll(HttpServletRequest request, HttpServletResponse response) throws ServletException, IOException {
List<Resource> list = service.getAllResource();
request.setAttribute("list", list);
request.getRequestDispatcher("/security/listresource.jsp").forward(request, response);
}
private void addUI(HttpServletRequest request, HttpServletResponse response) throws ServletException, IOException {
request.getRequestDispatcher("/security/addresource.jsp").forward(request, response);
}
private void add(HttpServletRequest request, HttpServletResponse response) throws ServletException, IOException {
try {
Resource r = WebUtils.request2Bean(request, Resource.class);
r.setId(UUID.randomUUID().toString());
service.addResource(r);
request.setAttribute("message", "添加成功!!!");
} catch (Exception e) {
e.printStackTrace();
request.setAttribute("message", "添加失败!!!");
}
request.getRequestDispatcher("/message.jsp").forward(request, response);
}
private void forUpdatePrivilegeUI(HttpServletRequest request, HttpServletResponse response) throws ServletException, IOException {
String resourceid = request.getParameter("id");
Resource r = service.finfResourceByID(resourceid);
List<Privilege> list = service.getAllPrivilege();
request.setAttribute("resource", r);
request.setAttribute("list", list);
request.getRequestDispatcher("/security/updateResourcePrivilege.jsp").forward(request, response);
}
protected void doPost(HttpServletRequest request, HttpServletResponse response)
throws ServletException, IOException {
doGet(request, response);
}
}
- 1
- 2
- 3
- 4
- 5
- 6
- 7
- 8
- 9
- 10
- 11
- 12
- 13
- 14
- 15
- 16
- 17
- 18
- 19
- 20
- 21
- 22
- 23
- 24
- 25
- 26
- 27
- 28
- 29
- 30
- 31
- 32
- 33
- 34
- 35
- 36
- 37
- 38
- 39
- 40
- 41
- 42
- 43
- 44
- 45
- 46
- 47
- 48
- 49
- 50
- 51
- 52
- 53
- 54
- 55
- 56
- 57
- 58
- 59
- 60
- 61
- 62
- 63
- 64
- 65
- 66
- 67
- 68
- 69
- 70
- 71
- 72
- 73
紧接着,我们就要在WebRoot根目录下的security目录下新建一个更新资源的权限的页面——updateResourcePrivilege.jsp。
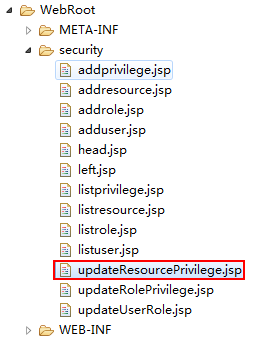
该页面的内容如下:
<%@ page language="java" contentType="text/html; charset=UTF-8"
pageEncoding="UTF-8"%>
<%@ taglib uri="http://java.sun.com/jsp/jstl/core" prefix="c" %>
<!DOCTYPE html PUBLIC "-//W3C//DTD HTML 4.01 Transitional//EN" "http://www.w3.org/TR/html4/loose.dtd">
<html>
<head>
<meta http-equiv="Content-Type" content="text/html; charset=UTF-8">
<title>更新资源的权限界面</title>
</head>
<body>
<table border="1" width="40%">
<tr>
<td>资源URI</td>
<td>${resource.uri }</td>
</tr>
<tr>
<td>资源描述</td>
<td>${resource.description }</td>
</tr>
<tr>
<td>资源原有权限</td>
<td>${resource.privilege.name }</td>
</tr>
<tr>
<td>须授予的权限</td>
<td>
<form action="${pageContext.request.contextPath }/ResourceServlet?method=updatePrivilege" method="post">
<input type="hidden" name="rid" value="${resource.id }">
<c:forEach var="p" items="${list }">
<input type="radio" name="pid" value="${p.id }">${p.name }<br/>
</c:forEach>
<input type="submit" value="更新权限">
</form>
</td>
</tr>
</table>
</body>
</html>
- 1
- 2
- 3
- 4
- 5
- 6
- 7
- 8
- 9
- 10
- 11
- 12
- 13
- 14
- 15
- 16
- 17
- 18
- 19
- 20
- 21
- 22
- 23
- 24
- 25
- 26
- 27
- 28
- 29
- 30
- 31
- 32
- 33
- 34
- 35
- 36
- 37
- 38
- 39
- 40
当我们给资源选中一个权限之后,点击更新权限的按钮,请求也应交给ResourceServlet,又由于请求URL后面的method参数的值是updatePrivilege,因此要把请求派发给updatePrivilege方法处理,这样ResourceServlet的代码就应该为:
public class ResourceServlet extends HttpServlet {
private SecurityService service = new SecurityService();
protected void doGet(HttpServletRequest request, HttpServletResponse response)
throws ServletException, IOException {
String method = request.getParameter("method");
if ("getAll".equals(method)) {
getAll(request, response);
}
if ("addUI".equals(method)) {
addUI(request, response);
}
if ("add".equals(method)) {
add(request, response);
}
if ("forUpdatePrivilegeUI".equals(method)) {
forUpdatePrivilegeUI(request, response);
}
if ("updatePrivilege".equals(method)) {
updatePrivilege(request, response);
}
}
private void getAll(HttpServletRequest request, HttpServletResponse response) throws ServletException, IOException {
List<Resource> list = service.getAllResource();
request.setAttribute("list", list);
request.getRequestDispatcher("/security/listresource.jsp").forward(request, response);
}
private void addUI(HttpServletRequest request, HttpServletResponse response) throws ServletException, IOException {
request.getRequestDispatcher("/security/addresource.jsp").forward(request, response);
}
private void add(HttpServletRequest request, HttpServletResponse response) throws ServletException, IOException {
try {
Resource r = WebUtils.request2Bean(request, Resource.class);
r.setId(UUID.randomUUID().toString());
service.addResource(r);
request.setAttribute("message", "添加成功!!!");
} catch (Exception e) {
e.printStackTrace();
request.setAttribute("message", "添加失败!!!");
}
request.getRequestDispatcher("/message.jsp").forward(request, response);
}
private void forUpdatePrivilegeUI(HttpServletRequest request, HttpServletResponse response) throws ServletException, IOException {
String resourceid = request.getParameter("id");
Resource r = service.finfResourceByID(resourceid);
List<Privilege> list = service.getAllPrivilege();
request.setAttribute("resource", r);
request.setAttribute("list", list);
request.getRequestDispatcher("/security/updateResourcePrivilege.jsp").forward(request, response);
}
private void updatePrivilege(HttpServletRequest request, HttpServletResponse response) throws ServletException, IOException {
try {
String resourceid = request.getParameter("rid");
String privilegeid = request.getParameter("pid");
service.updateResourcePrivilege(resourceid, privilegeid);
request.setAttribute("message", "更新成功!!!");
} catch (Exception e) {
e.printStackTrace();
request.setAttribute("message", "更新失败!!!");
}
request.getRequestDispatcher("/message.jsp").forward(request, response);
}
protected void doPost(HttpServletRequest request, HttpServletResponse response)
throws ServletException, IOException {
doGet(request, response);
}
}
- 1
- 2
- 3
- 4
- 5
- 6
- 7
- 8
- 9
- 10
- 11
- 12
- 13
- 14
- 15
- 16
- 17
- 18
- 19
- 20
- 21
- 22
- 23
- 24
- 25
- 26
- 27
- 28
- 29
- 30
- 31
- 32
- 33
- 34
- 35
- 36
- 37
- 38
- 39
- 40
- 41
- 42
- 43
- 44
- 45
- 46
- 47
- 48
- 49
- 50
- 51
- 52
- 53
- 54
- 55
- 56
- 57
- 58
- 59
- 60
- 61
- 62
- 63
- 64
- 65
- 66
- 67
- 68
- 69
- 70
- 71
- 72
- 73
- 74
- 75
- 76
- 77
- 78
- 79
- 80
- 81
- 82
- 83
- 84
- 85
- 86
- 87
- 88
- 89
- 90
- 91
- 92
- 93
至此,我们的资源管理模块就已设计完毕了,欢迎您测试!接下来,我们就来设计角色管理模块。
角色管理模块的设计
当我们点击角色管理这一超链接时,就应将请求交给RoleServlet。
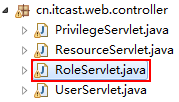
又由于请求URL后面的method参数的值是getAll,因此要把请求派发给getAll方法处理,这样RoleServlet的代码就应该为:
public class RoleServlet extends HttpServlet {
private SecurityService service = new SecurityService();
protected void doGet(HttpServletRequest request, HttpServletResponse response)
throws ServletException, IOException {
String method = request.getParameter("method");
if ("getAll".equals(method)) {
getAll(request, response);
}
}
private void getAll(HttpServletRequest request, HttpServletResponse response) throws ServletException, IOException {
List<Role> list = service.getAllRole();
request.setAttribute("list", list);
request.getRequestDispatcher("/security/listrole.jsp").forward(request, response);
}
protected void doPost(HttpServletRequest request, HttpServletResponse response)
throws ServletException, IOException {
doGet(request, response);
}
}
- 1
- 2
- 3
- 4
- 5
- 6
- 7
- 8
- 9
- 10
- 11
- 12
- 13
- 14
- 15
- 16
- 17
- 18
- 19
- 20
- 21
- 22
- 23
- 24
- 25
- 26
- 27
- 28
- 29
顺其自然地,我们接下来应在WebRoot根目录下的security目录下新建一个展示角色列表的页面——listrole.jsp。
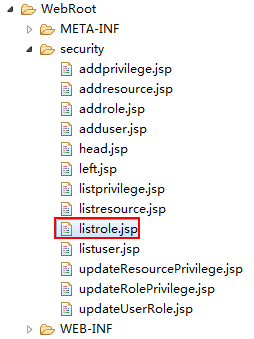
listrole.jsp页面的内容如下:
<%@ page language="java" contentType="text/html; charset=UTF-8"
    pageEncoding="UTF-8"%>
<%@ taglib uri="http://java.sun.com/jsp/jstl/core" prefix="c" %>
<!DOCTYPE html PUBLIC "-//W3C//DTD HTML 4.01 Transitional//EN" "http://www.w3.org/TR/html4/loose.dtd">
<html>
<head>
<meta http-equiv="Content-Type" content="text/html; charset=UTF-8">
<title>角色列表</title>
</head>
<body>
    <br/><br/>
    <table width="80%" align="center">
        <tr>
            <td></td>
            <td></td>
            <td align="right">
                <a href="${pageContext.request.contextPath }/RoleServlet?method=addUI">添加角色</a>
            </td>
        </tr>
    </table>
    <br/>
    <table width="80%" border="1" align="center">
        <tr>
            <td>角色名称</td>
            <td>角色描述</td>
            <td>操作</td>
        </tr>
        <c:forEach var="role" items="${list }">
            <tr>
                <td>${role.name }</td>
                <td>${role.description }</td>
                <td>
                    <a href="${pageContext.request.contextPath }/RoleServlet?method=forUpdateRolePrivilegeUI&id=${role.id }">为角色授予权限</a>
                    <a href="#">删除</a>
                    <a href="#">修改</a>
                </td>
            </tr>
        </c:forEach>
    </table>
</body>
</html>
- 1
- 2
- 3
- 4
- 5
- 6
- 7
- 8
- 9
- 10
- 11
- 12
- 13
- 14
- 15
- 16
- 17
- 18
- 19
- 20
- 21
- 22
- 23
- 24
- 25
- 26
- 27
- 28
- 29
- 30
- 31
- 32
- 33
- 34
- 35
- 36
- 37
- 38
- 39
- 40
- 41
我们要添加一个角色,就应该点击添加角色的超链接,接着给我们提供一个添加角色的页面,同样地该请求也要交给RoleServlet,又由于请求URL后面的method参数的值是addUI,因此要把请求派发给addUI方法处理,这样RoleServlet的代码就应该为:
public class RoleServlet extends HttpServlet {
private SecurityService service = new SecurityService();
protected void doGet(HttpServletRequest request, HttpServletResponse response)
throws ServletException, IOException {
String method = request.getParameter("method");
if ("getAll".equals(method)) {
getAll(request, response);
}
if ("addUI".equals(method)) {
addUI(request, response);
}
}
private void getAll(HttpServletRequest request, HttpServletResponse response) throws ServletException, IOException {
List<Role> list = service.getAllRole();
request.setAttribute("list", list);
request.getRequestDispatcher("/security/listrole.jsp").forward(request, response);
}
private void addUI(HttpServletRequest request, HttpServletResponse response) throws ServletException, IOException {
request.getRequestDispatcher("/security/addrole.jsp").forward(request, response);
}
protected void doPost(HttpServletRequest request, HttpServletResponse response)
throws ServletException, IOException {
doGet(request, response);
}
}
- 1
- 2
- 3
- 4
- 5
- 6
- 7
- 8
- 9
- 10
- 11
- 12
- 13
- 14
- 15
- 16
- 17
- 18
- 19
- 20
- 21
- 22
- 23
- 24
- 25
- 26
- 27
- 28
- 29
- 30
- 31
- 32
- 33
- 34
- 35
- 36
- 37
接下来,我们应在WebRoot根目录下的security目录下新建一个添加角色的页面——addrole.jsp。
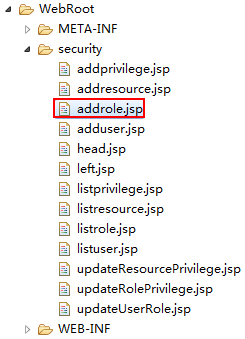
addrole.jsp页面内容如下:
<%@ page language="java" contentType="text/html; charset=UTF-8"
    pageEncoding="UTF-8"%>
<!DOCTYPE html PUBLIC "-//W3C//DTD HTML 4.01 Transitional//EN" "http://www.w3.org/TR/html4/loose.dtd">
<html>
<head>
<meta http-equiv="Content-Type" content="text/html; charset=UTF-8">
<title>添加角色界面</title>
</head>
<body>
    <form action="${pageContext.request.contextPath }/RoleServlet?method=add" method="post">
        <table>
            <tr>
                <td>角色名称</td>
                <td>
                    <input type="text" name="name">
                </td>
            </tr>
            <tr>
                <td>角色描述</td>
                <td>
                    <textarea rows="5" cols="50" name="description"></textarea>
                </td>
            </tr>
            <tr>
                <td></td>
                <td>
                    <input type="submit" value="添加角色">
                </td>
            </tr>
        </table>
    </form>
</body>
</html>
- 1
- 2
- 3
- 4
- 5
- 6
- 7
- 8
- 9
- 10
- 11
- 12
- 13
- 14
- 15
- 16
- 17
- 18
- 19
- 20
- 21
- 22
- 23
- 24
- 25
- 26
- 27
- 28
- 29
- 30
- 31
- 32
- 33
当我们在以上页面填写完一个角色的详细信息之后,点击添加角色按钮,请求也应交给RoleServlet,又由于请求URL后面的method参数的值是add,因此要把请求派发给add方法处理,这样RoleServlet的代码就应该为:
public class RoleServlet extends HttpServlet {
private SecurityService service = new SecurityService();
protected void doGet(HttpServletRequest request, HttpServletResponse response)
throws ServletException, IOException {
String method = request.getParameter("method");
if ("getAll".equals(method)) {
getAll(request, response);
}
if ("addUI".equals(method)) {
addUI(request, response);
}
if ("add".equals(method)) {
add(request, response);
}
}
private void getAll(HttpServletRequest request, HttpServletResponse response) throws ServletException, IOException {
List<Role> list = service.getAllRole();
request.setAttribute("list", list);
request.getRequestDispatcher("/security/listrole.jsp").forward(request, response);
}
private void addUI(HttpServletRequest request, HttpServletResponse response) throws ServletException, IOException {
request.getRequestDispatcher("/security/addrole.jsp").forward(request, response);
}
private void add(HttpServletRequest request, HttpServletResponse response) throws ServletException, IOException {
try {
Role role = WebUtils.request2Bean(request, Role.class);
role.setId(UUID.randomUUID().toString());
service.addRole(role);
request.setAttribute("message", "添加成功!!!");
} catch (Exception e) {
e.printStackTrace();
request.setAttribute("message", "添加失败!!!");
}
request.getRequestDispatcher("/message.jsp").forward(request, response);
}
protected void doPost(HttpServletRequest request, HttpServletResponse response)
throws ServletException, IOException {
doGet(request, response);
}
}
- 1
- 2
- 3
- 4
- 5
- 6
- 7
- 8
- 9
- 10
- 11
- 12
- 13
- 14
- 15
- 16
- 17
- 18
- 19
- 20
- 21
- 22
- 23
- 24
- 25
- 26
- 27
- 28
- 29
- 30
- 31
- 32
- 33
- 34
- 35
- 36
- 37
- 38
- 39
- 40
- 41
- 42
- 43
- 44
- 45
- 46
- 47
- 48
- 49
- 50
- 51
- 52
- 53
- 54
- 55
- 56
其实这儿还隐藏着一个优化技巧,由于这四个对象都要生成id,每次这样写这句代码XXX.setId(UUID.randomUUID().toString());显然很麻烦,势必是要优化的,我们可以对这四个对象的共同属性id进行抽取,提取出这四者的父类。我们在cn.itcast.domain包下创建这四者的父类——Generic类。
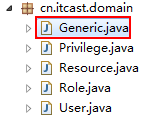
Generic类的具体代码如下:
public class Generic {

    private String id;

    public Generic() {
        this.id = UUID.randomUUID().toString();
    }

    public String getId() {
        return id;
    }

    public void setId(String id) {
        this.id = id;
    }

}
- 1
- 2
- 3
- 4
- 5
- 6
- 7
- 8
- 9
- 10
- 11
- 12
- 13
- 14
- 15
- 16
- 17
这样其他四个类都来继承Generic类,如Role类继承Generic类。
public class Role extends Generic {

    private String name;
    private String description;

    private Set<Privilege> privileges = new HashSet<Privilege>();

    public String getName() {
        return name;
    }

    public void setName(String name) {
        this.name = name;
    }

    public String getDescription() {
        return description;
    }

    public void setDescription(String description) {
        this.description = description;
    }

    public Set<Privilege> getPrivileges() {
        return privileges;
    }

    public void setPrivileges(Set<Privilege> privileges) {
        this.privileges = privileges;
    }

}
- 1
- 2
- 3
- 4
- 5
- 6
- 7
- 8
- 9
- 10
- 11
- 12
- 13
- 14
- 15
- 16
- 17
- 18
- 19
- 20
- 21
- 22
- 23
- 24
- 25
- 26
- 27
- 28
- 29
- 30
- 31
- 32
这样优化之后,XxxServlet里面的add方法,就可省略这句XXX.setId(UUID.randomUUID().toString());代码了,有人会这样优化,所以我们也要多学习学习。但是事已至此,我们都已经写了这么远了,因此我们不做这样的优化了。
当添加完一个角色后,就要给其授予权限了,我们可以在listrole.jsp页面点击为角色授予权限的超链接,这时,请求也应交给RoleServlet,该请求URL后面不仅要携带method参数,而且还要携带角色的id。由于请求URL后面的method参数的值是forUpdateRolePrivilegeUI,因此要把请求派发给forUpdateRolePrivilegeUI方法处理,这样RoleServlet的代码就应该为:
public class RoleServlet extends HttpServlet {
private SecurityService service = new SecurityService();
protected void doGet(HttpServletRequest request, HttpServletResponse response)
throws ServletException, IOException {
String method = request.getParameter("method");
if ("getAll".equals(method)) {
getAll(request, response);
}
if ("addUI".equals(method)) {
addUI(request, response);
}
if ("add".equals(method)) {
add(request, response);
}
if ("forUpdateRolePrivilegeUI".equals(method)) {
forUpdateRolePrivilegeUI(request, response);
}
}
private void getAll(HttpServletRequest request, HttpServletResponse response) throws ServletException, IOException {
List<Role> list = service.getAllRole();
request.setAttribute("list", list);
request.getRequestDispatcher("/security/listrole.jsp").forward(request, response);
}
private void addUI(HttpServletRequest request, HttpServletResponse response) throws ServletException, IOException {
request.getRequestDispatcher("/security/addrole.jsp").forward(request, response);
}
private void add(HttpServletRequest request, HttpServletResponse response) throws ServletException, IOException {
try {
Role role = WebUtils.request2Bean(request, Role.class);
role.setId(UUID.randomUUID().toString());
service.addRole(role);
request.setAttribute("message", "添加成功!!!");
} catch (Exception e) {
e.printStackTrace();
request.setAttribute("message", "添加失败!!!");
}
request.getRequestDispatcher("/message.jsp").forward(request, response);
}
private void forUpdateRolePrivilegeUI(HttpServletRequest request, HttpServletResponse response) throws ServletException, IOException {
String roleid = request.getParameter("id");
Role r = service.findRole(roleid);
List<Privilege> list = service.getAllPrivilege();
request.setAttribute("role", r);
request.setAttribute("list", list);
request.getRequestDispatcher("/security/updateRolePrivilege.jsp").forward(request, response);
}
protected void doPost(HttpServletRequest request, HttpServletResponse response)
throws ServletException, IOException {
doGet(request, response);
}
}
- 1
- 2
- 3
- 4
- 5
- 6
- 7
- 8
- 9
- 10
- 11
- 12
- 13
- 14
- 15
- 16
- 17
- 18
- 19
- 20
- 21
- 22
- 23
- 24
- 25
- 26
- 27
- 28
- 29
- 30
- 31
- 32
- 33
- 34
- 35
- 36
- 37
- 38
- 39
- 40
- 41
- 42
- 43
- 44
- 45
- 46
- 47
- 48
- 49
- 50
- 51
- 52
- 53
- 54
- 55
- 56
- 57
- 58
- 59
- 60
- 61
- 62
- 63
- 64
- 65
- 66
- 67
- 68
- 69
- 70
- 71
- 72
紧接着,我们就要在WebRoot根目录下的security目录下新建一个更新角色权限的页面——updateRolePrivilege.jsp。
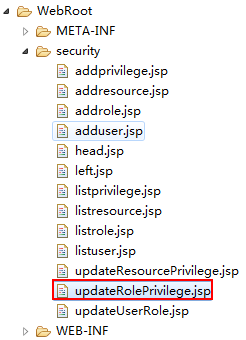
updateRolePrivilege.jsp页面的内容为:
<%@ page language="java" contentType="text/html; charset=UTF-8"
pageEncoding="UTF-8"%>
<%@ taglib uri="http://java.sun.com/jsp/jstl/core" prefix="c" %>
<!DOCTYPE html PUBLIC "-//W3C//DTD HTML 4.01 Transitional//EN" "http://www.w3.org/TR/html4/loose.dtd">
<html>
<head>
<meta http-equiv="Content-Type" content="text/html; charset=UTF-8">
<title>更新角色的权限</title>
</head>
<body>
<table border="1" width="40%">
<tr>
<td>角色名称</td>
<td>${role.name }</td>
</tr>
<tr>
<td>角色描述</td>
<td>${role.description }</td>
</tr>
<tr>
<td>角色原有权限</td>
<td>
<c:forEach var="p" items="${role.privileges }">
${p.name }<br/>
</c:forEach>
</td>
</tr>
<tr>
<td>须授予的权限</td>
<td>
<form action="${pageContext.request.contextPath }/RoleServlet?method=updatePrivilege" method="post">
<input type="hidden" name="roleid" value="${role.id }">
<c:forEach var="p" items="${list }">
<input type="checkbox" name="pid" value="${p.id }">${p.name }<br/>
</c:forEach>
<input type="submit" value="更新权限">
</form>
</td>
</tr>
</table>
</body>
</html>
- 1
- 2
- 3
- 4
- 5
- 6
- 7
- 8
- 9
- 10
- 11
- 12
- 13
- 14
- 15
- 16
- 17
- 18
- 19
- 20
- 21
- 22
- 23
- 24
- 25
- 26
- 27
- 28
- 29
- 30
- 31
- 32
- 33
- 34
- 35
- 36
- 37
- 38
- 39
- 40
- 41
- 42
- 43
- 44
当我们给角色选中若干个权限之后,点击更新权限的按钮,请求也应交给RoleServlet,又由于请求URL后面的method参数的值是updatePrivilege,因此要把请求派发给updatePrivilege方法处理,这样RoleServlet的代码就应该为:
public class RoleServlet extends HttpServlet {
private SecurityService service = new SecurityService();
protected void doGet(HttpServletRequest request, HttpServletResponse response)
throws ServletException, IOException {
String method = request.getParameter("method");
if ("getAll".equals(method)) {
getAll(request, response);
}
if ("addUI".equals(method)) {
addUI(request, response);
}
if ("add".equals(method)) {
add(request, response);
}
if ("forUpdateRolePrivilegeUI".equals(method)) {
forUpdateRolePrivilegeUI(request, response);
}
if ("updatePrivilege".equals(method)) {
updatePrivilege(request, response);
}
}
private void getAll(HttpServletRequest request, HttpServletResponse response) throws ServletException, IOException {
List<Role> list = service.getAllRole();
request.setAttribute("list", list);
request.getRequestDispatcher("/security/listrole.jsp").forward(request, response);
}
private void addUI(HttpServletRequest request, HttpServletResponse response) throws ServletException, IOException {
request.getRequestDispatcher("/security/addrole.jsp").forward(request, response);
}
private void add(HttpServletRequest request, HttpServletResponse response) throws ServletException, IOException {
try {
Role role = WebUtils.request2Bean(request, Role.class);
role.setId(UUID.randomUUID().toString());
service.addRole(role);
request.setAttribute("message", "添加成功!!!");
} catch (Exception e) {
e.printStackTrace();
request.setAttribute("message", "添加失败!!!");
}
request.getRequestDispatcher("/message.jsp").forward(request, response);
}
private void forUpdateRolePrivilegeUI(HttpServletRequest request, HttpServletResponse response) throws ServletException, IOException {
String roleid = request.getParameter("id");
Role r = service.findRole(roleid);
List<Privilege> list = service.getAllPrivilege();
request.setAttribute("role", r);
request.setAttribute("list", list);
request.getRequestDispatcher("/security/updateRolePrivilege.jsp").forward(request, response);
}
private void updatePrivilege(HttpServletRequest request, HttpServletResponse response) throws ServletException, IOException {
try {
String roleid = request.getParameter("roleid");
String[] pids = request.getParameterValues("pid");
service.updateRolePrivilege(roleid, pids);
request.setAttribute("message", "更新成功!!!");
} catch (Exception e) {
e.printStackTrace();
request.setAttribute("message", "更新失败!!!");
}
request.getRequestDispatcher("/message.jsp").forward(request, response);
}
protected void doPost(HttpServletRequest request, HttpServletResponse response)
throws ServletException, IOException {
doGet(request, response);
}
}
- 1
- 2
- 3
- 4
- 5
- 6
- 7
- 8
- 9
- 10
- 11
- 12
- 13
- 14
- 15
- 16
- 17
- 18
- 19
- 20
- 21
- 22
- 23
- 24
- 25
- 26
- 27
- 28
- 29
- 30
- 31
- 32
- 33
- 34
- 35
- 36
- 37
- 38
- 39
- 40
- 41
- 42
- 43
- 44
- 45
- 46
- 47
- 48
- 49
- 50
- 51
- 52
- 53
- 54
- 55
- 56
- 57
- 58
- 59
- 60
- 61
- 62
- 63
- 64
- 65
- 66
- 67
- 68
- 69
- 70
- 71
- 72
- 73
- 74
- 75
- 76
- 77
- 78
- 79
- 80
- 81
- 82
- 83
- 84
- 85
- 86
- 87
- 88
- 89
- 90
- 91
至此,我们的角色管理模块就已设计完毕,欢迎您测试!最后我们来设计最后一个模块——用户管理模块。
用户管理模块的设计
当我们点击用户管理这一超链接时,就应将请求交给UserServlet。
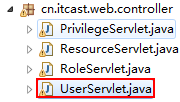
又由于请求URL后面的method参数的值是getAll,因此要把请求派发给getAll方法处理,这样UserServlet的代码就应该为:
public class UserServlet extends HttpServlet {

    private SecurityService service = new SecurityService();

    protected void doGet(HttpServletRequest request, HttpServletResponse response)
            throws ServletException, IOException {

        String method = request.getParameter("method");
        if ("getAll".equals(method)) {
            getAll(request, response);
        }

    }

    private void getAll(HttpServletRequest request, HttpServletResponse response) throws ServletException, IOException {

        List<User> list = service.getAllUser();
        request.setAttribute("list", list);
        request.getRequestDispatcher("/security/listuser.jsp").forward(request, response);

    }

    protected void doPost(HttpServletRequest request, HttpServletResponse response)
            throws ServletException, IOException {
        doGet(request, response);
    }

}
- 1
- 2
- 3
- 4
- 5
- 6
- 7
- 8
- 9
- 10
- 11
- 12
- 13
- 14
- 15
- 16
- 17
- 18
- 19
- 20
- 21
- 22
- 23
- 24
- 25
- 26
- 27
- 28
顺其自然地,我们接下来应在WebRoot根目录下的security目录下新建一个展示用户列表的页面——listuser.jsp。
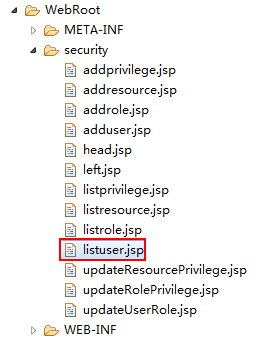
listuser.jsp页面的内容如下:
<%@ page language="java" contentType="text/html; charset=UTF-8"
pageEncoding="UTF-8"%>
<%@ taglib uri="http://java.sun.com/jsp/jstl/core" prefix="c" %>
<!DOCTYPE html PUBLIC "-//W3C//DTD HTML 4.01 Transitional//EN" "http://www.w3.org/TR/html4/loose.dtd">
<html>
<head>
<meta http-equiv="Content-Type" content="text/html; charset=UTF-8">
<title>用户列表</title>
</head>
<body>
<br/><br/>
<table width="80%" align="center">
<tr>
<td></td>
<td></td>
<td align="right">
<a href="${pageContext.request.contextPath }/UserServlet?method=addUI">添加用户</a>
</td>
</tr>
</table>
<br/>
<table width="80%" border="1" align="center">
<tr>
<td>用户名称</td>
<td>用户密码</td>
<td>用户描述</td>
<td>操作</td>
</tr>
<c:forEach var="user" items="${list }">
<tr>
<td>${user.username }</td>
<td>${user.password }</td>
<td>${user.description }</td>
<td>
<a href="${pageContext.request.contextPath }/UserServlet?method=forUpdateUserRoleUI&id=${user.id }">为用户授予角色</a>
<a href="#">删除</a>
<a href="#">修改</a>
</td>
</tr>
</c:forEach>
</table>
</body>
</html>
- 1
- 2
- 3
- 4
- 5
- 6
- 7
- 8
- 9
- 10
- 11
- 12
- 13
- 14
- 15
- 16
- 17
- 18
- 19
- 20
- 21
- 22
- 23
- 24
- 25
- 26
- 27
- 28
- 29
- 30
- 31
- 32
- 33
- 34
- 35
- 36
- 37
- 38
- 39
- 40
- 41
- 42
- 43
我们要添加一个用户,就应该点击添加用户的超链接,接着给我们提供一个添加用户的页面,同样地该请求也要交给UserServlet,又由于请求URL后面的method参数的值是addUI,因此要把请求派发给addUI方法处理,这样UserServlet的代码就应该为:
public class UserServlet extends HttpServlet {

    private SecurityService service = new SecurityService();

    protected void doGet(HttpServletRequest request, HttpServletResponse response)
            throws ServletException, IOException {

        String method = request.getParameter("method");
        if ("getAll".equals(method)) {
            getAll(request, response);
        }
        if ("addUI".equals(method)) {
            addUI(request, response);
        }

    }

    private void getAll(HttpServletRequest request, HttpServletResponse response) throws ServletException, IOException {

        List<User> list = service.getAllUser();
        request.setAttribute("list", list);
        request.getRequestDispatcher("/security/listuser.jsp").forward(request, response);

    }

    private void addUI(HttpServletRequest request, HttpServletResponse response) throws ServletException, IOException {

        request.getRequestDispatcher("/security/adduser.jsp").forward(request, response);

    }

    protected void doPost(HttpServletRequest request, HttpServletResponse response)
            throws ServletException, IOException {
        doGet(request, response);
    }

}
- 1
- 2
- 3
- 4
- 5
- 6
- 7
- 8
- 9
- 10
- 11
- 12
- 13
- 14
- 15
- 16
- 17
- 18
- 19
- 20
- 21
- 22
- 23
- 24
- 25
- 26
- 27
- 28
- 29
- 30
- 31
- 32
- 33
- 34
- 35
- 36
- 37
接下来,我们应在WebRoot根目录下的security目录下新建一个添加用户的页面——adduser.jsp。
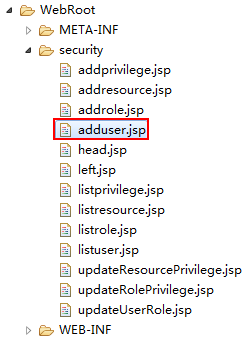
该页面的内容如下:
<%@ page language="java" contentType="text/html; charset=UTF-8"
    pageEncoding="UTF-8"%>
<!DOCTYPE html PUBLIC "-//W3C//DTD HTML 4.01 Transitional//EN" "http://www.w3.org/TR/html4/loose.dtd">
<html>
<head>
<meta http-equiv="Content-Type" content="text/html; charset=UTF-8">
<title>添加用户界面</title>
</head>
<body>
    <form action="${pageContext.request.contextPath }/UserServlet?method=add" method="post">
        <table>
            <tr>
                <td>用户名</td>
                <td>
                    <input type="text" name="username">
                </td>
            </tr>
            <tr>
                <td>用户密码</td>
                <td>
                    <input type="text" name="password">
                </td>
            </tr>
            <tr>
                <td>用户描述</td>
                <td>
                    <textarea rows="5" cols="50" name="description"></textarea>
                </td>
            </tr>
            <tr>
                <td></td>
                <td>
                    <input type="submit" value="添加用户">
                </td>
            </tr>
        </table>
    </form>
</body>
</html>
- 1
- 2
- 3
- 4
- 5
- 6
- 7
- 8
- 9
- 10
- 11
- 12
- 13
- 14
- 15
- 16
- 17
- 18
- 19
- 20
- 21
- 22
- 23
- 24
- 25
- 26
- 27
- 28
- 29
- 30
- 31
- 32
- 33
- 34
- 35
- 36
- 37
- 38
- 39
当我们在以上页面填写完一个用户的详细信息之后,点击添加用户按钮,请求也应交给UserServlet,又由于请求URL后面的method参数的值是add,因此要把请求派发给add方法处理,这样UserServlet的代码就应该为:
public class UserServlet extends HttpServlet {

    private SecurityService service = new SecurityService();

    protected void doGet(HttpServletRequest request, HttpServletResponse response)
            throws ServletException, IOException {

        String method = request.getParameter("method");
        if ("getAll".equals(method)) {
            getAll(request, response);
        }
        if ("addUI".equals(method)) {
            addUI(request, response);
        }
        if ("add".equals(method)) {
            add(request, response);
        }
    }

    private void getAll(HttpServletRequest request, HttpServletResponse response) throws ServletException, IOException {

        List<User> list = service.getAllUser();
        request.setAttribute("list", list);
        request.getRequestDispatcher("/security/listuser.jsp").forward(request, response);

    }

    private void addUI(HttpServletRequest request, HttpServletResponse response) throws ServletException, IOException {

        request.getRequestDispatcher("/security/adduser.jsp").forward(request, response);

    }

    private void add(HttpServletRequest request, HttpServletResponse response) throws ServletException, IOException {

        try {
            User user = WebUtils.request2Bean(request, User.class);
            user.setId(UUID.randomUUID().toString());
            service.addUser(user);

            request.setAttribute("message", "添加成功!!!");
        } catch (Exception e) {
            e.printStackTrace();
            request.setAttribute("message", "添加失败!!!");
        }
        request.getRequestDispatcher("/message.jsp").forward(request, response);

    }

    protected void doPost(HttpServletRequest request, HttpServletResponse response)
            throws ServletException, IOException {
        doGet(request, response);
    }

}
- 1
- 2
- 3
- 4
- 5
- 6
- 7
- 8
- 9
- 10
- 11
- 12
- 13
- 14
- 15
- 16
- 17
- 18
- 19
- 20
- 21
- 22
- 23
- 24
- 25
- 26
- 27
- 28
- 29
- 30
- 31
- 32
- 33
- 34
- 35
- 36
- 37
- 38
- 39
- 40
- 41
- 42
- 43
- 44
- 45
- 46
- 47
- 48
- 49
- 50
- 51
- 52
- 53
- 54
- 55
当添加完一个用户后,就要给其授予角色了,我们可以在listuser.jsp页面点击为用户授予角色的超链接,这时,请求也应交给UserServlet,该请求URL后面不仅要携带method参数,而且还要携带用户的id。由于请求URL后面的method参数的值是forUpdateUserRoleUI,因此要把请求派发给forUpdateUserRoleUI方法处理,这样UserServlet的代码就应该为:
public class UserServlet extends HttpServlet {

    private SecurityService service = new SecurityService();

    protected void doGet(HttpServletRequest request, HttpServletResponse response)
            throws ServletException, IOException {

        String method = request.getParameter("method");
        if ("getAll".equals(method)) {
            getAll(request, response);
        }
        if ("addUI".equals(method)) {
            addUI(request, response);
        }
        if ("add".equals(method)) {
            add(request, response);
        }
        if ("forUpdateUserRoleUI".equals(method)) {
            forUpdateUserRoleUI(request, response);
        }
    }

    private void getAll(HttpServletRequest request, HttpServletResponse response) throws ServletException, IOException {

        List<User> list = service.getAllUser();
        request.setAttribute("list", list);
        request.getRequestDispatcher("/security/listuser.jsp").forward(request, response);

    }

    private void addUI(HttpServletRequest request, HttpServletResponse response) throws ServletException, IOException {

        request.getRequestDispatcher("/security/adduser.jsp").forward(request, response);

    }

    private void add(HttpServletRequest request, HttpServletResponse response) throws ServletException, IOException {

        try {
            User user = WebUtils.request2Bean(request, User.class);
            user.setId(UUID.randomUUID().toString());
            service.addUser(user);

            request.setAttribute("message", "添加成功!!!");
        } catch (Exception e) {
            e.printStackTrace();
            request.setAttribute("message", "添加失败!!!");
        }
        request.getRequestDispatcher("/message.jsp").forward(request, response);

    }

    private void forUpdateUserRoleUI(HttpServletRequest request, HttpServletResponse response) throws ServletException, IOException {

        String userid = request.getParameter("id");
        User user = service.findUser(userid);

        List<Role> list = service.getAllRole();
        request.setAttribute("user", user);
        request.setAttribute("list", list);
        request.getRequestDispatcher("/security/updateUserRole.jsp").forward(request, response);

    }

    protected void doPost(HttpServletRequest request, HttpServletResponse response)
            throws ServletException, IOException {
        doGet(request, response);
    }

}
- 1
- 2
- 3
- 4
- 5
- 6
- 7
- 8
- 9
- 10
- 11
- 12
- 13
- 14
- 15
- 16
- 17
- 18
- 19
- 20
- 21
- 22
- 23
- 24
- 25
- 26
- 27
- 28
- 29
- 30
- 31
- 32
- 33
- 34
- 35
- 36
- 37
- 38
- 39
- 40
- 41
- 42
- 43
- 44
- 45
- 46
- 47
- 48
- 49
- 50
- 51
- 52
- 53
- 54
- 55
- 56
- 57
- 58
- 59
- 60
- 61
- 62
- 63
- 64
- 65
- 66
- 67
- 68
- 69
- 70
紧接着,我们就要在WebRoot根目录下的security目录下新建一个更新用户角色的页面——updateUserRole.jsp。
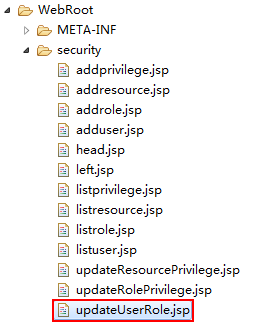
该页面的内容如下:
<%@ page language="java" contentType="text/html; charset=UTF-8"
pageEncoding="UTF-8"%>
<%@ taglib uri="http://java.sun.com/jsp/jstl/core" prefix="c" %>
<!DOCTYPE html PUBLIC "-//W3C//DTD HTML 4.01 Transitional//EN" "http://www.w3.org/TR/html4/loose.dtd">
<html>
<head>
<meta http-equiv="Content-Type" content="text/html; charset=UTF-8">
<title>更新用户的角色</title>
</head>
<body>
<table border="1" width="40%">
<tr>
<td>用户名</td>
<td>${user.username }</td>
</tr>
<tr>
<td>用户描述</td>
<td>${user.description }</td>
</tr>
<tr>
<td>用户原有角色</td>
<td>
<c:forEach var="role" items="${user.roles }">
${role.name }<br/>
</c:forEach>
</td>
</tr>
<tr>
<td>须授予的角色</td>
<td>
<form action="${pageContext.request.contextPath }/UserServlet?method=updateRole" method="post">
<input type="hidden" name="userid" value="${user.id }">
<c:forEach var="r" items="${list }">
<input type="checkbox" name="rid" value="${r.id }">${r.name }<br/>
</c:forEach>
<input type="submit" value="更新角色">
</form>
</td>
</tr>
</table>
</body>
</html>
- 1
- 2
- 3
- 4
- 5
- 6
- 7
- 8
- 9
- 10
- 11
- 12
- 13
- 14
- 15
- 16
- 17
- 18
- 19
- 20
- 21
- 22
- 23
- 24
- 25
- 26
- 27
- 28
- 29
- 30
- 31
- 32
- 33
- 34
- 35
- 36
- 37
- 38
- 39
- 40
- 41
- 42
- 43
- 44
当我们给用户选中若干个角色之后,点击更新权限的按钮,请求也应交给UserServlet,又由于请求URL后面的method参数的值是updateRole,因此要把请求派发给updateRole方法处理,这样UserServlet的代码就应该为:
public class UserServlet extends HttpServlet {

    private SecurityService service = new SecurityService();

    protected void doGet(HttpServletRequest request, HttpServletResponse response)
            throws ServletException, IOException {

        String method = request.getParameter("method");
        if ("getAll".equals(method)) {
            getAll(request, response);
        }
        if ("addUI".equals(method)) {
            addUI(request, response);
        }
        if ("add".equals(method)) {
            add(request, response);
        }
        if ("forUpdateUserRoleUI".equals(method)) {
            forUpdateUserRoleUI(request, response);
        }
        if ("updateRole".equals(method)) {
            updateRole(request, response);
        }
    }

    private void getAll(HttpServletRequest request, HttpServletResponse response) throws ServletException, IOException {

        List<User> list = service.getAllUser();
        request.setAttribute("list", list);
        request.getRequestDispatcher("/security/listuser.jsp").forward(request, response);

    }

    private void addUI(HttpServletRequest request, HttpServletResponse response) throws ServletException, IOException {

        request.getRequestDispatcher("/security/adduser.jsp").forward(request, response);

    }

    private void add(HttpServletRequest request, HttpServletResponse response) throws ServletException, IOException {

        try {
            User user = WebUtils.request2Bean(request, User.class);
            user.setId(UUID.randomUUID().toString());
            service.addUser(user);

            request.setAttribute("message", "添加成功!!!");
        } catch (Exception e) {
            e.printStackTrace();
            request.setAttribute("message", "添加失败!!!");
        }
        request.getRequestDispatcher("/message.jsp").forward(request, response);

    }

    private void forUpdateUserRoleUI(HttpServletRequest request, HttpServletResponse response) throws ServletException, IOException {

        String userid = request.getParameter("id");
        User user = service.findUser(userid);

        List<Role> list = service.getAllRole();
        request.setAttribute("user", user);
        request.setAttribute("list", list);
        request.getRequestDispatcher("/security/updateUserRole.jsp").forward(request, response);

    }

    private void updateRole(HttpServletRequest request, HttpServletResponse response) throws ServletException, IOException {

        try {
            String userid = request.getParameter("userid");
            String[] rids = request.getParameterValues("rid");
            service.updateUserRole(userid, rids);

            request.setAttribute("message", "更新成功!!!");
        } catch (Exception e) {
            e.printStackTrace();
            request.setAttribute("message", "更新失败!!!");
        }
        request.getRequestDispatcher("/message.jsp").forward(request, response);

    }

    protected void doPost(HttpServletRequest request, HttpServletResponse response)
            throws ServletException, IOException {
        doGet(request, response);
    }

}
- 1
- 2
- 3
- 4
- 5
- 6
- 7
- 8
- 9
- 10
- 11
- 12
- 13
- 14
- 15
- 16
- 17
- 18
- 19
- 20
- 21
- 22
- 23
- 24
- 25
- 26
- 27
- 28
- 29
- 30
- 31
- 32
- 33
- 34
- 35
- 36
- 37
- 38
- 39
- 40
- 41
- 42
- 43
- 44
- 45
- 46
- 47
- 48
- 49
- 50
- 51
- 52
- 53
- 54
- 55
- 56
- 57
- 58
- 59
- 60
- 61
- 62
- 63
- 64
- 65
- 66
- 67
- 68
- 69
- 70
- 71
- 72
- 73
- 74
- 75
- 76
- 77
- 78
- 79
- 80
- 81
- 82
- 83
- 84
- 85
- 86
- 87
- 88
- 89
至此,我们的角色管理模块就已设计完毕,欢迎您测试!下一篇文章我们重点关注权限的实现。


 1万+
1万+

 被折叠的 条评论
为什么被折叠?


