


默认资源映射及访问
Spring Boot 默认为我们提供了静态资源处理,使用 WebMvcAutoConfiguration 中的配置各种属性。
建议大家使用 Spring Boot 的默认配置方式,提供的静态资源映射如下:
- classpath:/META-INF/resources
- classpath:/resources
- classpath:/static
- classpath:/public
在工程里面路径是这样:
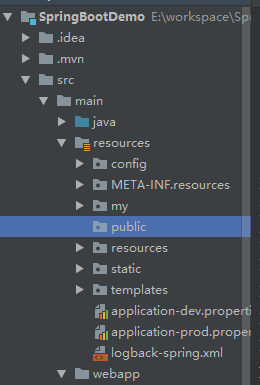
上面这几个都是静态资源的映射路径,优先级顺序为:META-INF/resources > resources > static > public
大家可以自己在上面 4 个路径下都放一张同名的图片,访问一下即可验证。
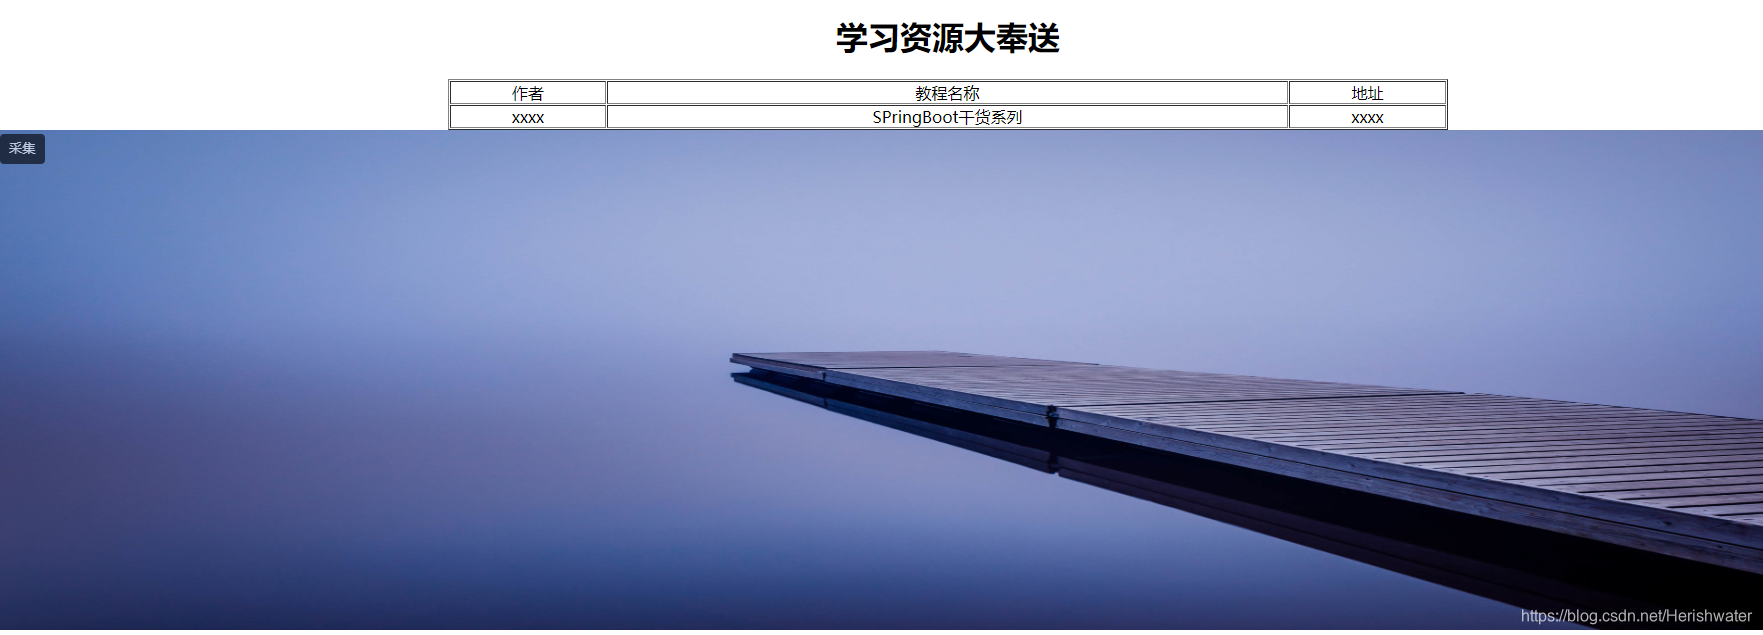
还有,你可以随机在上面一个路径下面放上 index.html,当我们访问应用根目录 http://lcoalhost:8080 时,会直接映射到 index.html 页面。
index.html 文件信息如下:
<!DOCTYPE html>
<head>
    <title>learn Resources</title>
    <meta http-equiv="Content-Type" content="text/html; charset=UTF-8" />

</head>
<body>

<div style="text-align: center;margin:0 auto;width: 1000px; ">
    <h1>学习资源大奉送</h1>
    <table width="100%" border="1" cellspacing="1" cellpadding="0">
        <tr>
            <td>作者</td>
            <td>教程名称</td>
            <td>地址</td>
        </tr>
        <tr>
            <td >xxxx</td>
            <td >SPringBoot干货系列</td>
            <td>xxxx</td>
        </tr>
    </table>
</div>

<div>
    <img src="bizhi.jpg" height="500px" width="100%">
</div>
</body>
</html>
打开访问链接,返回结果如下图。
对应在 application.properties 配置文件配置如下:
# 默认值为 /**
spring.mvc.static-path-pattern=/**
# 默认值为 classpath:/META-INF/resources/,classpath:/resources/,classpath:/static/,classpath:/public/
#spring.resources.static-locations=这里设置要指向的路径,多个使用英文逗号隔开
我们可以通过修改 spring.mvc.static-path-pattern 来修改默认的映射,例如我改成 /resources/**,那运行的时候访问 http://lcoalhost:8080/resources/index.html 才对应到 index.html 页面。
Thymeleaf 引用资源及访问
首先在 pom.xml 文件中引入依赖
<dependency>
    <groupId>org.springframework.boot</groupId>
    <artifactId>spring-boot-starter-thymeleaf</artifactId>
</dependency>

如图所示,spring-boot-starter-thymeleaf 会自动包含 spring-boot-starter-web,所以我们就不需要单独引入 web 依赖了。
编写 controller
@Controller
@RequestMapping("/learn")
public class LearnResourceController {

    @RequestMapping("/t")
    public ModelAndView template(){

        List<LearnResouce> learnList = new ArrayList<>();
        LearnResouce bean =new LearnResouce("官方参考文档","Spring Boot Reference Guide","http://docs.spring.io/spring-boot/docs/1.5.1.RELEASE/reference/htmlsingle/#getting-started-first-application");
        learnList.add(bean);
        bean =new LearnResouce("官方SpriongBoot例子","官方SpriongBoot例子","https://github.com/spring-projects/spring-boot/tree/master/spring-boot-samples");
        learnList.add(bean);
        bean =new LearnResouce("官方参考文档","Spring Boot Reference Guide","http://docs.spring.io/spring-boot/docs/1.5.1.RELEASE/reference/htmlsingle/#getting-started-first-application");
        learnList.add(bean);
        bean =new LearnResouce("官方SpriongBoot例子","官方SpriongBoot例子","https://github.com/spring-projects/spring-boot/tree/master/spring-boot-samples");
        learnList.add(bean);

        ModelAndView modelAndView = new ModelAndView("/template");
        modelAndView.addObject("learnList",learnList);
        return modelAndView;
    }
}
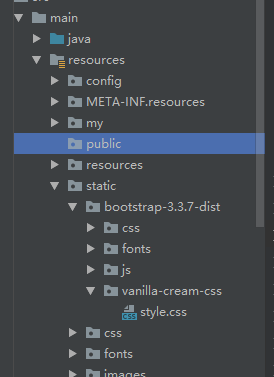
接着整合 bootstrap 框架到项目中,把下载好的 bootstrap-3.3.7-dist 文件放在 \src\main\resources\static 下,如图:
引入依赖后就在默认的模板路径 src/main/resources/templates 下编写模板文件即可完成。新建一个 template.html:
<!DOCTYPE html>
<html xmlns:th="http://www.thymeleaf.org">
<head>
    <title>template learn Resources</title>
    <meta http-equiv="Content-Type" content="text/html; charset=UTF-8" />

    <!-- main JS libs -->
    <script src="https://cdn.bootcss.com/jquery/3.4.1/jquery.min.js"></script>
    <script  th:src="@{/bootstrap-3.3.7-dist/js/bootstrap.min.js}"></script>

    <!-- Style CSS -->

    <link rel="stylesheet"  th:href="@{/bootstrap-3.3.7-dist/css/bootstrap.min.css}" />
    <link rel="stylesheet"  th:href="@{/bootstrap-3.3.7-dist/css/bootstrap-theme.min.css}" />
    <link rel="stylesheet"  th:href="@{/bootstrap-3.3.7-dist/vanilla-cream-css/style.css}"  />
</head>
<body style="background-image: none;">
<div class="body_wrap">
    <div class="container">
        <div class="alert alert-success text-center" role="alert">Sptring Boot学习资源大奉送</div>
        <table class="table table-striped table-bordered">
            <tr>
                <td>作者</td>
                <td>教程名称</td>
                <td>地址</td>
            </tr>
            <!--/*@thymesVar id="learnList" type=""*/-->
            <tr th:each="learn : ${learnList}" class="text-info">
                <td th:text="${learn.author}">嘟嘟MD</td>
                <td th:text="${learn.title}">SPringBoot干货系列</td>
                <td><a href="#" th:href="${learn.url}" class="btn btn-search btn-green" target="_blank"><span>点我</span></a>
                </td>
            </tr>
        </table>

    </div>
</div>
</body>
</html>
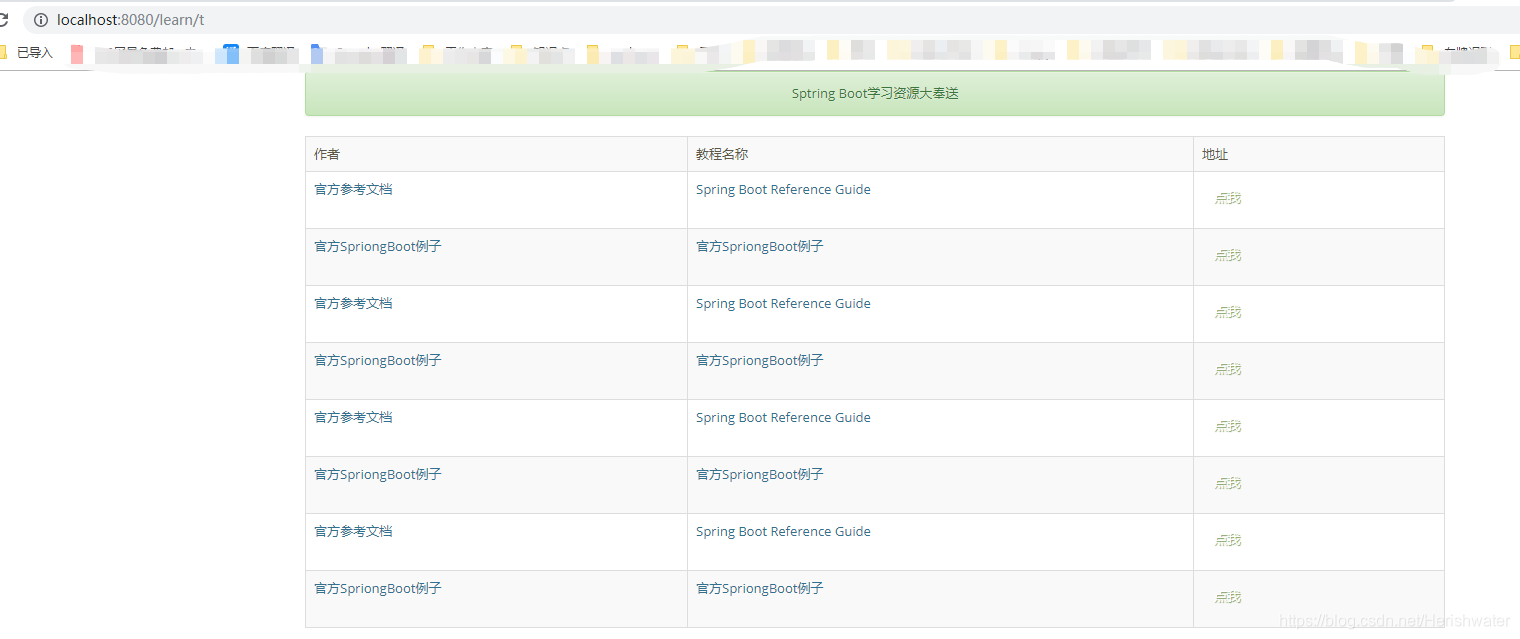
访问 http://localhost:8080/learn/t,页面效果如下:
如果我们修改 application.properties 配置文件,如下:
# 默认值为 /**
spring.mvc.static-path-pattern=/dudu/**
重新运行项目,再次访问 http://localhost:8080/learn/t,页面展示效果如下:
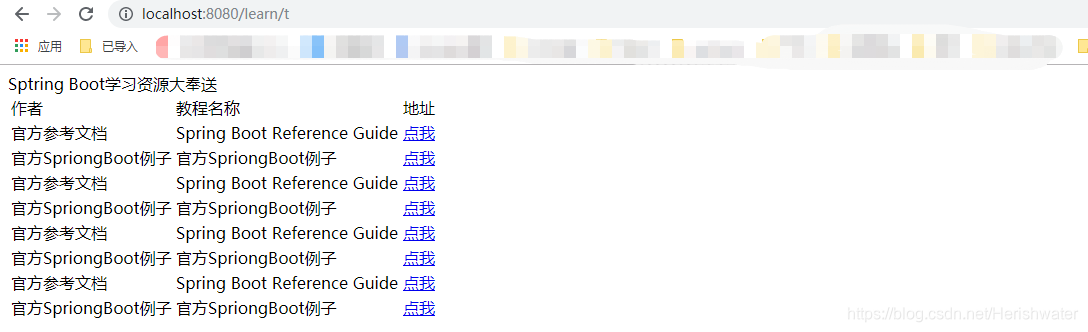
主要是因为页面访问不到静态资源中的 css 和 js 文件,这里我们需要修改一下 html 文件中部分内容。
<!DOCTYPE html>
<html xmlns:th="http://www.thymeleaf.org">
<head>
    <title>template learn Resources</title>
    <meta http-equiv="Content-Type" content="text/html; charset=UTF-8" />

    <!-- main JS libs -->
    <script src="https://cdn.bootcss.com/jquery/3.4.1/jquery.min.js"></script>
    <script  th:src="@{/dudu/bootstrap-3.3.7-dist/js/bootstrap.min.js}"></script>

    <!-- Style CSS -->

    <link rel="stylesheet"  th:href="@{/dudu/bootstrap-3.3.7-dist/css/bootstrap.min.css}" />
    <link rel="stylesheet"  th:href="@{/dudu/bootstrap-3.3.7-dist/css/bootstrap-theme.min.css}" />
    <link rel="stylesheet"  th:href="@{/dudu/bootstrap-3.3.7-dist/vanilla-cream-css/style.css}"  />
</head>
再次运行项目,访问链接页面则可以正常显示。
JSP 引用静态资源及访问
在 pom.xml 文件中引入依赖
		<!--web支持-->
		<dependency>
			<groupId>org.springframework.boot</groupId>
			<artifactId>spring-boot-starter-web</artifactId>
		</dependency>

		<!--jsp页面使用jstl标签-->
		<dependency>
        <groupId>javax.servlet</groupId>
        <artifactId>jstl</artifactId>
        </dependency>

        <!--用于编译jsp-->
        <dependency>
            <groupId>org.apache.tomcat.embed</groupId>
            <artifactId>tomcat-embed-jasper</artifactId>
        </dependency>
在配置文件中添加
spring.mvc.view.prefix: /WEB-INF/jsp/
spring.mvc.view.suffix: .jsp
修改 controller
@Controller
@RequestMapping("/learn")
public class LearnResourceController {

    @RequestMapping("")
    public ModelAndView index(){

        List<LearnResouce> learnList = new ArrayList<>();
        LearnResouce bean =new LearnResouce("官方参考文档","Spring Boot Reference Guide","http://docs.spring.io/spring-boot/docs/1.5.1.RELEASE/reference/htmlsingle/#getting-started-first-application");
        learnList.add(bean);
        bean =new LearnResouce("官方SpriongBoot例子","官方SpriongBoot例子","https://github.com/spring-projects/spring-boot/tree/master/spring-boot-samples");
        learnList.add(bean);
        bean =new LearnResouce("官方参考文档","Spring Boot Reference Guide","http://docs.spring.io/spring-boot/docs/1.5.1.RELEASE/reference/htmlsingle/#getting-started-first-application");
        learnList.add(bean);
        bean =new LearnResouce("官方SpriongBoot例子","官方SpriongBoot例子","https://github.com/spring-projects/spring-boot/tree/master/spring-boot-samples");
        learnList.add(bean);
        bean =new LearnResouce("官方参考文档","Spring Boot Reference Guide","http://docs.spring.io/spring-boot/docs/1.5.1.RELEASE/reference/htmlsingle/#getting-started-first-application");
        learnList.add(bean);
        bean =new LearnResouce("官方SpriongBoot例子","官方SpriongBoot例子","https://github.com/spring-projects/spring-boot/tree/master/spring-boot-samples");
        learnList.add(bean);
        bean =new LearnResouce("官方参考文档","Spring Boot Reference Guide","http://docs.spring.io/spring-boot/docs/1.5.1.RELEASE/reference/htmlsingle/#getting-started-first-application");
        learnList.add(bean);
        bean =new LearnResouce("官方SpriongBoot例子","官方SpriongBoot例子","https://github.com/spring-projects/spring-boot/tree/master/spring-boot-samples");
        learnList.add(bean);

        ModelAndView modelAndView = new ModelAndView("/form");
        modelAndView.addObject("learnList",learnList);
        return modelAndView;
    }
}
在 /WEB-INF/jsp/ 下面创建 form.jsp 文件
<!DOCTYPE html>
<%@ taglib prefix="spring" uri="http://www.springframework.org/tags"%>
<%@ page language="java" contentType="text/html; charset=UTF-8" pageEncoding="UTF-8"%>
<%@ taglib prefix="c" uri="http://java.sun.com/jsp/jstl/core"%>
<head>
    <meta charset="utf-8"/>
    <meta name="author" content="" />
    <meta name="keywords" content="" />
    <meta name="viewport" content="width=device-width,initial-scale=1" />
    <title></title>

    <!-- main JS libs -->
    <script src="https://cdn.bootcss.com/jquery/3.4.1/jquery.min.js"></script>
    <script src="${pageContext.request.contextPath}/bootstrap-3.3.7-dist/js/bootstrap.min.js" ></script>

    <!-- Style CSS -->
    <link rel="stylesheet" href="${pageContext.request.contextPath}/bootstrap-3.3.7-dist/css/bootstrap.min.css"  />
    <link rel="stylesheet" href="${pageContext.request.contextPath}/bootstrap-3.3.7-dist/css/bootstrap-theme.min.css"  />
    <link rel="stylesheet" href="${pageContext.request.contextPath}/bootstrap-3.3.7-dist/vanilla-cream-css/style.css"   />

    <style type="text/css">
        .gradient {filter: none !important;}
    </style>
    <![endif]-->
</head><body style="background-image: none;">
<div class="body_wrap">
    <div class="container">
        <div class="alert alert-success text-center" role="alert">Sptring Boot学习资源大奉送</div>
        <table class="table table-striped table-bordered">
            <tr>
                <td>作者</td>
                <td>教程名称</td>
                <td>地址</td>
            </tr>
            <c:forEach var="learn" items="${learnList}">
                <tr class="text-info">
                    <td>${learn.author}</td>
                    <td>${learn.title}</td>
                    <td><a href="${learn.url}" class="btn btn-search btn-green" target="_blank"><span>点我</span></a>
                    </td>
                </tr>
            </c:forEach>
        </table>
    </div>
</div>
</body>
</html>
启动项目,通过 http://localhost:8080/learn 访问,页面展示如下:

如果此时修改配置文件如下:
# 默认值为 /**
spring.mvc.static-path-pattern=/dudu/**
则同样需要修改 form.jsp 文件,使其能够正常访问静态资源文件。
<!-- main JS libs -->
    <script src="https://cdn.bootcss.com/jquery/3.4.1/jquery.min.js"></script>
    <script src="${pageContext.request.contextPath}/dudu/bootstrap-3.3.7-dist/js/bootstrap.min.js" ></script>

    <!-- Style CSS -->
    <link rel="stylesheet" href="${pageContext.request.contextPath}/dudu/bootstrap-3.3.7-dist/css/bootstrap.min.css"  />
    <link rel="stylesheet" href="${pageContext.request.contextPath}/dudu/bootstrap-3.3.7-dist/css/bootstrap-theme.min.css" />
    <link rel="stylesheet" href="${pageContext.request.contextPath}/dudu/bootstrap-3.3.7-dist/vanilla-cream-css/style.css"  />
如果此时修改配置文件如下:
#springboot设置contextPath,设置的path就是“/”改为“/cosmetics”,从此url的地址就变成了http://localhost:8080/cosmetics/。
server.servlet.context-path=/cosmetics
则再次访问 jsp 文件需要更换访问地址,http://localhost:8080/cosmetics/learn


 1292
1292


 被折叠的 条评论
为什么被折叠?
被折叠的 条评论
为什么被折叠?
 到【灌水乐园】发言


