


万分感谢大爱的原作者, 原文点这里
1.下载kindeditor(官网下载地址:http://kindeditor.net/down.php),并解压到Yii框架的protected/extensions目录下,比如我的路径是protected/extensions/kindeditor。
2. 在kindeditor目录创建一个php类文件KEditorWidget.php,内容如下:
<?php

/**
 * Kindeditor编辑器输入组件
 * 作者:http://www.icultivator.com
 * 简单使用方法:
 * <?php $this->widget('ext.kindeditor.KEditorWidget',array(
 *     'id'=>'Item_content',    # Textarea id
 * )); ?>
 */

class KEditorWidget extends CInputWidget
{
    public $id;
    public $language = 'zh_CN';
    public $paramOptions = '{}';

    /**
     * 初始化组件.
     */
    public function init()
    {
         // 阻止从命令行执行.
         if (Yii::app() instanceof CConsoleApplication)
              return;

         /** @var CClientScript $cs */
         $cs = Yii::app()->getClientScript();
         $cs->registerScriptFile($this->assetsUrl.'/kindeditor-min.js', CClientScript::POS_HEAD);
    }

    /**
     * 运行组件.
     */
    public function run()
    {
        $script = "KindEditor.ready(function(K){window.editor=K.create('#".$this->id."',".$this->paramOptions.");});";
        /** @var CClientScript $cs */
        $cs = Yii::app()->getClientScript();
        $cs->registerScript($this->id, $script, CClientScript::POS_HEAD);
        $cs->registerScriptFile($this->assetsUrl.'/lang/'.$this->language.'.js', CClientScript::POS_HEAD);
    }

    public function getAssetsUrl()
    {
        $assetsPath = Yii::getPathOfAlias('ext.kindeditor');
        $assetsUrl = Yii::app()->assetManager->publish($assetsPath, false, -1, YII_DEBUG);
        return $assetsUrl;
    }
}

?>- 接下来就是使用该组件在_form.php文件中显示出kindeditor的编辑器界面了,这也比较简单:
1)简单调用:
<div class="row">
    <?php echo $form->labelEx($model,'content'); ?>
    <?php echo $form->textArea ($model,'content',array('rows'=>6, 'cols'=>50)); ?>
    <?php echo $form->error($model,'content'); ?>
</div>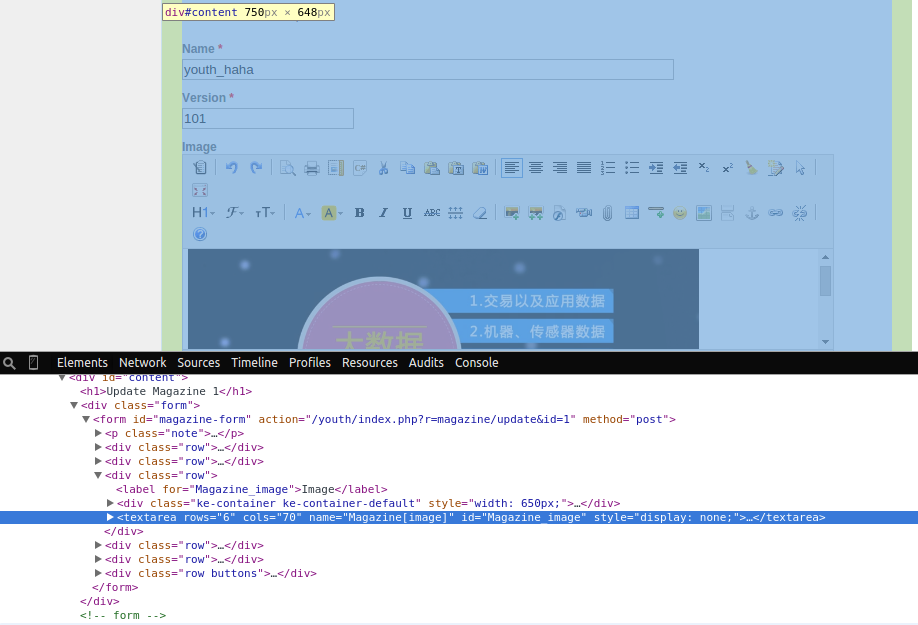
<?php $this->widget ('ext.kindeditor.KEditorWidget',array('id'=>'textarea_id'))?>注意最后一句,<?php $this->widget('ext.kindeditor.KEditorWidget', array('id'=>'textarea_id'))?>,其中的textarea_id是上面textarea文本框的id,如果不知道的话(在yii中不是然显示的),你可以打开所在的页面,然后按F12(通常是这个键),打开浏览器的调试模式,在代码那一块查看该textarea的id,如下图:
2)高级调用(设置编辑器参数),有时候我们想要更多的自定义一些选项,比如高度,宽度,以及想要显示的工具栏选项:
<div class="row">
    <?php echo $form->labelEx($model,'content'); ?>
    <?php echo $form->textArea($model,'content',        array('rows'=>6, 'cols'=>50)); ?>
    <?php echo $form->error($model,'content'); ?>
</div>
<?php $this->widget('ext.kindeditor.KEditorWidget', array('id'=>'Post_content','paramOptions'=>'{
    width:"700px",
    height:"300px",
}'))?>
更多编辑器设可参考这篇文章:KindEditor使用入门(二)—— 编辑器初始化参数


 5510
5510

 被折叠的 条评论
为什么被折叠?
被折叠的 条评论
为什么被折叠?
 到【灌水乐园】发言


