


----------------------------------------------------------------
2019-9-7更新: 六-6中安装tensorflow-gpu不要采用pip install tensorflow-gpu==1.9
直接用conda install --channel https://conda.anaconda.org/anaconda tensorflow-gpu=1.9.0命令安装
----------------------------------------------------------------
本文是关于tensorflow-gpu和CUDA以及cuDNN匹配安装的经验记录。
前言:
- 电脑配置deepin15.10 + gtx1070,tensorflow-gpu安装的版本是tensorflow-gpu 1.9.0,CUDA安装的版本是CUDA Toolkit 9.0,cuDNN是要与CUDA版本对应的。
- 关于CUDA的版本不要想着下最新的,tensorflow-gpu可能并不支持(可以点开看看对应支持的版本)。CUDA是显卡厂商NVIDIA推出的运算平台。 CUDA是一种由NVIDIA推出的通用并行计算架构,该架构使GPU能够解决复杂的计算问题。
- 这篇文章比较长,还请有耐心的慢慢做,tensorflow-gpu安装比较麻烦,希望你能一次成功,但如果成功不了可以多试几次。
一、前置工作
检查GPU是否支持CUDN:其实这一步是可以省略的,因为CUDN支持的显卡范围特别广,你基本只要确认你的GPU是不是NVIDIA的就可以了,当然如果你还是不确定的话,也可以去这个网站(https://developer.nvidia.com/cuda-gpus)中的“CUDA-Enabled GeForce Products”查一下,只要你的显卡型号在里面就可以了。
如果你的显卡不支持安装CUDN那么tensorflow-cpu版本应该更适合你,文章中并未提到关于tensorflow-cpu版本的安装,你可以看下一篇了。
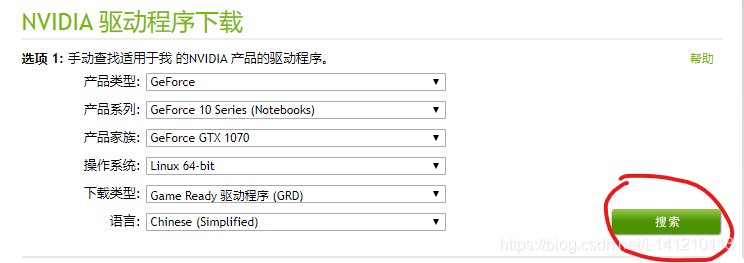
二、下载并安装显卡驱动
- 去官方网站查询和下载驱动https://www.nvidia.cn/Download/index.aspx?lang=cn
- 禁用nouveau驱动
sudo vim /etc/modprobe.d/blacklist-nouveau.conf
填入:
blacklist nouveau
options nouveau modeset=0
- 执行如下后,重启电脑
sudo update-initramfs -u
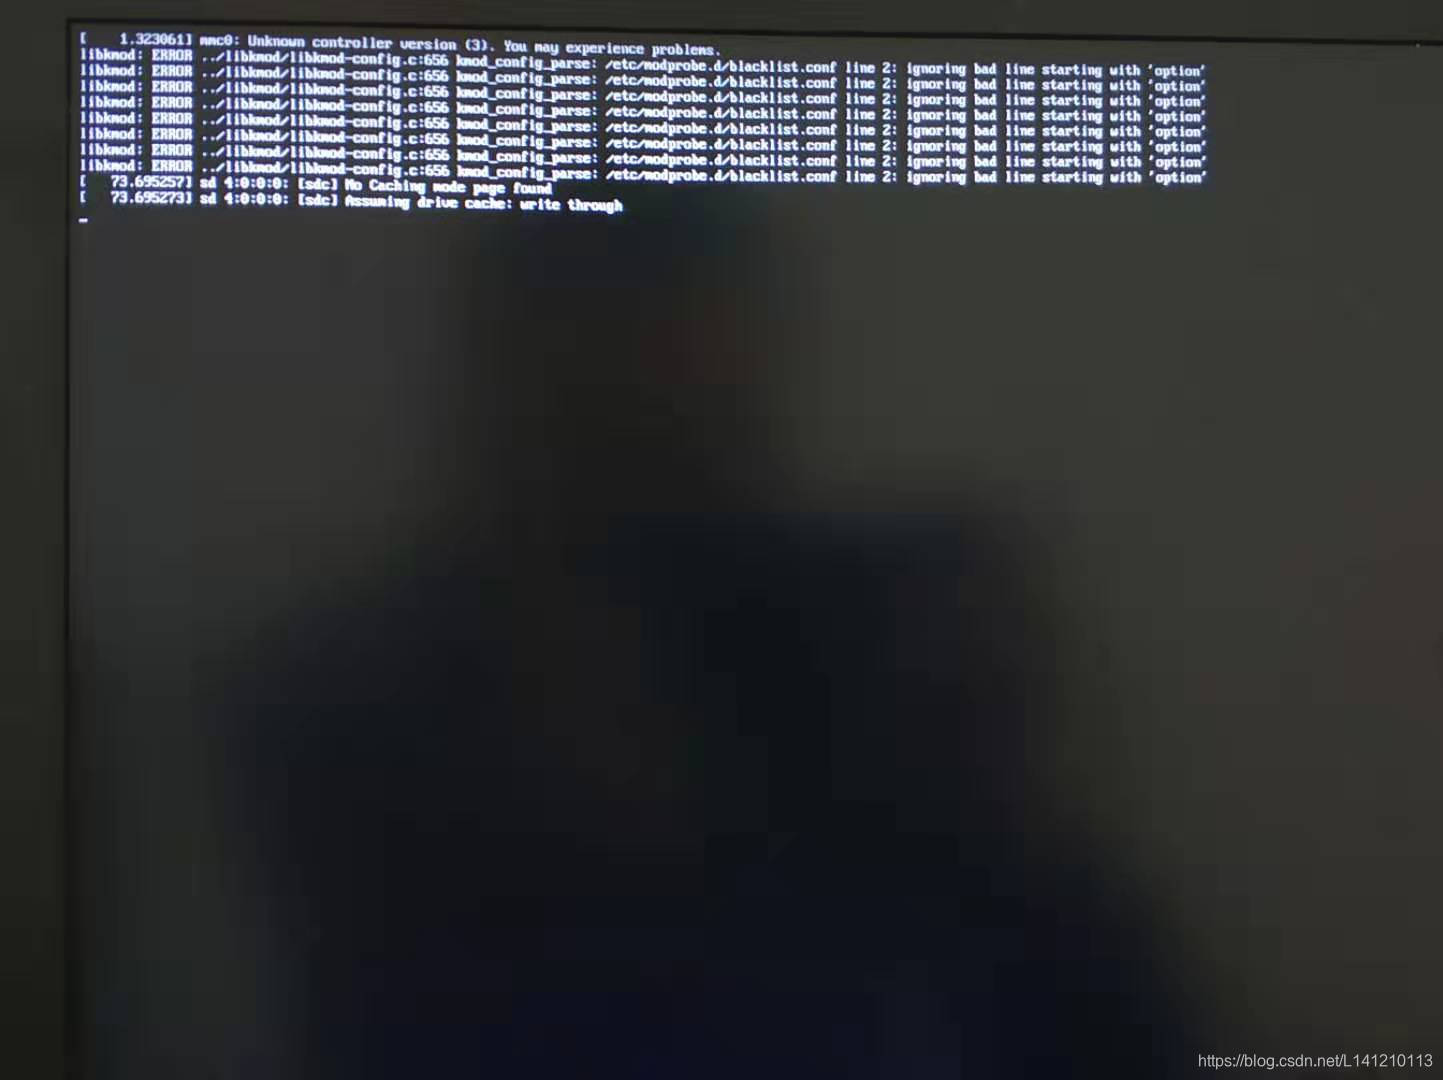
附:如果重启后黑屏,并且提示如下,请跳过第4步,直接进行5. 安装显卡驱动
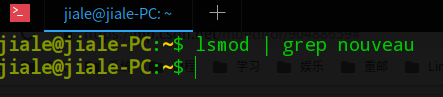
- 重启后,输入如下,如果没有信息出来就表明禁用成功
lsmod | grep nouveau
- 安装显卡驱动(高能,先把本教程传到手机或其他设备上再进行操作)
第一步:ctrl+alt+f2切换一下,进入命令界面
注:
(1)用户名密码输入时不要用小键盘的数字
(2)ctrl+alt+f1还可以去切换回来
第二步:关闭图像界面,输入命令关闭图像界面(关闭了切换回去也没用了,操作失败重启命令reboot)
sudo service lightdm stop
- 安装驱动
cd 到显卡驱动所放目录
sudo chmod a+x NVIDIA-Linux-x86_64-390.77.run
sudo ./NVIDIA-Linux-x86_64-390.77.run
安装过程中,全选Yes。
- 安装好后重启电脑
reboot
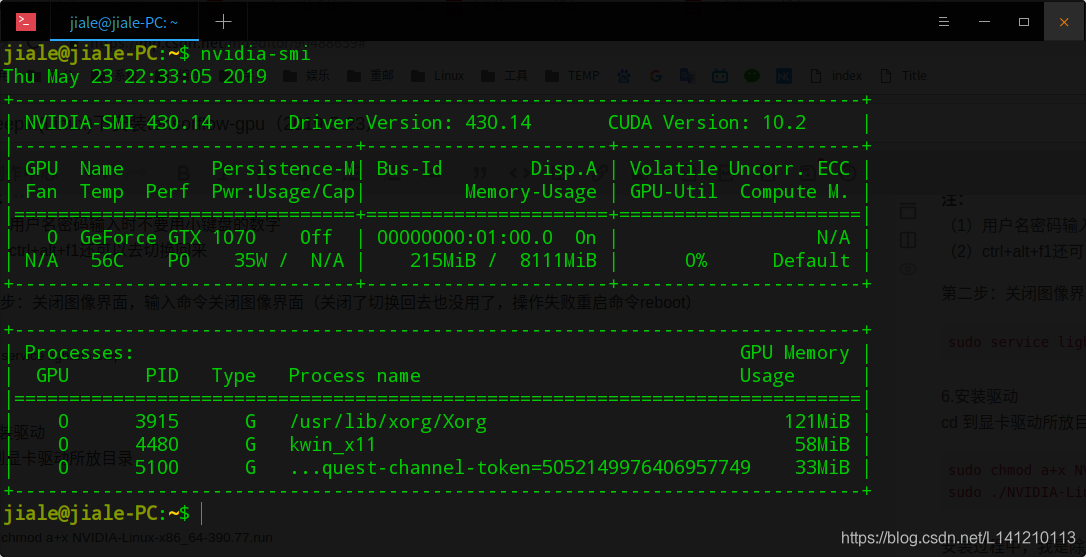
- 开机后输入
nvidia-smi
如图所示即可,之前用系统自带的驱动管理器安装是没这个的。
三、安装cuda9.0
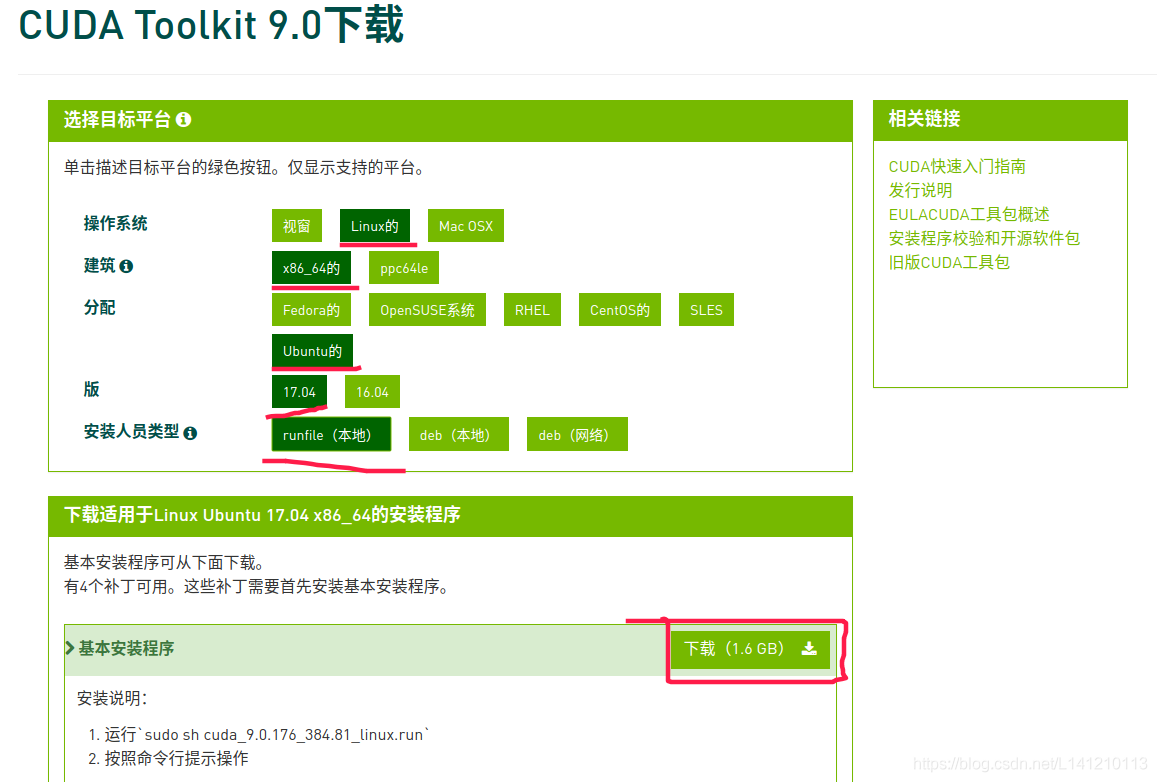
-
下载cuda-9.0(https://developer.nvidia.com/cuda-90-download-archive?target_os=Linux&target_arch=x86_64&target_distro=Ubuntu&target_version=1704&target_type=runfilelocal)
-
安装cuda9前的设置
安装前先保证gcc和g++版本对应cuda,我的是cuda9.0,官方文档要求gcc/g++ 5.x,
先对gcc/g++降级。 -
发现网上的安装gcc-5的通用方法已不支持Deepin15.10,网上的安装方法是
sudo apt-get install gcc-5
在Deepin15.10中会提示:E:无法定位软件包
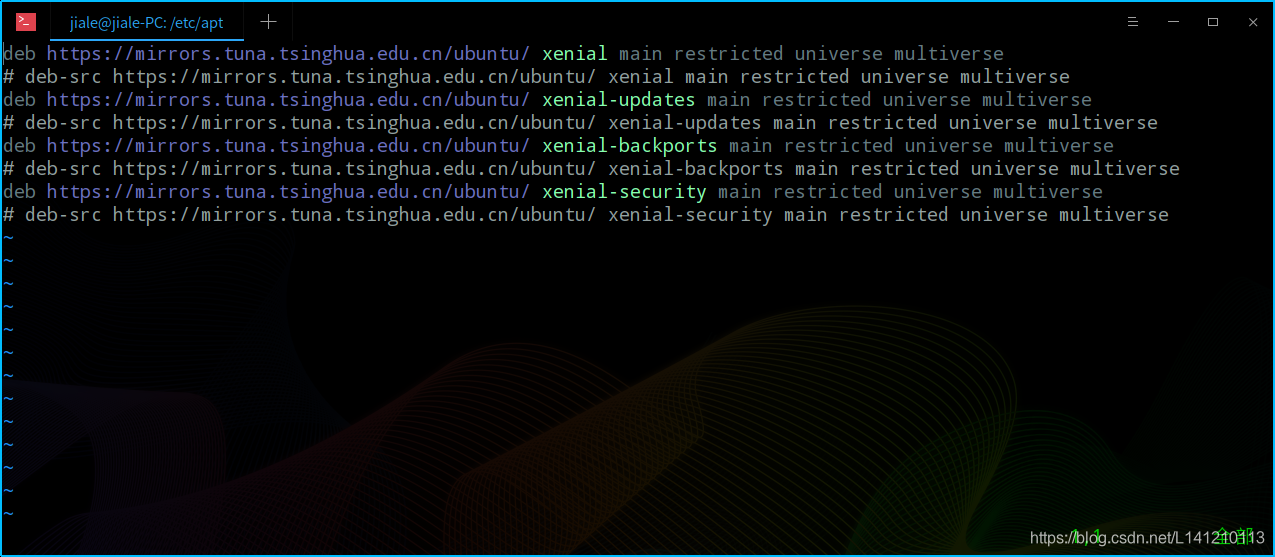
- 我们需要先更换ubuntu16.04的源,清华镜像站:https://mirrors.tuna.tsinghua.edu.cn/help/ubuntu/
或者你直接把我的源复制进去
deb https://mirrors.tuna.tsinghua.edu.cn/ubuntu/ xenial main restricted universe multiverse
# deb-src https://mirrors.tuna.tsinghua.edu.cn/ubuntu/ xenial main restricted universe multiverse
deb https://mirrors.tuna.tsinghua.edu.cn/ubuntu/ xenial-updates main restricted universe multiverse
# deb-src https://mirrors.tuna.tsinghua.edu.cn/ubuntu/ xenial-updates main restricted universe multiverse
deb https://mirrors.tuna.tsinghua.edu.cn/ubuntu/ xenial-backports main restricted universe multiverse
# deb-src https://mirrors.tuna.tsinghua.edu.cn/ubuntu/ xenial-backports main restricted universe multiverse
deb https://mirrors.tuna.tsinghua.edu.cn/ubuntu/ xenial-security main restricted universe multiverse
# deb-src https://mirrors.tuna.tsinghua.edu.cn/ubuntu/ xenial-security main restricted universe multiverse
更换方法:
(1),进入配置目录
cd /etc/apt && ls
你可以看一下,sources.list就是apt-get的配置文件。由于我已经更换过了,sources.list.deepin15.10与sources.list.ubuntu16.04都是我的备份文件。

(2),备份原配置文件
sudo cp sources.list source.list.deepin15.10
(3),修改原文件
sudo vim /etc/apt/sources.list
这是我的,你可以更换ubuntu16.04的源,清华镜像站:https://mirrors.tuna.tsinghua.edu.cn/help/ubuntu/
或者你直接把我的源复制进去
deb https://mirrors.tuna.tsinghua.edu.cn/ubuntu/ xenial main restricted universe multiverse
# deb-src https://mirrors.tuna.tsinghua.edu.cn/ubuntu/ xenial main restricted universe multiverse
deb https://mirrors.tuna.tsinghua.edu.cn/ubuntu/ xenial-updates main restricted universe multiverse
# deb-src https://mirrors.tuna.tsinghua.edu.cn/ubuntu/ xenial-updates main restricted universe multiverse
deb https://mirrors.tuna.tsinghua.edu.cn/ubuntu/ xenial-backports main restricted universe multiverse
# deb-src https://mirrors.tuna.tsinghua.edu.cn/ubuntu/ xenial-backports main restricted universe multiverse
deb https://mirrors.tuna.tsinghua.edu.cn/ubuntu/ xenial-security main restricted universe multiverse
# deb-src https://mirrors.tuna.tsinghua.edu.cn/ubuntu/ xenial-security main restricted universe multiverse
(4),更新,等待更新完毕就可以sudo apt-get install gcc-5
sudo apt-get update
- 安装gcc-5/g+±5
sudo apt-get install gcc-5
sudo apt-get install g++-5
- 设置gcc默认版本
sudo update-alternatives --install /usr/bin/gcc gcc /usr/bin/gcc-5 100
sudo update-alternatives --install /usr/bin/g++ g++ /usr/bin/g++-5 100
- 安装cuda-9.0
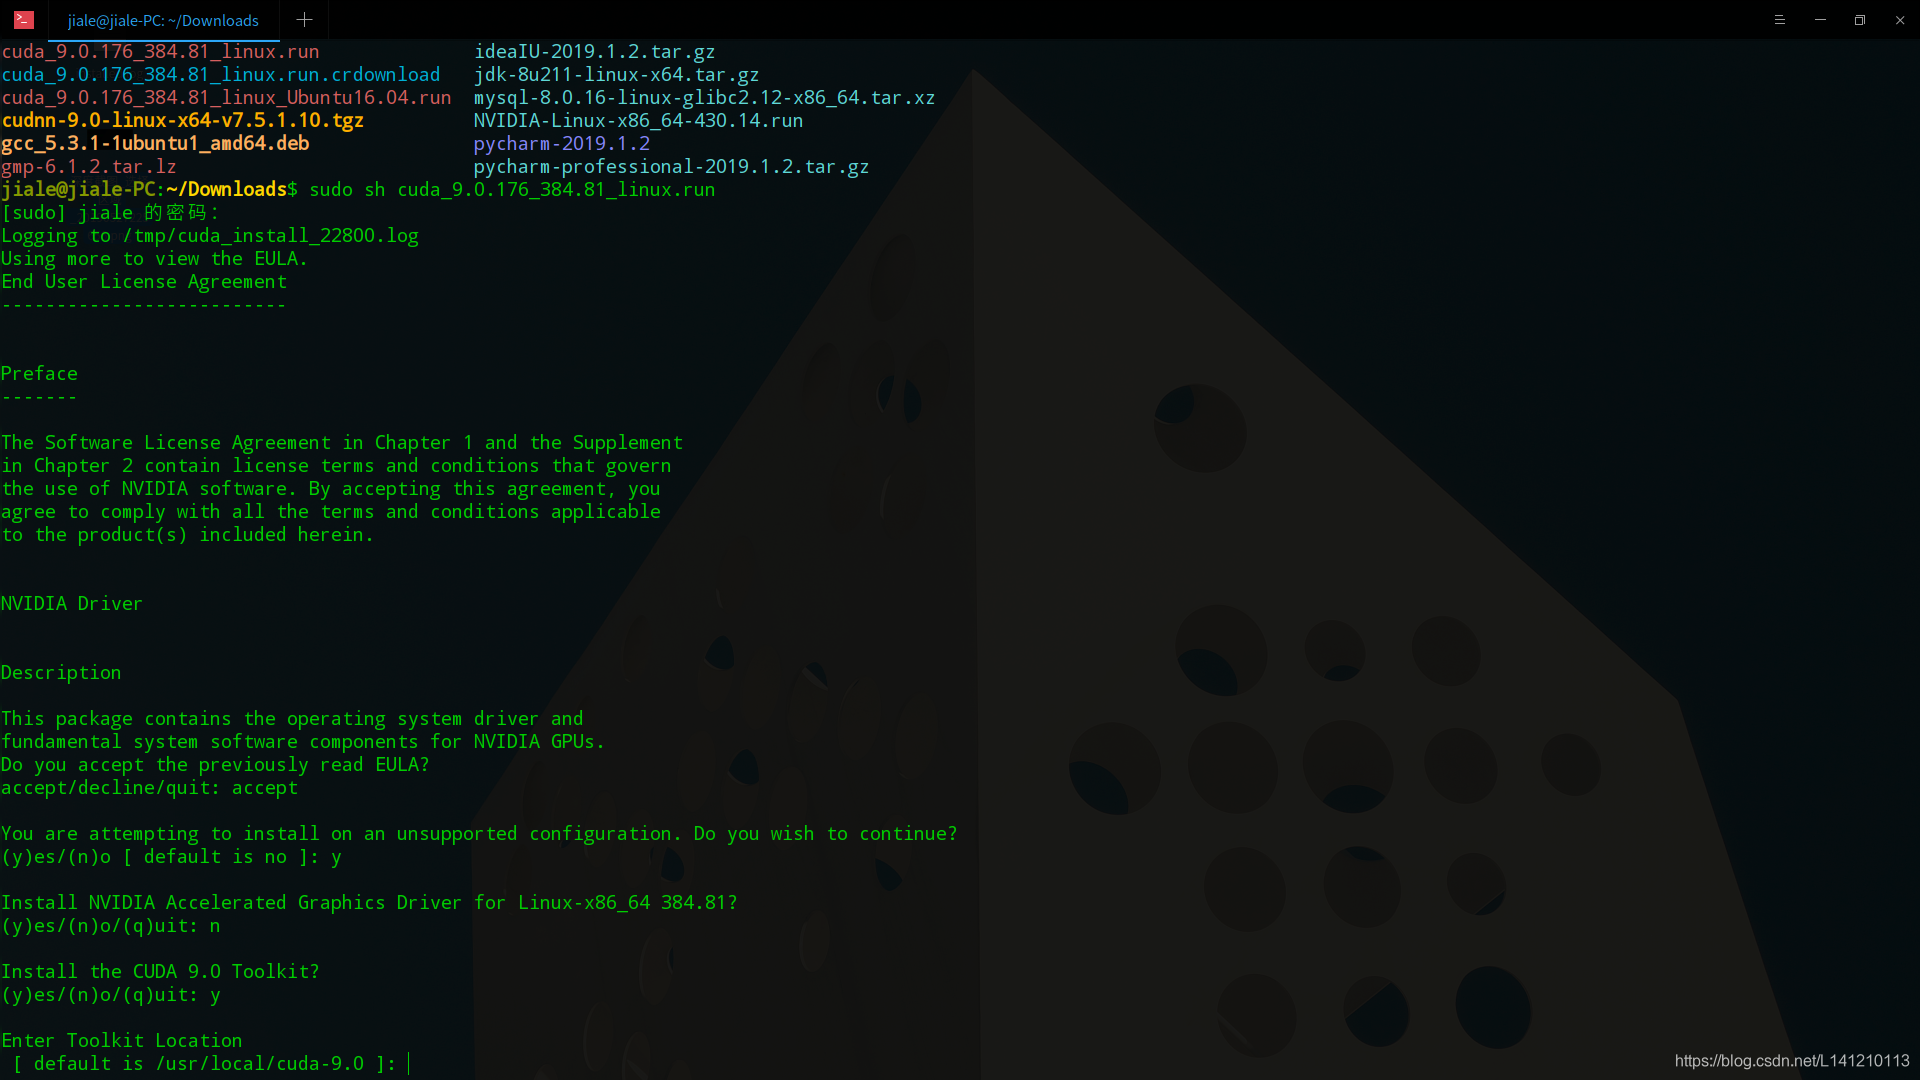
(1)cd到cuda_9.0.176_384.81_linux.run的下载目录,执行
sudo sh cuda_9.0.176_384.81_linux.run
(2)先按q直接跳过阅读协议,然后accept,后面的除了Install NVIDIA Accelerated Graphics Driver for Linux-x86_64 384.81这样的选n(我们第二步已经安装过驱动了),其它的有y选y,或者直接回车默认,
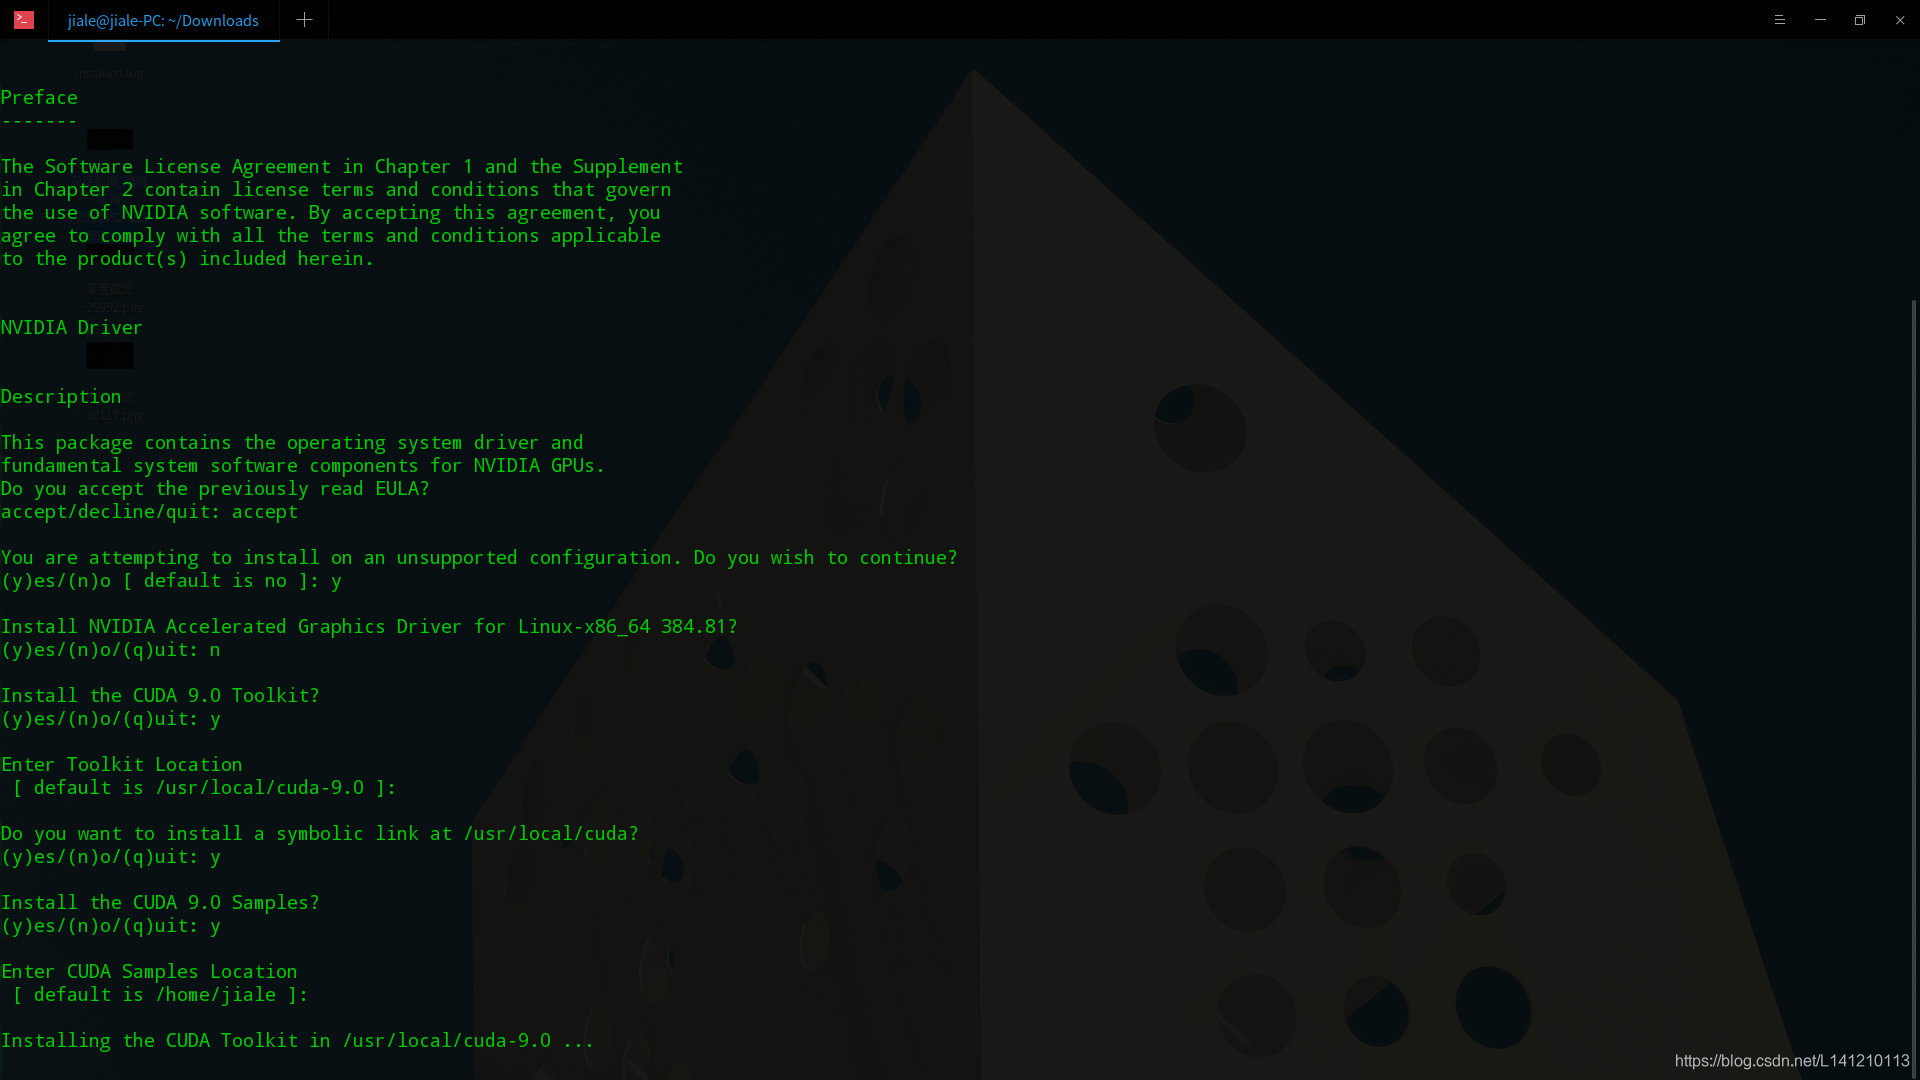
(3)完整的安装记录
Logging to /tmp/cuda_install_22800.log
Using more to view the EULA.
End User License Agreement
--------------------------


Preface
-------

The Software License Agreement in Chapter 1 and the Supplement
in Chapter 2 contain license terms and conditions that govern
the use of NVIDIA software. By accepting this agreement, you
agree to comply with all the terms and conditions applicable
to the product(s) included herein.


NVIDIA Driver


Description

This package contains the operating system driver and
fundamental system software components for NVIDIA GPUs.
Do you accept the previously read EULA?
accept/decline/quit: accept

You are attempting to install on an unsupported configuration. Do you wish to continue?
(y)es/(n)o [ default is no ]: y

Install NVIDIA Accelerated Graphics Driver for Linux-x86_64 384.81?
(y)es/(n)o/(q)uit: n

Install the CUDA 9.0 Toolkit?
(y)es/(n)o/(q)uit: y

Enter Toolkit Location
 [ default is /usr/local/cuda-9.0 ]:

Do you want to install a symbolic link at /usr/local/cuda?
(y)es/(n)o/(q)uit: y

Install the CUDA 9.0 Samples?
(y)es/(n)o/(q)uit: y

Enter CUDA Samples Location
 [ default is /home/jiale ]:

Installing the CUDA Toolkit in /usr/local/cuda-9.0 ...
Missing recommended library: libGLU.so
Missing recommended library: libX11.so
Missing recommended library: libXi.so
Missing recommended library: libXmu.so
Missing recommended library: libGL.so

Installing the CUDA Samples in /home/jiale ...
Copying samples to /home/jiale/NVIDIA_CUDA-9.0_Samples now...
Finished copying samples.

===========
= Summary =
===========

Driver:   Not Selected
Toolkit:  Installed in /usr/local/cuda-9.0
Samples:  Installed in /home/jiale, but missing recommended libraries

Please make sure that
 -   PATH includes /usr/local/cuda-9.0/bin
 -   LD_LIBRARY_PATH includes /usr/local/cuda-9.0/lib64, or, add /usr/local/cuda-9.0/lib64 to /etc/ld.so.conf and run ldconfig as root

To uninstall the CUDA Toolkit, run the uninstall script in /usr/local/cuda-9.0/bin

Please see CUDA_Installation_Guide_Linux.pdf in /usr/local/cuda-9.0/doc/pdf for detailed information on setting up CUDA.

***WARNING: Incomplete installation! This installation did not install the CUDA Driver. A driver of version at least 384.00 is required for CUDA 9.0 functionality to work.
To install the driver using this installer, run the following command, replacing <CudaInstaller> with the name of this run file:
    sudo <CudaInstaller>.run -silent -driver

Logfile is /tmp/cuda_install_22800.log
(4)我们发现安装了两个分别是
Toolkit:  Installed in /usr/local/cuda-9.0
Samples:  Installed in /home/jiale, but missing recommended libraries
- 检查一下环境变量
vim ~/.bashr
末尾添加
#cuda
export LD_LIBRARY_PATH=/usr/local/cuda-9.0/lib64/:$LD_LIBRARY_PATH
export PATH=/usr/local/cuda-9.0/bin:$PATH
然后source ~/.bashrc一下
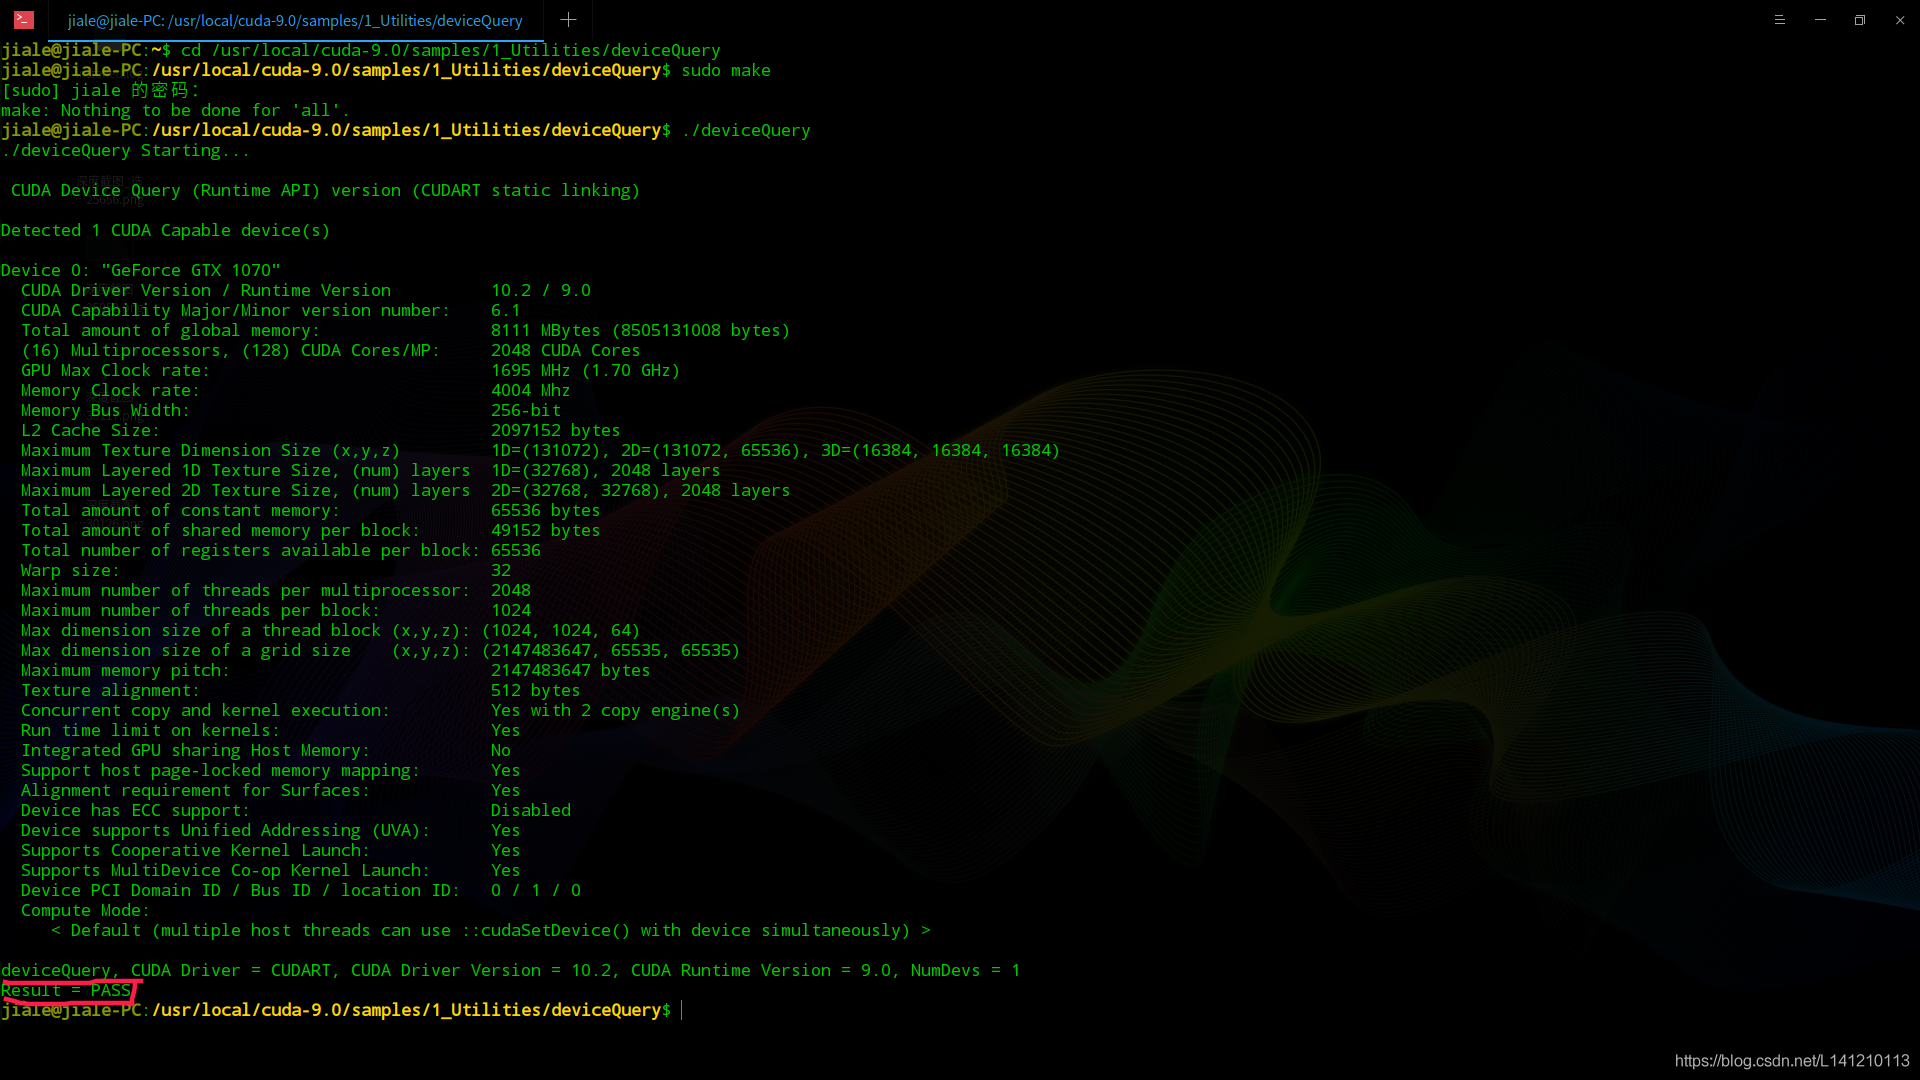
- 验证安装
重新打开一个终端
cd /usr/local/cuda-9.0/samples/1_Utilities/deviceQuery
sudo make
./deviceQuery
有PASS则表示成功
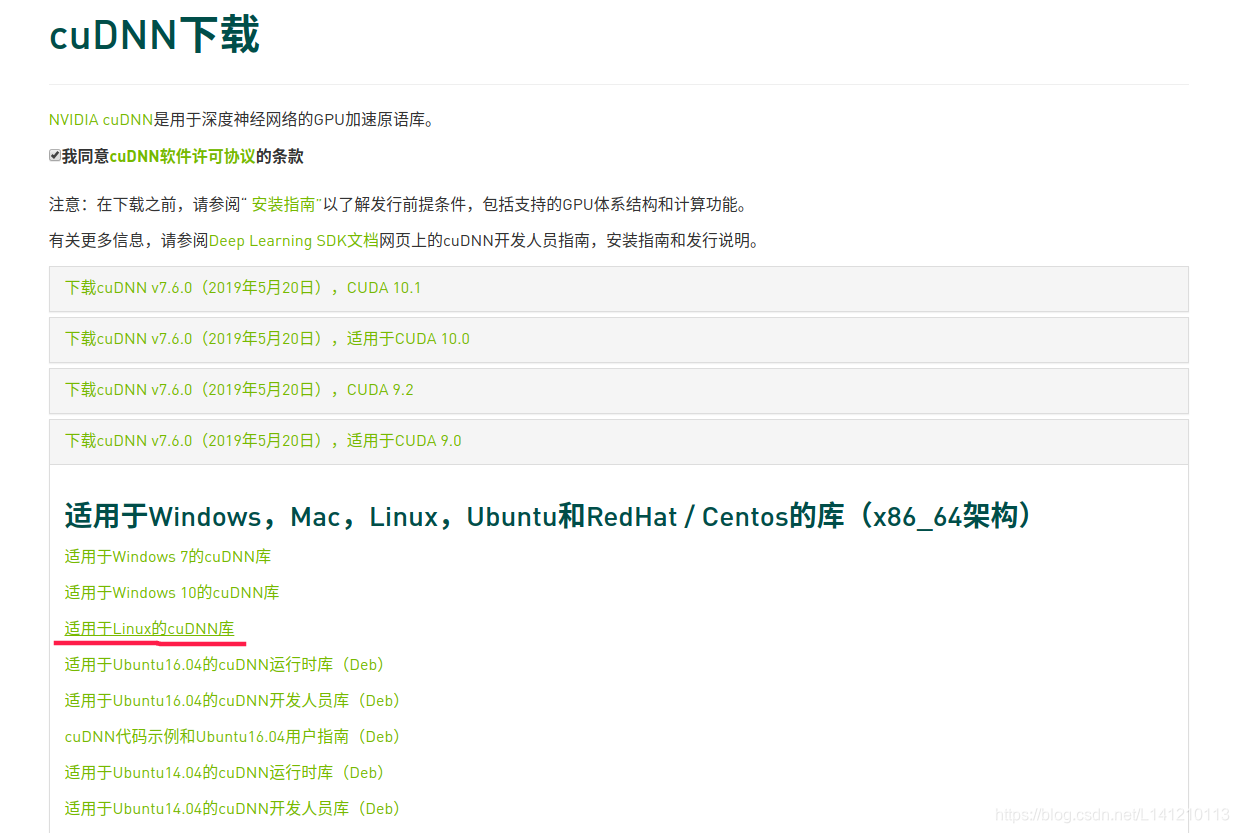
四、安装cudnn7
- 下载
当你进了下载网站(https://developer.nvidia.com/rdp/cudnn-download),你会发现他要让你注册了才能下载,但为了能安装,注册什么的就干了吧,不过程比较烦,最后注册完选择合适的版本下载(因为我们CUDA安装的版本是CUDA Toolkit 9.0这里选择最下面那个)
- 先解压安装包,后复制到cuda目录
tar -zvxf cudnn-9.0-linux-x64-v7.tgz
cd cuda
sudo cp -P lib64/* /usr/local/cuda/lib64/
sudo cp -P include/* /usr/local/cuda/include/
sudo chmod a+r /usr/local/cuda/include/cudnn.h /usr/local/cuda/lib64/libcudnn*
- 同样的,添加到环境变量,内容如下
vim ~/.bashr
添加
#cudnn
export LD_LIBRARY_PATH="$LD_LIBRARY_PATH:/usr/local/cuda/lib64:/usr/local/cuda/extras/CUPTI/lib64"
export CUDA_HOME=/usr/local/cuda
五、安装Anaconda
- 先去这里下载Anaconda:https://www.anaconda.com/distribution/

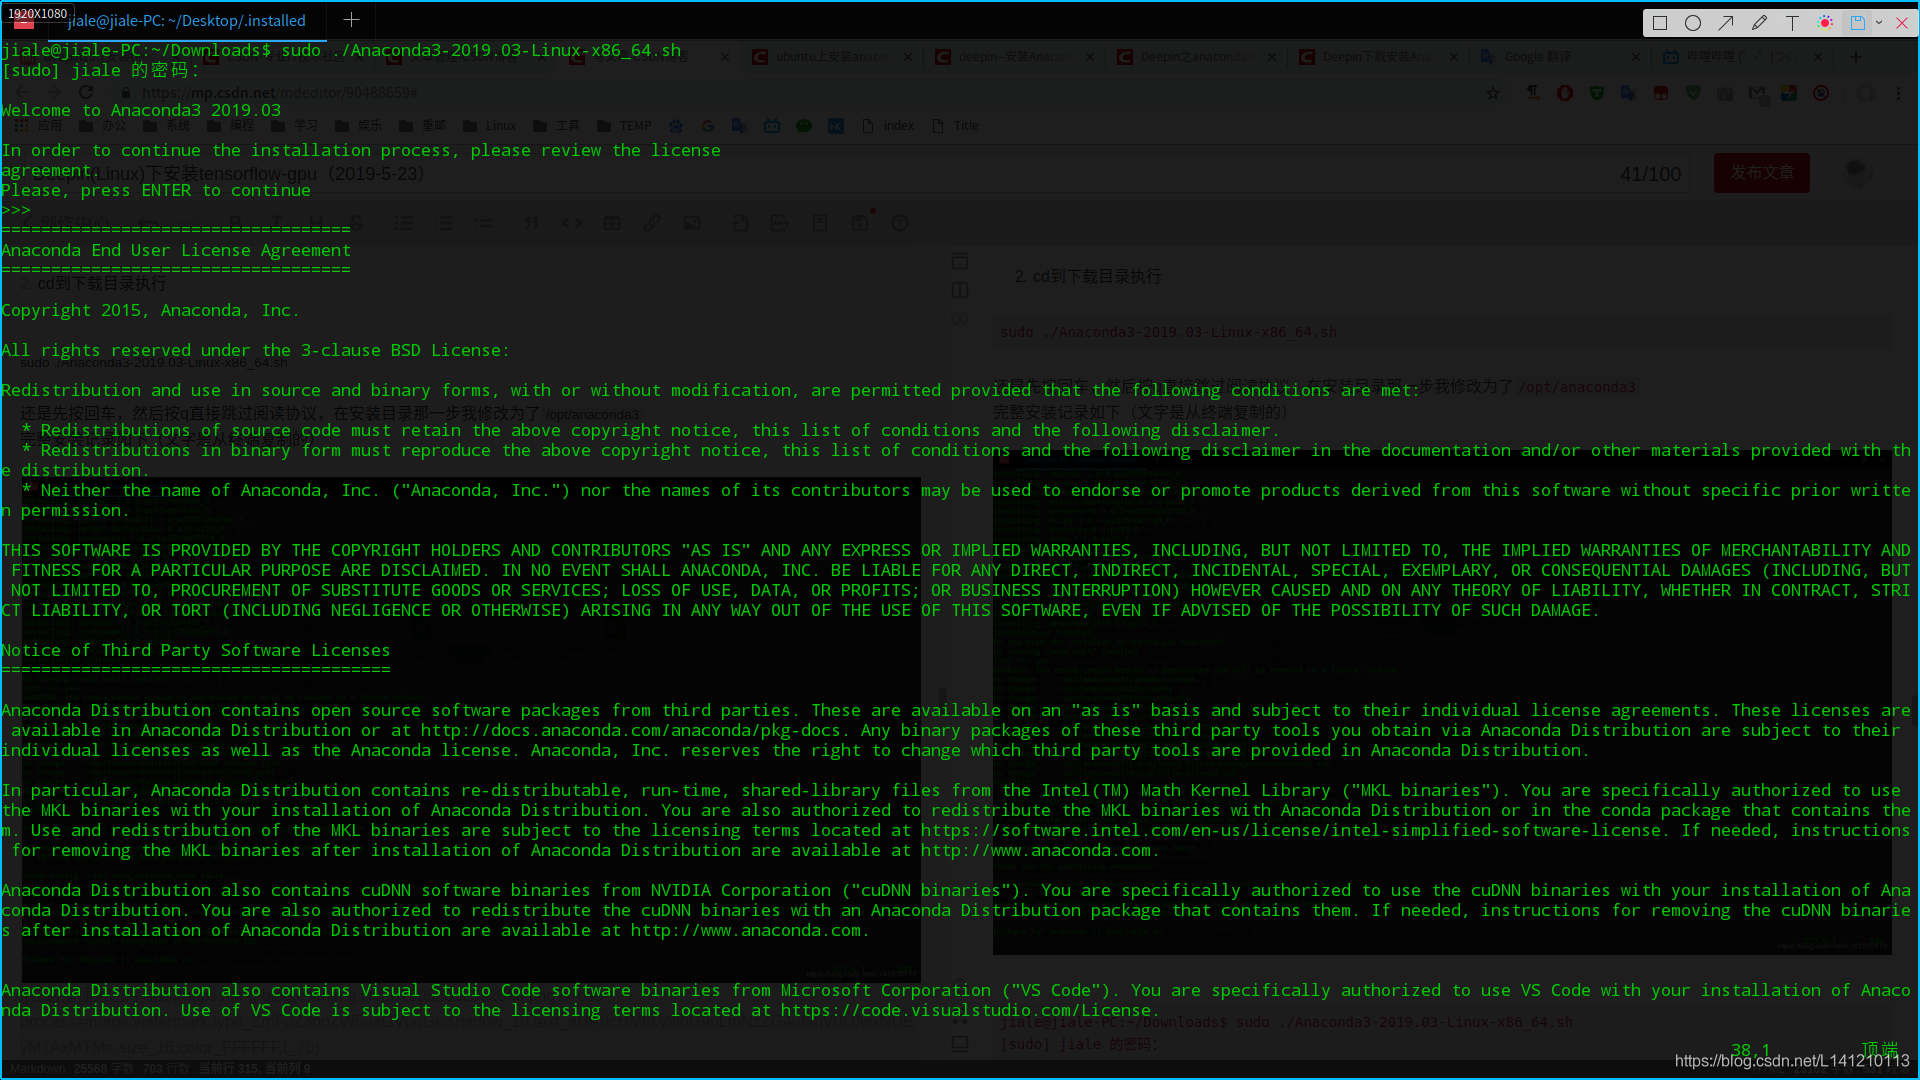
- cd到下载目录执行
sudo ./Anaconda3-2019.03-Linux-x86_64.sh
还是先按回车,然后按q直接跳过阅读协议,在安装目录那一步我修改为了/opt/anaconda3
完整安装记录如下(文字是从终端复制的)
jiale@jiale-PC:~/Downloads$ sudo ./Anaconda3-2019.03-Linux-x86_64.sh
[sudo] jiale 的密码:
Welcome to Anaconda3 2019.03
In order to continue the installation process, please review the license
agreement.
Please, press ENTER to continue
>>>
===================================
Anaconda End User License Agreement
===================================
Copyright 2015, Anaconda, Inc.
All rights reserved under the 3-clause BSD License:
Redistribution and use in source and binary forms, with or without modification, are permitted provided that the following conditions are met:
* Redistributions of source code must retain the above copyright notice, this list of conditions and the following disclaimer.
* Redistributions in binary form must reproduce the above copyright notice, this list of conditions and the following disclaimer in the documentation and/or other materials provided with th
e distribution.
* Neither the name of Anaconda, Inc. ("Anaconda, Inc.") nor the names of its contributors may be used to endorse or promote products derived from this software without specific prior writte
n permission.
THIS SOFTWARE IS PROVIDED BY THE COPYRIGHT HOLDERS AND CONTRIBUTORS "AS IS" AND ANY EXPRESS OR IMPLIED WARRANTIES, INCLUDING, BUT NOT LIMITED TO, THE IMPLIED WARRANTIES OF MERCHANTABILITY AND
FITNESS FOR A PARTICULAR PURPOSE ARE DISCLAIMED. IN NO EVENT SHALL ANACONDA, INC. BE LIABLE FOR ANY DIRECT, INDIRECT, INCIDENTAL, SPECIAL, EXEMPLARY, OR CONSEQUENTIAL DAMAGES (INCLUDING, BUT
NOT LIMITED TO, PROCUREMENT OF SUBSTITUTE GOODS OR SERVICES; LOSS OF USE, DATA, OR PROFITS; OR BUSINESS INTERRUPTION) HOWEVER CAUSED AND ON ANY THEORY OF LIABILITY, WHETHER IN CONTRACT, STRI
CT LIABILITY, OR TORT (INCLUDING NEGLIGENCE OR OTHERWISE) ARISING IN ANY WAY OUT OF THE USE OF THIS SOFTWARE, EVEN IF ADVISED OF THE POSSIBILITY OF SUCH DAMAGE.
Notice of Third Party Software Licenses
=======================================
Anaconda Distribution contains open source software packages from third parties. These are available on an "as is" basis and subject to their individual license agreements. These licenses are
available in Anaconda Distribution or at http://docs.anaconda.com/anaconda/pkg-docs. Any binary packages of these third party tools you obtain via Anaconda Distribution are subject to their
individual licenses as well as the Anaconda license. Anaconda, Inc. reserves the right to change which third party tools are provided in Anaconda Distribution.
In particular, Anaconda Distribution contains re-distributable, run-time, shared-library files from the Intel(TM) Math Kernel Library ("MKL binaries"). You are specifically authorized to use
the MKL binaries with your installation of Anaconda Distribution. You are also authorized to redistribute the MKL binaries with Anaconda Distribution or in the conda package that contains the
m. Use and redistribution of the MKL binaries are subject to the licensing terms located at https://software.intel.com/en-us/license/intel-simplified-software-license. If needed, instructions
for removing the MKL binaries after installation of Anaconda Distribution are available at http://www.anaconda.com.
Anaconda Distribution also contains cuDNN software binaries from NVIDIA Corporation ("cuDNN binaries"). You are specifically authorized to use the cuDNN binaries with your installation of Ana
conda Distribution. You are also authorized to redistribute the cuDNN binaries with an Anaconda Distribution package that contains them. If needed, instructions for removing the cuDNN binarie
s after installation of Anaconda Distribution are available at http://www.anaconda.com.
Anaconda Distribution also contains Visual Studio Code software binaries from Microsoft Corporation ("VS Code"). You are specifically authorized to use VS Code with your installation of Anaco
nda Distribution. Use of VS Code is subject to the licensing terms located at https://code.visualstudio.com/License.
Cryptography Notice
===================
This distribution includes cryptographic software. The country in which you currently reside may have restrictions on the import, possession, use, and/or re-export to another country, of encr
yption software. BEFORE using any encryption software, please check your country's laws, regulations and policies concerning the import, possession, or use, and re-export of encryption softwa
re, to see if this is permitted. See the Wassenaar Arrangement http://www.wassenaar.org/ for more information.
Anaconda, Inc. has self-classified this software as Export Commodity Control Number (ECCN) 5D992b, which includes mass market information security software using or performing cryptographic f
unctions with asymmetric algorithms. No license is required for export of this software to non-embargoed countries. In addition, the Intel(TM) Math Kernel Library contained in Anaconda, Inc.'
Do you accept the license terms? [yes|no]
[no] >>> yes
Anaconda3 will now be installed into this location:
/root/anaconda3
- Press ENTER to confirm the location
- Press CTRL-C to abort the installation
- Or specify a different location below
[/root/anaconda3] >>> /opt/anaconda3
PREFIX=/opt/anaconda3
installing: python-3.7.3-h0371630_0 ...
Python 3.7.3
installing: conda-env-2.6.0-1 ...
installing: blas-1.0-mkl ...
installing: ca-certificates-2019.1.23-0 ...
installing: intel-openmp-2019.3-199 ...
installing: libgcc-ng-8.2.0-hdf63c60_1 ...
installing: libgfortran-ng-7.3.0-hdf63c60_0 ...
installing: libstdcxx-ng-8.2.0-hdf63c60_1 ...
installing: bzip2-1.0.6-h14c3975_5 ...
installing: expat-2.2.6-he6710b0_0 ...
installing: fribidi-1.0.5-h7b6447c_0 ...
installing: gmp-6.1.2-h6c8ec71_1 ...
installing: graphite2-1.3.13-h23475e2_0 ...
installing: icu-58.2-h9c2bf20_1 ...
installing: jbig-2.1-hdba287a_0 ...
installing: jpeg-9b-h024ee3a_2 ...
installing: libffi-3.2.1-hd88cf55_4 ...
installing: liblief-0.9.0-h7725739_2 ...
installing: libsodium-1.0.16-h1bed415_0 ...
installing: libtool-2.4.6-h7b6447c_5 ...
installing: libuuid-1.0.3-h1bed415_2 ...
installing: libxcb-1.13-h1bed415_1 ...
installing: lz4-c-1.8.1.2-h14c3975_0 ...
installing: lzo-2.10-h49e0be7_2 ...
installing: mkl-2019.3-199 ...
installing: ncurses-6.1-he6710b0_1 ...
installing: openssl-1.1.1b-h7b6447c_1 ...
installing: patchelf-0.9-he6710b0_3 ...
installing: pcre-8.43-he6710b0_0 ...
installing: pixman-0.38.0-h7b6447c_0 ...
installing: snappy-1.1.7-hbae5bb6_3 ...
installing: xz-5.2.4-h14c3975_4 ...
installing: yaml-0.1.7-had09818_2 ...
installing: zlib-1.2.11-h7b6447c_3 ...
installing: blosc-1.15.0-hd408876_0 ...
installing: glib-2.56.2-hd408876_0 ...
installing: hdf5-1.10.4-hb1b8bf9_0 ...
installing: libedit-3.1.20181209-hc058e9b_0 ...
installing: libpng-1.6.36-hbc83047_0 ...
installing: libssh2-1.8.0-h1ba5d50_4 ...
installing: libxml2-2.9.9-he19cac6_0 ...
installing: mpfr-4.0.1-hdf1c602_3 ...
installing: pandoc-2.2.3.2-0 ...
installing: readline-7.0-h7b6447c_5 ...
installing: tk-8.6.8-hbc83047_0 ...
installing: zeromq-4.3.1-he6710b0_3 ...
installing: zstd-1.3.7-h0b5b093_0 ...
installing: dbus-1.13.6-h746ee38_0 ...
installing: freetype-2.9.1-h8a8886c_1 ...
installing: gstreamer-1.14.0-hb453b48_1 ...
installing: krb5-1.16.1-h173b8e3_7 ...
installing: libarchive-3.3.3-h5d8350f_5 ...
installing: libtiff-4.0.10-h2733197_2 ...
installing: libxslt-1.1.33-h7d1a2b0_0 ...
installing: mpc-1.1.0-h10f8cd9_1 ...
installing: sqlite-3.27.2-h7b6447c_0 ...
installing: unixodbc-2.3.7-h14c3975_0 ...
installing: fontconfig-2.13.0-h9420a91_0 ...
installing: gst-plugins-base-1.14.0-hbbd80ab_1 ...
installing: libcurl-7.64.0-h20c2e04_2 ...
installing: alabaster-0.7.12-py37_0 ...
installing: asn1crypto-0.24.0-py37_0 ...
installing: atomicwrites-1.3.0-py37_1 ...
installing: attrs-19.1.0-py37_1 ...
installing: backcall-0.1.0-py37_0 ...
installing: backports-1.0-py37_1 ...
installing: bitarray-0.8.3-py37h14c3975_0 ...
installing: boto-2.49.0-py37_0 ...
installing: cairo-1.14.12-h8948797_3 ...
installing: certifi-2019.3.9-py37_0 ...
installing: chardet-3.0.4-py37_1 ...
installing: click-7.0-py37_0 ...
installing: cloudpickle-0.8.0-py37_0 ...
installing: colorama-0.4.1-py37_0 ...
installing: contextlib2-0.5.5-py37_0 ...
installing: curl-7.64.0-hbc83047_2 ...
installing: dask-core-1.1.4-py37_1 ...
installing: decorator-4.4.0-py37_1 ...
installing: defusedxml-0.5.0-py37_1 ...
installing: docutils-0.14-py37_0 ...
installing: entrypoints-0.3-py37_0 ...
installing: et_xmlfile-1.0.1-py37_0 ...
installing: fastcache-1.0.2-py37h14c3975_2 ...
installing: filelock-3.0.10-py37_0 ...
installing: future-0.17.1-py37_0 ...
installing: glob2-0.6-py37_1 ...
installing: gmpy2-2.0.8-py37h10f8cd9_2 ...
installing: greenlet-0.4.15-py37h7b6447c_0 ...
installing: heapdict-1.0.0-py37_2 ...
installing: idna-2.8-py37_0 ...
installing: imagesize-1.1.0-py37_0 ...
installing: ipython_genutils-0.2.0-py37_0 ...
installing: itsdangerous-1.1.0-py37_0 ...
installing: jdcal-1.4-py37_0 ...
installing: jeepney-0.4-py37_0 ...
installing: kiwisolver-1.0.1-py37hf484d3e_0 ...
installing: lazy-object-proxy-1.3.1-py37h14c3975_2 ...
installing: llvmlite-0.28.0-py37hd408876_0 ...
installing: locket-0.2.0-py37_1 ...
installing: lxml-4.3.2-py37hefd8a0e_0 ...
installing: markupsafe-1.1.1-py37h7b6447c_0 ...
installing: mccabe-0.6.1-py37_1 ...
installing: mistune-0.8.4-py37h7b6447c_0 ...
installing: mkl-service-1.1.2-py37he904b0f_5 ...
installing: more-itertools-6.0.0-py37_0 ...
installing: mpmath-1.1.0-py37_0 ...
installing: msgpack-python-0.6.1-py37hfd86e86_1 ...
installing: numpy-base-1.16.2-py37hde5b4d6_0 ...
installing: olefile-0.46-py37_0 ...
installing: pandocfilters-1.4.2-py37_1 ...
installing: parso-0.3.4-py37_0 ...
installing: pep8-1.7.1-py37_0 ...
installing: pickleshare-0.7.5-py37_0 ...
installing: pkginfo-1.5.0.1-py37_0 ...
installing: pluggy-0.9.0-py37_0 ...
installing: ply-3.11-py37_0 ...
installing: prometheus_client-0.6.0-py37_0 ...
installing: psutil-5.6.1-py37h7b6447c_0 ...
installing: ptyprocess-0.6.0-py37_0 ...
installing: py-1.8.0-py37_0 ...
installing: py-lief-0.9.0-py37h7725739_2 ...
installing: pycodestyle-2.5.0-py37_0 ...
installing: pycosat-0.6.3-py37h14c3975_0 ...
installing: pycparser-2.19-py37_0 ...
installing: pycrypto-2.6.1-py37h14c3975_9 ...
installing: pycurl-7.43.0.2-py37h1ba5d50_0 ...
installing: pyflakes-2.1.1-py37_0 ...
installing: pyodbc-4.0.26-py37he6710b0_0 ...
installing: pyparsing-2.3.1-py37_0 ...
installing: pysocks-1.6.8-py37_0 ...
installing: python-libarchive-c-2.8-py37_6 ...
installing: pytz-2018.9-py37_0 ...
installing: pyyaml-5.1-py37h7b6447c_0 ...
installing: pyzmq-18.0.0-py37he6710b0_0 ...
installing: qt-5.9.7-h5867ecd_1 ...
installing: qtpy-1.7.0-py37_1 ...
installing: rope-0.12.0-py37_0 ...
installing: ruamel_yaml-0.15.46-py37h14c3975_0 ...
installing: send2trash-1.5.0-py37_0 ...
installing: simplegeneric-0.8.1-py37_2 ...
installing: sip-4.19.8-py37hf484d3e_0 ...
installing: six-1.12.0-py37_0 ...
installing: snowballstemmer-1.2.1-py37_0 ...
installing: sortedcontainers-2.1.0-py37_0 ...
installing: soupsieve-1.8-py37_0 ...
installing: sphinxcontrib-1.0-py37_1 ...
installing: sqlalchemy-1.3.1-py37h7b6447c_0 ...
installing: tblib-1.3.2-py37_0 ...
installing: testpath-0.4.2-py37_0 ...
installing: toolz-0.9.0-py37_0 ...
installing: tornado-6.0.2-py37h7b6447c_0 ...
installing: tqdm-4.31.1-py37_1 ...
installing: unicodecsv-0.14.1-py37_0 ...
installing: wcwidth-0.1.7-py37_0 ...
installing: webencodings-0.5.1-py37_1 ...
installing: werkzeug-0.14.1-py37_0 ...
installing: wrapt-1.11.1-py37h7b6447c_0 ...
installing: wurlitzer-1.0.2-py37_0 ...
installing: xlrd-1.2.0-py37_0 ...
installing: xlsxwriter-1.1.5-py37_0 ...
installing: xlwt-1.3.0-py37_0 ...
installing: zipp-0.3.3-py37_1 ...
installing: babel-2.6.0-py37_0 ...
installing: backports.os-0.1.1-py37_0 ...
installing: backports.shutil_get_terminal_size-1.0.0-py37_2 ...
installing: beautifulsoup4-4.7.1-py37_1 ...
installing: cffi-1.12.2-py37h2e261b9_1 ...
installing: cycler-0.10.0-py37_0 ...
installing: cytoolz-0.9.0.1-py37h14c3975_1 ...
installing: harfbuzz-1.8.8-hffaf4a1_0 ...
installing: html5lib-1.0.1-py37_0 ...
installing: importlib_metadata-0.8-py37_0 ...
installing: jedi-0.13.3-py37_0 ...
installing: mkl_random-1.0.2-py37hd81dba3_0 ...
installing: multipledispatch-0.6.0-py37_0 ...
installing: nltk-3.4-py37_1 ...
installing: openpyxl-2.6.1-py37_1 ...
installing: packaging-19.0-py37_0 ...
installing: partd-0.3.10-py37_1 ...
installing: pathlib2-2.3.3-py37_0 ...
installing: pexpect-4.6.0-py37_0 ...
installing: pillow-5.4.1-py37h34e0f95_0 ...
installing: pyqt-5.9.2-py37h05f1152_2 ...
installing: pyrsistent-0.14.11-py37h7b6447c_0 ...
installing: python-dateutil-2.8.0-py37_0 ...
installing: qtawesome-0.5.7-py37_1 ...
installing: setuptools-40.8.0-py37_0 ...
installing: singledispatch-3.4.0.3-py37_0 ...
installing: sortedcollections-1.1.2-py37_0 ...
installing: sphinxcontrib-websupport-1.1.0-py37_1 ...
installing: sympy-1.3-py37_0 ...
installing: terminado-0.8.1-py37_1 ...
installing: traitlets-4.3.2-py37_0 ...
installing: zict-0.1.4-py37_0 ...
installing: astroid-2.2.5-py37_0 ...
installing: bleach-3.1.0-py37_0 ...
installing: clyent-1.2.2-py37_1 ...
installing: cryptography-2.6.1-py37h1ba5d50_0 ...
installing: cython-0.29.6-py37he6710b0_0 ...
installing: distributed-1.26.0-py37_1 ...
installing: get_terminal_size-1.0.0-haa9412d_0 ...
installing: gevent-1.4.0-py37h7b6447c_0 ...
installing: isort-4.3.16-py37_0 ...
installing: jinja2-2.10-py37_0 ...
installing: jsonschema-3.0.1-py37_0 ...
installing: jupyter_core-4.4.0-py37_0 ...
installing: navigator-updater-0.2.1-py37_0 ...
installing: networkx-2.2-py37_1 ...
installing: nose-1.3.7-py37_2 ...
installing: pango-1.42.4-h049681c_0 ...
installing: path.py-11.5.0-py37_0 ...
installing: pygments-2.3.1-py37_0 ...
installing: pytest-4.3.1-py37_0 ...
installing: wheel-0.33.1-py37_0 ...
installing: conda-verify-3.1.1-py37_0 ...
installing: flask-1.0.2-py37_1 ...
installing: jupyter_client-5.2.4-py37_0 ...
installing: nbformat-4.4.0-py37_0 ...
installing: pip-19.0.3-py37_0 ...
installing: prompt_toolkit-2.0.9-py37_0 ...
installing: pylint-2.3.1-py37_0 ...
installing: pyopenssl-19.0.0-py37_0 ...
installing: pytest-openfiles-0.3.2-py37_0 ...
installing: pytest-remotedata-0.3.1-py37_0 ...
installing: secretstorage-3.1.1-py37_0 ...
installing: ipython-7.4.0-py37h39e3cac_0 ...
installing: keyring-18.0.0-py37_0 ...
installing: nbconvert-5.4.1-py37_3 ...
installing: urllib3-1.24.1-py37_0 ...
installing: ipykernel-5.1.0-py37h39e3cac_0 ...
installing: requests-2.21.0-py37_0 ...
installing: anaconda-client-1.7.2-py37_0 ...
installing: conda-4.6.11-py37_0 ...
installing: jupyter_console-6.0.0-py37_0 ...
installing: notebook-5.7.8-py37_0 ...
installing: qtconsole-4.4.3-py37_0 ...
installing: sphinx-1.8.5-py37_0 ...
installing: spyder-kernels-0.4.2-py37_0 ...
installing: anaconda-navigator-1.9.7-py37_0 ...
installing: anaconda-project-0.8.2-py37_0 ...
installing: conda-build-3.17.8-py37_0 ...
installing: jupyterlab_server-0.2.0-py37_0 ...
installing: numpydoc-0.8.0-py37_0 ...
installing: widgetsnbextension-3.4.2-py37_0 ...
installing: ipywidgets-7.4.2-py37_0 ...
installing: jupyterlab-0.35.4-py37hf63ae98_0 ...
installing: spyder-3.3.3-py37_0 ...
installing: _ipyw_jlab_nb_ext_conf-0.1.0-py37_0 ...
installing: jupyter-1.0.0-py37_7 ...
installing: bokeh-1.0.4-py37_0 ...
installing: bottleneck-1.2.1-py37h035aef0_1 ...
installing: h5py-2.9.0-py37h7918eee_0 ...
installing: imageio-2.5.0-py37_0 ...
installing: matplotlib-3.0.3-py37h5429711_0 ...
installing: mkl_fft-1.0.10-py37ha843d7b_0 ...
installing: numpy-1.16.2-py37h7e9f1db_0 ...
installing: numba-0.43.1-py37h962f231_0 ...
installing: numexpr-2.6.9-py37h9e4a6bb_0 ...
installing: pandas-0.24.2-py37he6710b0_0 ...
installing: pytest-arraydiff-0.3-py37h39e3cac_0 ...
installing: pytest-doctestplus-0.3.0-py37_0 ...
installing: pywavelets-1.0.2-py37hdd07704_0 ...
installing: scipy-1.2.1-py37h7c811a0_0 ...
installing: bkcharts-0.2-py37_0 ...
installing: dask-1.1.4-py37_1 ...
installing: patsy-0.5.1-py37_0 ...
installing: pytables-3.5.1-py37h71ec239_0 ...
installing: pytest-astropy-0.5.0-py37_0 ...
installing: scikit-image-0.14.2-py37he6710b0_0 ...
installing: scikit-learn-0.20.3-py37hd81dba3_0 ...
installing: astropy-3.1.2-py37h7b6447c_0 ...
installing: statsmodels-0.9.0-py37h035aef0_0 ...
installing: seaborn-0.9.0-py37_0 ...
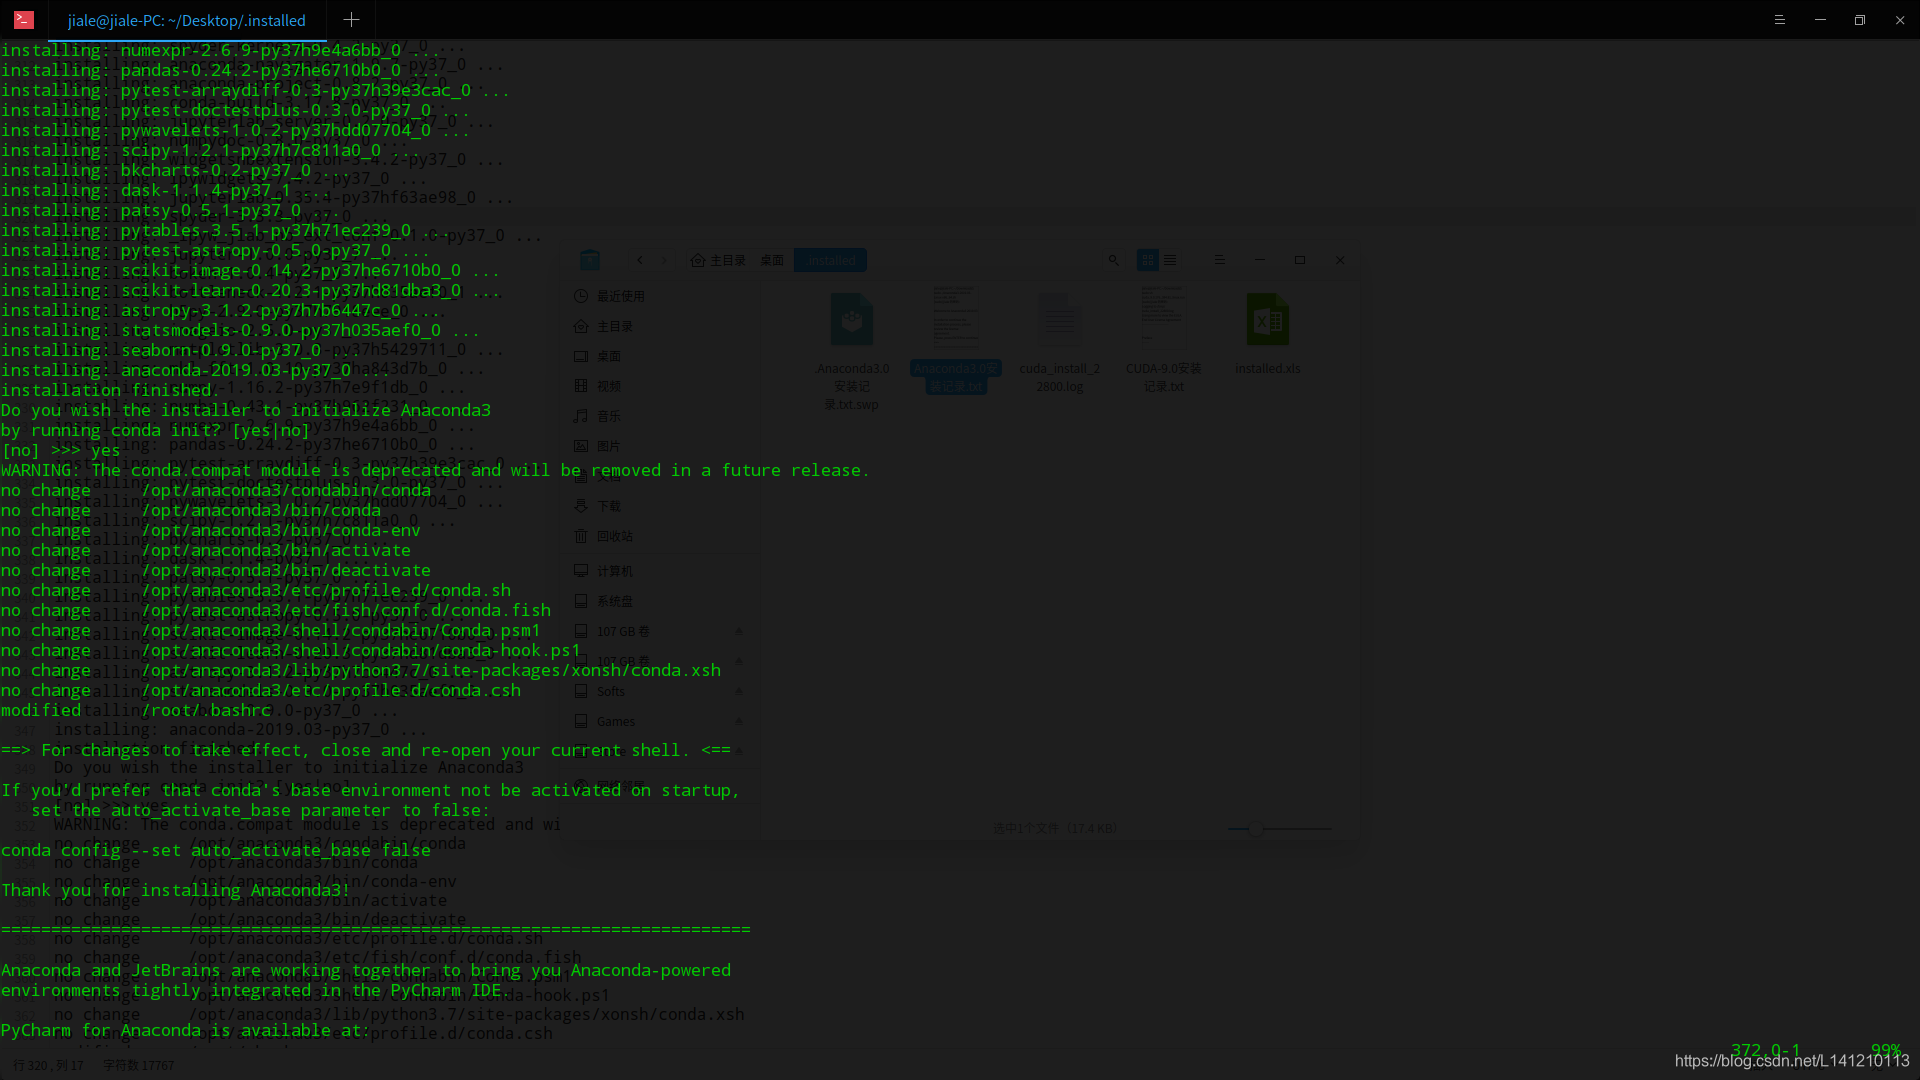
installing: anaconda-2019.03-py37_0 ...
installation finished.
Do you wish the installer to initialize Anaconda3
by running conda init? [yes|no]
[no] >>> yes
WARNING: The conda.compat module is deprecated and will be removed in a future release.
no change /opt/anaconda3/condabin/conda
no change /opt/anaconda3/bin/conda
no change /opt/anaconda3/bin/conda-env
no change /opt/anaconda3/bin/activate
no change /opt/anaconda3/bin/deactivate
no change /opt/anaconda3/etc/profile.d/conda.sh
no change /opt/anaconda3/etc/fish/conf.d/conda.fish
no change /opt/anaconda3/shell/condabin/Conda.psm1
no change /opt/anaconda3/shell/condabin/conda-hook.ps1
no change /opt/anaconda3/lib/python3.7/site-packages/xonsh/conda.xsh
no change /opt/anaconda3/etc/profile.d/conda.csh
modified /root/.bashrc
==> For changes to take effect, close and re-open your current shell. <==
If you'd prefer that conda's base environment not be activated on startup,
set the auto_activate_base parameter to false:
conda config --set auto_activate_base false
Thank you for installing Anaconda3!
===========================================================================
Anaconda and JetBrains are working together to bring you Anaconda-powered
environments tightly integrated in the PyCharm IDE.
PyCharm for Anaconda is available at:
https://www.anaconda.com/pycharm
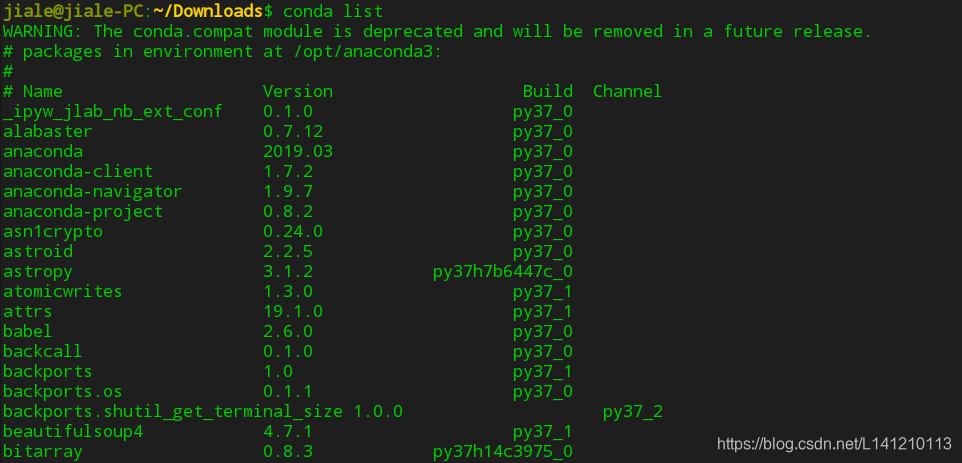
- 测试conda环境
conda list
如果是(如果直接有反应就不必再配置了)
bash: conda: 未找到命令
那么需要自己配置环境变量:
(1)打开~/.bashrc
sudo vim ~/.bashrc
(2)添加
把anaconda3的bin目录添加进去,其中/opt/anaconda3/是你安装时候设置的目录,如果你没有设置,那么就是默认目录,(~/anaconda3)
#Anaconda3
export PATH="/opt/anaconda3/bin:$PATH"
(3)然后更新bashrc,即可立即生效,不用关机
source ~/.bashrc
(4)再次测试
conda list
- 更换国内原
(1)pip国内源
cd ~
mkdir .pip
cd .pip
vim pip.conf
pip.conf填入
[global]
index-url = https://pypi.tuna.tsinghua.edu.cn/simple
附: 有的博客切换了conda源为清华源(不必做这一步,清华源的anaconda地址已经改变了)
六、安装tensorflow-gpu
- 检测目前安装了哪些环境:conda info --envs
这时候你应该只有一个base * /opt/anaconda3

- 安装不同版本的python:
(随便建立一个tensorflow的工作环境文件夹)cd到你建立的tensorflow,执行
对于GPU版本:conda create --name tensorflow-gpu python=3.6

- 这时候再测试
conda info --envs
会多出来tensorflow-gpu这一项

- 按照提示,激活之:source activate tensorflow-gpu(这里注意,命令为source activate tensorflow-gpu而不是source activate tensorflow,这里是你自己之前起的名字),(注意成功后在命令前面会有(tensorflow-gpu)的标志)
- 检查新环境中的python版本:python --version

- 安装 tensorflow-gpu
命令行输入:pip install tensorflow-gpu==1.9
(1)保证你已经激活了tensorflow-gpu,即命令行前面戴着(tensorflow-gpu)的帽子,如果不戴帽子要先执行source activate tensorflow-gpu
(2)执行
pip install tensorflow-gpu==1.9 (弃用)
conda install --channel https://conda.anaconda.org/anaconda tensorflow-gpu=1.9.0
(3)等待显示安装成功
(4)附:我之前在win10下安装用的conda,这里应该也可以,conda install --channel https://conda.anaconda.org/anaconda tensorflow-gpu=1.9.0
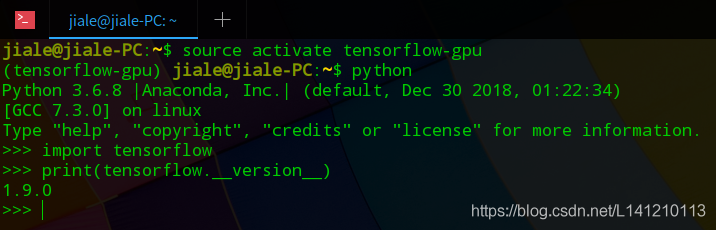
- 确认tensorflow安装成功:
在终端里面键入python(仍然要先激活tensorflow-gpu的帽子),然后键
import tensorflow
tensorflow._version__,如下图便是成功了
七、后续工作
1、设置在pycharm中使用tensorflow
路径可以通过命令which python获取,(操作过程要带tensorflow-gpu的帽子)

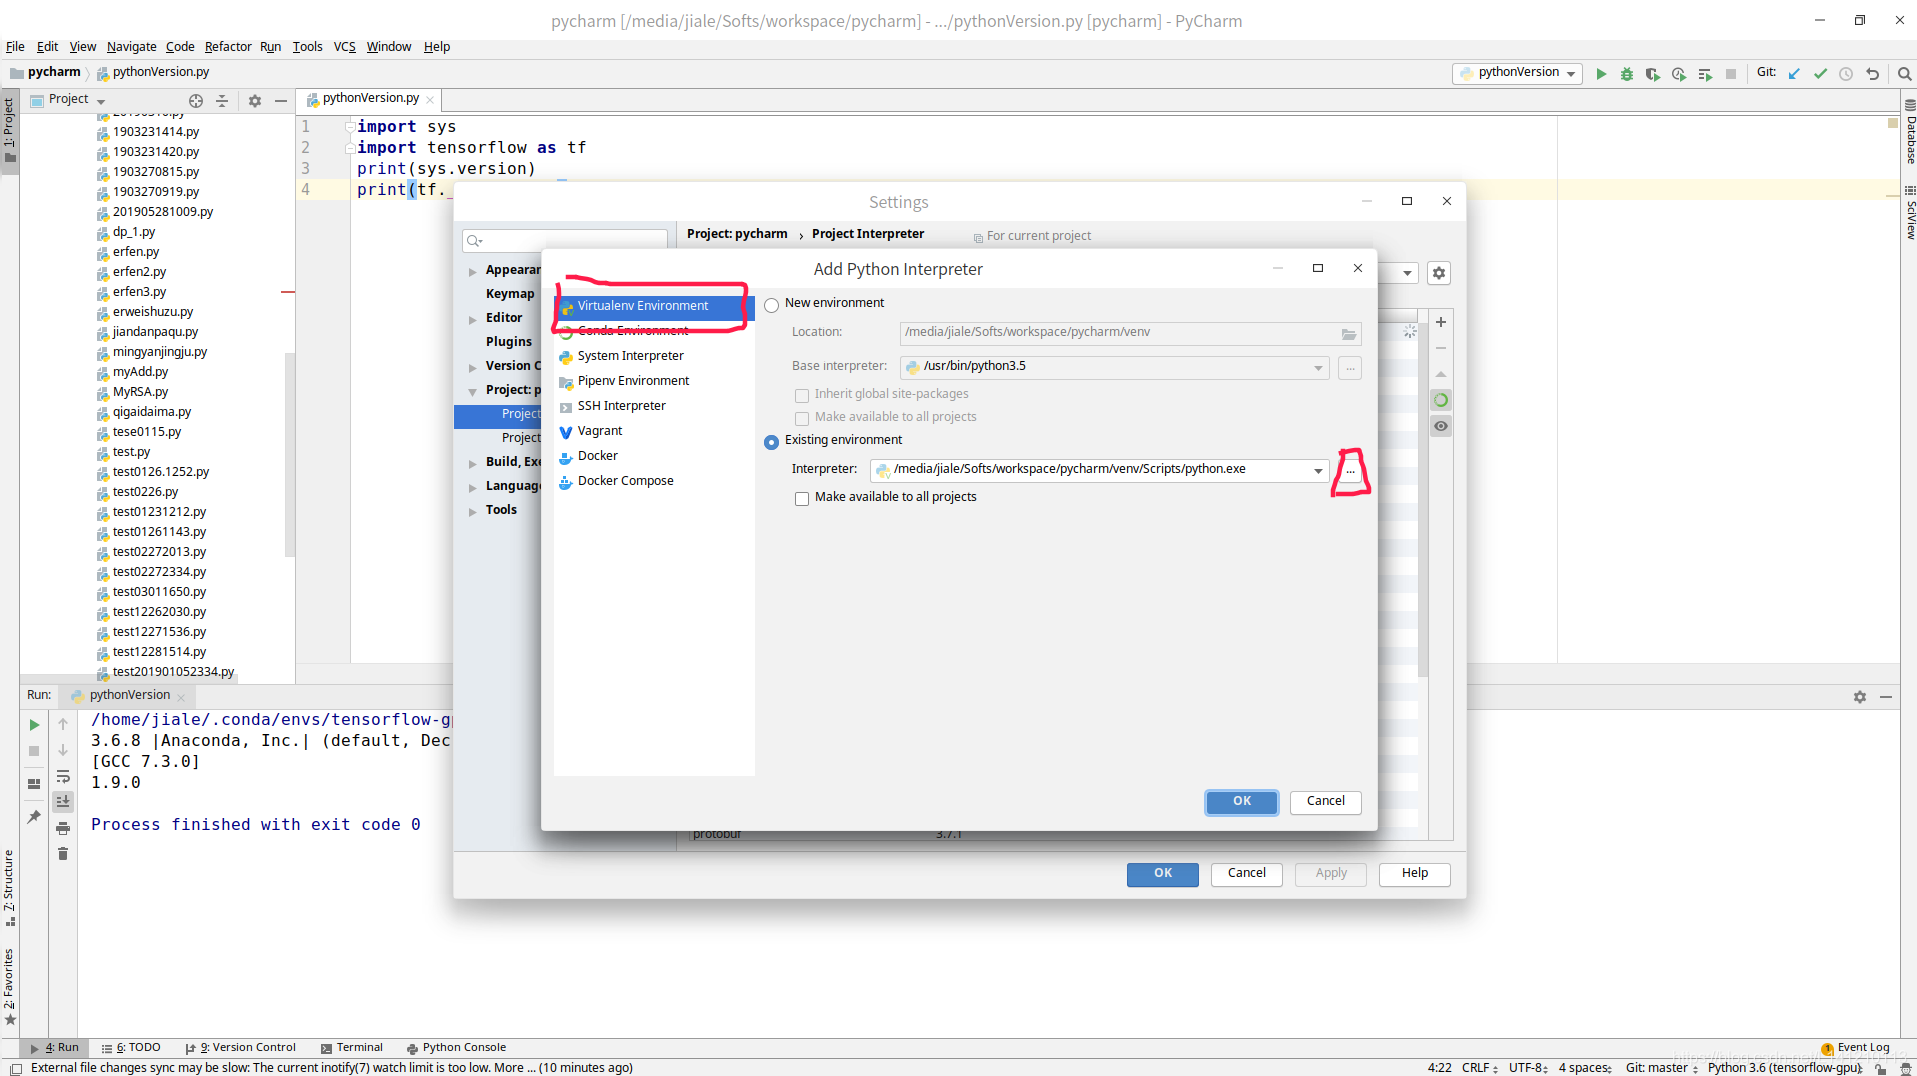
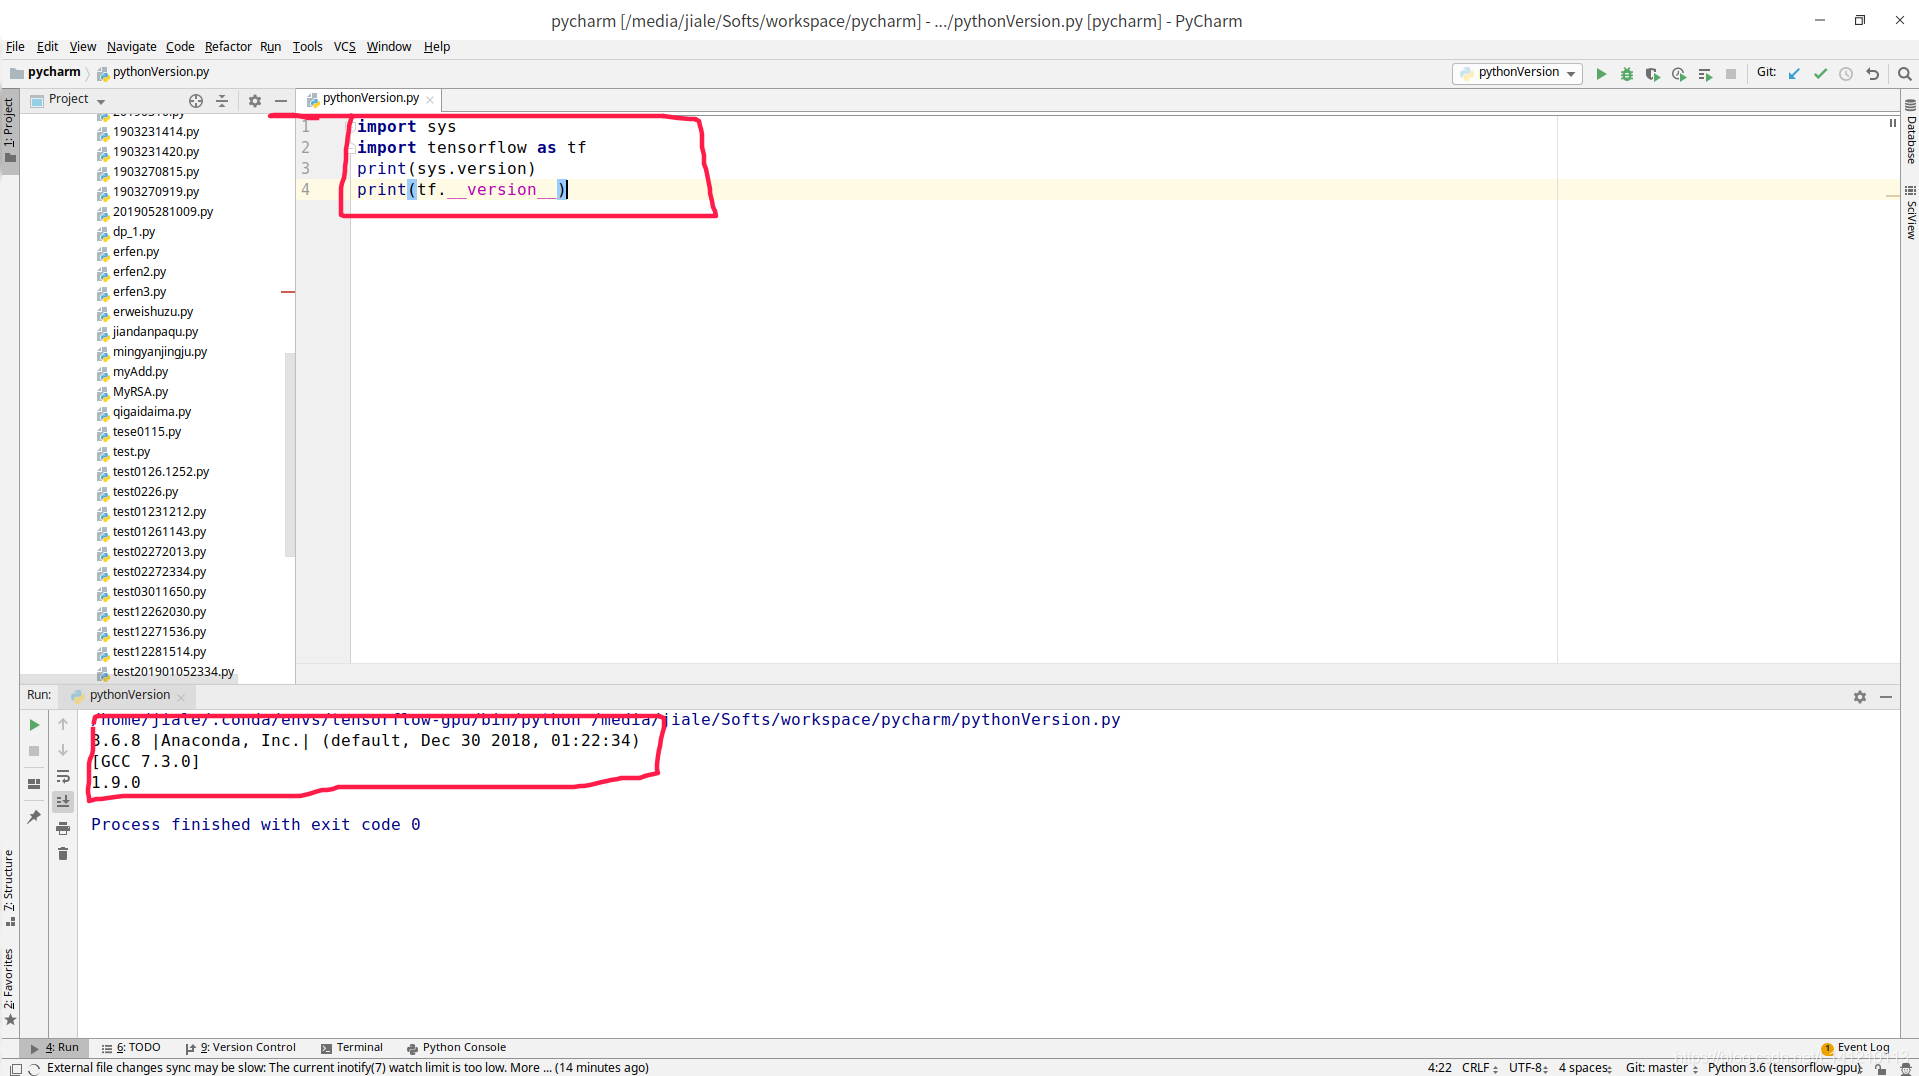
新建.py文件输入
import sys
import tensorflow as tf
print(sys.version)
print(tf.__version__)
程序输出如下,python版本3.6.8,tensorflow版本1.9.0即是安装成功
2、设置在jupyter notebook中使用tensorflow-gpu
终端输入命令jupyter notebook,会自动打开浏览器,请自行输入如下代码确定
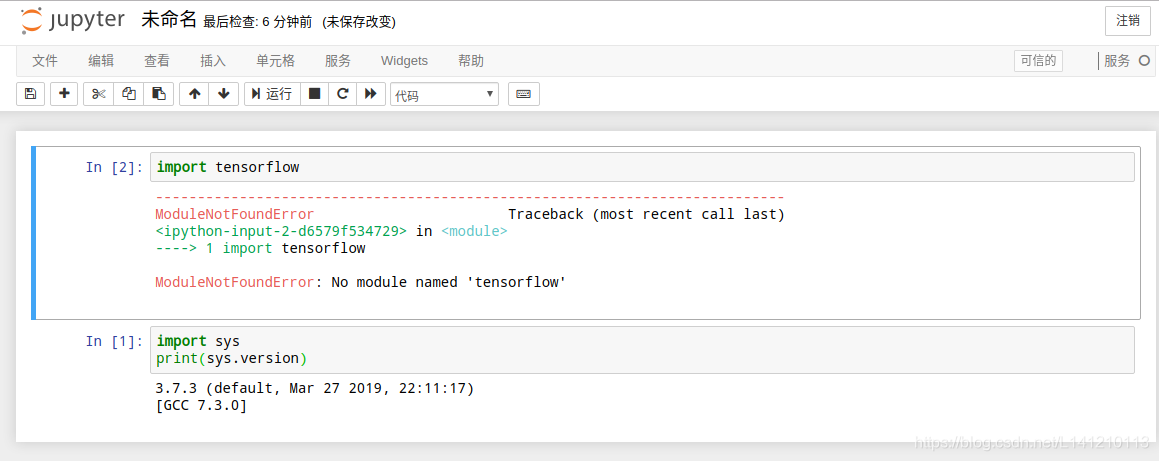
正常情况如下,如果import tensorflow as tf print(tf.version)这里出错,看看python版本是不是3.6.x,如果不是需要你重新设置jupyter的python环境
去终端输入:conda install --prefix=/home/jiale/.conda/envs/tensorflow-gpu ipykernel
(注:其中/home/jiale/.conda/envs/tensorflow-gpu是你新安装的tensorflow-gpu路径)
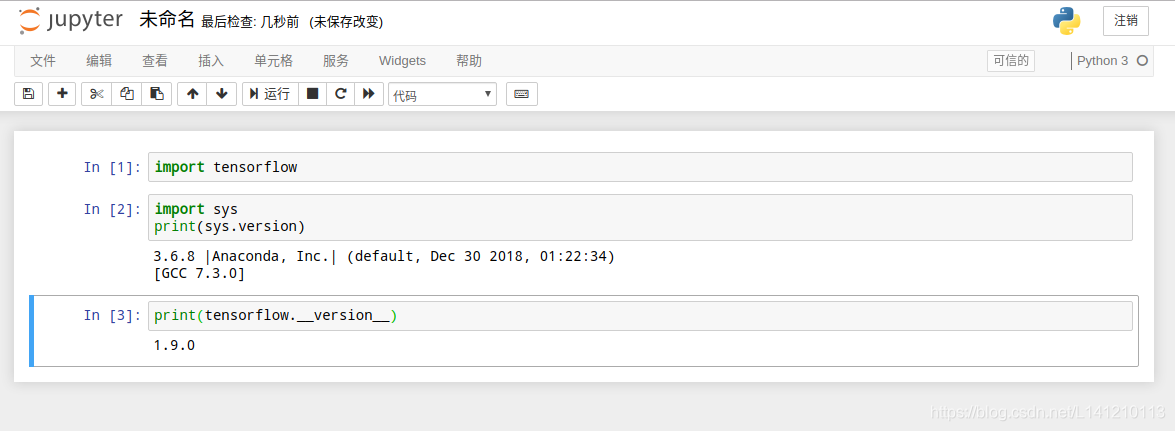
然后激活新的python虚拟环境,输入命令:
python -m ipykernel install --user
启动jupyter notebook去查看,终端输入命令jupyter notebook,会自动打开浏览器,请自行输入如下代码确定
参考博客1,参考博客2
附: 所有安装完成后可以去/etc/apt下把,source.list的备份source.list.deepin15.10换源成source.list
后记,布鲁斯,我们为什么会跌倒,是为了学会站起来。


 5529
5529


 被折叠的 条评论
为什么被折叠?
被折叠的 条评论
为什么被折叠?
 到【灌水乐园】发言


