


本文源自:https://blog.csdn.net/u010003835/article/details/85007946
参考文章 :
官方文档
https://www.cloudera.com/documentation/enterprise/6/6.0/topics/installation.html
CDH常见问题及解决方法(待续)
https://blog.csdn.net/qq_24699959/article/details/80310070
CDH 6.0.1 集群搭建 「Process」
http://www.cnblogs.com/piperck/p/9944469.html
CentOS7 关闭防火墙
https://blog.csdn.net/Post_Yuan/article/details/78603212
本篇文章 将会讲解 如何安装 CDH 6.0.1。 配置 CDH 花了将近 1 周的时间。
首先,我们强调一下,博主其实最主要的步奏都是参照 官网的 安装步奏进行 配置的。官网是 最好的解决方案,网上的很多博文只是用来参考,这点大家切记切记。
其中重要的文档:
安装前准备
https://www.cloudera.com/documentation/enterprise/6/latest/topics/installation_reqts.html
安装cm的步骤流程
https://www.cloudera.com/documentation/enterprise/6/latest/topics/install_cm_cdh.html
其他文档:
CDH5实践(二)Cloudera Manager 5安装Hive,HBase,Impala,Spark等服务
https://blog.csdn.net/csolo/article/details/52506718
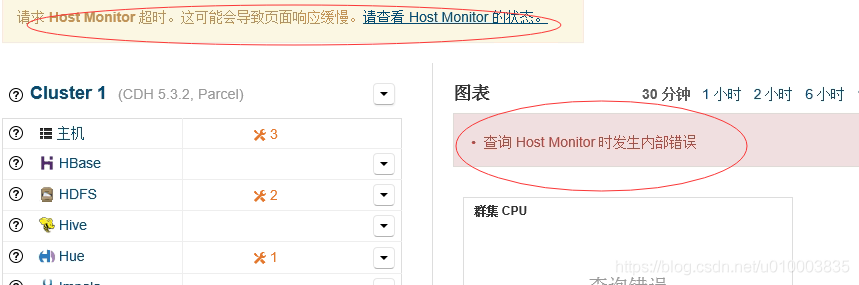
安装CDH2.2后页面显示“无法发出查询:Host Monitor未运行
http://www.aboutyun.com/thread-12751-1-1.html
Linux系统如何查看是多少位的
https://blog.csdn.net/qq_33326449/article/details/79712249
-
输入命令【uname -a】,回车 -
根据返回的信息,如果有【x86_64】字样就说明是64位的,没有就是32位的!
python安装pip出现No package python-pip available
https://blog.csdn.net/u011418530/article/details/79986251
特别鸣谢,军哥 与 杨兄的帮助,在安装过程中给予了一定的帮助。
0.安装环境
0.1 安装环境
1.安装前准备
1.1 操作系统设置
1.1.1 配置固定IP 与 解析关系
1.1.2 关闭 SELINUX
1.1.3 关闭防火墙
1.1.4 配置时间同步 NTP
1.1.5 配置集群 ssh免密登录
2.安装
2.1 步骤1 Linux 下安装JDK
2.2 步骤2 配置Repo
2.3 步骤3 安装服务
2.4 步骤4 修改各节点配置 并启动 cloudera-scm-agent
2.5 步骤5 安装并配置MySQL
2.6 步骤6 配置CM 及其他服务的数据库 基于 MySQL,增加mysql-connector 包
2.7 步骤7 初始化数据库,启动服务
2.8 步骤8 Parcel 安装
3.常见问题详解
3.1 安装中断,如何继续
3.2 Inspector 检测 出现各种错误警告
3.3 运行日志在哪里
4.几种加快安装的方式
4.1 启动httpd 服务,使用离线 parcel 包安装
4.2 创建本地yum源,使用离线 rpm 包安装
======================================================================
0.安装环境
0.1 安装环境
本文的安装环境在 CentOS7 下 搭建完成
Linux 版本 : CentOS 7
CDH版本 :CM 6.0.1
1.安装前准备
1.1 操作系统设置
1.1.1 配置固定IP 与 解析关系
关于本话题 请参考 以下两篇文章:
CentOS 6
Linux_Centos6下_三种配置固定ip的方式
https://blog.csdn.net/u010003835/article/details/52233296
CentOS 7
Linux_VMware下配置_CentOS7固定IP
https://blog.csdn.net/u010003835/article/details/84791773
1.1.2 关闭 SELINUX
我们在安装的时候,需要在集群的各个节点 关闭 SELINUX
查看 SELINUX 的状态
-
[root@cdh-node2 ~]# /usr/sbin/sestatus -v -
SELinux status: disabled
修改状态
vim /etc/selinux/config
将SELINUX=enforcing改为SELINUX=disabled
1.1.3 关闭防火墙
关于 CentOS7 如何关闭防火墙 / 查询状态 推荐以下文章 :
CentOS7 关闭防火墙
https://blog.csdn.net/Post_Yuan/article/details/78603212
其中重要的概念:
firewalld 服务管理
1、安装firewalld
yum -y install firewalld
2、开机启动/禁用服务
systemctl enable/disable firewalld
3、启动/关闭服务
systemctl start/stop firewalld
4、查看服务状态
systemctl status firewalld
1.1.4 配置时间同步 NTP
为了一些服务的一致性,我们需要配置集群的时间同步,可以参考我写过的文章进行配置:
Linux_NTP 网络同步 -> ntpd / CDH6
https://blog.csdn.net/u010003835/article/details/84962098
1.1.5 配置集群 ssh免密登录
请参考我的博客:
https://blog.csdn.net/u010003835/article/details/85006786
2.安装
2.1 步骤1 安装Java
Linux 下安装 JDK 请考看以下文章:
http://www.cnblogs.com/caosiyang/archive/2013/03/14/2959087.html
2.2 步骤2 配置Repo
该步骤建议替换从本地yum源安装的方式 !!!!!!
首先我们需要下载 Repo , Repo 是 yum 用来管理包的配置文件。
下载地址:
Step1:
https://archive.cloudera.com/cm6/6.0.1/redhat7/yum/cloudera-manager.repo
-
通过以下指令: -
sudo wget <repo_file_url> -P /etc/yum.repos.d/
repo_file_url 换成以上的地址即可
-P LOCAL_DIR:保存所有的文件或目录到指定的目录下
Step2:
之后我们还需要执行以下指令,Import the repository signing GPG key:
sudo rpm --import https://archive.cloudera.com/cm6/6.0.1/redhat7/yum/RPM-GPG-KEY-cloudera
2.3 步骤3 安装服务
这个步骤主要用来 安装 cloudera-manager-daemon 与 cloudera-manager-agent , cloudera-manager-server
其中 cloudera-manager-daemon 与 cloudera-manager-agent 是要每台机器进行安装的
cloudera-manager-server 只需要 在集群中想作为 未来管理节点的机器上安装即可 .
我们先看下是否能找到这些包
我们执行下面指令:
yum search cloudera-manager-daemons cloudera-manager-agent cloudera-manager-server
这里,我们采用 yum 安装。
安装指令:
主节点:
yum install cloudera-manager-daemons cloudera-manager-agent cloudera-manager-server
其他节点:
yum install cloudera-manager-daemons cloudera-manager-agent
最后建议把这些服务设置为 开机启动服务,方便管理。在集群重启的时候,可以不用担心服务的问题。
主节点:
sudo systemctl enable cloudera-scm-agent
sudo systemctl enable cloudera-scm-server
其他节点:
sudo systemctl enable cloudera-scm-agent
2.4 步骤4 修改各节点配置 并启动 cloudera-scm-agent
配置各个节点的 agent,使得各个节点的 agent 都指向 主节点:
主要通过以下步奏:
修改 /etc/cloudera-scm-agent/config.ini
| Property | Description |
|---|---|
| server_host | Name of the host where Cloudera Manager Server is running. |
| server_port | Port on the host where Cloudera Manager Server is running. |
[General]
# Hostname of the CM server.
#server_host=localhost
server_host=cdh-manager
# Port that the CM server is listening on.
server_port=7182
修改大致如图 , 请根据自己的机器动态调整:
-
[General] -
# Hostname of the CM server. -
#server_host=localhost -
server_host=cdh-manager -
# Port that the CM server is listening on. -
server_port=7182 -
## It should not normally be necessary to modify these. -
# Port that the CM agent should listen on. -
# listening_port=9000 -
# IP Address that the CM agent should listen on. -
# listening_ip= -
# Hostname that the CM agent reports as its hostname. If unset, will be -
# obtained in code through something like this: -
# -
# python -c 'import socket; \ -
# print socket.getfqdn(), \ -
# socket.gethostbyname(socket.getfqdn())' -
# -
# listening_hostname= -
# An alternate hostname to report as the hostname for this host in CM. -
# Useful when this agent is behind a load balancer or proxy and all -
# inbound communication must connect through that proxy. -
# reported_hostname= -
# Port that supervisord should listen on. -
# NB: This only takes effect if supervisord is restarted. -
# supervisord_port=19001 -
# Log file. The supervisord log file will be placed into -
# the same directory. Note that if the agent is being started via the -
# init.d script, /var/log/cloudera-scm-agent/cloudera-scm-agent.out will -
# also have a small amount of output (from before logging is initialized). -
# log_file=/var/log/cloudera-scm-agent/cloudera-scm-agent.log -
# Persistent state directory. Directory to store CM agent state that -
# persists across instances of the agent process and system reboots. -
# Particularly, the agent's UUID is stored here. -
# lib_dir=/var/lib/cloudera-scm-agent -
# Parcel directory. Unpacked parcels will be stored in this directory. -
# Downloaded parcels will be stored in <parcel_dir>/../parcel-cache -
# parcel_dir=/opt/cloudera/parcels -
# Enable supervisord event monitoring. Used in eager heartbeating, amongst -
# other things. -
# enable_supervisord_events=true -
# Maximum time to wait (in seconds) for all metric collectors to finish -
# collecting data. -
max_collection_wait_seconds=10.0 -
# Maximum time to wait (in seconds) when connecting to a local role's -
# webserver to fetch metrics. -
metrics_url_timeout_seconds=30.0 -
# Maximum time to wait (in seconds) when connecting to a local TaskTracker -
# to fetch task attempt data. -
task_metrics_timeout_seconds=5.0 -
# The list of non-device (nodev) filesystem types which will be monitored. -
monitored_nodev_filesystem_types=nfs,nfs4,tmpfs -
# The list of filesystem types which are considered local for monitoring purposes. -
# These filesystems are combined with the other local filesystem types found in -
# /proc/filesystems -
local_filesystem_whitelist=ext2,ext3,ext4,xfs -
# The largest size impala profile log bundle that this agent will serve to the -
# CM server. If the CM server requests more than this amount, the bundle will -
# be limited to this size. All instances of this limit being hit are logged to -
# the agent log. -
impala_profile_bundle_max_bytes=1073741824 -
# The largest size stacks log bundle that this agent will serve to the CM -
# server. If the CM server requests more than this amount, the bundle will be -
# limited to this size. All instances of this limit being hit are logged to the -
# agent log. -
stacks_log_bundle_max_bytes=1073741824 -
# The size to which the uncompressed portion of a stacks log can grow before it -
# is rotated. The log will then be compressed during rotation. -
stacks_log_max_uncompressed_file_size_bytes=5242880 -
# The orphan process directory staleness threshold. If a diretory is more stale -
# than this amount of seconds, CM agent will remove it. -
orphan_process_dir_staleness_threshold=5184000 -
# The orphan process directory refresh interval. The CM agent will check the -
# staleness of the orphan processes config directory every this amount of -
# seconds. -
orphan_process_dir_refresh_interval=3600 -
# A knob to control the agent logging level. The options are listed as follows: -
# 1) DEBUG (set the agent logging level to 'logging.DEBUG') -
# 2) INFO (set the agent logging level to 'logging.INFO') -
scm_debug=INFO -
# The DNS resolution collecion interval in seconds. A java base test program -
# will be executed with at most this frequency to collect java DNS resolution -
# metrics. The test program is only executed if the associated health test, -
# Host DNS Resolution, is enabled. -
dns_resolution_collection_interval_seconds=60 -
# The maximum time to wait (in seconds) for the java test program to collect -
# java DNS resolution metrics. -
dns_resolution_collection_timeout_seconds=30 -
# The directory location in which the agent-wide kerberos credential cache -
# will be created. -
# agent_wide_credential_cache_location=/var/run/cloudera-scm-agent -
[Security] -
# Use TLS and certificate validation when connecting to the CM server. -
use_tls=0 -
# The maximum allowed depth of the certificate chain returned by the peer. -
# The default value of 9 matches the default specified in openssl's -
# SSL_CTX_set_verify. -
max_cert_depth=9 -
# A file of CA certificates in PEM format. The file can contain several CA -
# certificates identified by -
# -
# -----BEGIN CERTIFICATE----- -
# ... (CA certificate in base64 encoding) ... -
# -----END CERTIFICATE----- -
# -
# sequences. Before, between, and after the certificates text is allowed which -
# can be used e.g. for descriptions of the certificates. -
# -
# The file is loaded once, the first time an HTTPS connection is attempted. A -
# restart of the agent is required to pick up changes to the file. -
# -
# Note that if neither verify_cert_file or verify_cert_dir is set, certificate -
# verification will not be performed. -
# verify_cert_file= -
# Directory containing CA certificates in PEM format. The files each contain one -
# CA certificate. The files are looked up by the CA subject name hash value, -
# which must hence be available. If more than one CA certificate with the same -
# name hash value exist, the extension must be different (e.g. 9d66eef0.0, -
# 9d66eef0.1 etc). The search is performed in the ordering of the extension -
# number, regardless of other properties of the certificates. Use the c_rehash -
# utility to create the necessary links. -
# -
# The certificates in the directory are only looked up when required, e.g. when -
# building the certificate chain or when actually performing the verification -
# of a peer certificate. The contents of the directory can thus be changed -
# without an agent restart. -
# -
# When looking up CA certificates, the verify_cert_file is first searched, then -
# those in the directory. Certificate matching is done based on the subject name, -
# the key identifier (if present), and the serial number as taken from the -
# certificate to be verified. If these data do not match, the next certificate -
# will be tried. If a first certificate matching the parameters is found, the -
# verification process will be performed; no other certificates for the same -
# parameters will be searched in case of failure. -
# -
# Note that if neither verify_cert_file or verify_cert_dir is set, certificate -
# verification will not be performed. -
# verify_cert_dir= -
# PEM file containing client private key. -
# client_key_file= -
# A command to run which returns the client private key password on stdout -
# client_keypw_cmd= -
# If client_keypw_cmd isn't specified, instead a text file containing -
# the client private key password can be used. -
# client_keypw_file= -
# PEM file containing client certificate. -
# client_cert_file= -
## Location of Hadoop files. These are the CDH locations when installed by -
## packages. Unused when CDH is installed by parcels. -
[Hadoop] -
#cdh_crunch_home=/usr/lib/crunch -
#cdh_flume_home=/usr/lib/flume-ng -
#cdh_hadoop_bin=/usr/bin/hadoop -
#cdh_hadoop_home=/usr/lib/hadoop -
#cdh_hbase_home=/usr/lib/hbase -
#cdh_hbase_indexer_home=/usr/lib/hbase-solr -
#cdh_hcat_home=/usr/lib/hive-hcatalog -
#cdh_hdfs_home=/usr/lib/hadoop-hdfs -
#cdh_hive_home=/usr/lib/hive -
#cdh_httpfs_home=/usr/lib/hadoop-httpfs -
#cdh_hue_home=/usr/share/hue -
#cdh_hue_plugins_home=/usr/lib/hadoop -
#cdh_impala_home=/usr/lib/impala -
#cdh_kudu_home=/usr/lib/kudu -
#cdh_llama_home=/usr/lib/llama -
#cdh_mr1_home=/usr/lib/hadoop-0.20-mapreduce -
#cdh_mr2_home=/usr/lib/hadoop-mapreduce -
#cdh_oozie_home=/usr/lib/oozie -
#cdh_parquet_home=/usr/lib/parquet -
#cdh_pig_home=/usr/lib/pig -
#cdh_solr_home=/usr/lib/solr -
#cdh_spark_home=/usr/lib/spark -
#cdh_sqoop_home=/usr/lib/sqoop -
#cdh_sqoop2_home=/usr/lib/sqoop2 -
#cdh_yarn_home=/usr/lib/hadoop-yarn -
#cdh_zookeeper_home=/usr/lib/zookeeper -
#hive_default_xml=/etc/hive/conf.dist/hive-default.xml -
#webhcat_default_xml=/etc/hive-webhcat/conf.dist/webhcat-default.xml -
#jsvc_home=/usr/libexec/bigtop-utils -
#tomcat_home=/usr/lib/bigtop-tomcat -
#oracle_home=/usr/share/oracle/instantclient -
## Location of Cloudera Management Services files. -
[Cloudera] -
#mgmt_home=/usr/share/cmf -
## Location of JDBC Drivers. -
[JDBC] -
#cloudera_mysql_connector_jar=/usr/share/java/mysql-connector-java.jar -
#cloudera_oracle_connector_jar=/usr/share/java/oracle-connector-java.jar -
#By default, postgres jar is found dynamically in $MGMT_HOME/lib -
#cloudera_postgresql_jdbc_jar=
更多的配置 ,请参考以下文档:
2.5 步骤5 安装并配置 MySQL (只需要 主节点)
首先是安装 mysql , 我是按照 官网的教程去安装的:
https://www.cloudera.com/documentation/enterprise/6/6.0/topics/cm_ig_mysql.html#cmig_topic_5_5
wget http://repo.mysql.com/mysql-community-release-el7-5.noarch.rpmsudo rpm -ivh mysql-community-release-el7-5.noarch.rpmsudo yum update 该步骤耗时较长 20-30 min,并不必要sudo yum install mysql-serversudo systemctl start mysqld
检查是否安装好:
启动服务:
sudo systemctl start mysqld
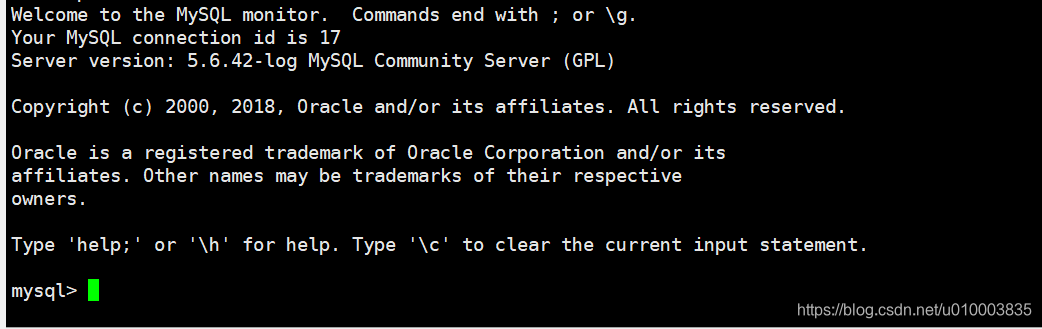
执行 :
mysql
看是否能空密码连接上。
接下来我们主要修改下配置文件 (注意将 mysql 服务关闭 ):
配置文件所在地 /etc/my.cnf (默认配置地址)
改为以下段落,记得修改前进行备份:
-
[mysqld] -
datadir=/var/lib/mysql -
socket=/var/lib/mysql/mysql.sock -
transaction-isolation = READ-COMMITTED -
# Disabling symbolic-links is recommended to prevent assorted security risks; -
# to do so, uncomment this line: -
symbolic-links = 0 -
key_buffer_size = 32M -
max_allowed_packet = 32M -
thread_stack = 256K -
thread_cache_size = 64 -
query_cache_limit = 8M -
query_cache_size = 64M -
query_cache_type = 1 -
max_connections = 550 -
#expire_logs_days = 10 -
#max_binlog_size = 100M -
#log_bin should be on a disk with enough free space. -
#Replace '/var/lib/mysql/mysql_binary_log' with an appropriate path for your -
#system and chown the specified folder to the mysql user. -
log_bin=/var/lib/mysql/mysql_binary_log -
#In later versions of MySQL, if you enable the binary log and do not set -
#a server_id, MySQL will not start. The server_id must be unique within -
#the replicating group. -
server_id=1 -
binlog_format = mixed -
read_buffer_size = 2M -
read_rnd_buffer_size = 16M -
sort_buffer_size = 8M -
join_buffer_size = 8M -
# InnoDB settings -
innodb_file_per_table = 1 -
innodb_flush_log_at_trx_commit = 2 -
innodb_log_buffer_size = 64M -
innodb_buffer_pool_size = 4G -
innodb_thread_concurrency = 8 -
innodb_flush_method = O_DIRECT -
innodb_log_file_size = 512M -
[mysqld_safe] -
log-error=/var/log/mysqld.log -
pid-file=/var/run/mysqld/mysqld.pid -
sql_mode=STRICT_ALL_TABLES
这些配置的含义,请参考本节开头的文档
之后我们把之前的日志文件拷贝出来:
-
# 拷贝日志文件 -
Move old InnoDB log files /var/lib/mysql/ib_logfile0 and /var/lib/mysql/ib_logfile1 out of /var/lib/mysql/ to a backup location
将原来的日志移出
再启动mysql, 为了防止mysql 默认帐户 被人乱用,我们可以执行下面的工具,
-
sudo /usr/bin/mysql_secure_installation-
[...] -
Enter current password for root (enter for none): -
OK, successfully used password, moving on... -
[...] -
Set root password? [Y/n] Y -
New password: -
Re-enter new password: -
Remove anonymous users? [Y/n] Y -
[...] -
Disallow root login remotely? [Y/n] N -
[...] -
Remove test database and access to it [Y/n] Y -
[...] -
Reload privilege tables now? [Y/n] Y -
All done!
-
最后不要忘记, 将mysql 加到 开机启动中。
sudo systemctl enable mysqld
2.6 步骤6 配置CM 及其他服务的数据库 基于 MySQL,增加mysql-connector 包
我们需要给 mysql 增加必要的用户,用于其他组件 将 mysql 作为源数据库。
| Service | Database | User |
|---|---|---|
| Cloudera Manager Server | scm | scm |
| Activity Monitor | amon | amon |
| Reports Manager | rman | rman |
| Hue | hue | hue |
| Hive Metastore Server | metastore | hive |
| Sentry Server | sentry | sentry |
| Cloudera Navigator Audit Server | nav | nav |
| Cloudera Navigator Metadata Server | navms | navms |
| Oozie | oozie | oozie |
我们登录mysql 执行以下指令,我们给每个数据库设置密码 123456 :
CREATE DATABASE scm DEFAULT CHARACTER SET utf8 DEFAULT COLLATE utf8_general_ci;
CREATE DATABASE amon DEFAULT CHARACTER SET utf8 DEFAULT COLLATE utf8_general_ci;
CREATE DATABASE rman DEFAULT CHARACTER SET utf8 DEFAULT COLLATE utf8_general_ci;
CREATE DATABASE hue DEFAULT CHARACTER SET utf8 DEFAULT COLLATE utf8_general_ci;
CREATE DATABASE metastore DEFAULT CHARACTER SET utf8 DEFAULT COLLATE utf8_general_ci;
CREATE DATABASE sentry DEFAULT CHARACTER SET utf8 DEFAULT COLLATE utf8_general_ci;
CREATE DATABASE nav DEFAULT CHARACTER SET utf8 DEFAULT COLLATE utf8_general_ci;
CREATE DATABASE navms DEFAULT CHARACTER SET utf8 DEFAULT COLLATE utf8_general_ci;
CREATE DATABASE oozie DEFAULT CHARACTER SET utf8 DEFAULT COLLATE utf8_general_ci;
GRANT ALL ON scm.* TO 'scm'@'%' IDENTIFIED BY '123456';
GRANT ALL ON amon.* TO 'amon'@'%' IDENTIFIED BY '123456';
GRANT ALL ON rman.* TO 'rman'@'%' IDENTIFIED BY '123456';
GRANT ALL ON hue.* TO 'hue'@'%' IDENTIFIED BY '123456';
GRANT ALL ON metastore.* TO 'metastore'@'%' IDENTIFIED BY '123456';
GRANT ALL ON sentry.* TO 'sentry'@'%' IDENTIFIED BY '123456';
GRANT ALL ON nav.* TO 'nav'@'%' IDENTIFIED BY '123456';
GRANT ALL ON navms.* TO 'navms'@'%' IDENTIFIED BY '123456';
GRANT ALL ON oozie.* TO 'oozie'@'%' IDENTIFIED BY '123456';
#刷新权限:
FLUSH PRIVILEGES;
必须使用flush privileges的两种情况
1、改密码。
2、授权超用户。
其他
- Confirm that you have created all of the databases:
You can also confirm the privilege grants for a given user by running:SHOW DATABASES;SHOW GRANTS FOR '<user>'@'%';
除此以外,我们需要
Installing the MySQL JDBC Driver
具体步骤如下:
- Download the MySQL JDBC driver from http://www.mysql.com/downloads/connector/j/5.1.html (in .tar.gz format). As of the time of writing, you can download version 5.1.46 using wget as follows:
wget https://dev.mysql.com/get/Downloads/Connector-J/mysql-connector-java-5.1.46.tar.gz - Extract the JDBC driver JAR file from the downloaded file. For example:
tar zxvf mysql-connector-java-5.1.46.tar.gz - Copy the JDBC driver, renamed, to /usr/share/java/. If the target directory does not yet exist, create it. For example:
-
sudo mkdir -p /usr/share/java/ -
cd mysql-connector-java-5.1.46 -
sudo cp mysql-connector-java-5.1.46-bin.jar /usr/share/java/mysql-connector-java.jar
-
2.7 步骤7 初始化数据库,启动服务
由于这里我们用到了 cm 使用 mysql 作为源数据库,所以我们应该对 mysql 进行初始化,
初始化 的步奏 如下
The syntax for the scm_prepare_database.sh script is as follows:
sudo /opt/cloudera/cm/schema/scm_prepare_database.sh [options] <databaseType> <databaseName> <databaseUser> <password>示例如下:
-
sudo /opt/cloudera/cm/schema/scm_prepare_database.sh mysql -h db01.example.com --scm-host cm01.example.com scm scm -
Enter database password:
该步骤做完之后,我们就可以启动 cm 了
启动命令如下:
sudo systemctl start cloudera-scm-server开机启动
sudo systemctl enable cloudera-scm-server
2.8 步骤8 Parcel 安装
如果这些步骤都顺利进行的话,我们应该可以访问 cm 的 7180 端口 进行初始化配置了。
初始化界面如下:
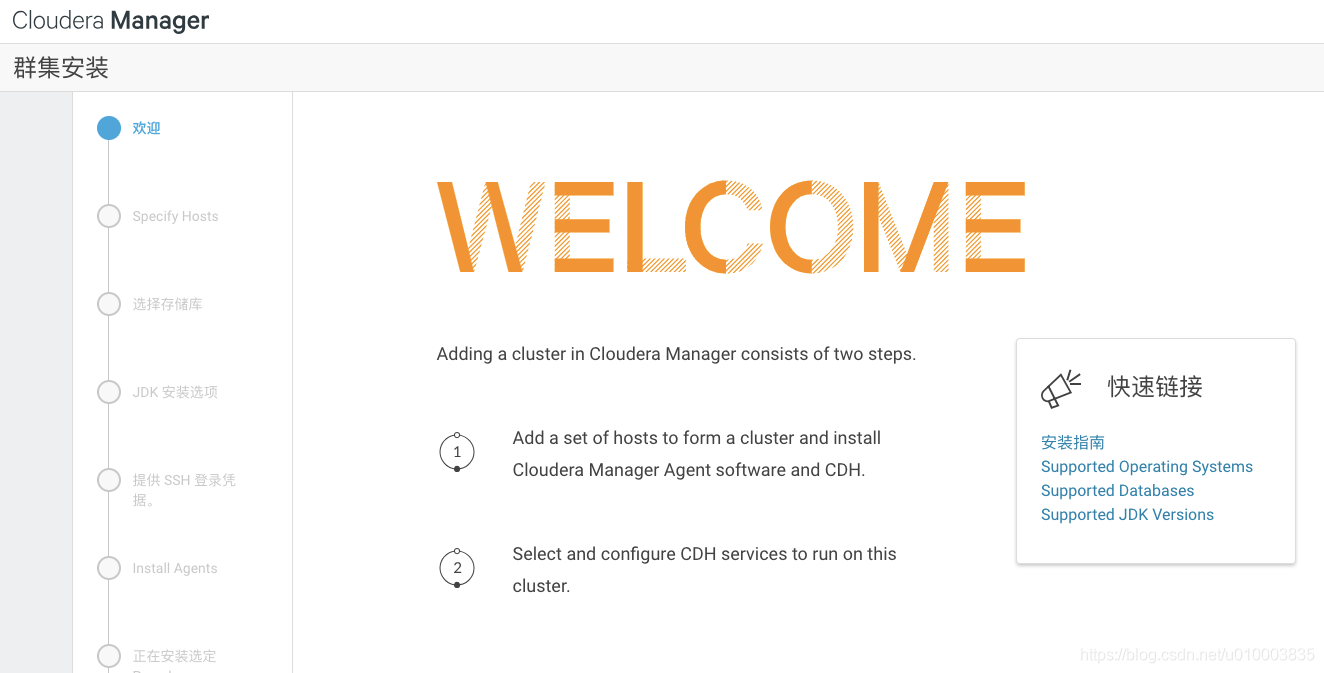
我们进行下一步。如果 我们的 agent 配置合理,可以扫描到集群中的机器。 参考 2.4
配置各个节点的 agent,使得各个节点的 agent 都指向 主节点:
主要通过以下步奏:
修改 /etc/cloudera-scm-agent/config.ini
[General]
# Hostname of the CM server.
#server_host=localhost
server_host=cdh-manager
# Port that the CM server is listening on.
server_port=7182
然后我们选择 parcel 6.0.1 网络安装 ,国内大约要 8-10 h ,我们可以下载离线包的形式进行配置。参考 第4 章 ,加速安装部分。
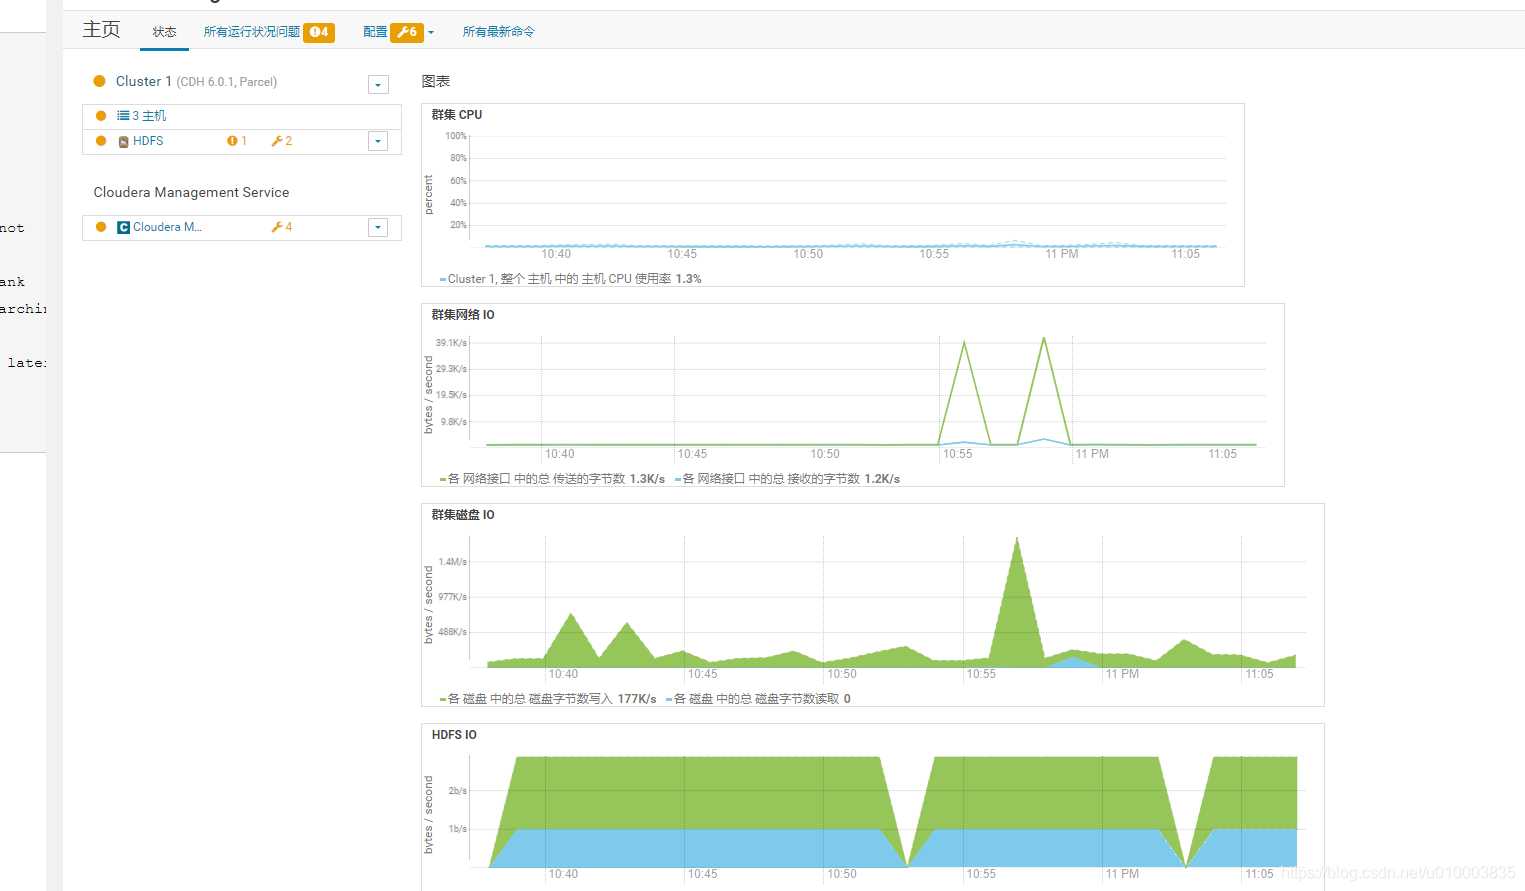
安装最后,我们再登录 cm 即可看到 管理界面了。
3.常见问题详解
3.1 安装中断,如何继续
出现原因:
parcel 包下载自动安装后,服务没分配
Step1 :
在顶部状态栏:
选择继续下一步安装
Step2:
分配服务:
3.2 Inspector 检测 出现各种错误警告
CDH创建Mysql数据库时能找到服务器找不到数据库
在创建新的数据库后应运行以下语句来修改数据库访问权限
mysql -uroot -p1234 -e"GRANT ALL PRIVILEGES ON *.* TO 'root'@'%' IDENTIFIED BY '1234' WITH GRANT OPTION;FLUSH PRIVILEGES;"
===============================
Cloudera 建议将 /proc/sys/vm/swappiness 设置为最大值 10。当前设置为 30。
echo "vm.swappiness=10" >> /etc/sysctl.conf
===========================
已启用透明大页面压缩,可能会导致重大性能问题
-
echo "echo never > /sys/kernel/mm/transparent_hugepage/defrag" >> /etc/rc.local -
echo "echo never > /sys/kernel/mm/transparent_hugepage/enabled" >> /etc/rc.local -
chmod +x /etc/rc.d/rc.local
===================
自启动CDH挂掉
原因:ip地址映射错误
Mysql服务未启动
========================
CDH安装Yarn时NodeManager启动失败
Error starting NodeManager
org.apache.hadoop.service.ServiceStateException: org.fusesource.leveldbjni.internal.NativeDB$DBException: IO error: /var/lib/hadoop-yarn/yarn-nm-recovery/yarn-nm-state/LOCK: 权限不够
方法一:修改目录权限
chmod -R 755 /var/lib/hadoop-yarn/
方法二:删除该对应子目录重试CDH添加服务操作
CDH内存不足超过阈值
调整主机配置参数 默认0.8 剩余内存为系统占用(可调整优化)
3.3 运行日志在哪里
运行日志 所在目录
/var/log
下 cloudera 开头的都是 目录 ,重要的是 cloudera-scm-server
4.几种加快安装的方式
4.1 启动httpd 服务,使用离线 parcel 包安装
这里我们需要借用httpd 搭建一个网络服务
Httpd
CentOS7 默认是不安装 httpd 的,我们通过以下指令先安装下 httpd 服务
安装:
yum install -y httpd
启动httpd 服务:
systemctl start httpd
开机启动
systemctl enable httpd
启动后,我们可以直接通过地址访问一下,看下服务是否启动正常: httpd 默认使用的就是 80端口
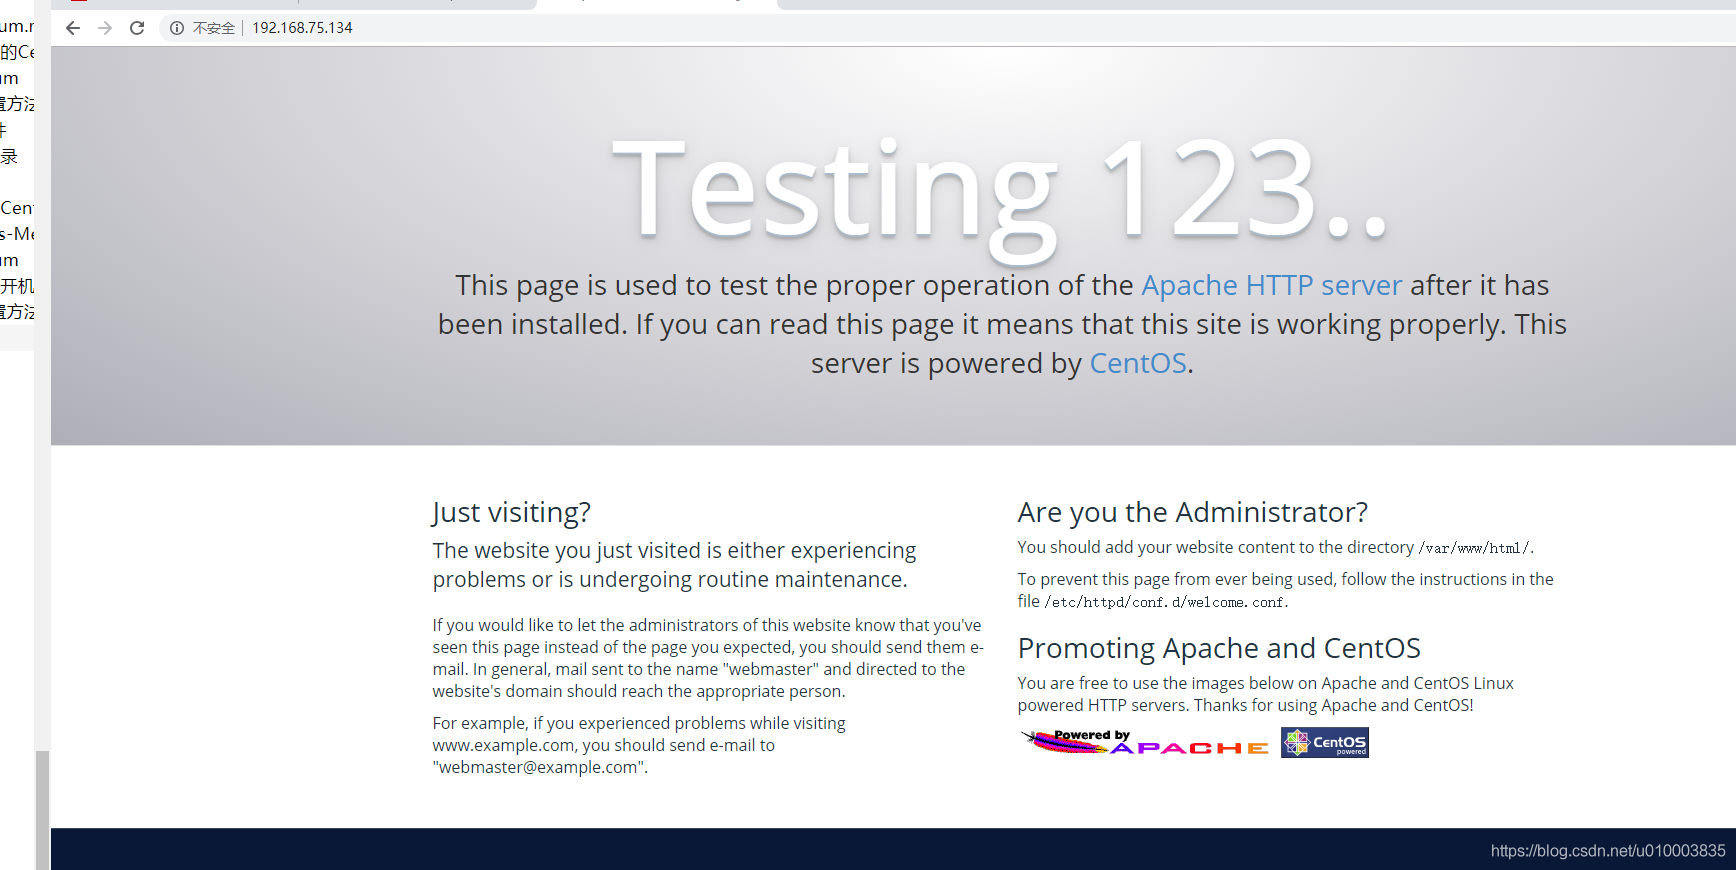
注意 httpd 有一定的公约,/var/www/html 是 httpd 的根目录,
假设我们 将文件放在 /var/www/html/cdh6/parcels/6.0.1 下,我们可以通过页面访问到 :
http://192.168.75.134/cdh6/parcels/6.0.1/
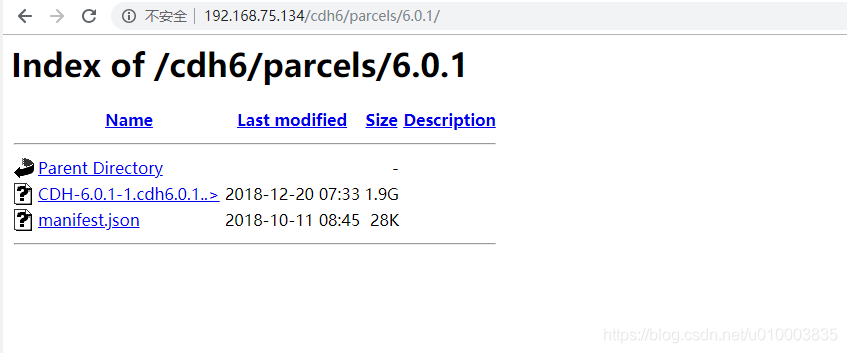
==================================
这里我们需要从官网上下载对应系统的 parcel,在安装时候通过本地加速
6.0.1 版本的地址如下,
https://archive.cloudera.com/cdh6/6.0.1/parcels/
注意
manifest.json 与 sha256 校验文件最好一并下载
4.2 创建本地数据源
step1 : 搭建httpd 服务
这里我们需要借鉴上一个小节 4.1 的 httpd 服务,不熟悉的可以先看下 httpd 服务如何搭建。
搭建好服务后,启动httpd
step2: 下载所需要的包
我们就从官网上下载对应系统 rpm 包
官网地址
https://archive.cloudera.com/cm6/6.0.1/redhat7/yum/RPMS/x86_64/
将该目录下的rpm全部下载。下载好后,我们将这些包放置在
/var/www/html/yum/centos7/repo/
目录下。
step3: 创建本地 repo 源
首先,我们要为下载的这些rpm,生成一个依赖关系。
我们执行以下指令
cd /var/www/html/yum/centos7/repo/
createrepo .
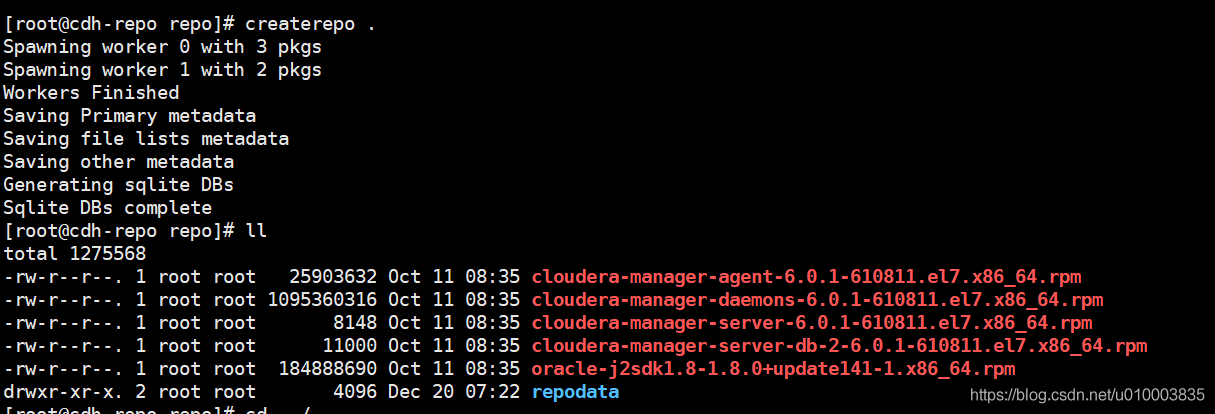
之后。会生成一个 repodata 文件夹
除此之外,我们还需要为源,编写 .repo 文件来描述我们的源。
首先,我们切换到所有 源的配置目录
cd /etc/yum.repos.d/
新建一个 localCDH.repo
内容如下:
-
[localCDHRepo] -
name=local_CDH_Repo -
baseurl=http://192.168.75.134/yum/centos7/repo/ -
enabled=true -
gpgcheck=false
最后,我们执行下
yum makecache
-
[root@cdh-repo yum.repos.d]# yum makecache -
Loaded plugins: fastestmirror, langpacks -
Loading mirror speeds from cached hostfile -
* base: mirrors.tuna.tsinghua.edu.cn -
* extras: mirrors.neusoft.edu.cn -
* updates: mirrors.tuna.tsinghua.edu.cn -
base | 3.6 kB 00:00:00 -
epel | 3.2 kB 00:00:00 -
extras | 3.4 kB 00:00:00 -
localCDHRepo | 2.9 kB 00:00:00 -
updates | 3.4 kB 00:00:00 -
Metadata Cache Created
更新本地缓存,这样就加载了我们新创建的源。
我们验证一下:
-
[root@cdh-repo yum.repos.d]# yum search cloudera -
Loaded plugins: fastestmirror, langpacks -
Loading mirror speeds from cached hostfile -
* base: mirrors.tuna.tsinghua.edu.cn -
* extras: mirrors.neusoft.edu.cn -
* updates: mirrors.tuna.tsinghua.edu.cn -
========================================================================== N/S matched: cloudera =========================================================================== -
cloudera-manager-agent.x86_64 : The Cloudera Manager Agent -
cloudera-manager-server.x86_64 : The Cloudera Manager Server -
cloudera-manager-server-db-2.x86_64 : Embedded database for the Cloudera Manager Server -
cloudera-manager-daemons.x86_64 : Provides daemons for monitoring Hadoop and related tools. -
Name and summary matches only, use "search all" for everything. -
[root@cdh-repo yum.repos.d]#
可以看到能找到相对应的包。
之后,我们把 localCDH.repo 放到其他机器的 /etc/yum.repos.d/ 目录下,让其他机器也可以通过 httpd 访问到这些 rpm。


 1287
1287


 被折叠的 条评论
为什么被折叠?
被折叠的 条评论
为什么被折叠?
 到【灌水乐园】发言


