


笔记大纲
- 引用外部属性文件(常见操作:数据库连接配置)
- 直接配置方式
- 引入配置方式(properties文件)
- 通过import标签导入配置文件
- 自动装配
- 配置方式(手动/自动)
- 装配方式(byName/byType)
- 通过注解配置bean(重点!)
- 常用的注解标识组件
- 扫描组件(xml)
- 组件装配
1.引用外部属性文件
当bean的配置信息增多时,查改操作bean的配置信息就会显得麻烦,所以要进一步的优化,把一部分信息提取到bean配置文件的外部,以properties格式的属性文件封装,在bean的配置(.XML)文件引用properties属性文件的内容即可,属性值发生改变只需修改properties属性文件,这种技术常用于连接数据库是配置基本信息。
1.1.直接配置方式
导入mysql驱动包和druid连接池的jar包:
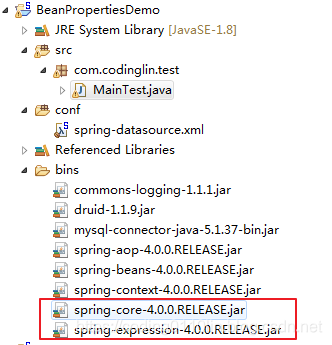
配置xml文件:
<?xml version="1.0" encoding="UTF-8"?>
<beans xmlns="http://www.springframework.org/schema/beans"
	xmlns:xsi="http://www.w3.org/2001/XMLSchema-instance"
	xsi:schemaLocation="http://www.springframework.org/schema/beans http://www.springframework.org/schema/beans/spring-beans.xsd">

	<!-- 配置连接mysql数据库 -->
	<bean id="dataSource" class="com.alibaba.druid.pool.DruidDataSource">
		<property name="driverClassName" value="com.mysql.jdbc.Driver"></property>
		<property name="url" value="jdbc:mysql://localhost:3306/codinglin_datasource01"></property>
		<property name="username" value="root"></property>
		<property name="password" value="root"></property>
	</bean>
</beans>
测试类:
package com.codinglin.test;
import java.sql.SQLException;
import javax.sql.DataSource;
import org.springframework.context.ApplicationContext;
import org.springframework.context.support.ClassPathXmlApplicationContext;
public class MainTest {
	public static void main(String[] args) throws SQLException {
		//获取Spring容器对象
		ApplicationContext applicationContext = new ClassPathXmlApplicationContext("spring-datasource.xml");
		//从容器中获取数据源连接池
		DataSource dataSource = applicationContext.getBean("dataSource",DataSource.class);
		System.out.println(dataSource);
		System.out.println(dataSource.getConnection());
	}
}
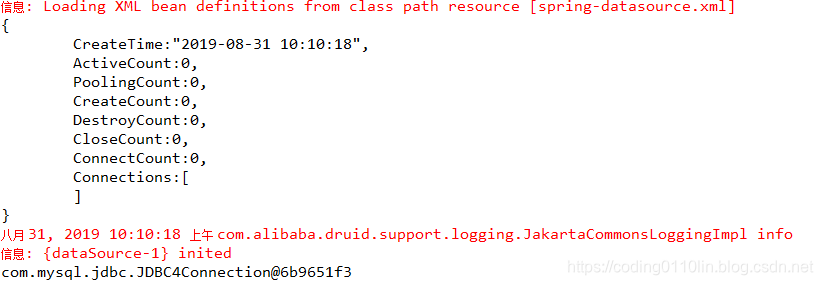
运行结果:
1.2.引入配置方式
在conf文件夹新建mysqlDB.properties属性文件:
jdbc.dirverClassName=com.mysql.jdbc.Driver
jdbc.url=jdbc:mysql://localhost/codinglin_datasource01
jdbc.username=root
jdbc.password=root
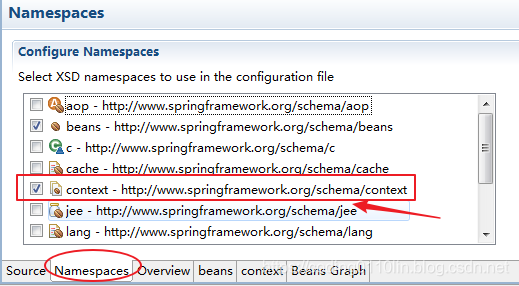
引入context名称空间:
修改xml文件:
<?xml version="1.0" encoding="UTF-8"?>
<beans xmlns="http://www.springframework.org/schema/beans"
	xmlns:xsi="http://www.w3.org/2001/XMLSchema-instance"
	xmlns:context="http://www.springframework.org/schema/context"
	xsi:schemaLocation="http://www.springframework.org/schema/beans http://www.springframework.org/schema/beans/spring-beans.xsd
		http://www.springframework.org/schema/context http://www.springframework.org/schema/context/spring-context-4.0.xsd">
	<!-- 配置连接mysql数据库 -->
	<!-- <bean id="dataSource" class="com.alibaba.druid.pool.DruidDataSource">
		<property name="driverClassName" value="com.mysql.jdbc.Driver"></property>
		<property name="url" value="jdbc:mysql://localhost:3306/codinglin_datasource01"></property>
		<property name="username" value="root"></property>
		<property name="password" value="root"></property>
	</bean> -->

	<!-- 读取外部的配置文件,指定properties属性文件的位置(类路径下的) -->
	<context:property-placeholder location="classpath:mysqlDB.properties"/>
	<!-- 配置数据库连接池,通过${}获取从属性文件中加载值 -->
	<bean id="dataSource" class="com.alibaba.druid.pool.DruidDataSource">
	<property name="driverClassName" value="${jdbc.dirverClassName}"/>
	<property name="url" value="${jdbc.url}"/>
	<property name="username" value="${jdbc.username}"/>
	<property name="password" value="${jdbc.password}"/>
	</bean>
</beans>
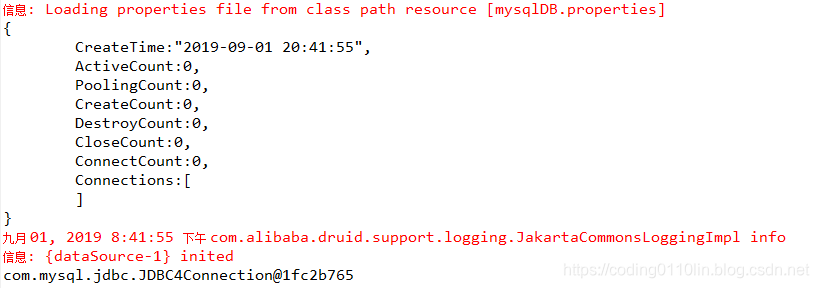
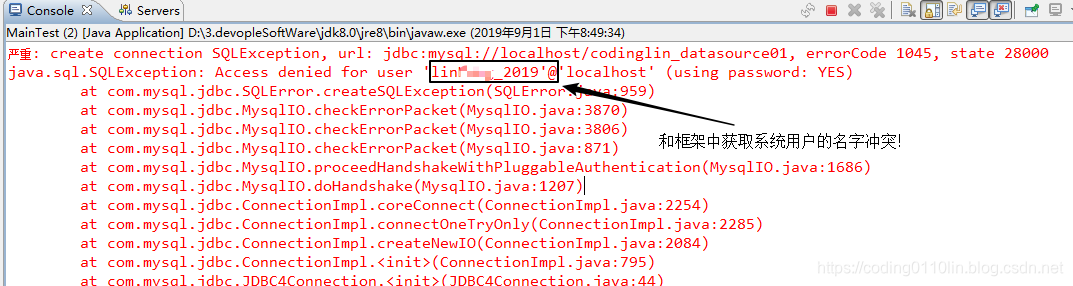
运行结果:
注意:

报错信息:
1.3.通过import标签导入配置文件
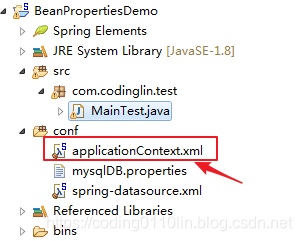
工程目录结构:
新建application文件,加入import标签:
<?xml version="1.0" encoding="UTF-8"?>
<beans xmlns="http://www.springframework.org/schema/beans"
	xmlns:xsi="http://www.w3.org/2001/XMLSchema-instance"
	xsi:schemaLocation="http://www.springframework.org/schema/beans http://www.springframework.org/schema/beans/spring-beans.xsd">
	<import resource="spring-datasource.xml"/>
</beans>
修改测试类:
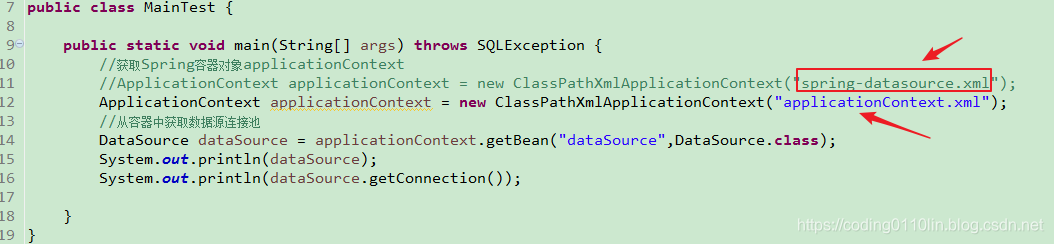
运行结果与1.1、1.2一致!
2.自动装配
2.1.配置方式
(1)手动配置:以value或ref的方式明确指定属性值都是手动装配。
(2)自动装配:按照指定的装配规则,不需要明确指定,Spring自动将匹配的属性值注入bean中,自动装配只能装配通过ref引用的属性。
2.2.装配方式
autowired="byName"或autowired=“byType”
(1)根据类型装配,将类型匹配的bean作为属性注入到另一个bean中。IOC容器中有多个与目标bean类型一致的bean,Spring是无法判定哪个bean最合适,则不能自动装配。
(2)根据名称装配,必须与目标bean的名称和set()后的名字设置完全一致。
(3)通过构造器自动装配,当bean中存在多个构造器时,比较复杂,不推荐使用。
新建Address类:
package com.codinglin.beans;
public class Address {
	private String city; //城市
	private String location;//区域
	public String getCity() {
		return city;
	}
	public void setCity(String city) {
		this.city = city;
	}
	public String getLocation() {
		return location;
	}
	public void setLocation(String location) {
		this.location = location;
	}
}
新建BlogInfo类:
package com.codinglin.beans;
public class BlogInfo {
	private String blogName; //博客名
	private String blogUrl;  //博客地址
	public String getBlogName() {
		return blogName;
	}
	public void setBlogName(String blogName) {
		this.blogName = blogName;
	}
	public String getBlogUrl() {
		return blogUrl;
	}
	public void setBlogUrl(String blogUrl) {
		this.blogUrl = blogUrl;
	}


}
新建MyInfo类:
package com.codinglin.beans;

public class MyInfo {
	private String myName;
	private String age;
	private BlogInfo blogInfo;
	private Address address;
	public String getMyName() {
		return myName;
	}
	public void setMyName(String myName) {
		this.myName = myName;
	}
	public String getAge() {
		return age;
	}
	public void setAge(String age) {
		this.age = age;
	}
	public BlogInfo getBlogInfo() {
		return blogInfo;
	}
	public void setBlogInfo(BlogInfo blogInfo) {
		this.blogInfo = blogInfo;
	}
	public Address getAddress() {
		return address;
	}
	public void setAddress(Address address) {
		this.address = address;
	}
    //重写toString方法
	@Override
	public String toString() {
		return this.myName+"今年"+this.age+"岁,工作于"+address.getCity()+"—"+address.getLocation()+",个人博客信息:"
	   +blogInfo.getBlogName()+"—"+blogInfo.getBlogUrl();

	}
}
配置xml文件:
自动装配类型按照:autowired=“byName”!
<?xml version="1.0" encoding="UTF-8"?>
<beans xmlns="http://www.springframework.org/schema/beans"
	xmlns:xsi="http://www.w3.org/2001/XMLSchema-instance"
	xsi:schemaLocation="http://www.springframework.org/schema/beans http://www.springframework.org/schema/beans/spring-beans.xsd">

	<!-- 将 Address对象交给容器创建-->
	<bean id="address" class="com.codinglin.beans.Address">
		<property name="city" value="北京"></property>
		<property name="location" value="朝阳区"></property>
	</bean>

	<!-- 将 BlogInfo对象交给容器创建-->
	<bean id="blogInfo" class="com.codinglin.beans.BlogInfo">
		<property name="blogName" value="林大侠Coding日常"></property>
		<property name="blogUrl" value="https://coding0110lin.blog.csdn.net/"></property>
	</bean>
	<!-- 配置个人信息MyInfo对象 -->
	<bean id="myInfo" class="com.codinglin.beans.MyInfo" autowire="byName">
		<property name="myName" value="木木林"></property>
		<property name="age" value="18"></property>

		<!-- 手动装配
		<property name="address" ref="address"></property>
		<property name="blogInfo" ref="blogInfo"></property>
		 -->

	</bean>
</beans>
测试类:
package com.codinglin.test;
import org.springframework.context.ApplicationContext;
import org.springframework.context.support.ClassPathXmlApplicationContext;
import com.codinglin.beans.MyInfo;
public class MainTest {
	public static void main(String[] args) {
		ApplicationContext applicationContext = new ClassPathXmlApplicationContext("spring-autoware.xml");
		MyInfo myInfo = applicationContext.getBean("myInfo",MyInfo.class);
		System.out.println(myInfo);
	}
}
运行结果:

3.通过注解配置bean(重点!)
相对XML方式而言,通过注解的方式配置bean会更加简洁与优雅,与MVC组件化开发的理念也十分契合,是我们在日常开发中常使用的方式。
3.1.常用的注解标识组件
默认情况:使用组件的类名,其首字母需要小写后得到的字符串作为bean的id!
!!!引入Jar包:spring-aop-4.0.0.RELEASE.jar
| 常用注解 | 说明 |
|---|---|
| @Component(普通组件) | 标识一个受Spring IOC容器管理的组件 |
| @Controller(表现层控制器组件) | 标识一个受Spring IOC容器管理的表述层控制器组件 |
| @Service(业务逻辑层组件) | 标识一个受Spring IOC容器管理的业务逻辑层组件 |
| @Repository(持久化层组件) | 标识一个受Spring IOC容器管理的持久化层组件 |
@Antowired(自动装配)(@Resource或@Inject) | 根据类型实现自动装配 |
| @Qualifier | 具体指定要装配哪个bean |
3.2.扫描组件
组件被上述组件标识后需要通过Spring进行扫描才能侦测到,可以指定被扫描的packpage,例如:
<!--在xml文件中引入context命名称,指定扫描com.codinglin.beans下的组件-->
<bean>
<context:component-scan base-package="com.codinglin.beans"></context:component-scan>
</bean>
注意:
①base-package属性指定一个需要扫描的基类包,Spring容器将会扫描这个基类包及其子包中的所有类。
②扫描多个包时,可以使用逗号分隔!
③如仅扫描特定的类而非基包下的所有类,可使用resource-pattern属性过滤特定的类。
<bean>
    <!--过滤componen下autoware类-->
<context:component-scan base-package="com.codinglin.component"
                        resource-pattern="autoware/*.class">
</context:component-scan>
</bean>
④包含&排除
使用标签
<context:include-filter>,需要设置use-default-filters="false",表示禁用默认过滤器!使用标签
<context:exclude-filter>,需要设置use-default-filters="true",先包含再过滤!
	<context:component-scan base-package="com.codinglin.beans" use-default-filters="true">
			<!--子节点表示包含的目标类-->
			<context:include-filter></context:include-filter>
			<!--子节点表示排除的目标类-->
			<context:exclude-filter type="assignable" exprssion="全类名">                             </context:exclude-filter>
    </context:component-scan>
过滤表达式(type属性设置):
| 类别属性(type) | 示例 | 说明 |
|---|---|---|
| annotation | com.codinglin.XxxAnnotation | 过滤所有标注了XxxAnnotation的类。这个规则根据目标组件是否标注了指定类型的注解进行过滤。 |
| assignable | com.codinglin.BaseXxx | 过滤所有BaseXxx类的子类。这个规则根据目标组件是否是指定类型的子类的方式进行过滤。 |
| aspectj | com.codinglin.*Service+ | 所有类名是以Service结束的,或这样的类的子类。这个规则根据AspectJ表达式进行过滤。 |
| regex | com.codinglin.anno.* | 所有com.atguigu.anno包下的类。这个规则根据正则表达式匹配到的类名进行过滤。 |
| custom | com.codinglin.XxxTypeFilter | 使用XxxTypeFilter类通过编码的方式自定义过滤规则。该类必须实现org.springframework.core.type.filter.TypeFilter接口 |
3.3.组件装配
@Autowired工作原理即为自动装配。
规则:
①优先使用byType的方式进行装配,如果是唯一匹配,则进行自动装配。如匹配多个兼容类型的bean,再通过byName的方式进行唯一的确定;如果唯一确定,则自动装配,否则抛出异常!
②默认情况下,@Autowired注解必须要进行装配,可以使用required=false设置可选的。
③可以使用@Qualifier(中文:限定符)注解具体制定要装配哪个bean。
④@Autowired和@Qualifier注解可以加在带有形参的方法上。
☝上述分享来源个人总结,如果分享对您有帮忙,希望您积极转载;如果您有不同的见解,希望您积极留言,让我们一起探讨,您的鼓励将是我前进道路上一份助力,非常感谢!我会不定时更新相关技术动态,同时我也会不断完善自己,提升技术,希望与君同成长同进步!
☞本人博客:https://coding0110lin.blog.csdn.net/ 欢迎转载,一起技术交流吧!


 99
99


 被折叠的 条评论
为什么被折叠?
被折叠的 条评论
为什么被折叠?
 到【灌水乐园】发言


