步骤1:先运行,看到效果,再学习
步骤2:模仿和排错
步骤3:基于前面的知识点
步骤4:uploadPage.jsp
步骤5:UploadController.java
步骤6:UploadController.java
步骤7:application.properties
步骤8:测试
步骤 1 : 先运行,看到效果,再学习
老规矩,先下载下载区(点击进入)的可运行项目,配置运行起来,确认可用之后,再学习做了哪些步骤以达到这样的效果。
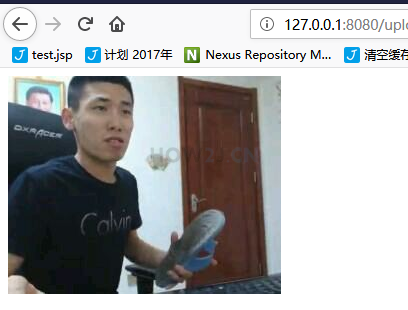
访问测试地址:
| http://127.0.0.1:8080/uploadPage
|
。。。如图所示看到上传后的图片
注: 启动方式是Springboot特有的,直接运行类:com.how2java.springboot.Application 的主方法。

步骤 2 : 模仿和排错
在确保可运行项目能够正确无误地运行之后,再严格照着教程的步骤,对代码模仿一遍。
模仿过程难免代码有出入,导致无法得到期望的运行结果,此时此刻通过比较正确答案 ( 可运行项目 ) 和自己的代码,来定位问题所在。
采用这种方式,学习有效果,排错有效率,可以较为明显地提升学习速度,跨过学习路上的各个槛。
推荐使用diffmerge软件,进行文件夹比较。把你自己做的项目文件夹,和我的可运行项目文件夹进行比较。
这个软件很牛逼的,可以知道文件夹里哪两个文件不对,并且很明显地标记出来
这里提供了绿色安装和使用教程:diffmerge 下载和使用教程
步骤 3 : 基于前面的知识点
本知识点在Springboot 热部署 的基础上进行
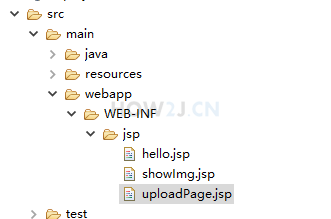
步骤 4 : uploadPage.jsp
在jsp目录下新建uploadPage.jsp,需要几点:
1. method="post" 是必须的
2. enctype="multipart/form-data" 是必须的,表示提交二进制文件
3. name="file" 是必须的,和后续服务端对应
4. accept="image/*" 表示只选择图片

| <%@ page language="java" contentType="text/html; charset=UTF-8"
pageEncoding="UTF-8"%>
<form action="upload" method="post" enctype="multipart/form-data">
选择图片:<input type="file" name="file" accept="image/*" /> <br>
<input type="submit" value="上传">
</form>
|
步骤 5 : UploadController.java
因为uploadPage.jsp 在WEB-INF下,不能直接从浏览器访问,所以要在这里加一个uploadPage跳转,这样就可以通过
| http://127.0.0.1:8080/uploadPage
|
访问到uploadPage.jsp了
| package com.how2java.springboot.web;
import java.io.File;
import java.io.FileNotFoundException;
import java.io.IOException;
import javax.servlet.http.HttpServletRequest;
import org.springframework.stereotype.Controller;
import org.springframework.ui.Model;
import org.springframework.web.bind.annotation.RequestMapping;
import org.springframework.web.bind.annotation.RequestMethod;
import org.springframework.web.bind.annotation.RequestParam;
import org.springframework.web.multipart.MultipartFile;
@Controller
public class UploadController {
@RequestMapping("/uploadPage")
public String uploadPage() {
return "uploadPage";
}
}
|
步骤 6 : UploadController.java
为UploadController.java 新增upload用来接受上传
1. 接受上传的文件
| @RequestParam("file") MultipartFile file
|
2. 根据时间戳创建新的文件名,这样即便是第二次上传相同名称的文件,也不会把第一次的文件覆盖了
| String fileName = System.currentTimeMillis()+file.getOriginalFilename();
|
3. 通过req.getServletContext().getRealPath("") 获取当前项目的真实路径,然后拼接前面的文件名
| String destFileName=req.getServletContext().getRealPath("")+"uploaded"+File.separator+fileName;
|
4. 第一次运行的时候,这个文件所在的目录往往是不存在的,这里需要创建一下目录
| File destFile = new File(destFileName);
destFile.getParentFile().mkdirs();
|
5. 把浏览器上传的文件复制到希望的位置
| file.transferTo(destFile);
|
6. 把文件名放在model里,以便后续显示用
| m.addAttribute("fileName",fileName);
|
| package com.how2java.springboot.web;
import java.io.File;
import java.io.FileNotFoundException;
import java.io.IOException;
import javax.servlet.http.HttpServletRequest;
import org.springframework.stereotype.Controller;
import org.springframework.ui.Model;
import org.springframework.web.bind.annotation.RequestMapping;
import org.springframework.web.bind.annotation.RequestMethod;
import org.springframework.web.bind.annotation.RequestParam;
import org.springframework.web.multipart.MultipartFile;
@Controller
public class UploadController {
@RequestMapping("/uploadPage")
public String uploadPage() {
return "uploadPage";
}
@RequestMapping(value = "/upload", method = RequestMethod.POST)
public String upload(HttpServletRequest req, @RequestParam("file") MultipartFile file,Model m) {
try {
String fileName = System.currentTimeMillis()+file.getOriginalFilename();
String destFileName=req.getServletContext().getRealPath("")+"uploaded"+File.separator+fileName;
File destFile = new File(destFileName);
destFile.getParentFile().mkdirs();
file.transferTo(destFile);
m.addAttribute("fileName",fileName);
} catch (FileNotFoundException e) {
e.printStackTrace();
return "上传失败," + e.getMessage();
} catch (IOException e) {
e.printStackTrace();
return "上传失败," + e.getMessage();
}
return "showImg";
}
}
|
步骤 7 : application.properties
设置上传文件的大小,默认是1m,太小了,文件稍微大一点就会出错
| spring.mvc.view.prefix=/WEB-INF/jsp/
spring.mvc.view.suffix=.jsp
spring.http.multipart.maxFileSize=100Mb
spring.http.multipart.maxRequestSize=100Mb
|
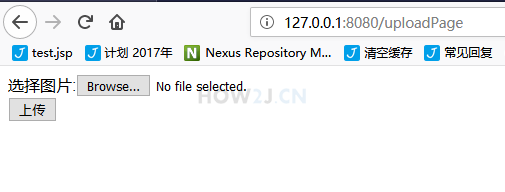
步骤 8 : 测试
访问测试地址:
| http://127.0.0.1:8080/uploadPage
|

关注我,分享更多Java全栈技术
更多Java全栈技术内容,点击了解: https://how2j.cn/k/springboot/springboot-upload/1652.html


 334
334

 被折叠的 条评论
为什么被折叠?
被折叠的 条评论
为什么被折叠?
 到【灌水乐园】发言


