


源代码:依然是使用QMUIWindowInsetLayout 视图,加上QMUITopBarLayout的栏栏,然后只上一个按钮,按钮是QMUI里
QMUIRoundButton有圆角的。
老规据先上效果图:这是我理想要的。
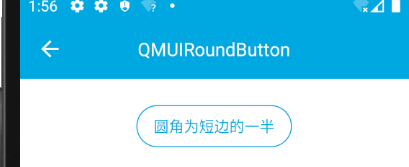
activity_button.xml :QMUIWindowInsetLayout 的视图加QMUITopBarLayout, 然后再上圆角:
<?xml version="1.0" encoding="utf-8"?>
<com.qmuiteam.qmui.widget.QMUIWindowInsetLayout xmlns:android="http://schemas.android.com/apk/res/android"
    xmlns:app="http://schemas.android.com/apk/res-auto"
    xmlns:tools="http://schemas.android.com/tools"
    android:layout_width="match_parent"
    android:layout_height="match_parent"
    tools:context=".ButtonActivity">

    <com.qmuiteam.qmui.widget.QMUITopBarLayout
        android:id="@+id/topbar"
        android:layout_width="match_parent"
        android:layout_height="wrap_content"
        android:fitsSystemWindows="true"
        android:background="@color/app_color_theme_4">
    </com.qmuiteam.qmui.widget.QMUITopBarLayout>

    <com.qmuiteam.qmui.widget.roundwidget.QMUIRoundButton
        android:id="@+id/button_showDefaultDialog"
        android:layout_width="wrap_content"
        android:layout_height="wrap_content"
        android:layout_centerInParent="true"
        android:onClick="onClickShowDefaultDialog"
        android:paddingBottom="10dp"
        android:paddingLeft="16dp"
        android:paddingRight="16dp"
        android:paddingTop="10dp"
        android:layout_marginTop="20dp"
        android:layout_marginBottom="20dp"
        android:text="圆角按钮 显示"
        app:qmui_isRadiusAdjustBounds="true" />

</com.qmuiteam.qmui.widget.QMUIWindowInsetLayout>
ButtonActivity .class:沉浸式栏一定要有这句话,QMUIStatusBarHelper.translucent(this); 然后用butterknife这个方式重新设置视图。
public class ButtonActivity extends Activity {
    @BindView(R.id.topbar)
    QMUITopBarLayout mTopBar;

    @Override
    protected void onCreate(Bundle savedInstanceState) {
        super.onCreate(savedInstanceState);
//        setContentView(R.layout.activity_button);

        View root = LayoutInflater.from(this).inflate(R.layout.activity_button, null);
        ButterKnife.bind(this, root);
        //沉浸式状态栏
        QMUIStatusBarHelper.translucent(this);
        setContentView(root);
        initTopBar();
    }

    private void initTopBar() {
        mTopBar.addLeftBackImageButton().setOnClickListener(new View.OnClickListener() {
            @Override
            public void onClick(View v) {
                finish();
                overridePendingTransition(R.anim.slide_still, R.anim.slide_out_right);
            }
        });
        mTopBar.setTitle("沉浸式状态栏示例");
    }

    public void onClickShowDefaultDialog(View view) { }


}
上效果图:看左边的按钮 ,哈哈,笑shi我了,我也不知道为啥了,我想要的效果图应该如右边好好待着在主视图内的。而不是乱跑的。困惑中.....
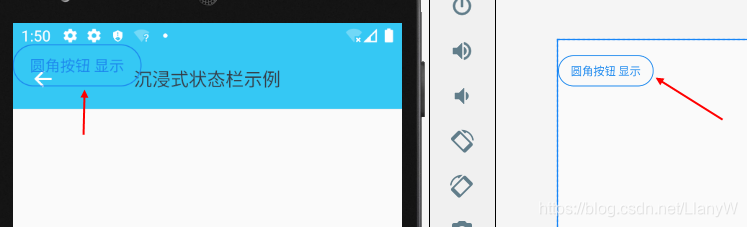
按钮问题:原因是按钮上边距设置过小,本来是要改成:?att/qmui_topbar_heigh,但是是还小,暂时将按钮的外边顶距直接改:
android:layout_marginTop="10dp"改成 android:layout_marginTop="100dp"。
最后运行效果图,差不多跟demo一样了。看了一下demo加了一个ScrollView滚动视图,里面再放一个LinearLayout,


 2816
2816


 被折叠的 条评论
为什么被折叠?
被折叠的 条评论
为什么被折叠?
 到【灌水乐园】发言


