


1.创建视图
效果图: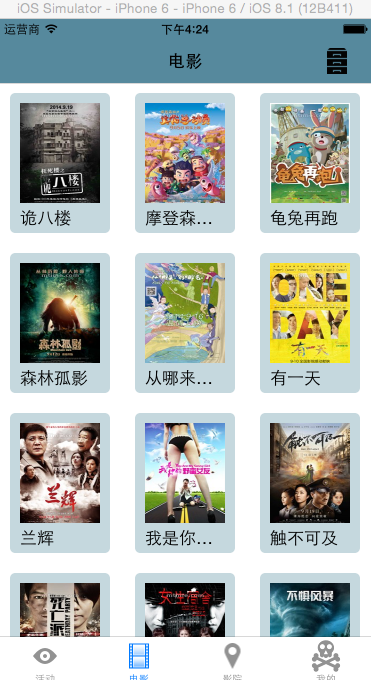
(1).这是苹果官方提供的一种瀑布流效果,之后加到collectionView上
UICollectionViewFlowLayout  *flowlauout =[[UICollectionViewFlowLayout alloc] init];

 (2).不同于tableview ,它用item进行显示, 所以需要先设置每个item有多大
flowlauout.itemSize =CGSizeMake(90, 160);

 (3).设置行间距
flowlauout.minimumInteritemSpacing =2;

 (4)设置列间距
flowlauout.minimumLineSpacing =2;

   (5).设置默认的滚动方向,默认是垂直的方向
flowlauout.scrollDirection =UICollectionViewScrollDirectionHorizontal;

  (6).设定头或者尾视图的尺寸
flowlauout.headerReferenceSize =CGSizeMake(0, 300);

   (7).创建一个collectionView
 UICollectionView *collectionView= [[UICollectionView alloc] initWithFrame:CGRectMake(0, 0, self.view.frame.size.width, self.view.frame.size.height) collectionViewLayout:flowlauout];

注意把flowlauout加上

 (8).接下来就是和tableView很相似 ,使用前需要签两个协议dataSource ,delegate
 collectionView.dataSource =self;
    [collectionView setDelegate:self];

(9).把collectionView加到self.view上
[self.view addSubview:collectionView];

  (10).通过注册的方式创建cell(这是与tableView不通过的地方)
  第一个参数 :需要制定注册对象的类型
 第二个参数 :重用标志
[collectionView registerClass:[MyCell class] forCellWithReuseIdentifier:@"reuse"];

 (10),注册一个头视图
[collectionView registerClass:[MyCollectionReusableView class] forSupplementaryViewOfKind:UICollectionElementKindSectionHeader  withReuseIdentifier:@"headerView"];
// 第一个参数 :需要注册的对象类型
// 第二个参数 :指定是头视图还是尾视图,常量字符串在系统的UICollectionViewFlowlayout类的最上面
// 第三个参数 :重用标志
2.header 头视图的创建
-(UICollectionReusableView *)collectionView:(UICollectionView *)collectionView viewForSupplementaryElementOfKind:(NSString *)kind atIndexPath:(NSIndexPath *)indexPath{
    if ([kind isEqualToString:UICollectionElementKindSectionHeader]) {
        MyCollectionReusableView *view =  [collectionView dequeueReusableSupplementaryViewOfKind:UICollectionElementKindSectionHeader  withReuseIdentifier:@"headerView" forIndexPath:indexPath];
        view.myLabel.text =@"1111";
        view.frame =CGRectMake(0, 0, 100, 100);
        return view;
    }else{
        return nil;
    }
}
使用注册的方式创建的cell,必须使用自定义的cell,否则在里面会重复大量的创建视图,为了杜绝重复创建,必须使用自定义cell
 3. collectionView的两个协议方法
-(NSInteger)collectionView:(UICollectionView *)collectionView numberOfItemsInSection:(NSInteger)section{
    return self.arr.count;
}

-(UICollectionViewCell *)collectionView:(UICollectionView *)collectionView cellForItemAtIndexPath:(NSIndexPath *)indexPath{
 #warning 在collectionCell的创建的时候,提供了另一种不同于tableview的cell创建方式

  MyCell *cell =[collectionView dequeueReusableCellWithReuseIdentifier:@"reuse" forIndexPath:indexPath];
    // 只要通过注册的方式创建的cell ,在取值的时候就不需要进行是否为空的判断了
   cell 的背景颜色
    cell.contentView.backgroundColor =[UIColor whiteColor];
    cell 的文本内容
    cell.myLabel.text =[NSString stringWithFormat:@"%ld", indexPath.row];

    // 用sd 显示
    [cell.myImageView sd_setImageWithURL:[NSURL URLWithString:self.arr[indexPath.row]]];


    return cell;
}
4.创建一个collectionViewCell
 在cell的.h文件中
@property(nonatomic ,retain)UIImageView *myImageView;
@property(nonatomic ,retain)UILabel *myLabel;

 在cell.m文件中

-(instancetype )initWithFrame:(CGRect)frame{
    self =[super initWithFrame:frame];
    if (self) {
        self.myImageView =[[UIImageView alloc] initWithFrame:CGRectMake(0, 0, 80, 100)];
        [self.contentView addSubview:self.myImageView];
//        [_myImageView release];
        self.myLabel =[[UILabel alloc] initWithFrame:CGRectMake(0, 100, 80, 30)];
        [self.contentView addSubview:self.myLabel];
//        [self.myLabel release];

    }
    return self;
}


 被折叠的 条评论
为什么被折叠?
被折叠的 条评论
为什么被折叠?
 到【灌水乐园】发言


