


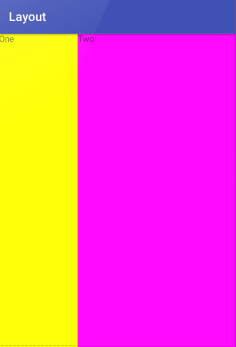
一、权重详解
用法归纳: 按比例划分水平方向:将涉及到的View的android:width属性设置为0dp,然后设置为android weight属性设置比例即可;类推,竖直方向,只需设android:height为0dp,然后设weight属性即可!<?xml version="1.0" encoding="utf-8"?> <LinearLayout xmlns:android="http://schemas.android.com/apk/res/android" xmlns:tools="http://schemas.android.com/tools" android:layout_width="match_parent" android:layout_height="match_parent" android:orientation="horizontal" tools:context="com.example.layout.MainActivity"> <TextView android:layout_width="0dp" android:layout_weight="1" android:layout_height="match_parent" android:background="#FFFF00" android:text="One" /> <TextView android:layout_width="0dp" android:layout_weight="2" android:layout_height="match_parent" android:background="#FF00FF" android:text="Two" /> </LinearLayout>
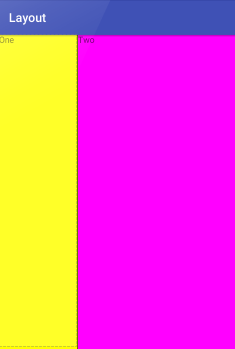
二、设置分割线
方法1、利用控件间隔和背景
<?xml version="1.0" encoding="utf-8"?>
<LinearLayout xmlns:android="http://schemas.android.com/apk/res/android"
    xmlns:tools="http://schemas.android.com/tools"
    android:layout_width="match_parent"
    android:layout_height="match_parent"
    android:orientation="horizontal"
    android:background="#000000"
    tools:context="com.example.layout.MainActivity">
    <TextView
        android:layout_width="0dp"
        android:layout_weight="1"
        android:layout_height="match_parent"
        android:background="#FFFF00"
        android:text="One"
        android:layout_marginRight="1dp"/>
    <TextView
        android:layout_width="0dp"
        android:layout_weight="2"
        android:layout_height="match_parent"
        android:background="#FF00FF"
        android:text="Two" />
</LinearLayout>
方法2、添加View
<?xml version="1.0" encoding="utf-8"?>
<LinearLayout xmlns:android="http://schemas.android.com/apk/res/android"
    xmlns:tools="http://schemas.android.com/tools"
    android:layout_width="match_parent"
    android:layout_height="match_parent"
    android:orientation="horizontal"
    tools:context="com.example.layout.MainActivity">
    <TextView
        android:layout_width="0dp"
        android:layout_weight="1"
        android:layout_height="match_parent"
        android:background="#FFFF00"
        android:text="One"
        />
    <View
        android:layout_width="1dp"
        android:layout_height="match_parent"
        android:background="#000000"/>
    <TextView
        android:layout_width="0dp"
        android:layout_weight="2"
        android:layout_height="match_parent"
        android:background="#FF00FF"
        android:text="Two" />
</LinearLayout>
3、第二种则是使用LinearLayout的一个divider属性,直接为LinearLayout设置分割线 这里就需要你自己准备一张线的图片了
1)android:divider设置作为分割线的图片

2)android:showDividers设置分割线的位置
,none(无),begining(开始),end(结束),middle(每两个组件间)
3)dividerPadding设置分割线的Padding
<?xml version="1.0" encoding="utf-8"?>
<LinearLayout xmlns:android="http://schemas.android.com/apk/res/android"
    xmlns:tools="http://schemas.android.com/tools"
    android:layout_width="match_parent"
    android:layout_height="match_parent"
    android:orientation="vertical"
    android:divider="@drawable/line"
    android:showDividers="middle"
    android:dividerPadding="0dp"
    tools:context="com.example.layout.MainActivity">
    <TextView
        android:layout_width="match_parent"
        android:layout_weight="1"
        android:layout_height="0dp"
        android:text="One"
        />
    <TextView
        android:layout_width="match_parent"
        android:layout_weight="2"
        android:layout_height="0dp"
        android:text="Two" />
</LinearLayout>
三、Layout_gravity的注意事项
当 android:orientation="vertical" 时, 只有水平方向的设置才起作用,垂直方向的设置不起作用。 即:left,right,center_horizontal 是生效的。 当 android:orientation="horizontal" 时, 只有垂直方向的设置才起作用,水平方向的设置不起作用。 即:top,bottom,center_vertical 是生效的。


 611
611

 被折叠的 条评论
为什么被折叠?
被折叠的 条评论
为什么被折叠?
 到【灌水乐园】发言


