


一,alibaba短信接口调用
1)调用阿里的短信接口是很方便的,前提是你要开通好阿里的短信服务;
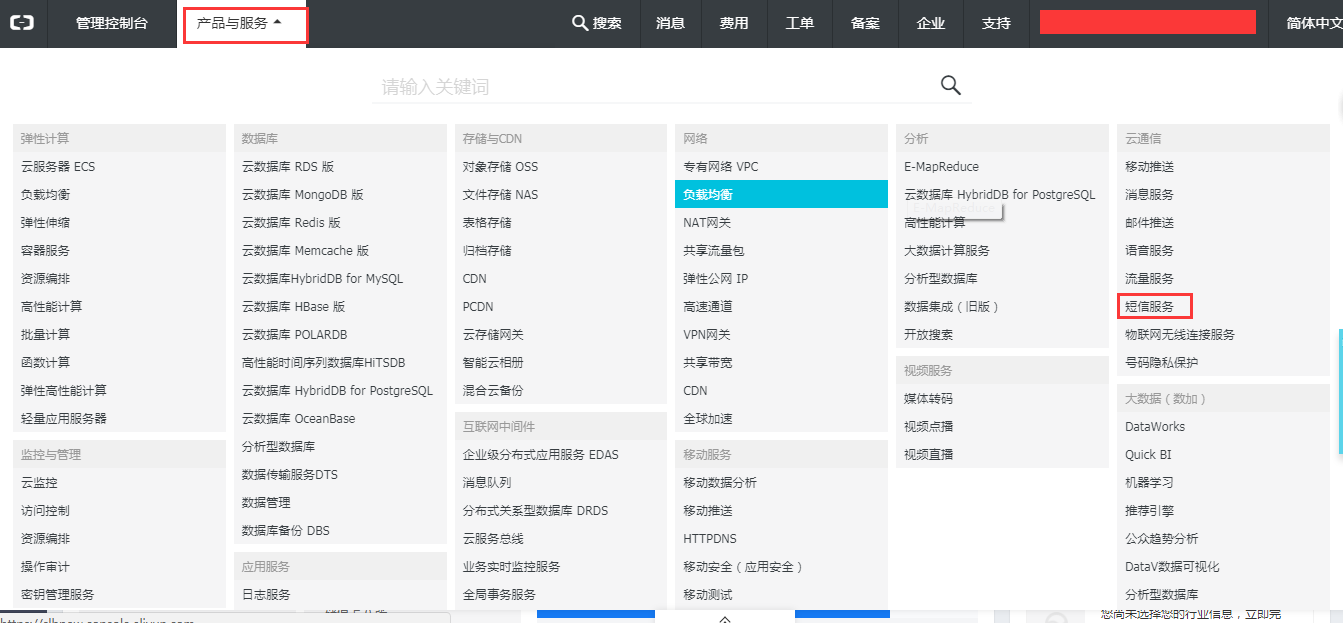
二,开通大体流程
1)登录阿里控制台----->开通短信服务------>交钱-------->获取AK-------->配置签名(配置消息签名,一般是公司名)
-------->配置模板(配置消息内容,例如:你的验证码是${code},请妥善保管…..)------->开发

三,下载demo,引入依赖jar包

<dependency> <groupId>aliyun.java.sdk</groupId> <artifactId>core</artifactId> <version>3.3.1</version> <systemPath>${project.basedir}/src/main/webapp/WEB-INF/lib/aliyun-java-sdk-core-3.3.1.jar</systemPath> <scope>compile</scope> </dependency> <dependency> <groupId>aliyun.java.sdk</groupId> <artifactId>dysmsapi</artifactId> <version>1.0.0</version> <systemPath>${project.basedir}/src/main/webapp/WEB-INF/lib/aliyun-java-sdk-dysmsapi-1.0.0.jar</systemPath> <scope>compile</scope> </dependency>
四,调用接口
@Controllerpublic class ShortMessageController { //产品名称:云通信短信API产品,开发者无需替换 static final String product = "Dysmsapi"; //产品域名,开发者无需替换 static final String domain = "dysmsapi.aliyuncs.com"; // TODO 此处需要替换成开发者自己的AK(在[阿里云](https://l.gushuji.site/aliyun)访问控制台寻找) static final String accessKeyId = "**********"; static final String accessKeySecret = "**************"; @Autowired private VerificationCodeMapper verificationCodeMapper; @RequestMapping("getSsm") @ResponseBody public String getSsm(String number) { //可自助调整超时时间 System.setProperty("sun.net.client.defaultConnectTimeout", "10000"); System.setProperty("sun.net.client.defaultReadTimeout", "10000"); //初始化acsClient,暂不支持region化 IClientProfile profile = DefaultProfile.getProfile("cn-hangzhou", accessKeyId, accessKeySecret); try { DefaultProfile.addEndpoint("cn-hangzhou", "cn-hangzhou", product, domain); } catch (ClientException e1) { e1.printStackTrace(); } IAcsClient acsClient = new DefaultAcsClient(profile); //随机生成六位验证码 int code = (int)((Math.random()*9+1)*100000); //删除该号码上次的验证码记录 verificationCodeMapper.deleteVerificationCodeMapper(number); //保存到数据库 VerificationCode verificationCode = new VerificationCode(); verificationCode.setCode(code+""); verificationCode.setNumber(number); int i =verificationCodeMapper.addVerificationCode(verificationCode); //组装请求对象-具体描述见控制台-文档部分内容 SendSmsRequest request = new SendSmsRequest(); //必填:待发送手机号 request.setPhoneNumbers(number); //必填:短信签名-可在短信控制台中找到,你在签名管理里的内容 request.setSignName("星晨"); //必填:短信模板-可在短信控制台中找到,你模板管理里的模板编号 request.setTemplateCode("SMS_115760262"); //可选:模板中的变量替换JSON串,如模板内容为"亲爱的${name},您的验证码为${code}"时,此处的值为 request.setTemplateParam("{\"code\":\""+code+"\"}"); //选填-上行短信扩展码(无特殊需求用户请忽略此字段) //request.setSmsUpExtendCode("90997"); //可选:outId为提供给业务方扩展字段,最终在短信回执消息中将此值带回给调用者 //request.setOutId("yourOutId"); //hint 此处可能会抛出异常,注意catch SendSmsResponse sendSmsResponse = null; try { sendSmsResponse = acsClient.getAcsResponse(request); } catch (ServerException e) { e.printStackTrace(); } catch (ClientException e) { e.printStackTrace(); } //获取发送状态 String cod = sendSmsResponse.getCode(); return cod; }}


 488
488


 被折叠的 条评论
为什么被折叠?
被折叠的 条评论
为什么被折叠?
 到【灌水乐园】发言


