


由于完全改了status bar,建议先做几张png图片,加到
Frameworks/base/core/res/res/drawable
下。最好做一张背景图,替换 statusbar_background.png
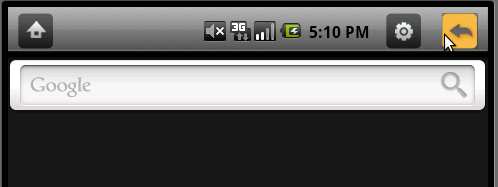
另外我又加了几张icon,分别是home menu和back的正常和按下状态。
这些图片为:
stat_home.png
stat_home_pressed.png
stat_back.png
stat_back_pressed.png
stat_menu.png
stat_menu_pressed.png
修改步骤为:
一. 修改xml界面
1. 增加图标
当然,更改整个status bar避免不要要对源码大刀修一下。我的该法是:
修改status bar的layerout文件:
Frameworks/base/core/res/res/layout/status_bar.xml
在原来的linearlayout中新增三个image view
- <LinearLayout android:id="@+id/icons"
- android:layout_width="fill_parent"
- android:layout_height="fill_parent"
- android:orientation="horizontal">
- <ImageView android:id="@+id/status_home"
- android:layout_width="wrap_content"
- android:layout_height="wrap_content"
- android:layout_gravity="top"
- android:paddingTop="6dip"
- android:paddingRight="10dip"
- android:paddingLeft="10dip"
- android:src="@drawable/stat_home" />
- <com.android.server.status.IconMerger android:id="@+id/notificationIcons"
- android:layout_width="0dip"
- android:layout_weight="1"
- android:layout_height="fill_parent"
- android:layout_alignParentLeft="true"
- android:paddingLeft="6dip"
- android:gravity="center_vertical"
- android:orientation="horizontal"/>
- <LinearLayout android:id="@+id/statusIcons"
- android:layout_width="wrap_content"
- android:layout_height="fill_parent"
- android:layout_alignParentRight="true"
- android:paddingRight="6dip"
- android:gravity="center_vertical"
- android:orientation="horizontal"/>
- <ImageView android:id="@+id/status_menu"
- android:layout_width="wrap_content"
- android:layout_height="wrap_content"
- android:layout_gravity="top"
- android:paddingTop="6dip"
- android:paddingLeft="10dip"
- android:paddingRight="10dip"
- android:src="@drawable/stat_menu" />
- <ImageView android:id="@+id/status_back"
- android:layout_width="wrap_content"
- android:layout_height="wrap_content"
- android:layout_gravity="top"
- android:paddingTop="6dip"
- android:paddingRight="10dip"
- android:paddingLeft="10dip"
- android:src="@drawable/stat_back" />
- /LinearLayout>
这样做的好处就是简单。同时保证 最右端是home按钮,最左端是back按钮,不受它本来的约束。这样status bar上即可看到这些按钮了。
图标的位置,可通过修改 paddingRight, paddingLeft 和paddingTop的值达到最佳视觉效果。
2. 修改status bar的高度。
既然要在status bar上增加那么几个按钮,当然是想要使用触摸操作的,android自带的status bar高度太小,不适用。对于7寸屏的话,50pixel的高度应该是差不多了。
修改高度很简单,如我转的shinning mm的博文。
修改frameworks/base/core/res/res/values/dimens.xml的status_bar_height属性
<!-- Height of the status bar -->
<dimen name="status_bar_height">50dip</dimen>
当然,如果相改title的高度,可以修改 Frameworks/base/core/res/res/values/themes.xml中的Window attributes的windowTitleSize值,不过我觉得没必要,改了反倒不好看了 :)
编译运行一下:
- ~/donut$ source ./env.sh
- ~/donut$ make –j8
- ~/donut$ emulator –skin WVGA800
~/donut$ source ./env.sh ~/donut$ make –j8 ~/donut$ emulator –skin WVGA800
, 看状态栏是不是改变了?
二 为按钮添加动态效果
添加动态效果,就是触摸按下hilight,松开或者移出后恢复的动作。这一块,我是通过修改 frameworks/base/services/java/com/android/server/status/StatusBarView.java实现的。
1. 获取statusbar中新增加的icon的handler。
在类中新增加三个成员(这需要import android.widget.ImageView;):
- ImageView mHomeIcon;
- ImageView mBackIcon;
- ImageView mMenuIcon;
ImageView mHomeIcon; ImageView mBackIcon; ImageView mMenuIcon;
同时增加三个常量,表示这些icon对应的键值(这需要import android.view.KeyEvent;)
- public static final int RESV_KEY_HOME = KeyEvent.KEYCODE_HOME;
- public static final int RESV_KEY_BACK = KeyEvent.KEYCODE_BACK;
- public static final int RESV_KEY_MENU = KeyEvent.KEYCODE_MENU;;
public static final int RESV_KEY_HOME = KeyEvent.KEYCODE_HOME; public static final int RESV_KEY_BACK = KeyEvent.KEYCODE_BACK; public static final int RESV_KEY_MENU = KeyEvent.KEYCODE_MENU;;
在onFinishInflate()中,获得实际的对象:
- mHomeIcon = (ImageView)findViewById(R.id.status_home);
- mBackIcon = (ImageView)findViewById(R.id.status_back);
- mMenuIcon = (ImageView)findViewById(R.id.status_menu);
mHomeIcon = (ImageView)findViewById(R.id.status_home); mBackIcon = (ImageView)findViewById(R.id.status_back); mMenuIcon = (ImageView)findViewById(R.id.status_menu);
这三个对象就是我们在status_bar.xml中添加的。
2. 添加触摸处理。
首先,应该判断是那个图标被按下,这个我们在StatusBarView.Java的onTouchEvent中来判断。
这里,我做了一个小的按键状态,已方便处理按下、弹起和移出的动作。
首先增加两个状态成员:
- int mResvKeyState = -1; //记住的上次按键状态, -1为无状态。
- int mResvKeyCode = -1; //记住的上次按键值,-1为无状态。
int mResvKeyState = -1; //记住的上次按键状态, -1为无状态。 int mResvKeyCode = -1; //记住的上次按键值,-1为无状态。
这样我的onTouchEvent就变成这样了:
- @Override
- public boolean onTouchEvent(MotionEvent event) {
- if(mService.mExpanded==true || mService.mTracking==true){
- if (event.getAction() != MotionEvent.ACTION_DOWN) {
- mService.interceptTouchEvent(event);
- }
- return true;
- }
- if(mResvKeyState == -1) // remembered key state, no reserve
- {
- switch(getResvKeyArea(event)){
- case RESV_KEY_HOME:
- case RESV_KEY_BACK:
- case RESV_KEY_MENU:
- {
- mResvKeyState = event.getAction();
- mResvKeyCode = getResvKeyArea(event);
- updateResvKeyIcon(mResvKeyState, mResvKeyCode);
- }
- break;
- default:
- if (event.getAction() != MotionEvent.ACTION_DOWN) {
- mService.interceptTouchEvent(event);
- }
- }
- }else{
- mResvKeyState = event.getAction(); // new state
- if(mResvKeyState == MotionEvent.ACTION_MOVE){
- if(mResvKeyCode != getResvKeyArea(event)){
- /* out of bound, resume the icon */
- updateResvKeyIcon(MotionEvent.ACTION_UP, mResvKeyCode);
- mResvKeyCode = -1;
- mResvKeyState = -1;
- }
- }else if(mResvKeyState == MotionEvent.ACTION_UP){
- updateResvKeyIcon(mResvKeyState, mResvKeyCode);
- mResvKeyCode = -1;
- mResvKeyState = -1;
- }else{
- Log.d(TAG, "state machine error! Never be here!");
- }
- }
- return true;
- }
里面用到的两个private方法简单实现如下:
- private int getResvKeyArea(MotionEvent event)
- {
- if( (event.getX() <= mHomeIcon.getRight())
- && (event.getY() <= this.getHeight()) ){
- return RESV_KEY_HOME;
- }
- else if( (event.getX() >= mBackIcon.getLeft())
- && (event.getY() <= this.getHeight()) ){
- return RESV_KEY_BACK;
- }
- else if( (event.getX() >= mMenuIcon.getLeft())
- && (event.getY() <= this.getHeight()) ){
- return RESV_KEY_MENU;
- }else
- return -1;
- }
- private int updateResvKeyIcon(int state, int key)
- {
- if(key == RESV_KEY_BACK){
- if(state == MotionEvent.ACTION_UP){
- mBackIcon.setImageResource(com.android.internal.R.drawable.stat_back);
- }else if(state == MotionEvent.ACTION_DOWN){
- mBackIcon.setImageResource(com.android.internal.R.drawable.stat_back_pressed);
- }
- }else if(key == RESV_KEY_HOME){
- if(state == MotionEvent.ACTION_UP){
- mHomeIcon.setImageResource(com.android.internal.R.drawable.stat_home);
- }else if(state == MotionEvent.ACTION_DOWN){
- mHomeIcon.setImageResource(com.android.internal.R.drawable.stat_home_pressed);
- }
- }else if(key == RESV_KEY_MENU){
- if(state == MotionEvent.ACTION_UP){
- mMenuIcon.setImageResource(com.android.internal.R.drawable.stat_menu);
- }else if(state == MotionEvent.ACTION_DOWN){
- mMenuIcon.setImageResource(com.android.internal.R.drawable.stat_menu_pressed);
- }
- }
- return 0;
- }
2.3中,用systemUI APK来管理界面, 这样直接用R.drawable.stat_menu_pressed来索引就可以了。
同时,我不想再在按下这些icon的时候,触发下拉动作,我也改了 onInterceptTouchEvent函数:
- @Override
- public boolean onInterceptTouchEvent(MotionEvent event) {
- if( (event.getX() > mHomeIcon.getRight())
- && (event.getX() < mMenuIcon.getLeft())){
- return mService.interceptTouchEvent(event)
- ? true : super.onInterceptTouchEvent(event);
- }
- return false;
- }
再编译一下,看一下结果 :) 是不是能动了?
三,添加相应事件
1. 添加新的intent
首先是新增一条intent, 在framework/base/core/java/android/content/intent.java中增加
- @SdkConstant(SdkConstantType.BROADCAST_INTENT_ACTION)
- public static final String ACTION_ICONKEY_CHANGED = "android.intent.action.ICONKEY_CHANGED";
添加hide 标志,表示是系统内部intent,不向外公布 不需要make -api
如果不想进行make -api
2. 发送intent
在StatusBarView.java的OnKeyEvent中,松开按键的分支else if(mResvKeyState == MotionEvent.ACTION_UP)操作中加入发送intent的动作:
- Intent intent = new Intent(Intent.ACTION_ICONKEY_CHANGED);
- intent.addFlags(Intent.FLAG_RECEIVER_REGISTERED_ONLY);
- intent.putExtra("keycode", mResvKeyCode);
- mService.sendIntent(intent);
在窗帘下拉时, ANR。针对测试结果,此时将back键转为home键来操作。
Intent intent = new Intent(Intent.ACTION_ICONKEY_CHANGED);
intent.addFlags(Intent.FLAG_RECEIVER_REGISTERED_ONLY);
if(mService.mExpanded == true){
switch(mResvKeyCode){
case KeyEvent.KEYCODE_BACK:
mResvKeyCode = KeyEvent.KEYCODE_HOME;
intent.putExtra("keycode", mResvKeyCode);
mService.sendIntent(intent);
break;
case KeyEvent.KEYCODE_MENU:
break;
case KeyEvent.KEYCODE_HOME:
intent.putExtra("keycode", mResvKeyCode);
mService.sendIntent(intent);
default:
break;
}
} else {
intent.putExtra("keycode", mResvKeyCode);
mService.sendIntent(intent);
}
这 个intent是只有注册的接收者才能接收。
这里,我们是通过StatusBarService来发送这个intent的。
在StatusBarService.java中新增一个方法:
- void sendIntent(Intent intent)
- {
- mContext.sendBroadcast(intent);
- }
void sendIntent(Intent intent) { mContext.sendBroadcast(intent); }
注:
2.3中有所更改:
public void sendIntent(Intent intent) {
// TODO Auto-generated method stub
StatusBarService.this.sendBroadcast(intent);
}
3.接收并处理intent
这个就要修改StatusBarPolicy.java了
首先,在构造函数中加入Intent的filter,注册号这个intent的receiver。
filter.addAction(Intent.ACTION_ICONKEY_CHANGED);
然后再private BroadcastReceiver mIntentReceiver = new BroadcastReceiver() 加入Intent的receiver动作;
- else if (action.equals(Intent.ACTION_ICONKEY_CHANGED)) {
- G, "Received ACTION_ICONKEY_CHANGED");
- updateIconKeyAction(intent);
- }
方法updateIconKeyAction的定义如下:
- private final void updateIconKeyAction(Intent intent){
- int keycode = intent.getIntExtra("keycode", -1);
- if(keycode != -1){
- long now = SystemClock.uptimeMillis();
- try {
- KeyEvent down = new KeyEvent(now, now, KeyEvent.ACTION_DOWN, keycode, 0);
- KeyEvent up = new KeyEvent(now, now, KeyEvent.ACTION_UP, keycode, 0);
- (IWindowManager.Stub
- .asInterface(ServiceManager.getService("window")))
- .injectKeyEvent(down, false);
- (IWindowManager.Stub
- .asInterface(ServiceManager.getService("window")))
- .injectKeyEvent(up, false);
- } catch (RemoteException e) {
- Log.i("Input", "DeadOjbectException");
- }
- }
- }
这样,基本上就完成了。
编译一下, 由于新增了一个intent,因此要先make update-api,
- ~/donut$ source ./env.sh
- ~/donut$ make update-api
- ~/donut$ make –j8 //交叉编译看不到编译的顺序
- ~/donut$ emulator –skin WVGA800
~/donut$ source ./env.sh ~/donut$ make update-api ~/donut$ make –j8 ~/donut$ emulator –skin WVGA800
另外,如果不是做phone,也可以在StatusBarPolicy.java中将所有phone相关的处理都删掉。


 1万+
1万+

 被折叠的 条评论
为什么被折叠?
被折叠的 条评论
为什么被折叠?
 到【灌水乐园】发言


