


该例子使用了springJunit4测试框架,免部署,如果没理解这个测试框架的可以在我博客中找到相应的文章学习一下。工程代码如下:
package spring.shusheng.aspect;

import org.aspectj.lang.annotation.Aspect;
import org.aspectj.lang.annotation.Before;
/**
 * 定义一个切面类,用于组织一些切面逻辑方法,主要用于记日志等方面
 * 使用了动态代理机制织入代码
 * @author shusheng
 */
@Aspect
public class HelloAspect {

    /**
     * 该方法会在调用sayHello(String params) 之前执行。
     * 然后再调用业务逻辑的sayHello(string str) 方法。
     */
    @Before("execution(* spring.shusheng.service.HelloService.sayHello(..))")
    public void cutSayHello() {
        System.out.println("before");
    }
}
package spring.shusheng.service;

public interface HelloService {

    public String sayHello(String str) ;
}
package spring.shusheng.service.impl;

import org.springframework.stereotype.Component;

import spring.shusheng.service.HelloService;

@Component
public class HelloServiceImpl implements HelloService {

    @Override
    public String sayHello(String str ) {

        return "hello "+ str;
    }
}
package test;

import javax.annotation.Resource;

import org.junit.Test;
import org.junit.runner.RunWith;
import org.springframework.test.context.ContextConfiguration;
import org.springframework.test.context.junit4.SpringJUnit4ClassRunner;

import spring.shusheng.service.HelloService;

/**
 * 下面两个注解为springJunit4的内容
 * 通过该测试框架实现了依赖注入功能
 * @author shusheng
 *
 */
@RunWith(SpringJUnit4ClassRunner.class)
@ContextConfiguration(locations = "classpath:META-INF/applicationContext.xml")
public class HelloServiceTest {

    private HelloService helloService;

    @Test
    public void testSayHello() {
        String result = helloService.sayHello("world");
        System.out.println(result);
    }

    @Resource
    public void setHelloService(HelloService helloService) {
        this.helloService = helloService;
    }

}
下面是applicationContext.xml文件内容
<?xml version="1.0" encoding="UTF-8"?>
<beans xmlns="http://www.springframework.org/schema/beans"
       xmlns:aop="http://www.springframework.org/schema/aop"
       xmlns:xsi="http://www.w3.org/2001/XMLSchema-instance"
       xmlns:context="http://www.springframework.org/schema/context"
       xsi:schemaLocation="
            http://www.springframework.org/schema/beans
            http://www.springframework.org/schema/beans/spring-beans-3.0.xsd
            http://www.springframework.org/schema/context
            http://www.springframework.org/schema/context/spring-context-3.0.xsd
            http://www.springframework.org/schema/aop
            http://www.springframework.org/schema/aop/spring-aop-3.0.xsd"
            default-autowire="byName"
            >

<context:component-scan base-package="spring.shusheng.service,spring.shusheng.aspect">
    <!--如果不写下面这个context:include-filter标签,就需要在切面类上加@Component-->
    <context:include-filter type="annotation" expression="org.aspectj.lang.annotation.Aspect"/>
</context:component-scan>
<aop:aspectj-autoproxy />

</beans>
下面是web.xml内容:
<?xml version="1.0" encoding="UTF-8"?>
<web-app version="3.0"
    xmlns="http://java.sun.com/xml/ns/javaee"
    xmlns:xsi="http://www.w3.org/2001/XMLSchema-instance"
    xsi:schemaLocation="
    http://java.sun.com/xml/ns/javaee
    http://java.sun.com/xml/ns/javaee/web-app_3_0.xsd">
<!--制定spring配置文件位置-->
<context-param>
    <param-name>contextConfigLocation</param-name>
    <param-value>classpath:META-INF/applicationContext.xml</param-value>
</context-param>

<listener>
    <listener-class>org.springframework.web.context.ContextLoaderListener</listener-class>
</listener>


</web-app>
下面是所需的一些jar包
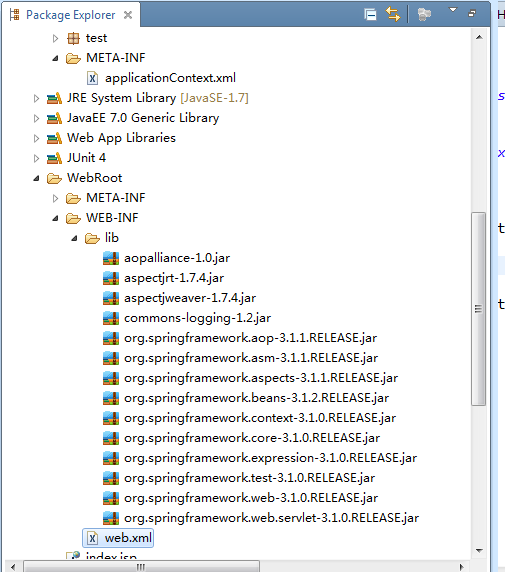
新建工程然后运行测试类即可


 8335
8335

 被折叠的 条评论
为什么被折叠?
被折叠的 条评论
为什么被折叠?
 到【灌水乐园】发言


