


springmvc框架写到现在终于牵扯到小程序了(所以别说我“不务正业”),对于一个应用程序来说,它的本质其实就是无数个对数据进行增删改查的操作,这里起到至关重要的就是数据,于是这篇帖子的目的就是实现小程序与后台数据的交互。
小程序使用的是wx.request的api来提交和接收数据,最常见的就是接收后台传过来的json数据,并对其进行解析
先看运行结果: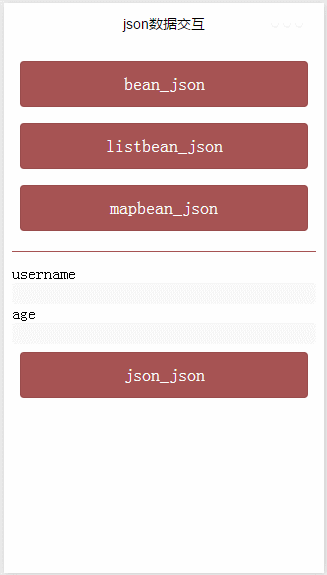
这里总结springmvc框架的三种转json方法
| 后台 | 前台 | 返回前台的json格式 |
|---|---|---|
| 对象/bean/实体类 | json | {“id”: 0,”username”: “”,”age”: 0} |
| List<实体类> | json | [{“id”:1,”username”:”2”,”age”:1},{“id”:2,”username”:”3”,”age”:2}] |
| Map<String,实体类> | json | {“success”:true,”detail”:[ ] } |
按步骤,从头开始来:
后台
web.xml
<?xml version="1.0" encoding="UTF-8"?><web-app xmlns:xsi="http://www.w3.org/2001/XMLSchema-instance" xmlns="http://java.sun.com/xml/ns/javaee" xsi:schemaLocation="http://java.sun.com/xml/ns/javaee http://java.sun.com/xml/ns/javaee/web-app_3_0.xsd" id="WebApp_ID" version="3.0"><servlet><servlet-name>springmvc</servlet-name><servlet-class>org.springframework.web.servlet.DispatcherServlet</servlet-class><init-param><param-name>contextConfigLocation</param-name><param-value>classpath:config/ybajax.xml</param-value></init-param></servlet><servlet-mapping><servlet-name>springmvc</servlet-name><url-pattern>*.mn</url-pattern></servlet-mapping><filter><filter-name>CharacterEncodingFilter</filter-name><filter-class>org.springframework.web.filter.CharacterEncodingFilter</filter-class><init-param><param-name>encoding</param-name><param-value>UTF-8</param-value></init-param></filter><filter-mapping><filter-name>CharacterEncodingFilter</filter-name><url-pattern>/*</url-pattern></filter-mapping></web-app>
导入springmvc所需要的jar包:http://pan.baidu.com/s/1jIK6sb8
导入json所需要的jar包:http://pan.baidu.com/s/1i5bnggP
配置文件 ybajax.xml
<?xml version="1.0" encoding="UTF-8"?><beansxmlns="http://www.springframework.org/schema/beans"xmlns:xsi="http://www.w3.org/2001/XMLSchema-instance"xmlns:mvc="http://www.springframework.org/schema/mvc"xmlns:context="http://www.springframework.org/schema/context"xsi:schemaLocation="http://www.springframework.org/schema/beanshttp://www.springframework.org/schema/beans/spring-beans-3.0.xsdhttp://www.springframework.org/schema/mvchttp://www.springframework.org/schema/mvc/spring-mvc-3.0.xsdhttp://www.springframework.org/schema/contexthttp://www.springframework.org/schema/context/spring-context-3.0.xsd"><context:component-scan base-package="action"/><!-- 注册适配器 --><bean class="org.springframework.web.servlet.mvc.annotation.AnnotationMethodHandlerAdapter"><property name="messageConverters"><list><bean class="org.springframework.http.converter.json.MappingJacksonHttpMessageConverter"></bean></list></property></bean><bean class="org.springframework.web.servlet.view.InternalResourceViewResolver"><property name="prefix" value="/jsp/"/><property name="suffix" value=".jsp"/></bean></beans>
注意json需要对应的适配器类
实体类:User.java (实现bean用到)和 Bean.java(实现List、Map用到)
package bean;public class User {private int id;private String username;private int age;public User() {}public User(int id, String username, int age) {this.id = id;this.username = username;this.age = age;}public int getId() {return id;}public void setId(int id) {this.id = id;}public String getUsername() {return username;}public void setUsername(String username) {this.username = username;}public int getAge() {return age;}public void setAge(int age) {this.age = age;}}package bean;import java.util.ArrayList;import java.util.List;public class Bean {private List<User> listuser= new ArrayList<User>();private Bean(){}public List<User> getListuser() {return listuser;}public void setListuser(List<User> listuser) {this.listuser = listuser;}}
AjaxAction.java
package action;import java.util.ArrayList;import java.util.HashMap;import java.util.List;import java.util.Map;import org.springframework.stereotype.Controller;import org.springframework.ui.Model;import org.springframework.web.bind.annotation.RequestBody;import org.springframework.web.bind.annotation.RequestMapping;import org.springframework.web.bind.annotation.RequestMethod;import org.springframework.web.bind.annotation.ResponseBody;import bean.Bean;import bean.User;@Controller@RequestMapping("/user")public class YbAjaxAction{@RequestMapping(method=RequestMethod.POST,value="/bean2json")public @ResponseBody User bean2json(User user){return user;}@RequestMapping(method=RequestMethod.POST,value="/listbean2json")public @ResponseBody List<User> listbean2json(Bean bean){List<User> listuser=bean.getListuser();return listuser;}@RequestMapping(method=RequestMethod.POST,value="/mapbean2json")public @ResponseBody Map<String,Object> mapbean2json(Bean bean){List<User> listuser=bean.getListuser();Map<String, Object> mapuser=new HashMap<String, Object>();mapuser.put("success",true);mapuser.put("detail",listuser);return mapuser;}//表单提交@RequestMapping(method=RequestMethod.POST,value="/json2json")public @ResponseBody User bean2json(@RequestBody Map<String, String> map){String username="";int age=0;if(map.containsKey("username")){username=map.get("username");}if(map.containsKey("age")){age=Integer.parseInt(map.get("age"));}User user=new User(1,username,age);return user;}}
@ResponseBody: 该注解用于将Controller的方法返回的对象,通过适当的HttpMessageConverter转换为指定格式后,写入到Response对象的body数据区(用于返回json数据给页面)@RequestBody : 该注解用于读取Request请求的body部分数据,使用系统默认配置的HttpMessageConverter进行解析,然后把相应的数据绑定到要返回的对象上;再把HttpMessageConverter返回的对象数据绑定到 controller中方法的参数上(用于接收前台的数据)
前台
index.wxml
<view class="container"><button bindtap="bean_json" class="btn">bean_json</button><button bindtap="listbean_json" class="btn">listbean_json</button><button bindtap="mapbean_json" class="btn">mapbean_json</button><view class="line"></view><form bindsubmit="json_json"><view><view >username</view><input name="username" type="text" class="input_bg"/></view><view><view >age</view><input name="age" type="text" class="input_bg"/></view><button formType="submit" class="btn">json_json</button></form><text>{{show}}</text></view>
index.wxss
.container {height: 100%;display: flex;flex-direction: column;padding: 20rpx;}.input_bg{background-color: #F8F8F8;border-radius: 10rpx;}.btn{background-color: #A65353;margin: 20rpx;border-radius: 10rpx;color:#F8F8F8;}.line{height: 1rpx;width: 100%;background-color: #A65353;margin: 30rpx 0;}
index.js
var app = getApp()Page({data: {show:""},bean_json: function() {var that=this;wx.request({url: 'http://localhost:8080/springMVC/user/bean2json.mn',data: {id:1,username:"toBeMN",age:28},method: 'POST',header: {"Content-Type":"application/x-www-form-urlencoded"},success: function(res){var show="对象转jsonusername:"+res.data.username+"age:"+res.data.age;that.setData({show:show})}})},listbean_json: function() {var that=this;wx.request({url: 'http://localhost:8080/springMVC/user/listbean2json.mn',data: {'listuser[0].username':"Hello",'listuser[0].age':18,'listuser[1].username':"World",'listuser[1].age':28},method: 'POST',header: {"Content-Type":"application/x-www-form-urlencoded"},success: function(res){var show="list<对象>转json ";for(var i=0;i<res.data.length;i++){show+="username:"+res.data[i].username+"age:"+res.data[i].age;}that.setData({show:show})}})},mapbean_json: function() {var that=this;wx.request({url: 'http://localhost:8080/springMVC/user/mapbean2json.mn',data: {'listuser[0].username':"Hello",'listuser[0].age':48,'listuser[1].username':"MINA",'listuser[1].age':58},method: 'POST',header: {"Content-Type":"application/x-www-form-urlencoded"},success: function(res){var show="map<String,Obiect>转json ";for(var i=0;i<res.data.detail.length;i++){show+="username:"+res.data.detail[i].username+"age:"+res.data.detail[i].age;}that.setData({show:show})}})},json_json: function(res) {var that=this;console.log(res.detail.value)wx.request({url: 'http://localhost:8080/springMVC/user/json2json.mn',data: res.detail.value,method: 'POST',header: {"Content-Type":"application/json"},success: function(res){var show="表单提交返回jsonusername:"+res.data.username+"age:"+res.data.age;that.setData({show:show})}})},onLoad: function () {}})
所有的映射处理都交由框架,我们只需要设置对的属性名、变量名,即可自动赋值
例如表单提交,这个应该是最常用的,因为小程序form提交后会将表单中的数据存入一个json串(如果表单中input的name没有写,则不会有数据,这是小程序内部映射的神奇之处),所以使用request请求的时候可以直接将json串传到后台解析,后台处理完业务在将结果json传回前台,这就是一个交互的过程。
本文来自 码农大圣 的CSDN 博客 ,全文地址请点击:https://blog.csdn.net/zalan01408980/article/details/79806794?utm_source=copy


 2837
2837


 被折叠的 条评论
为什么被折叠?
被折叠的 条评论
为什么被折叠?
 到【灌水乐园】发言


