


EditText是除了TextView控件之外的属性,还可以实现输入文本内容。下面我们就举几个实例来练习一下这种控件的使用方法。
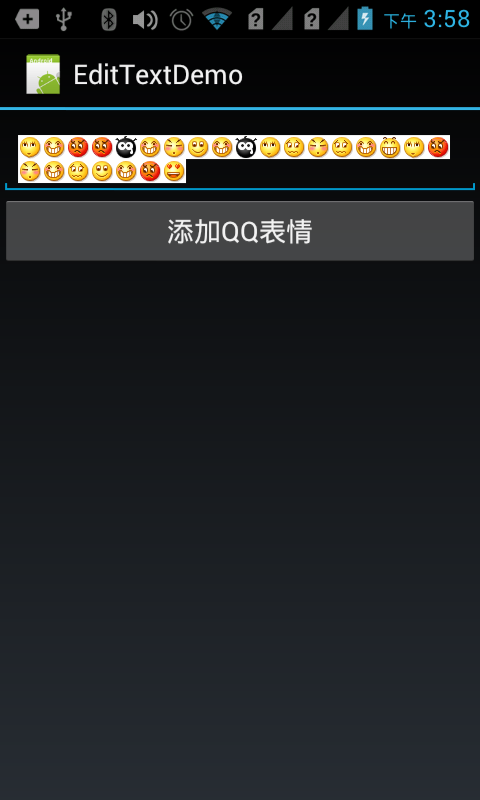
1. 案例一:像QQ一样输入表情图像
主要代码:
- /** Called when the activity is first created. */
- @Override
- public void onCreate(Bundle savedInstanceState) {
- super.onCreate(savedInstanceState);
- setContentView(R.layout.main);
- initComponent();
- button.setOnClickListener(new View.OnClickListener() {
- @Override
- public void onClick(View v) {
- int randomId = 1 + new Random().nextInt(5); //取得随机数randomId 范围在[1,6)之间
- try {
- //利用反射机制:根据随机产生的1至5的整数从R.drawable类中获得相应资源ID(静态变量)的Field对象
- Field field = R.drawable.class.getDeclaredField("face" + randomId); //取得图片的名称+1个随机数
- //获得资源ID的值,也就是静态变量的值
- int resourceId = Integer.parseInt(field.get(null).toString());
- /*
- * 在android重要要显示图片信息,必须使用Bitmap位图的对象来装载。
- * 查看Android 的BitmapFactory的API文档:Public Methods,这些方法描述了如何讲一些字符串,字节数组转化为字节对象
- */
- Bitmap bitmap = BitmapFactory.decodeResource(getResources(), resourceId);
- // 要让图片替代指定的文字就要用ImageSpan
- ImageSpan imageSpan = new ImageSpan(EditTextDemoActivity.this, bitmap);
- // 创建一个SpannableString对象,以便插入用ImageSpan对象封装的图像
- SpannableString spannableString = new SpannableString("face");
- // 用ImageSpan对象替换face
- spannableString.setSpan(imageSpan, 0, 4, Spannable.SPAN_EXCLUSIVE_EXCLUSIVE);
- // 将随机获得的图像追加到EditText控件的最后
- editText.append(spannableString);
- } catch (Exception e) {
- // TODO: handle exception
- }
- }
- });
- }
Demo执行结果:
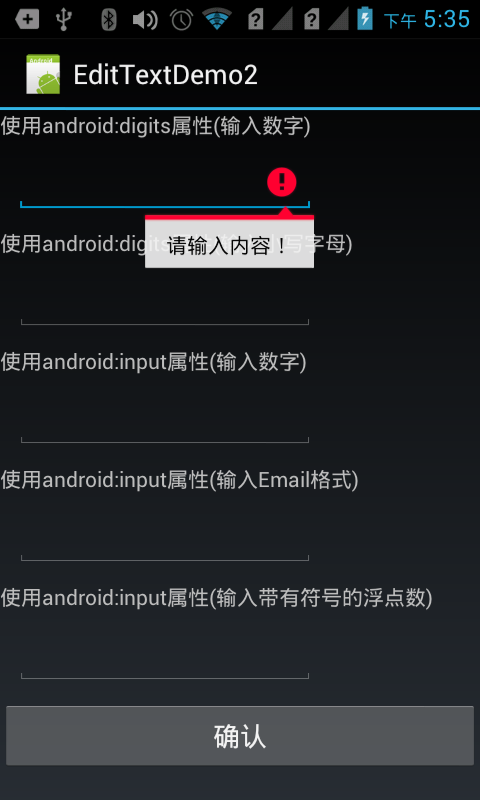
2. 案例二:在EditText中输入特定的字符,实现校验功能。
主要代码:
- button.setOnClickListener(new View.OnClickListener() {
- @Override
- public void onClick(View v) {
- String value = editText.getText().toString();
- //trim() 表示输入前后空格
- if(value == null || value.trim().equals("")){
- editText.setError("请输入内容!");
- return;
- }
- }
Demo执行结果:
- <?xml version="1.0" encoding="utf-8"?>
- <LinearLayout xmlns:android="http://schemas.android.com/apk/res/android"
- android:layout_width="fill_parent"
- android:layout_height="fill_parent"
- android:orientation="vertical" >
- <TextView
- android:layout_width="fill_parent"
- android:layout_height="wrap_content"
- android:text="使用android:digits属性(输入数字)" />
- <EditText
- android:id="@+id/num"
- android:layout_width="200dp"
- android:layout_height="wrap_content"
- android:layout_margin="10dp"
- android:digits="0123456789" />
- <TextView
- android:layout_width="fill_parent"
- android:layout_height="wrap_content"
- android:text="使用android:digits属性(输入小写字母)" />
- <EditText
- android:layout_width="200dp"
- android:layout_height="wrap_content"
- android:layout_margin="10dp"
- android:digits="abcdefghijklmnopqrstuvwxyz" />
- <TextView
- android:layout_width="fill_parent"
- android:layout_height="wrap_content"
- android:text="使用android:input属性(输入数字)" />
- <EditText
- android:layout_width="200dp"
- android:layout_height="wrap_content"
- android:layout_margin="10dp"
- android:inputType="number|textCapCharacters" />
- <TextView
- android:layout_width="fill_parent"
- android:layout_height="wrap_content"
- android:text="使用android:input属性(输入Email格式)" />
- <EditText
- android:layout_width="200dp"
- android:layout_height="wrap_content"
- android:layout_margin="10dp"
- android:inputType="textEmailAddress" />
- <TextView
- android:layout_width="fill_parent"
- android:layout_height="wrap_content"
- android:text="使用android:input属性(输入带有符号的浮点数)" />
- <EditText
- android:layout_width="200dp"
- android:layout_height="wrap_content"
- android:layout_margin="10dp"
- android:numeric="decimal|signed" />
- <Button
- android:id="@+id/button"
- android:layout_width="fill_parent"
- android:layout_height="wrap_content"
- android:text="确认" />
- </LinearLayout>
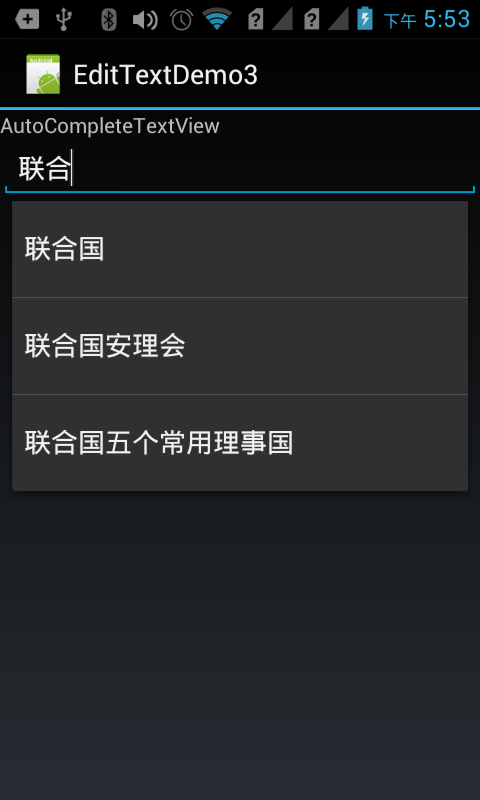
3. 案例三:实现城市名称的模糊查询
如果我们想实现用户输入的内容有自动提示的功能,类似百度的搜索结果, AutoCompleteTextView可以实现。
程序主要代码:
- private static final String[] COUNTRIES = new String[] {
- "联合国", "联合国安理会", "联合国五个常用理事国","Google","Google map"
- };
- /** Called when the activity is first created. */
- @Override
- public void onCreate(Bundle savedInstanceState) {
- super.onCreate(savedInstanceState);
- setContentView(R.layout.main);
- initComponent();
- //第二个参数表示适配器的下拉风格
- ArrayAdapter<String> adapter = new ArrayAdapter<String>(EditTextDemo3.this,
- android.R.layout.simple_dropdown_item_1line, COUNTRIES);
- auto.setAdapter(adapter);
- mul.setAdapter(adapter);
- mul.setTokenizer(new MultiAutoCompleteTextView.CommaTokenizer()); //完成对选项的拆分功能,以逗号进行拆分。
- }
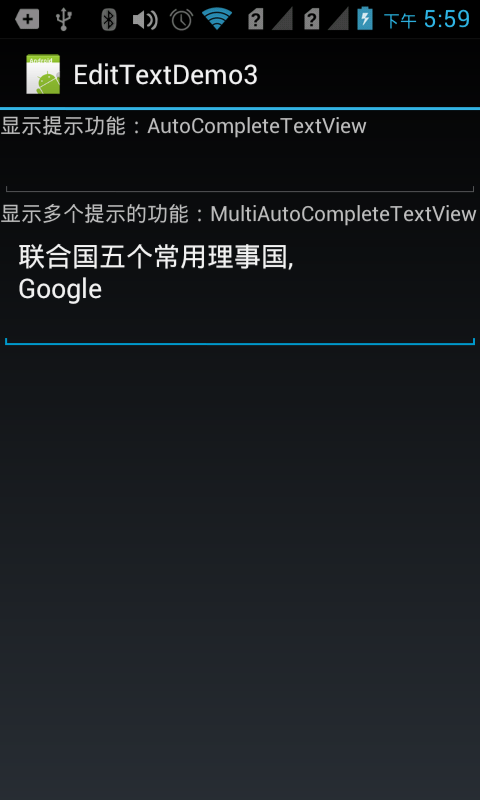
Demo执行结果:
- <TextView
- android:layout_width="fill_parent"
- android:layout_height="wrap_content"
- android:text="显示提示功能:AutoCompleteTextView" />
- <AutoCompleteTextView
- android:id="@+id/autotext"
- android:layout_width="fill_parent"
- android:layout_height="wrap_content" />
- <TextView
- android:layout_width="fill_parent"
- android:layout_height="wrap_content"
- android:text="显示多个提示的功能:MultiAutoCompleteTextView" />
- <MultiAutoCompleteTextView
- android:id="@+id/mul"
- android:layout_width="fill_parent"
- android:layout_height="wrap_content" />
[说明]:1. 注意其中AutoCompleteTextView的使用方法可以参考 android api 文档。其中 setAdapter() 适配器的用法是一个很重要的方法,不懂的可以先在网上找这方面的资料,后续也会讲到这方面的内容
2. MultiAutoCompleteTextView是AutoCompleteTextView的子类,它是对AutoCompleteTextView的扩展,但是你必须提供一个 MultiAutoCompleteTextView.Tokenizer来区分不同的字符串,通过使用这个方法:setTokenizer (MultiAutoCompleteTextView.Tokenizer t)。具体使用方法参考案例以及注释
参考:http://developer.android.com/reference/android/widget/AutoCompleteTextView.ht


 被折叠的 条评论
为什么被折叠?
被折叠的 条评论
为什么被折叠?
 到【灌水乐园】发言


