


网上对于delegate,block,notification运用都有介绍,但都是介绍的用法;我这里针对于懒人和一些基础不太好的同学进一步补充介绍(是小demo实战)!
delegate是经典设计模式也就是大部分的语言都可以实现的模式,delegate只是保存了一个对象指针,直接回调,没有额外消耗。
block出栈需要将使用的数据从栈拷贝到堆,当然对象的话就是加计数,使用完或者block置nil后才消除。所以我们用block时要进行弱引用:ARC下:__weak typeof(self) weakSelf = self;非ARC下:__block typeof(self) weakSelf = self;
notification 通知的用法相对就是比较简单的,记住:有添加就要有移除;
delegate用法:
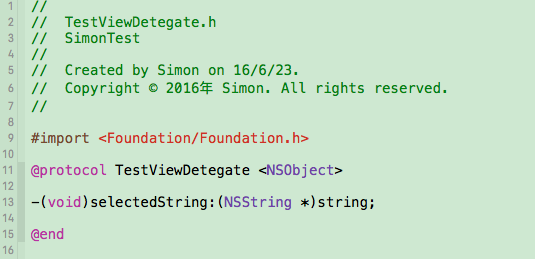
1,定义一个vc(TestViewController),在你定义的vc.h(TestViewController.h)中进行声明
@protocol TestViewDelegate;
@interface TestViewController : UIViewController
@property(assign, nonatomic) id testViewDelegate;
@end
@protocol TestViewDelegate
-(void)selectedString:(NSString *)string;
@end
2,外部写好delegate在调用,在vc(TestViewController)引用TestViewDetegate.h ,之后和1一样。
3,就是传值了,在vc(TestViewController)定义一个button在其点击方法中添加delegate的传值
- (IBAction)back:(id)sender {
if (self.testViewDelegate && [self.testViewDelegate respondsToSelector:@selector(selectedString:)]) {
[self.testViewDelegate selectedString:@”T - T”];
}
}
4,接收delete的传值时,在你的第一个vc(SimonViewController)添加TestViewDelegate,如图1; 点击按钮跳转到(TestViewController)中,并对delegate赋self , 如图1下面代码;
- (IBAction)buttonClick:(id)sender {
TestViewController *vc = [[UIStoryboard storyboardWithName:@”Main” bundle:nil] instantiateViewControllerWithIdentifier:@”TestView”];
vc.testViewDelegate = self;
[self.navigationController pushViewController:vc animated:YES];
}

5,接收到delete传值处理
-(void)selectedString:(NSString *)string{
[self.navigationController popViewControllerAnimated:YES];//返回上个页面
NSLog(@”string — >%@”,string);
}
打印:string — >T - T
block用法:
1,block的声明也是vc.h(TestViewController.h)中进行声明,如下:
typedef void (^TestViewblock)(NSString *string);
@interface TestViewController : UIViewController
@property(nonatomic,strong)TestViewblock testViewBlock;
@end
2,在vc(TestViewController)定义一个button在其点击方法中添加block的传值
- (IBAction)back:(id)sender {
if (_testViewBlock) {
_testViewBlock(@”T - T”);
}
}
3,跳转到vc(TestViewController)及block值处理:
- (IBAction)buttonClick:(id)sender {
TestViewController *vc = [[UIStoryboard storyboardWithName:@”Main” bundle:nil] instantiateViewControllerWithIdentifier:@”TestView”];
[self.navigationController pushViewController:vc animated:YES];
__weak typeof(self) weakSelf=self;//避免block 循环缓存
vc.testViewBlock=^(NSString *string){
[weakSelf.navigationController popViewControllerAnimated:YES];//返回上个页面
NSLog(@”Block—>%@”,string);
};
}
打印:Block—>T - T
notification(通知)用法:
1,在vc(SimonViewController)的viewWillAppear添加通知,为了避免重复添加我这里执行了先移除再添加:
-(void)viewWillAppear:(BOOL)animated{
[super viewWillAppear:animated];
[[NSNotificationCenter defaultCenter] removeObserver:self];//移除通知
[[NSNotificationCenter defaultCenter] addObserver:self selector:@selector(notification:) name:@”test_notification” object:nil];//添加通知
}
2,在vc(TestViewController)点击进行传值
- (IBAction)back:(id)sender {
[[NSNotificationCenter defaultCenter] postNotificationName:@”test_notification” object:@”T - T”];
}
3,在vc(SimonViewController)接收通知处理
-(void)notification:(NSNotification *)notification{
NSString *sting = [notification object];
NSLog(@”sting —>%@”,sting);
}
打印:sting —>T - T
4,在vc(SimonViewController)的viewWillDisappear中移除通知,通知移除后,在vc(TestViewController)进行传值,将不被接收处理;小伙伴们,可以试试!
-(void)viewWillDisappear:(BOOL)animated{
[super viewWillDisappear:animated];
[[NSNotificationCenter defaultCenter] removeObserver:self];
}


 263
263

 被折叠的 条评论
为什么被折叠?
被折叠的 条评论
为什么被折叠?
 到【灌水乐园】发言


