


一.思路
首先,整理NIO进行服务端开发的步骤:
(1)创建ServerSocketChannel,配置它为非阻塞模式。
(2)绑定监听,配置TCP参数,backlog的大小。
(3)创建一个独立的I/O线程,用于轮询多路复用器Selector。
(4)创建Selector,将之前创建的ServerSocketChannel注册到Selector上,监听SelectionKeyACCEPT。
(5)启动I/O线程,在循环体中执行Selector.select()方法,轮训就绪的Channel。
(6)当轮询到了处于就绪状态的Channel时,需要对其进行判断,如果是OP_ACCEPT状态,说明是新的客户端接入,则调用ServerSocketChannel.accept()方法接受新的客户端。
(7)设置新接入的客户端链路SocketChannel为非阻塞模式,配置其他的一些TCP参数。
(8)将SocketChannel注册到Selector,监听OP_READ操作位。
(9)如果轮询的Channel为OP_READ,则说明SocketChannel中有新的就绪的数据包需要读取,则构造ByteBuffer对象,读取数据包。
(10)如果轮询的Channel为OP_WRITE,则说明还有数据没有发送完成,需要继续发送。
二.服务端代码
这里需要注意ByteBuffer的使用,可以见我的另一篇文章NIO中Buffer缓冲区的核心要点
以下代码的实现和上面的思路一致
public class NIOServer implements  Runnable{
    private Selector selector;
    private ByteBuffer readBuffer = ByteBuffer.allocate(1024);
    private ByteBuffer wirteBuffer = ByteBuffer.allocate(1024);
    Scanner scanner = new Scanner(System.in);
    public static void main(String[] args){
        new Thread(new NIOServer()).start();
    }

    public NIOServer() {
        init();
        System.out.println("server NIO start");
    }

    public void init(){
        try {
            this.selector = Selector.open();
            ServerSocketChannel serverSocketChannel = ServerSocketChannel.open();
            serverSocketChannel.configureBlocking(false);
            serverSocketChannel.bind(new InetSocketAddress(8888));
            serverSocketChannel.register(selector, SelectionKey.OP_ACCEPT);
        } catch (IOException e) {
            e.printStackTrace();
        }
        Thread thread = new Thread();
    }


    @Override
    public void run() {
        try {
            while(true){
                selector.select();
                Set<SelectionKey> keys = selector.selectedKeys();
                Iterator<SelectionKey> iterator = keys.iterator();
                while(iterator.hasNext()){
                    SelectionKey key = iterator.next();
                    iterator.remove();
                    if (key.isValid()){
                        if(key.isAcceptable()){
                            accept(key);
                        }
                        if(key.isReadable()){
                            read(key);
                        }
                        if (key.isWritable()){
                            write(key);
                        }
                    }
                }
            }
        } catch (IOException e) {
            e.printStackTrace();
        }


    }

    public void read(SelectionKey key){
        this.readBuffer.clear();
        SocketChannel channel = (SocketChannel) key.channel();
        int res = -1;
        try {
            res = channel.read(readBuffer);
            if(res==-1){
                key.channel().close();
                key.cancel();
            }
            readBuffer.flip();
            byte[] bytes = new byte[readBuffer.remaining()];
            readBuffer.get(bytes);
            System.out.println("from-"+channel.getRemoteAddress()+":"+new String(bytes));
            channel.register(this.selector, SelectionKey.OP_WRITE);
        } catch (IOException e) {
            e.printStackTrace();
        }
    }

    public void write(SelectionKey key){
        try {
            wirteBuffer.clear();
            SocketChannel channel = (SocketChannel) key.channel();
            System.out.println("put message to client");
            String str = scanner.nextLine();
            wirteBuffer.put(str.getBytes());
            wirteBuffer.flip();
            channel.write(wirteBuffer);
            channel.register(this.selector, SelectionKey.OP_READ);
        } catch (IOException e) {
            e.printStackTrace();
        }
    }


    public void accept(SelectionKey key){
        try {
            ServerSocketChannel serverChannel = (ServerSocketChannel) key.channel();
            SocketChannel channel = serverChannel.accept();
            //設置非阻塞
            channel.configureBlocking(false);
            channel.register(this.selector, SelectionKey.OP_READ);
        } catch (IOException e) {
            e.printStackTrace();
        }
    }
}
三.客户端代码
客户端代码就比较简单了...服务端会写,这里基本就没什么问题!
public class NIOClient {

    public static void main(String[] args){
        ByteBuffer readBuffer = ByteBuffer.allocate(1024);
        ByteBuffer wirteBuffer = ByteBuffer.allocate(1024);
        Scanner scanner = new Scanner(System.in);
        SocketChannel channel = null;
        try {

            channel = SocketChannel.open();
            channel.connect(new InetSocketAddress("localhost", 8888));
            while(true){
                System.out.print("put message to Server:");
                String str = scanner.nextLine();
                if (str.equalsIgnoreCase("bye"))break;
                wirteBuffer.clear();
                wirteBuffer.put(str.getBytes());
                wirteBuffer.flip();
                channel.write(wirteBuffer);
                readBuffer.clear();
                int read = channel.read(readBuffer);
                if (read==-1){
                    break;
                }
                readBuffer.flip();
                byte[] bytes = new byte[readBuffer.remaining()];
                readBuffer.get(bytes);
                System.out.println("from server:"+new String(bytes));
            }

        } catch (IOException e) {
            e.printStackTrace();
        } finally {
            if (scanner!=null){
                scanner.close();
            }
            if (channel!=null){
                try {
                    channel.close();
                } catch (IOException e) {
                    e.printStackTrace();
                }
            }
        }
    }
}
四.运行
服务端
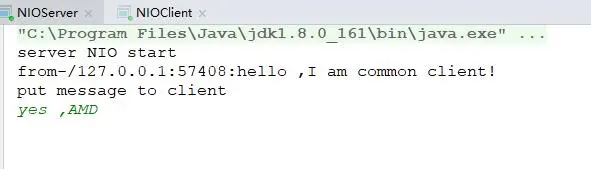
SERVER.jpg
客户端

CLIENT.jpg


 274
274

 被折叠的 条评论
为什么被折叠?
被折叠的 条评论
为什么被折叠?
 到【灌水乐园】发言


