


一:springCloud框架
是springboot的升级框架,其中包含很多子项目
eureka注册中心, feign消费者,Hystrix熔断器,Zuul路由,
Config全局配置中心,Bus消息总线,负载均衡策略
底层基于httpClient实现,发布一个controller类
spring家族:
spring Framework5.0 --》 springboot2.0 --》springcloud Finchley.SR2
springboot(微服务)相对于spring 约定优于配置
二:搭建springCloud框架
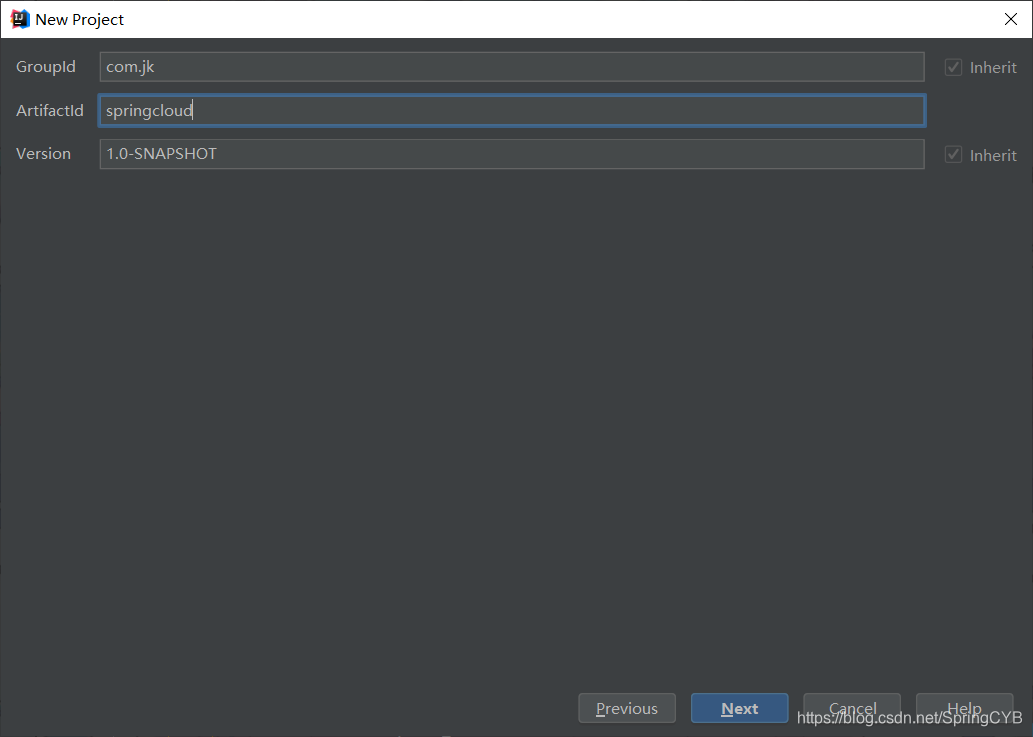
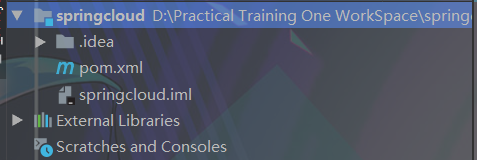
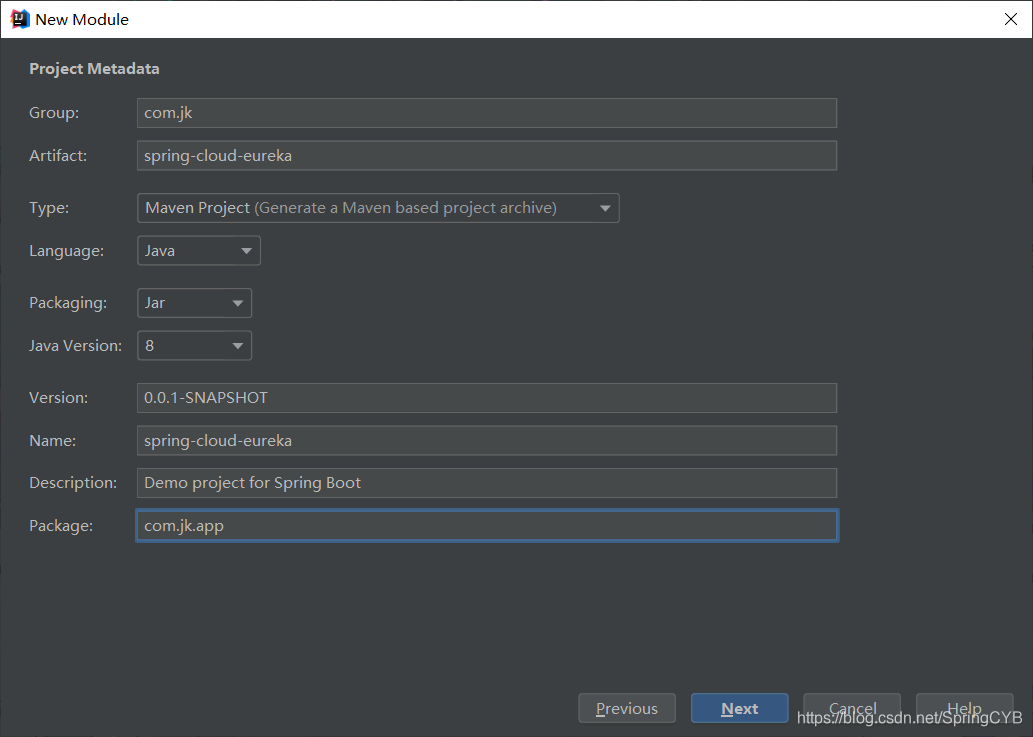
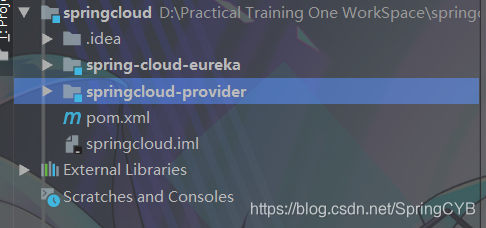
1.创建maven多模块儿项目
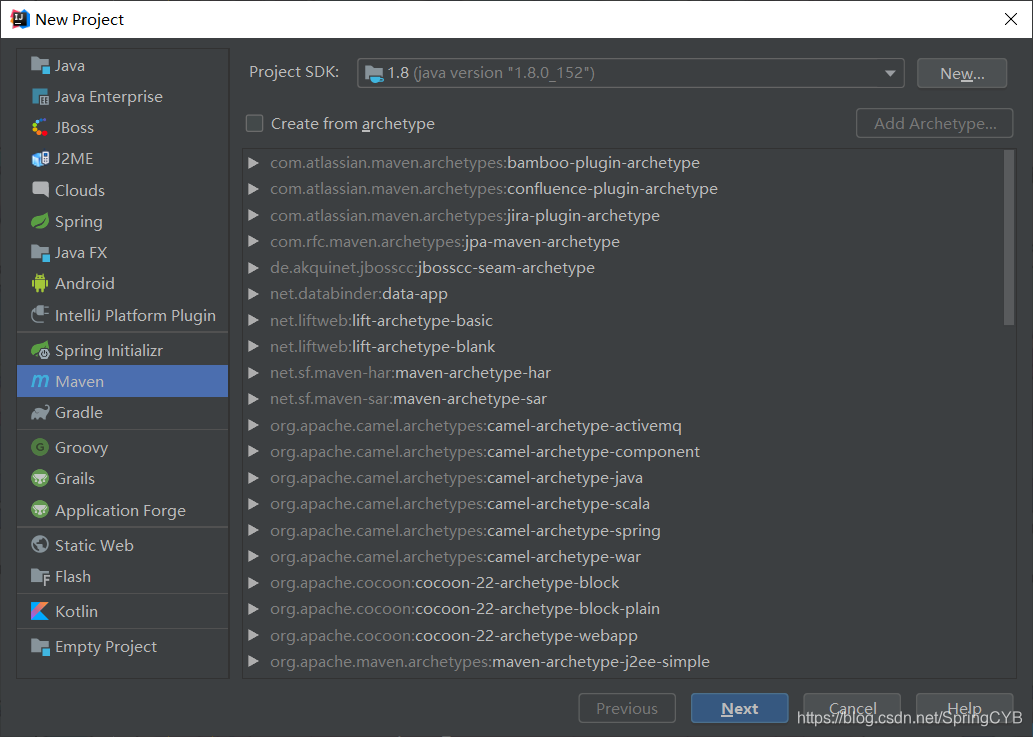
删除src文件夹
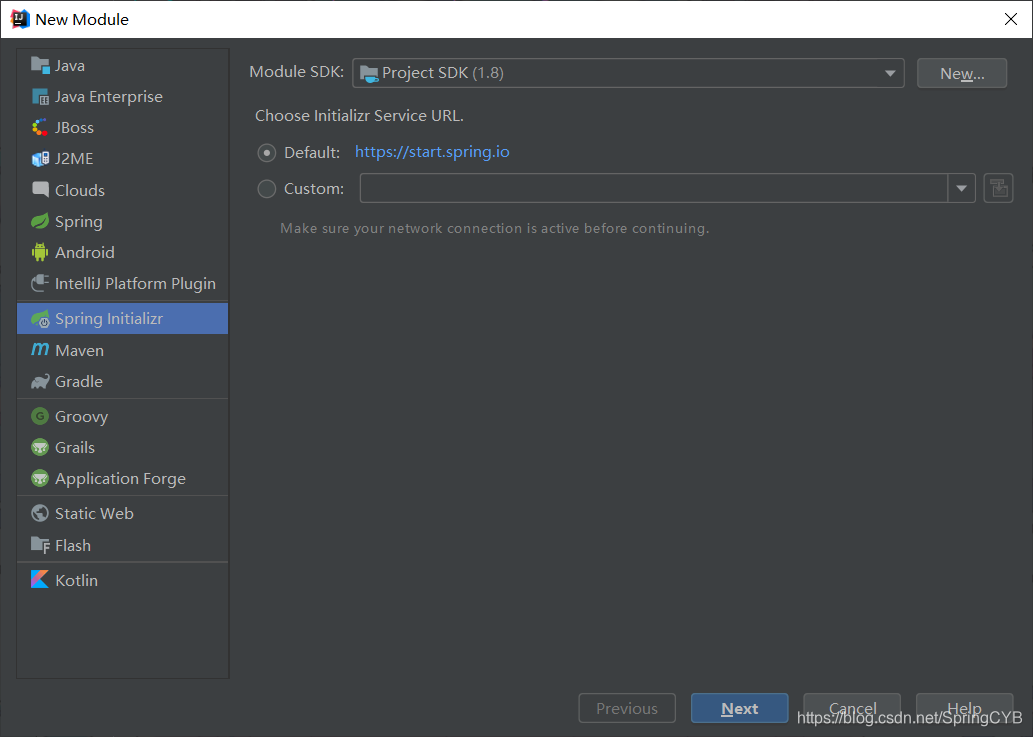
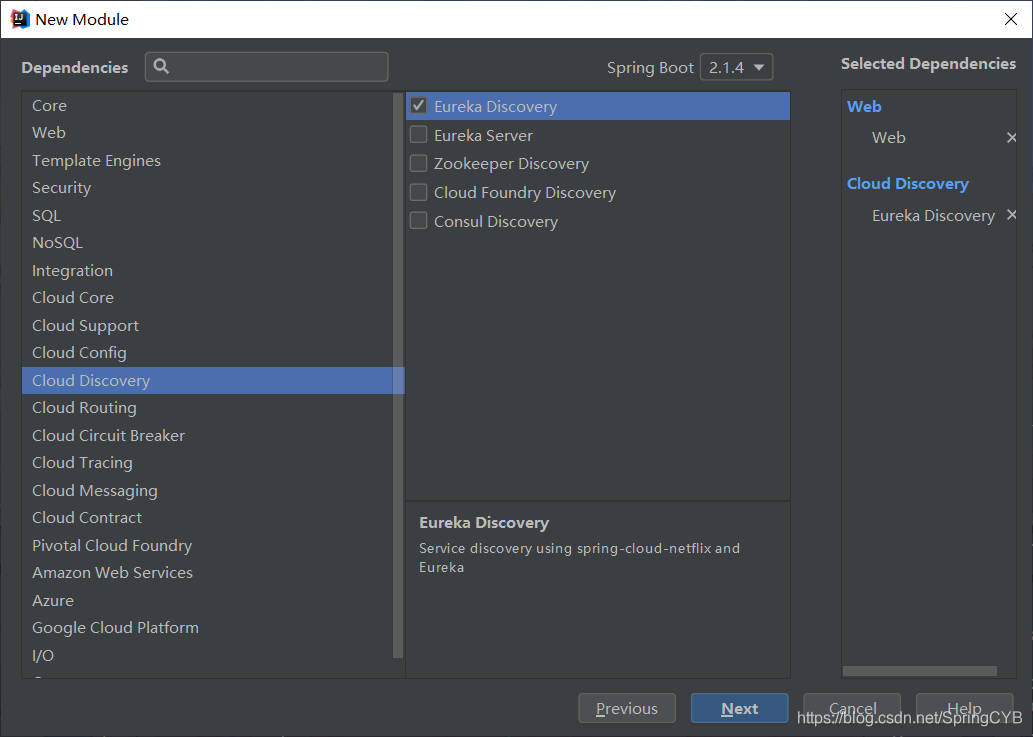
2.在springcloud项目上创建springboot项目勾选cloud discovery --》Eureka Server
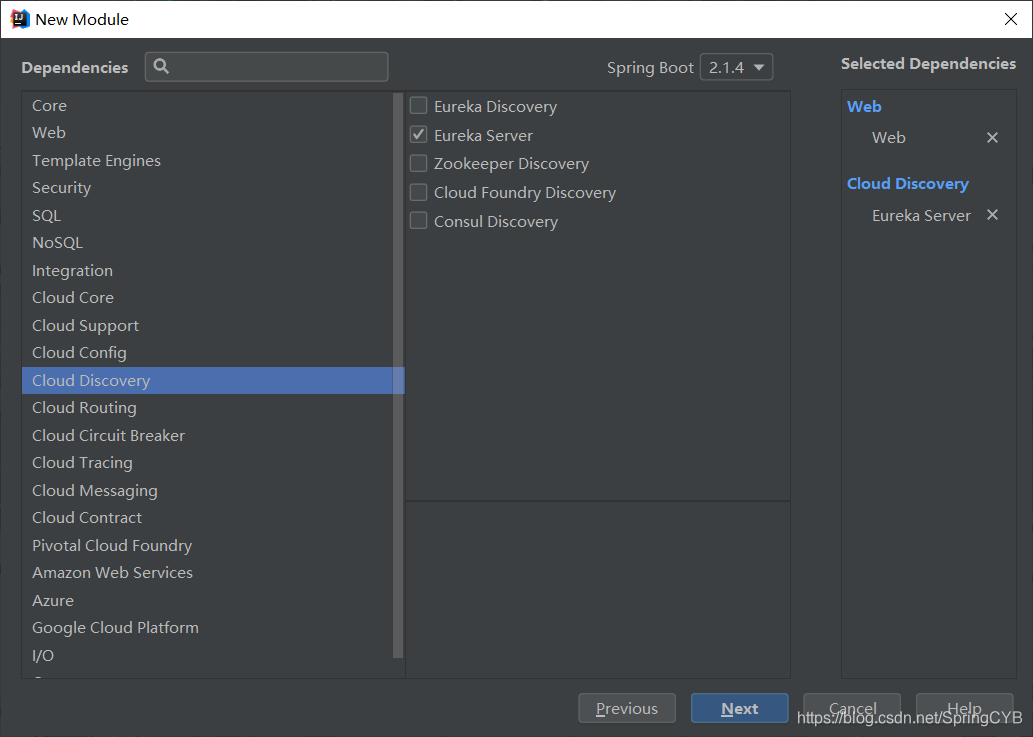
3.在配置类配置Eureka注册服务 Eureka Server
server:
  port: 8761


eureka:
  instance:
    hostname: localhost
  client:
    register-with-eureka: false
    fetch-registry: false
    service-url:
      defaultZone: http://${eureka.instance.hostname}:${server.port}/eureka
  server:
    enable-self-preservation: false
3.在启动类上加@EnableEurekaServer 启用eureka服务端
package com.jk.app;
import org.springframework.boot.SpringApplication;
import org.springframework.boot.autoconfigure.SpringBootApplication;
import org.springframework.cloud.netflix.eureka.server.EnableEurekaServer;
@SpringBootApplication
@EnableEurekaServer
public class SpringCloudEurekaApplication {
public static void main(String[] args) {
SpringApplication.run(SpringCloudEurekaApplication.class, args);
}
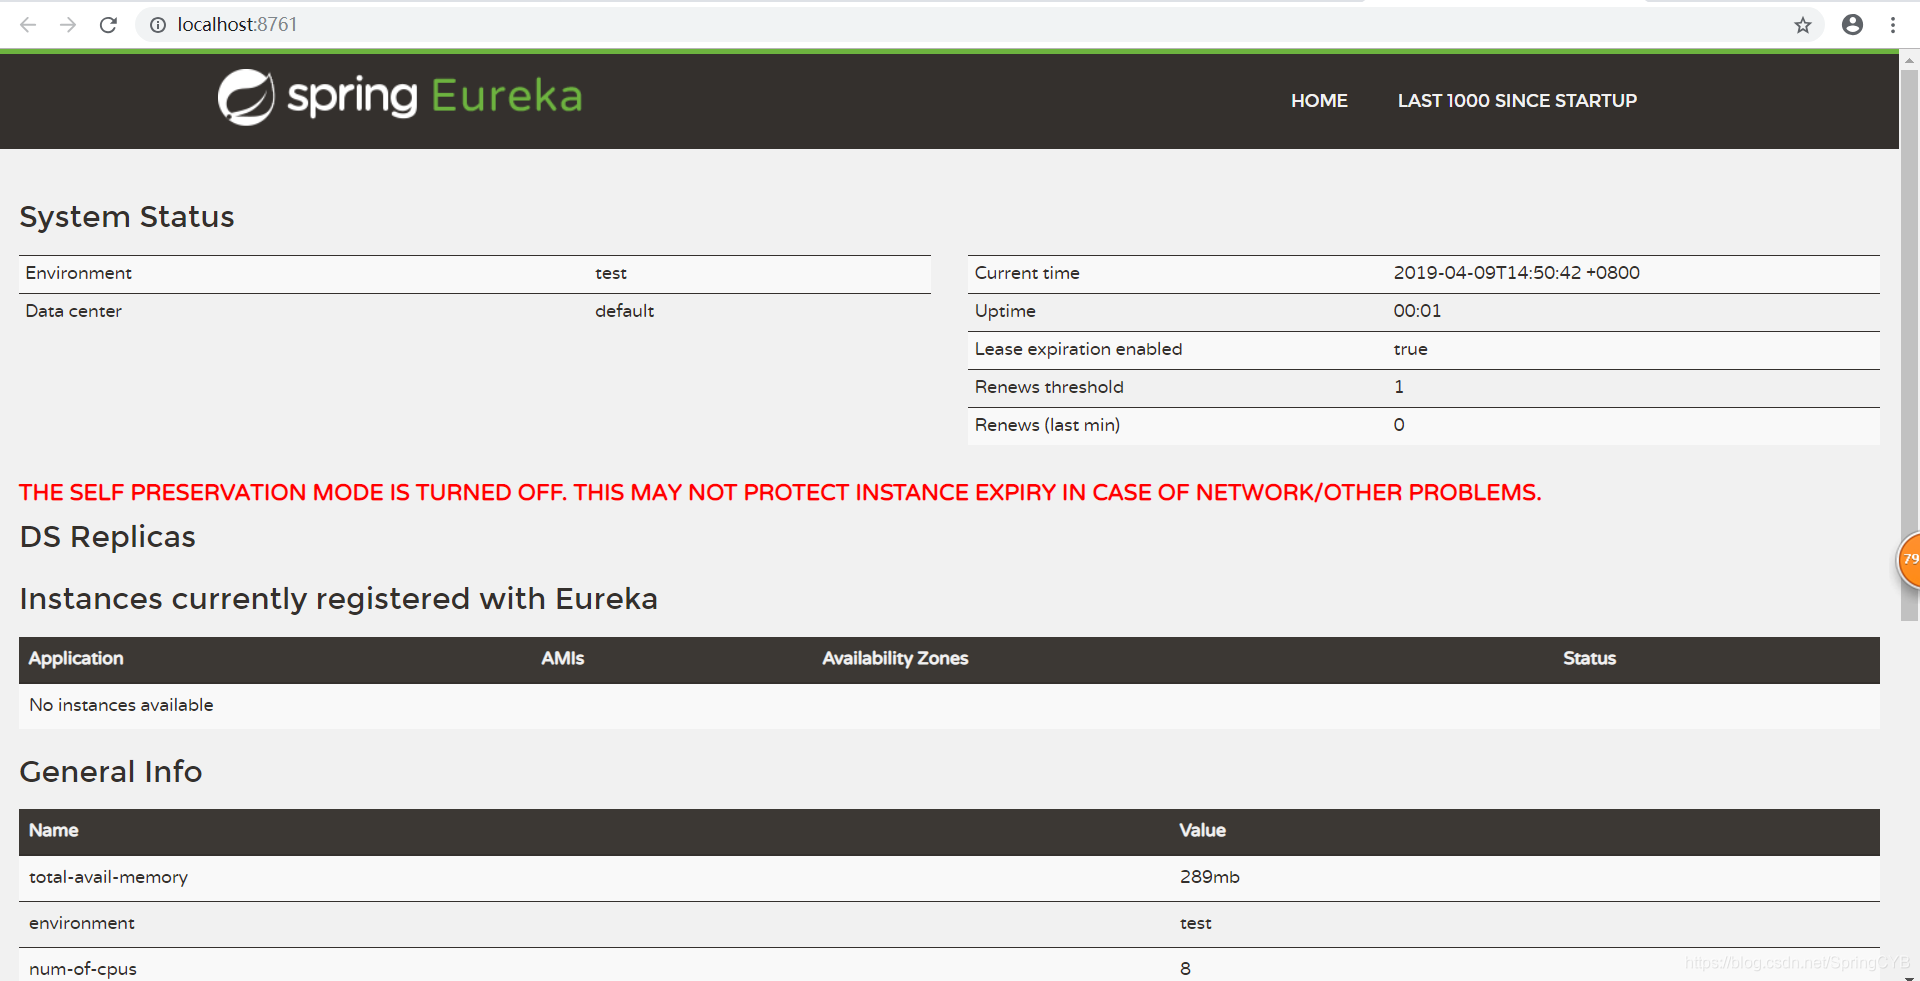
}4.启动项目访问路径地址,访问Eureka注册中心,出现如下图表示访问成功
5.创建一个生产者springcloud-provider
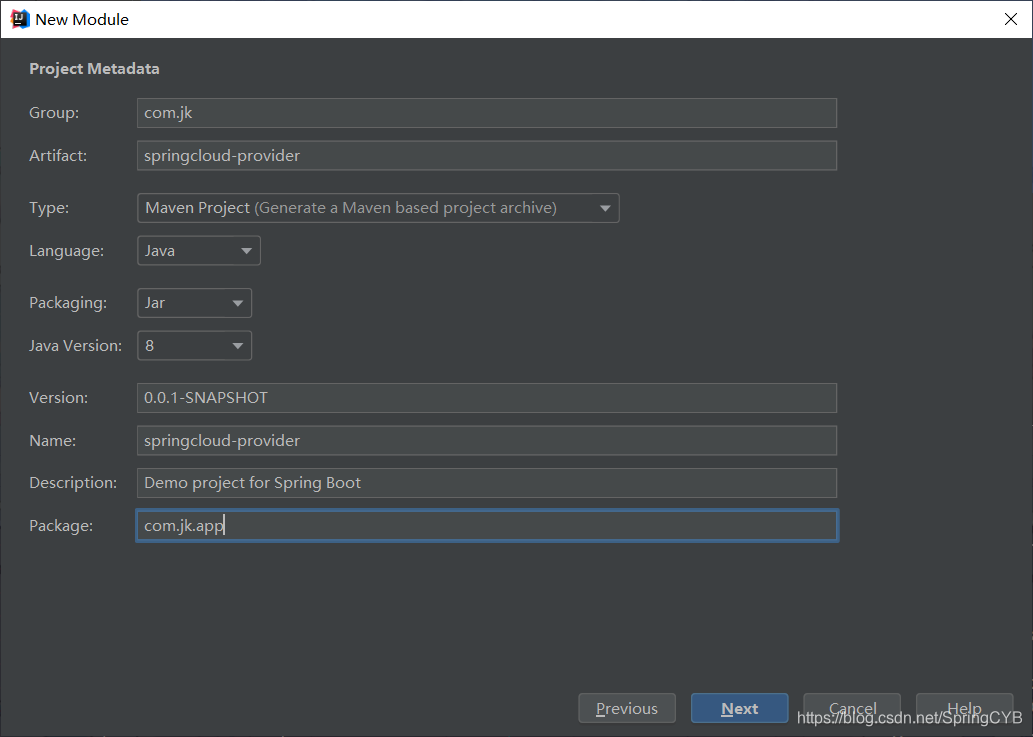
记得勾选Eureka Discover选项
6.配置生产者的配置文件
server:
  port: 8765

spring:
  application:
    name: springcloud-user-reg

eureka:
  client:
    service-url:
      defaultZone: http://localhost:8761/eureka
7.在生产者启动类上加上@EnableEurekaClient注解,并写一个方法进行测试框架是否搭建成功
package com.jk.app;

import org.springframework.beans.factory.annotation.Value;
import org.springframework.boot.SpringApplication;
import org.springframework.boot.autoconfigure.SpringBootApplication;
import org.springframework.cloud.netflix.eureka.EnableEurekaClient;
import org.springframework.web.bind.annotation.GetMapping;
import org.springframework.web.bind.annotation.RestController;

@SpringBootApplication
@EnableEurekaClient
@RestController
@ComponentScan("com.jk.*")
public class SpringcloudProviderApplication {

    public static void main(String[] args) {
        SpringApplication.run(SpringcloudProviderApplication.class, args);

    }

    /**
     * 测试方法
     */

    //动态取端口号,${server.port}和配置文件的值对应
    @Value("${server.port}")
    String post;
    @GetMapping("test")
    public String test(){
        //返回一句话
        return "I post port is :" +post;
    }

}
8.浏览器访问路径
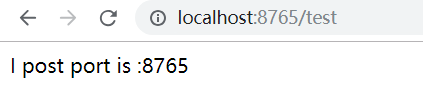
访问成功
9.我们回到Eureka注册中心看一下,发现注册中心已经注册上了!

idea启动多个实例的方法:
Edit Configurations--> single instance only 只能启动单个实力 将勾去掉
Edit Configurations--> Allow running in parallel 允许并行启动 将勾选上
10.接着创建消费者的项目,创建项目选择 Web Eureka Discover Ribbon

11.配置消费者的配置类
server:
  port: 8672

spring:
  application:
    name: springcloud-ribbon

eureka:
  client:
    service-url:
      defaultZone: http://localhost:8761/eureka
12.同样在在启动类上加@EnableEurekaClient 注解
13.在启动类中将RestRestTemplate注入spring中
package com.jk.app;

import org.springframework.boot.SpringApplication;
import org.springframework.boot.autoconfigure.SpringBootApplication;
import org.springframework.cloud.client.loadbalancer.LoadBalanced;
import org.springframework.cloud.netflix.eureka.EnableEurekaClient;
import org.springframework.context.annotation.Bean;
import org.springframework.context.annotation.ComponentScan;
import org.springframework.web.client.RestTemplate;

@SpringBootApplication
@EnableEurekaClient
@ComponentScan("com.jk.*")
public class SpringcloudRibbonApplication {

    public static void main(String[] args) {
        SpringApplication.run(SpringcloudRibbonApplication.class, args);
    }
    // 将RestTemplate注入到spring容器中
    // LoadBalanced负载均衡默认为轮询
    // 通过注入在controller中就可以使用调用生产者实例
    @Bean
    @LoadBalanced
    RestTemplate restTemplate(){
        return new RestTemplate();
    }


}
14.在消费者项目的controller中注入RestTemplate
@Autowired
private RestTemplate restTemplate;
package com.jk.controller;

import org.springframework.beans.factory.annotation.Autowired;
import org.springframework.web.bind.annotation.RestController;
import org.springframework.web.client.RestTemplate;

@RestController
public class UserController {

    @Autowired
    private RestTemplate restTemplate;
}
15.消费者调用生产者
restTemplate.getForObject("http://生产者实例名/请求生产者的Controller方法", 返回值类型.class);
在生产者项目创建Controller,并写一个测试方法测试
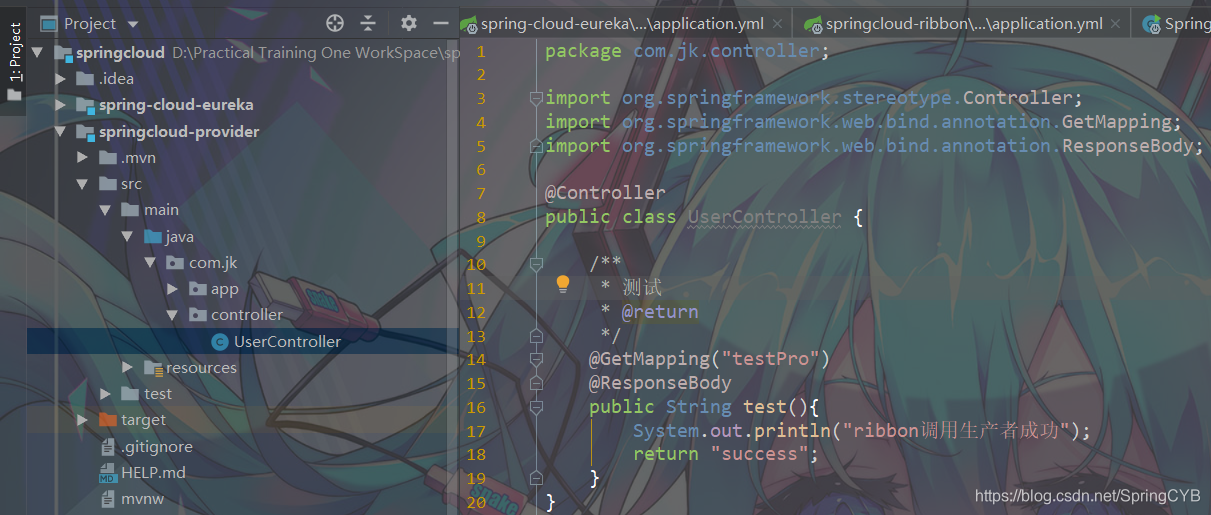
package com.jk.controller;

import org.springframework.stereotype.Controller;
import org.springframework.web.bind.annotation.GetMapping;
import org.springframework.web.bind.annotation.ResponseBody;

@Controller
public class UserController {

    /**
     * 测试
     * @return
     */
    @GetMapping("testPro")
    @ResponseBody
    public String test(){
        System.out.println("ribbon调用生产者成功");
        return "success";
    }
}
16.回到消费者controller调用方法
package com.jk.controller;

import org.springframework.beans.factory.annotation.Autowired;
import org.springframework.web.bind.annotation.GetMapping;
import org.springframework.web.bind.annotation.RestController;
import org.springframework.web.client.RestTemplate;

@RestController
public class UserController {

    @Autowired
    private RestTemplate restTemplate;

    /**
     * 调用生产者
     */

    //调用请求
    //get  查
    //Post  增
    //delete 删
    //put 改
    @GetMapping("select")
    public String select(){
        String result = restTemplate.getForObject("",String.class);
        return result;
    }
}
17.启动项目访问路径
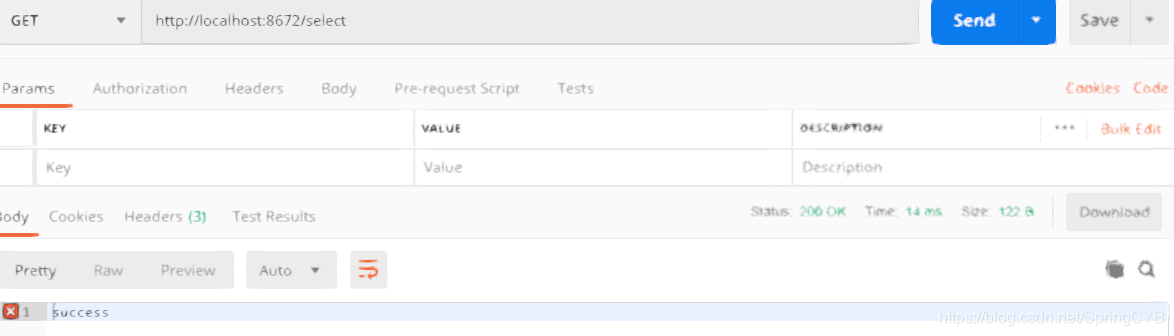
调用方法成功!
18.接着创建common项目接入实体Bean
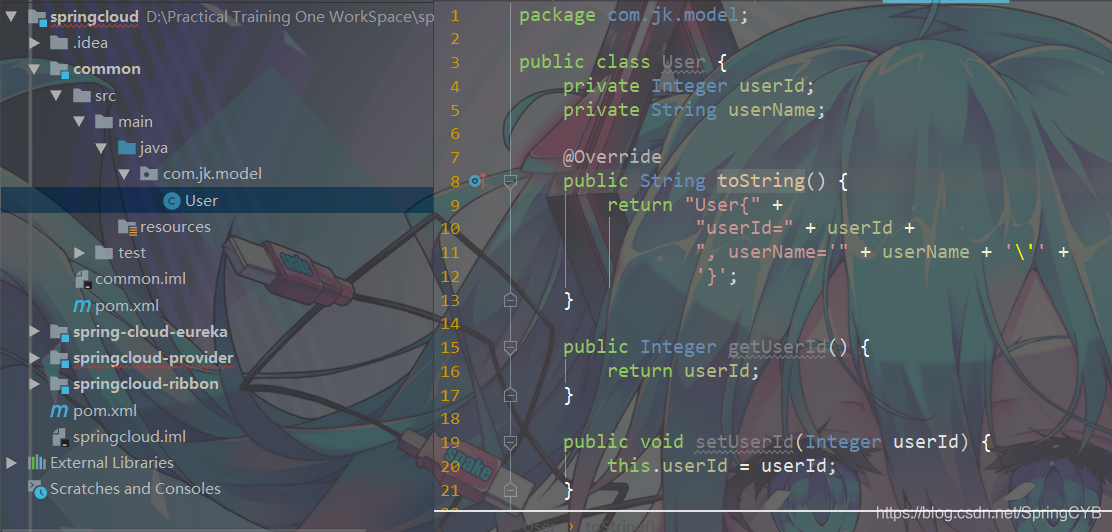
package com.jk.model;

public class User {
    private Integer userId;
    private String userName;


    public Integer getUserId() {
        return userId;
    }

    public void setUserId(Integer userId) {
        this.userId = userId;
    }

    public String getUserName() {
        return userName;
    }

    public void setUserName(String userName) {
        this.userName = userName;
    }

    @Override
    public String toString() {
        return "User{" +
                "userId=" + userId +
                ", userName='" + userName + '\'' +
                '}';
    }
}
13.在provider生产者项目和ribbon消费者的pom.xml文件中引入和common项目的依赖关系
        <dependency>
            <groupId>com.jk</groupId>
            <artifactId>common</artifactId>
            <version>1.0-SNAPSHOT</version>
        </dependency>
14.在生产者的controller中写一个新增的方法
package com.jk.controller;

import com.jk.model.User;
import org.springframework.stereotype.Controller;
import org.springframework.web.bind.annotation.GetMapping;
import org.springframework.web.bind.annotation.PostMapping;
import org.springframework.web.bind.annotation.RequestBody;
import org.springframework.web.bind.annotation.ResponseBody;

@Controller
public class UserController {

    /**
     * 测试
     * @return
     */
    @GetMapping("testPro")
    @ResponseBody
    public String test(){
        System.out.println("ribbon调用生产者成功");
        return "success";
    }

    /**
     * 新增的方法
     */
    @PostMapping("save")
    @ResponseBody
    public User save(@RequestBody User user){
        user.setUserId(11);
        return user;
    }

}
15.在消费者的controller中调用生产者发布的新增接口
@PostMapping("save")
    public User save(){
        User user = new User();
        user.setUserName("路明非");
        User user1 = restTemplate.postForObject("http://SPRINGCLOUD-USER-REG/save", user, User.class);
        return user1;
    }
16.启动项目访问地址
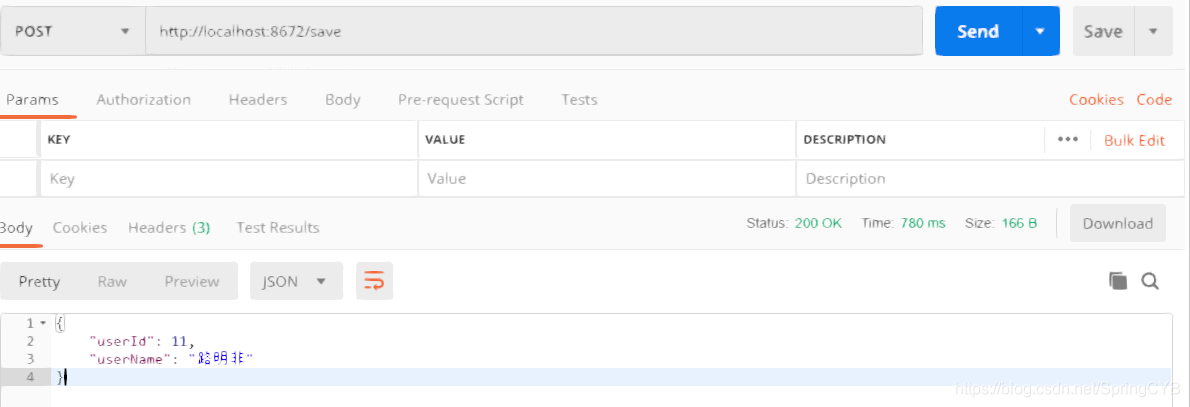
调用成功,搭建完毕。开始连接数据库
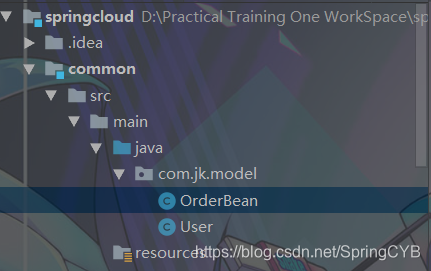
17.我在common项目中写入一个实体类
18.生产者项目中的pom.xml文件中引入数据库核心jar包
        <dependency>
            <groupId>mysql</groupId>
            <artifactId>mysql-connector-java</artifactId>
            <version>5.1.4</version>
        </dependency>
        <dependency>
            <groupId>org.mybatis.spring.boot</groupId>
            <artifactId>mybatis-spring-boot-starter</artifactId>
            <version>1.3.2</version>
        </dependency>
19.生产者项目配置类配置
server:
  port: 8765


spring:
  application:
    name: springcloud-user-reg
  datasource:
    driver-class-name: com.mysql.jdbc.Driver
    url: jdbc:mysql://localhost:3306/math?serverTimezone=Hongkong&useUnicode=true&characterEncoding=utf-8
    username: root
    password: root

eureka:
  client:
    service-url:
      defaultZone: http://localhost:8761/eureka
mybatis:
  mapper-locations: classpath:mapper/*.xml
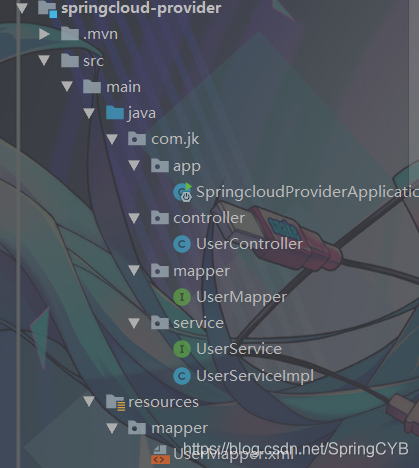
20.创建包结构
controller层记得加controller注解,Autowired注解注入service层
 /**
     * 数据库查询order列表
     *
     */
    @GetMapping("queryOrder")
    @ResponseBody
    public List<OrderBean> queryOrder(){
        return userService.queryOrder();
    }
service层
/**
     * 查询
     * @return
     */
    List<OrderBean> queryOrder();
serviceImpl层记得加Service注解,Autowired注解注入Mapper层
    @Override
    public List<OrderBean> queryOrder() {
        return userMapper.queryOrder();
    }
mapper层
    @Select("select * from t_order")
    List<OrderBean> queryOrder();
20.在生产者启动类加上@MapperScan("com.jk.mapper")扫描Mapper层
21.消费者Controller层调用查询方法
 /**
     * 调用生产者查询方法
     */
    @GetMapping("queryOrder")
    public List<OrderBean> queryOrder(){
        List forObject = restTemplate.getForObject("http://SPRINGCLOUD-USER-REG/queryOrder", List.class);
        return forObject;
    }
22.启动项目访问
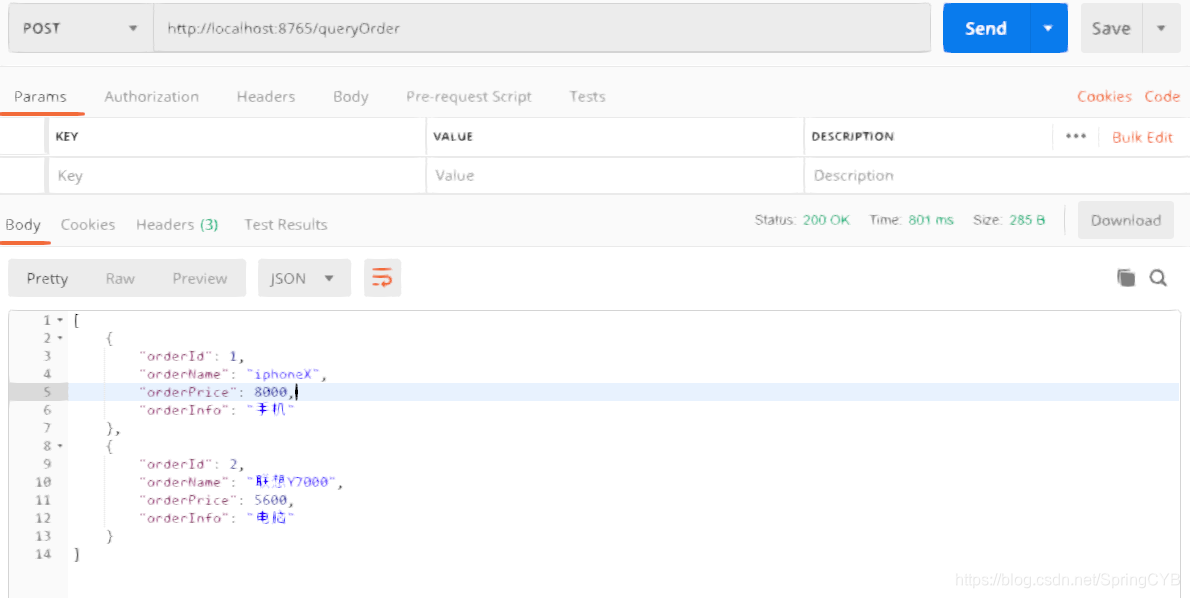
查询成功
我的mysql数据库
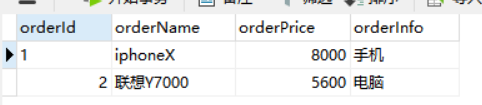
连接数据库成功!


 2567
2567


 被折叠的 条评论
为什么被折叠?
被折叠的 条评论
为什么被折叠?
 到【灌水乐园】发言


