


登录页面有个验证码,暂时没用到后台,在网上找了两个博客,记录一下。
一、直接写(参考-UIEngineer)
这个样式比较简单,直接在需要验证码的地方添加就行了。如果这个页面比较复杂,用组件会比较好。
<template>
     <div class="join_formitem">
       <label class="enquiry">验证码<span>:</span></label>
       <div class="captcha">
         <input type="text" placeholder="请输入验证码" class="yanzhengma_input" v-model="picLyanzhengma" />
         <input type="button" @click="createdCode" class="verification" v-model="checkCode" />
       </div>
    </div>
</template>

<script>
export default {
  data(){
    return{
      code:'',
      checkCode:'',
      picLyanzhengma:''         //..验证码图片
    }
  },
  created(){
    this.createdCode()
  },
  methods: {
    // 图片验证码
    createdCode(){
      // 先清空验证码输入
      this.code = ""
      this.checkCode = ""
      this.picLyanzhengma = ""
      // 验证码长度
      const codeLength = 4
      // 随机数
      const random = new Array(0,1,2,3,4,5,6,7,8,9,'A','B','C','D','E','F','G','H','I','J','K','L','M','N','O','P','Q','R','S','T','U','V','W','X','Y','Z')
      for(let i = 0;i < codeLength;i++){
        // 取得随机数的索引(0~35)
        let index = Math.floor(Math.random() * 36)
        // 根据索引取得随机数加到code上
        this.code += random[index]
      }
      // 把code值赋给验证码
      this.checkCode = this.code
    }
  }
}
</script>

<style>
.yanzhengma_input{
  font-family: 'Exo 2',sans-serif;
  border: 1px solid #fff;
  color: #fff;
  outline: none;
  border-radius: 12px;
  letter-spacing: 1px;
  font-size: 17px;
  font-weight: normal;
  background-color: rgba(82,56,76,.15);
  padding: 5px 0 5px 10px;
  margin-left: 30px;
  height: 30px;
  margin-top: 25px;
  border: 1px solid #e6e6e6;
}
.verification{
  border-radius: 12px;
  width: 100px;
  letter-spacing: 5px;
  margin-left: 50px;
  height: 40px;
  transform: translate(-15px,0);
}
.captcha{
  height:50px;
  text-align: justify;
}
</style>
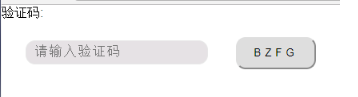
效果:
二、组件(参考-我在长安长安)
1. 新建一个文件夹 verificationCode(文件夹随便自己命名),然后在该文件下新建一个 index.vue,复制下面的代码:
<template>
  <div class="ValidCode disabled-select" :style="`width:${width}; height:${height}`" @click="refreshCode">
    <span v-for="(item, index) in codeList" :key="index" :style="getStyle(item)">{{item.code}}</span>
  </div>
</template>

<script>
export default {
  name: 'validCode',
  props: {
    width: {
      type: String,
      default: '100px'
    },
    height: {
      type: String,
      default: '48px'
    },
    length: {
      type: Number,
      default: 4
    }
  },
  data () {
    return {
      codeList: []
    }
  },
  mounted () {
    this.createdCode()
  },
  methods: {
    //刷新验证码的方法
    refreshCode () {
      this.createdCode()
    },
    // 生成验证码的方法
    createdCode () {
      let len = this.length,
        codeList = [],
        chars = 'ABCDEFGHJKMNPQRSTWXYZabcdefhijkmnprstwxyz0123456789',
        charsLen = chars.length
      // 生成
      for (let i = 0; i < len; i++) {
        let rgb = [Math.round(Math.random() * 220), Math.round(Math.random() * 240), Math.round(Math.random() * 200)]
        codeList.push({
          code: chars.charAt(Math.floor(Math.random() * charsLen)),
          color: `rgb(${rgb})`,
          fontSize: `1${[Math.floor(Math.random() * 10)]}px`,
          padding: `${[Math.floor(Math.random() * 10)]}px`,
          transform: `rotate(${Math.floor(Math.random() * 90) - Math.floor(Math.random() * 90)}deg)`
        })
      }
      // 指向
      this.codeList = codeList;
      // 将当前数据派发出去
      // this.$emit('update:value', codeList.map(item => item.code).join(''))
      this.$emit('sendData', codeList.map(item => item.code).join(''));
      //this.$emit('暴露给父组件的方法名',携带的参数); //记住你命名的这个方法
    },
    // 每个元素生成动态的样式
    getStyle (data) {
      return `color: ${data.color}; font-size: ${data.fontSize}; padding: ${data.padding}; transform: ${data.transform}`
    }
  }
}
</script>

<style scoped lang="scss">
  .ValidCode{
    display: flex;
    justify-content: center;
    align-items: center;
    cursor: pointer;
    span{
      display: inline-block;
    }
  }
</style>
2. 在父组件中使用
<validCode v-model="validCode" @sendData="getCode"></validCode>

//在<script>下面引入组件
import validCode from '@/components/verificationCode'

data(){
	return{
		validCode:""
	}
},
methods:{
//在方法中获取验证码的数据
//从子组件获取验证码,并将验证码返回到页面
  getCode(data){
    console.log(data)
    this.validCode = data;//在data中定义一个 validCode:'',用来记录验证码。
  }
}

3. 鉴于有的小伙伴需要,第三步就贴全部代码吧。
<el-form :model="loginForm" :rules="rules" ref="loginForm"
         class="demo-ruleForm login-form">
  <el-form-item prop="userName">
    <el-input v-model="loginForm.userName" style="width:418px" placeholder="输入您的账号或手机号" class="nobr" size="meddle" autocomplete="off"></el-input>
  </el-form-item>

  <el-form-item prop="password">
    <el-input show-password v-model="loginForm.password" style="width:418px" placeholder="输入您的密码" class="nobr" autocomplete="off"></el-input>
  </el-form-item>

  <el-form-item required>
    <el-col :span="18">
      <el-form-item prop="validCode">
        <el-input v-model="loginForm.validCode" style="width:313px" placeholder="输入验证码(忽略大小写)" class="nobr"></el-input>
      </el-form-item>
    </el-col>

    <el-col :span="6" align="right">
      <validCode v-model="validCode" ref="refresh" @sendData="getCode"></validCode>
    </el-col>

  </el-form-item>

  <el-form-item>
    <el-button type="primary" class="nobr" style="width:418px;" @click="submitForm('loginForm')">登录</el-button>
  </el-form-item>
</el-form>

<script>
import validCode from '@/components/verificationCode'

data(){
  let validUserName = (rule,value,callback) =>{
    if(!value){
      return callback(new Error('用户名不能为空'));
    }
    else {
      callback();
    }
  }

  let validPassword = (rule,value,callback) =>{
    if(!value){
      return callback(new Error('密码不能为空'));
    } else{
      callback();
    }
  }

  const checkValidCode = (rule, value, callback) => {
    if (!value) {
      callback(new Error('请输入验证码'))
    } else if (value.toUpperCase() !== this.validCode.toUpperCase()) {
      callback(new Error('验证码不正确'))
    } else {
      callback()
    }
  }

  return {
    validCode:"",

    loginForm:{
      userName: "",
      password: ""
    },
    rules:{
      userName:[
        { validator: validUserName, trigger: 'blur' }
      ],
      password:[
        { validator: validPassword, trigger: 'blur' }
      ],
      validCode:[
        { validator: checkValidCode, trigger: 'blur' }
      ]
    }
  }
},
  methods:{
    submitForm(formName){
       this.$refs[formName].validate((valid) => {
          if (valid) {
            //调用录接口
            //如果登录失败,需要刷新验证码的
            this.$refs.refresh.createdCode();
            this.validCode = ""; //清空验证码输入框的内容
          } else {
            console.log('error submit!!');
            return false;
          }
        });
    },

    //从子组件获取验证码,并将验证码返回到页面
    getCode(data){
      // console.log(data)
      this.validCode = data;
    }
</script>


 被折叠的 条评论
为什么被折叠?
被折叠的 条评论
为什么被折叠?
 到【灌水乐园】发言


