


Thymealeaf模板引擎入门
一、Thymeleaf简述
简单说, Thymeleaf 是一个跟 Velocity、FreeMarker 类似的模板引擎,它可以完全替代 JSP 。相较与其他的模板引擎,它有如下三个极吸引人的特点:
1、Thymeleaf 在有网络和无网络的环境下皆可运行,即它可以让美工在浏览器查看页面的静态效果,也可以让程序员在服务器查看带数据的动态页面效果。这是由于它支持 html 原型,然后在 html 标签里增加额外的属性来达到模板+数据的展示方式。浏览器解释 html 时会忽略未定义的标签属性,所以 thymeleaf 的模板可以静态地运行;当有数据返回到页面时,Thymeleaf 标签会动态地替换掉静态内容,使页面动态显示。
2、Thymeleaf 开箱即用的特性。它提供标准和spring标准两种方言,可以直接套用模板实现JSTL、 OGNL表达式效果,避免每天套模板、该jstl、改标签的困扰。同时开发人员也可以扩展和创建自定义的方言。
3、Thymeleaf 提供spring标准方言和一个与 SpringMVC 完美集成的可选模块,可以快速的实现表单绑定、属性编辑器、国际化等功能。
二、Spring Boot项目Thymeleaf模板页面存放位置
Spring Boot的Thymeleaf支持:
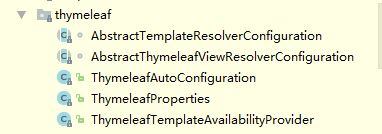
通过Thymeleaf类对集成所需的Bean进行自动配置,包括templateResolver、templateEngine和thymeleafViewResolver的配置。
1、创建Spring Boot项目boot_thymeleaf_demo
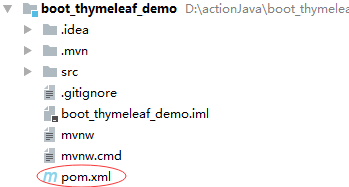
pom.xml文件:
-
<?xml version="1.0" encoding="UTF-8"?>
-
<project xmlns="http://maven.apache.org/POM/4.0.0" xmlns:xsi="http://www.w3.org/2001/XMLSchema-instance"
-
xsi:schemaLocation=
"http://maven.apache.org/POM/4.0.0 http://maven.apache.org/xsd/maven-4.0.0.xsd">
-
<modelVersion>4.0.0
</modelVersion>
-
-
<groupId>net.hw
</groupId>
-
<artifactId>boot_thymeleaf_demo
</artifactId>
-
<version>0.0.1-SNAPSHOT
</version>
-
<packaging>jar
</packaging>
-
-
<name>boot_thymeleaf_demo
</name>
-
<description>Demo project for Spring Boot
</description>
-
-
<parent>
-
<groupId>org.springframework.boot
</groupId>
-
<artifactId>spring-boot-starter-parent
</artifactId>
-
<version>1.5.3.RELEASE
</version>
-
<relativePath/>
<!-- lookup parent from repository -->
-
</parent>
-
-
<properties>
-
<project.build.sourceEncoding>UTF-8
</project.build.sourceEncoding>
-
<project.reporting.outputEncoding>UTF-8
</project.reporting.outputEncoding>
-
<java.version>1.8
</java.version>
-
</properties>
-
-
<dependencies>
-
<dependency>
-
<groupId>org.springframework.boot
</groupId>
-
<artifactId>spring-boot-starter-thymeleaf
</artifactId>
-
</dependency>
-
-
<dependency>
-
<groupId>org.springframework.boot
</groupId>
-
<artifactId>spring-boot-starter-test
</artifactId>
-
<scope>test
</scope>
-
</dependency>
-
</dependencies>
-
-
<build>
-
<plugins>
-
<plugin>
-
<groupId>org.springframework.boot
</groupId>
-
<artifactId>spring-boot-maven-plugin
</artifactId>
-
</plugin>
-
</plugins>
-
</build>
-
-
</project>
2、在templates目录创建index.html
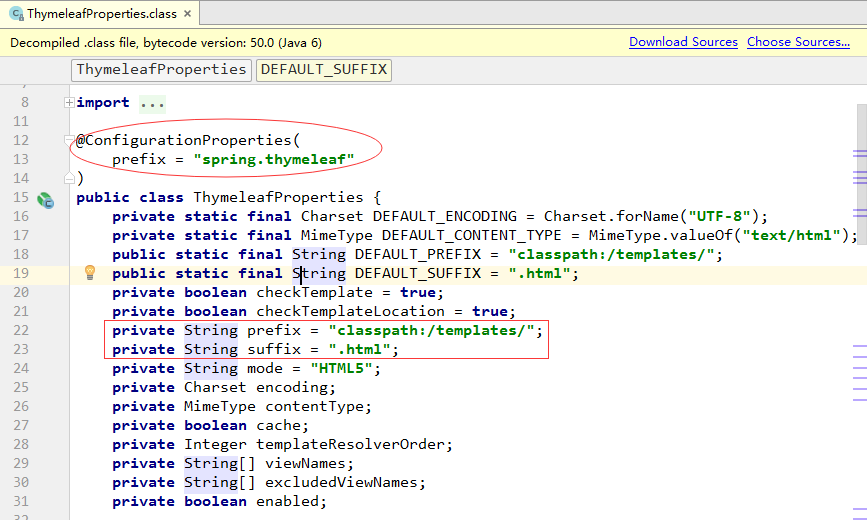
默认的thymeleaf模板页面应该放在resources/templates目录里。

-
<!DOCTYPE html>
-
<html lang="en">
-
<head>
-
<meta charset="UTF-8"/>
-
<title>index
</title>
-
</head>
-
<body>
-
<h1>Thymeleaf Page: Welcome to Spring Boot World!
</h1>
-
<h1>File Location: resources/templates/index.html
</h1>
-
</body>
-
</html>
3、创建控制器HomeController,定义请求映射方法

4、启动程序,访问http://localhost:8080/index

5、在main里创建目录结构webapp/WEB-INF/page,在里面创建index.html

-
<!DOCTYPE html>
-
<html lang="en">
-
<head>
-
<meta charset="UTF-8"/>
-
<title>index
</title>
-
</head>
-
<body>
-
<h1>Thymeleaf Page: Welcome to Spring Boot World!
</h1>
-
<h1>File Location: webapp/WEB-INF/page/index.html
</h1>
-
</body>
-
</html>
6、在application.properties里设置thymeleaf的前缀

7、启动程序,访问http://localhost:8080/index

由此可见,Spring Boot的自动配置确实很好用,只要设置一下属性就可以轻易搞定。
引入bootstrap到上述项目:

三、Thymeleaf模板基本语法
(一)简单表达式
1、变量的表达式:${...}
2、选择变量表达式:*{...}
3、信息表达式:#{...}
4、链接URL表达式:@{...}
(二)字面值
1、文本文字:'one text', 'Another one!',…
2、文字数量:0, 34, 3.0, 12.3,…
3、布尔型常量:true, false
4、空的文字:null
5、文字标记:one, sometext, main,…
(四)文本处理
1、字符串并置:+
2、文字替换:|The name is ${name}|
(五)表达式基本对象
1、#ctx:上下文对象
2、#vars:上下文变量
3、#locale:上下文语言环境
4、#httpServletRequest:(只有在Web上下文)HttpServletRequest对象
5、#httpSession:(只有在Web上下文)HttpSession对象。
用法:<span th:text="${#locale.country}">US</span>.
(六)实用工具对象
#dates: java.util的实用方法。对象:日期格式、组件提取等.
#calendars:类似于#日期,但对于java.util。日历对象
#numbers:格式化数字对象的实用方法。
#strings:字符串对象的实用方法:包含startsWith,将/附加等。
#objects:实用方法的对象。
#bools:布尔评价的实用方法。
#arrays:数组的实用方法。
#lists:list集合。
#sets:set集合。
#maps:map集合。
#aggregates:实用程序方法用于创建聚集在数组或集合.
#messages:实用程序方法获取外部信息内部变量表达式,以同样的方式,因为它们将获得使用# {…}语法
#ids:实用程序方法来处理可能重复的id属性(例如,由于迭代)。
四、案例演示
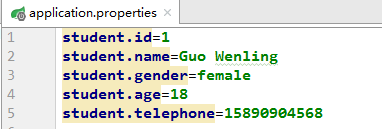
1、在application.properties文件定义属性
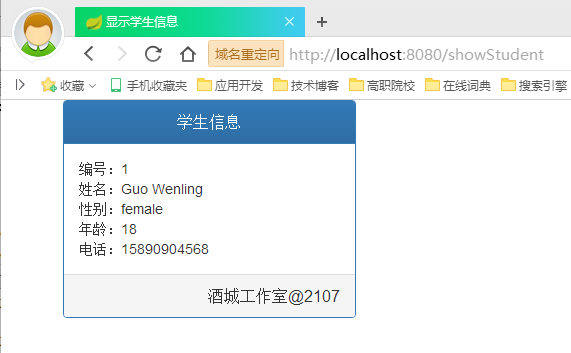
2、在templates里创建showStudent.html
利用thymeleaf消息表达式#{...}访问属性文件的数据,主要用于国际化。
利用thymeleaf超链接表达式@{...}访问静态资源或动态资源。(th:src='@{...}'、th:href='@{...}'、th:action='@{...}')
-
<!DOCTYPE html>
-
<html xmlns:th="http://www.thymeleaf.org">
-
<head>
-
<title>显示学生信息
</title>
-
<meta charset="UTF-8"/>
-
<meta name="viewport" content="width=device-width, initial-scale=1"/>
-
<link th:href="@{/bootstrap/css/bootstrap.css}" href="../static/bootstrap/css/bootstrap.css" rel="stylesheet"/>
-
<link th:href="@{/bootstrap/css/bootstrap-theme.css}" href="../static/bootstrap/css/bootstrap-theme.css"
-
rel=
"stylesheet"/>
-
<script th:src="@{/scripts/jquery-3.1.1.min.js}" src="../static/scripts/jquery-3.1.1.min.js">
</script>
-
<script th:src="@{/bootstrap/js/bootstrap.js}" src="../static/bootstrap/js/bootstrap.js">
</script>
-
</head>
-
<body>
-
<div class="container">
-
<div class="row">
-
<div class="col-md-4">
-
<div class="panel panel-primary">
-
<div class="panel-heading text-center">
-
<span class="panel-title">学生信息
</span>
-
</div>
-
<div class="panel-body">
-
编号:
<span th:text="#{student.id}">2
</span>
<br/>
-
姓名:
<span th:text="#{student.name}">萌萌哒
</span>
<br/>
-
性别:
<span th:text="#{student.gender}">男
</span>
<br/>
-
年龄:
<span th:text="#{student.age}">20
</span>
<br/>
-
电话:
<span th:text="#{student.telephone}">15890905678
</span>
<br/>
-
</div>
-
<div class="panel-footer text-right">
-
<span class="panel-title">酒城工作室@2107
</span>
-
</div>
-
</div>
-
</div>
-
</div>
-
</div>
-
</body>
-
</html>
在客户端显示页面:

只是显示静态数据,必须要通过服务端才能获取动态数据,替换静态数据,显示在模板页面。
4、在HomeController里添加请求映射方法

此时,启动程序,访问http://localhost:8080/showStudent

没有正确读取application.properties文件里定义的学生信息。
5、创建国际化配置类I18NConfig,定义资源包消息源Bean

-
package net.hw.config;
-
-
import org.springframework.context.
annotation.Bean;
-
import org.springframework.context.
annotation.Configuration;
-
import org.springframework.context.support.ResourceBundleMessageSource;
-
-
import java.io.File;
-
-
/**
-
* Created by howard on 2017/4/25.
-
*/
-
@Configuration
-
public
class I18NConfig {
-
@Bean
-
public ResourceBundleMessageSource messageSource() {
-
ResourceBundleMessageSource messageSource = new ResourceBundleMessageSource();
-
messageSource.setUseCodeAsDefaultMessage(
true);
-
messageSource.setFallbackToSystemLocale(
false);
-
messageSource.setBasename(
"application");
-
messageSource.setDefaultEncoding(
"UTF-8");
-
messageSource.setCacheSeconds(
2);
-
return messageSource;
-
}
-
}
说明:
setBaseName设置消息源的文件名,messageSource.setBasename("application");,表明消息源是以applicition打头的属性文件,如果要设置多个属性文件作为消息源,那么就要用setBaseNames方法来设置,比如:messageSource.setBasenames("student", "application"); 这样就有两个消息源:student.properties和application.properties。
此时启动程序,访问http://localhost:8080/showStudent
替换了静态数据,说明成功读取了application.properties里的数据。
5、在resources里创建application_zh_CN.properties

-
student.id=
1
-
student.
name=郭文玲
-
student.gender=女
-
student.age=
18
-
student.telephone=
15890904568
学生信息的中文版,到时会根据系统语言环境读取响应版本的属性文件。
此时启动程序,访问http://localhost:8080/showStudent
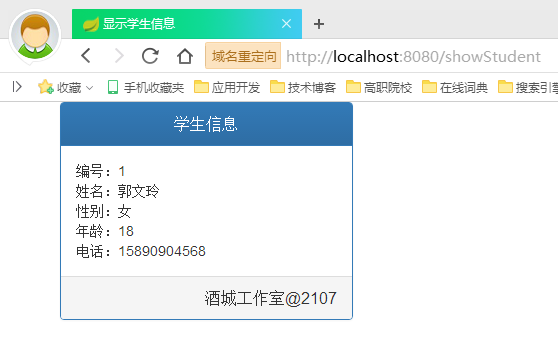
大家可以看到,显示的学生信息中文版,说明读取的是application_zh_CN.properties属性文件里的数据。
6、创建用户实体类User

-
package net.hw.bean;
-
-
import java.util.Date;
-
-
/**
-
* Created by howard on 2017/4/23.
-
*/
-
public
class User {
-
/**
-
* 用户标识符
-
*/
-
private
int id;
-
/**
-
* 用户名
-
*/
-
private String username;
-
/**
-
* 密码
-
*/
-
private String password;
-
/**
-
* 电话号码
-
*/
-
private String telephone;
-
/**
-
* 注册时间
-
*/
-
private Date registerTime;
-
/**
-
* 权限(0:管理员;1:普通用户)
-
*/
-
private
int popedom;
-
-
public int getId() {
-
return id;
-
}
-
-
public void setId(int id) {
-
this.id = id;
-
}
-
-
public String getUsername() {
-
return username;
-
}
-
-
public void setUsername(String username) {
-
this.username = username;
-
}
-
-
public String getPassword() {
-
return password;
-
}
-
-
public void setPassword(String password) {
-
this.password = password;
-
}
-
-
public String getTelephone() {
-
return telephone;
-
}
-
-
public void setTelephone(String telephone) {
-
this.telephone = telephone;
-
}
-
-
public Date getRegisterTime() {
-
return registerTime;
-
}
-
-
public void setRegisterTime(Date registerTime) {
-
this.registerTime = registerTime;
-
}
-
-
public int getPopedom() {
-
return popedom;
-
}
-
-
public void setPopedom(int popedom) {
-
this.popedom = popedom;
-
}
-
-
@
Override
-
public String
toString
() {
-
return
"User{" +
-
"id=" + id +
-
", username='" + username +
'\'' +
-
", password='" + password +
'\'' +
-
", telephone='" + telephone +
'\'' +
-
", registerTime=" + registerTime +
-
", popedom=" + popedom +
-
'}';
-
}
-
}
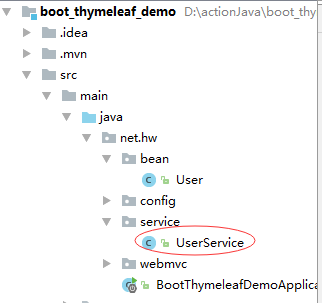
7、创建UserService类
-
package net.hw.service;
-
-
import net.hw.bean.User;
-
import org.springframework.stereotype.Service;
-
-
import java.util.ArrayList;
-
import java.util.Date;
-
import java.util.List;
-
-
/**
-
* Created by howard on 2017/4/25.
-
*/
-
@Service
-
public
class UserService {
-
public User findOneUser() {
-
User user =
new User();
-
user.setId(
1);
-
user.setUsername(
"李文强");
-
user.setPassword(
"12345");
-
user.setTelephone(
"15890904567");
-
user.setRegisterTime(
new Date());
-
user.setPopedom(
0);
-
return user;
-
}
-
-
public List<User> findAllUsers() {
-
List<User> users =
new ArrayList<User>();
-
-
User user =
new User();
-
user.setId(
1);
-
user.setUsername(
"李文强");
-
user.setPassword(
"12345");
-
user.setTelephone(
"15890904567");
-
user.setRegisterTime(
new Date());
-
user.setPopedom(
0);
-
users.add(user);
-
-
user =
new User();
-
user.setId(
2);
-
user.setUsername(
"张海洋");
-
user.setPassword(
"11111");
-
user.setTelephone(
"13990904567");
-
user.setRegisterTime(
new Date());
-
user.setPopedom(
1);
-
users.add(user);
-
-
user =
new User();
-
user.setId(
3);
-
user.setUsername(
"吴文燕");
-
user.setPassword(
"22222");
-
user.setTelephone(
"15890978905");
-
user.setRegisterTime(
new Date());
-
user.setPopedom(
1);
-
users.add(user);
-
-
user =
new User();
-
user.setId(
4);
-
user.setUsername(
"郑智化");
-
user.setPassword(
"33333");
-
user.setTelephone(
"15990956905");
-
user.setRegisterTime(
new Date());
-
user.setPopedom(
1);
-
users.add(user);
-
-
return users;
-
}
-
}
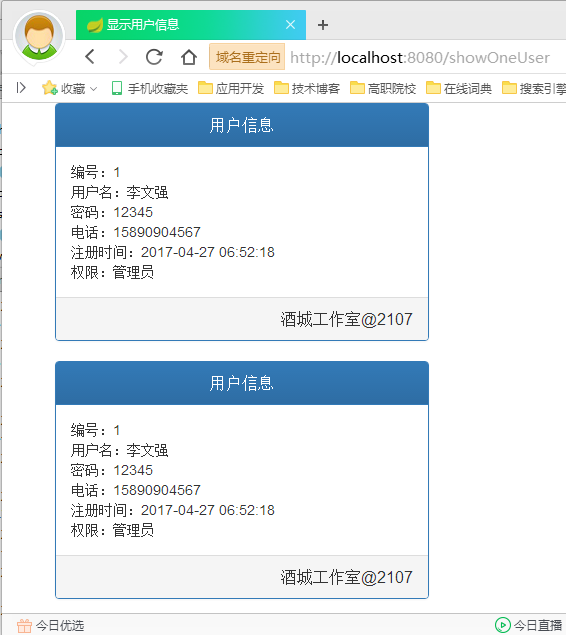
9、在templates里创建showOneUser.html

-
<!DOCTYPE html>
-
<html xmlns:th="http://www.thymeleaf.org">
-
<head>
-
<meta charset="UTF-8"/>
-
<title>显示用户信息
</title>
-
<meta charset="UTF-8"/>
-
<meta name="viewport" content="width=device-width, initial-scale=1"/>
-
<link th:href="@{/bootstrap/css/bootstrap.css}" href="../static/bootstrap/css/bootstrap.css" rel="stylesheet"/>
-
<link th:href="@{/bootstrap/css/bootstrap-theme.css}" href="../static/bootstrap/css/bootstrap-theme.css"
-
rel=
"stylesheet"/>
-
<script th:src="@{/scripts/jquery-3.1.1.min.js}" src="../static/scripts/jquery-3.1.1.min.js">
</script>
-
<script th:src="@{/bootstrap/js/bootstrap.js}" src="../static/bootstrap/js/bootstrap.js">
</script>
-
</head>
-
<body>
-
<div class="container">
-
<div class="row">
-
<div class="col-md-5">
-
<div class="panel panel-primary">
-
<div class="panel-heading text-center">
-
<span class="panel-title">用户信息
</span>
-
</div>
-
<div class="panel-body">
-
编号:
<span th:text="${user.id}">
</span>
<br/>
-
用户名:
<span th:text="${user.username}">
</span>
<br/>
-
密码:
<span th:text="${user.password}">
</span>
<br/>
-
电话:
<span th:text="${user.telephone}">
</span>
<br/>
-
注册时间:
<span th:text="${#dates.format(user.registerTime, 'yyyy-MM-dd hh:mm:ss')}">
</span>
<br/>
-
权限:
<span th:text="${user.popedom==0?'管理员':'普通用户'}">
</span>
<br/>
-
</div>
-
<div class="panel-footer text-right">
-
<span class="panel-title">酒城工作室@2107
</span>
-
</div>
-
</div>
-
</div>
-
</div>
-
<div class="row">
-
<div class="col-md-5">
-
<div class="panel panel-primary">
-
<div class="panel-heading text-center">
-
<span class="panel-title">用户信息
</span>
-
</div>
-
<div class="panel-body">
-
<div th:object="${user}">
-
编号:
<span th:text="*{id}">
</span>
<br/>
-
用户名:
<span th:text="*{username}">
</span>
<br/>
-
密码:
<span th:text="*{password}">
</span>
<br/>
-
电话:
<span th:text="*{telephone}">
</span>
<br/>
-
注册时间:
<span th:text="*{#dates.format(registerTime, 'yyyy-MM-dd hh:mm:ss')}">
</span>
<br/>
-
权限:
<span th:text="*{popedom==0?'管理员':'普通用户'}">
</span>
<br/>
-
</div>
-
</div>
-
<div class="panel-footer text-right">
-
<span class="panel-title">酒城工作室@2107
</span>
-
</div>
-
</div>
-
</div>
-
</div>
-
</div>
-
</body>
-
</html>
说明:此页面采用变量表达式${...}、选择变量表达式*{...}。
为了格式化注册时间,采用#dates对象的format方法。
为了将权限的数字0和1转换成“管理员”和“普通用户”,采用了三元运算符 (逻辑表达式)?(表达式1):(表达式2)。
启动程序,访问http://localhost:8080/showOneUser
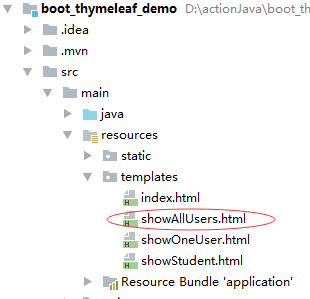
10、创建showAllUsers.html
-
<!DOCTYPE html>
-
<html xmlns:th="http://www.thymeleaf.org">
-
<head>
-
<meta charset="UTF-8"/>
-
<title>显示全部用户
</title>
-
<meta charset="UTF-8"/>
-
<meta name="viewport" content="width=device-width, initial-scale=1"/>
-
<link th:href="@{/bootstrap/css/bootstrap.css}" href="../static/bootstrap/css/bootstrap.css" rel="stylesheet"/>
-
<link th:href="@{/bootstrap/css/bootstrap-theme.css}" href="../static/bootstrap/css/bootstrap-theme.css"
-
rel=
"stylesheet"/>
-
<script th:src="@{/scripts/jquery-3.1.1.min.js}" src="../static/scripts/jquery-3.1.1.min.js">
</script>
-
<script th:src="@{/bootstrap/js/bootstrap.js}" src="../static/bootstrap/js/bootstrap.js">
</script>
-
</head>
-
<body>
-
<div class="container">
-
<div class="row">
-
<div class="col-md-5">
-
<div class="panel panel-primary">
-
<div class="panel-heading text-center">
-
<span class="panel-title">全部用户信息
</span>
-
</div>
-
<div class="panel-body">
-
<ul class="list-group">
-
<li class="list-group-item" th:each="user:${users}">
-
编号:
<span th:text="${user.id}">
</span>
<br/>
-
用户名:
<span th:text="${user.username}">
</span>
<br/>
-
密码:
<span th:text="${user.password}">
</span>
<br/>
-
电话:
<span th:text="${user.telephone}">
</span>
<br/>
-
注册时间:
<span th:text="${#dates.format(user.registerTime, 'yyyy-MM-dd hh:mm:ss')}">
</span>
<br/>
-
权限:
<span th:text="${user.popedom==0?'管理员':'普通用户'}">
</span>
<br/>
-
</li>
-
</ul>
-
</div>
-
<div class="panel-footer text-right">
-
<span class="panel-title">酒城工作室@2107
</span>
-
</div>
-
</div>
-
</div>
-
<div class="col-md-7">
-
<div class="panel panel-primary">
-
<div class="panel-heading text-center">
-
<span class="panel-title">全部用户信息
</span>
-
</div>
-
<div class="panel-body">
-
<table class="table-bordered" style="width: 100%">
-
<tr style="height: 40px; background-color: #f7ecb5">
-
<th class="text-center">编号
</th>
-
<th class="text-center">用户名
</th>
-
<th class="text-center">密码
</th>
-
<th class="text-center">电话
</th>
-
<th class="text-center">注册时间
</th>
-
<th class="text-center">权限
</th>
-
</tr>
-
<tr th:each="user:${users}" class="text-center" style="height: 40px">
-
<td>
<span th:text="${user.id}">
</span>
</td>
-
<td>
<span th:text="${user.username}">
</span>
</td>
-
<td>
<span th:text="${user.password}">
</span>
</td>
-
<td>
<span th:text="${user.telephone}">
</span>
</td>
-
<td>
<span th:text="${#dates.format(user.registerTime, 'yyyy-MM-dd hh:mm:ss')}">
</span>
</td>
-
<td>
<span th:text="${user.popedom==0?'管理员':'普通用户'}">
</span>
</td>
-
</tr>
-
</table>
-
</div>
-
<div class="panel-footer text-right">
-
<span class="panel-title">酒城工作室@2107
</span>
-
</div>
-
</div>
-
</div>
-
</div>
-
</div>
-
</body>
-
</html>
启动程序,访问http://localhost:8080/showAllUsers
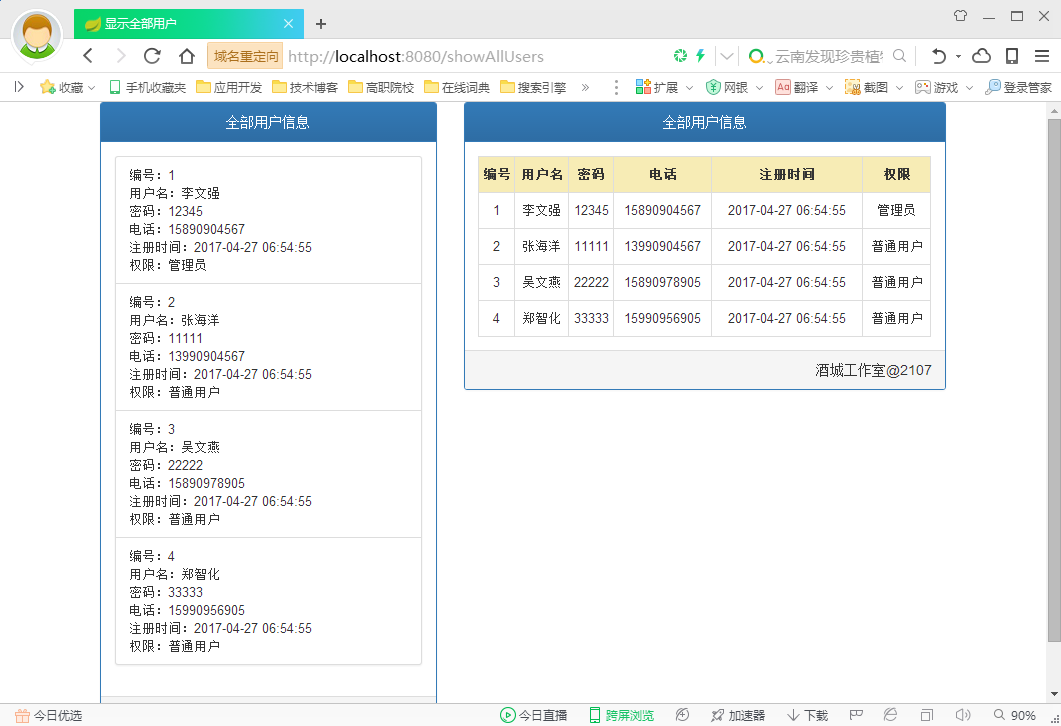
说明:左边面板里是卡片格式显示用户信息,右边面板是表格形式显示用户信息。
课堂练习:修改showAllUser.html代码,实现如下显示效果。

-
<!DOCTYPE html>
-
<html xmlns:th="http://www.thymeleaf.org">
-
<head>
-
<meta charset="UTF-8"/>
-
<title>显示全部用户
</title>
-
<meta charset="UTF-8"/>
-
<meta name="viewport" content="width=device-width, initial-scale=1"/>
-
<link th:href="@{/bootstrap/css/bootstrap.css}" href="../static/bootstrap/css/bootstrap.css" rel="stylesheet"/>
-
<link th:href="@{/bootstrap/css/bootstrap-theme.css}" href="../static/bootstrap/css/bootstrap-theme.css"
-
rel=
"stylesheet"/>
-
<script th:src="@{/scripts/jquery-3.1.1.min.js}" src="../static/scripts/jquery-3.1.1.min.js">
</script>
-
<script th:src="@{/bootstrap/js/bootstrap.js}" src="../static/bootstrap/js/bootstrap.js">
</script>
-
</head>
-
<body>
-
<div class="container">
-
<div class="row">
-
<div class="col-md-5">
-
<div class="panel panel-primary">
-
<div class="panel-heading text-center">
-
<span class="panel-title">全部用户信息
</span>
-
</div>
-
<div class="panel-body">
-
<ul class="list-group">
-
<li class="list-group-item" th:each="user:${users}">
-
<table class="table-bordered" style="width: 100%">
-
<tr>
-
<th>编号
</th>
-
<td>
<span th:text="${user.id}">
</span>
</td>
-
</tr>
-
<tr>
-
<th>用户名
</th>
-
<td>
<span th:text="${user.username}">
</span>
</td>
-
</tr>
-
<tr>
-
<th>密码
</th>
-
<td>
<span th:text="${user.password}">
</span>
</td>
-
</tr>
-
<tr>
-
<th>电话
</th>
-
<td>
<span th:text="${user.telephone}">
</span>
</td>
-
</tr>
-
<tr>
-
<th>注册时间
</th>
-
<td>
<span th:text="${#dates.format(user.registerTime, 'yyyy-MM-dd hh:mm:ss')}">
</span>
</td>
-
</tr>
-
<tr>
-
<th>权限
</th>
-
<td>
<span th:text="${user.popedom==0?'管理员':'普通用户'}">
</span>
</td>
-
</tr>
-
</table>
-
</li>
-
</ul>
-
</div>
-
<div class="panel-footer text-right">
-
<span class="panel-title">酒城工作室@2107
</span>
-
</div>
-
</div>
-
</div>
-
</div>
-
</div>
-
</body>
-
</html>
11、在application.properties里添加属性
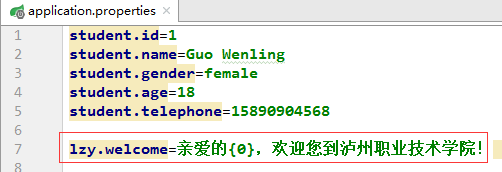
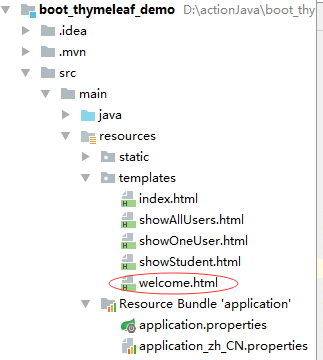
12、创建welcome.html(访问带参数的消息)
-
<!DOCTYPE html>
-
<html xmlns:th="http://www.thymeleaf.org">
-
<head>
-
<title>欢迎
</title>
-
<meta charset="UTF-8"/>
-
<meta name="viewport" content="width=device-width, initial-scale=1"/>
-
<link th:href="@{/bootstrap/css/bootstrap.css}" href="../static/bootstrap/css/bootstrap.css" rel="stylesheet"/>
-
<link th:href="@{/bootstrap/css/bootstrap-theme.css}" href="../static/bootstrap/css/bootstrap-theme.css"
-
rel=
"stylesheet"/>
-
<script th:src="@{/scripts/jquery-3.1.1.min.js}" src="../static/scripts/jquery-3.1.1.min.js">
</script>
-
<script th:src="@{/bootstrap/js/bootstrap.js}" src="../static/bootstrap/js/bootstrap.js">
</script>
-
</head>
-
<body>
-
<div class="container">
-
<div class="row">
-
<div class="col-md-5">
-
<div class="panel panel-primary">
-
<div class="panel-heading text-center">
-
<span class="panel-title">泸州职业技术学院
</span>
-
</div>
-
<div class="panel-body">
-
<span th:text="#{lzy.welcome(${name})}">
</span>
-
</div>
-
<div class="panel-footer text-right">
-
<span class="panel-title">酒城工作室@2107
</span>
-
</div>
-
</div>
-
</div>
-
</div>
-
</div>
-
</body>
-
</html>
12、在HomeController里添加请求映射方法
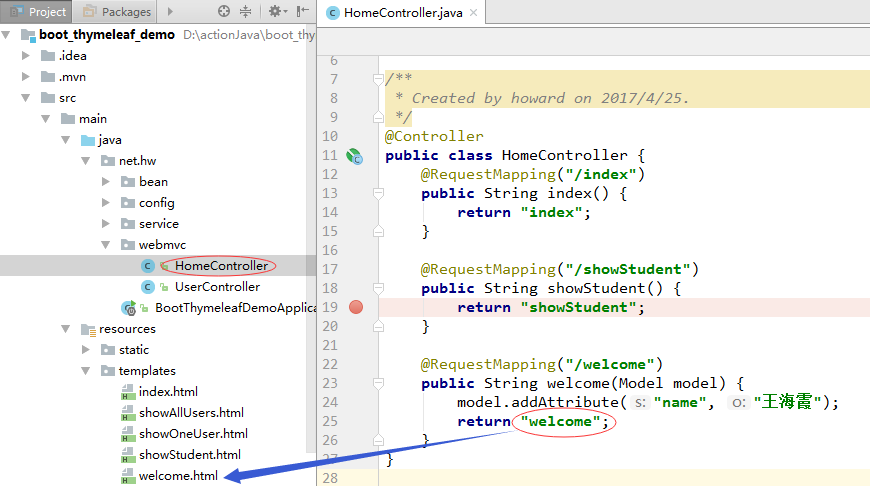
启动程序,访问http://localhost:8080/welcome

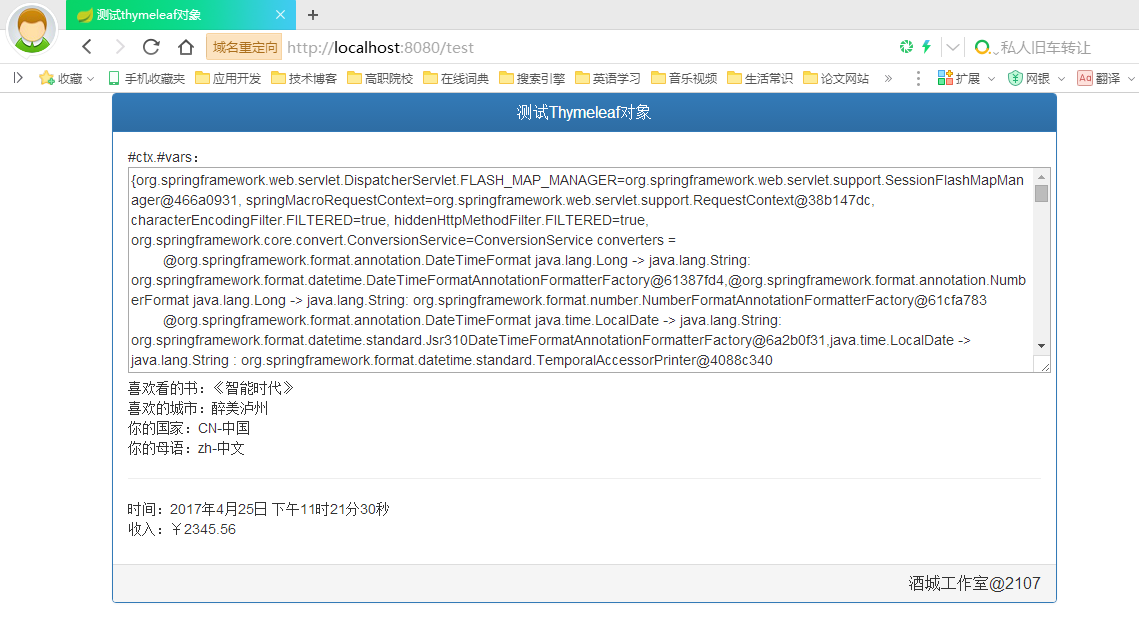
13、创建testThymeleafObjects.html

-
<!DOCTYPE html>
-
<html xmlns:th="http://www.thymeleaf.org">
-
<head>
-
<title>测试thymeleaf对象
</title>
-
<meta charset="UTF-8"/>
-
<meta name="viewport" content="width=device-width, initial-scale=1"/>
-
<link th:href="@{/bootstrap/css/bootstrap.css}" href="../static/bootstrap/css/bootstrap.css" rel="stylesheet"/>
-
<link th:href="@{/bootstrap/css/bootstrap-theme.css}" href="../static/bootstrap/css/bootstrap-theme.css"
-
rel=
"stylesheet"/>
-
<script th:src="@{/scripts/jquery-3.1.1.min.js}" src="../static/scripts/jquery-3.1.1.min.js">
</script>
-
<script th:src="@{/bootstrap/js/bootstrap.js}" src="../static/bootstrap/js/bootstrap.js">
</script>
-
</head>
-
<body>
-
<div class="container">
-
<div class="row">
-
<div class="col-md-10">
-
<div class="panel panel-primary">
-
<div class="panel-heading text-center">
-
<span class="panel-title">测试Thymeleaf对象
</span>
-
</div>
-
<div class="panel-body">
-
#ctx.#vars:
<br/>
-
<textarea th:text="${#ctx.#vars}" rows="10" cols="150">
</textarea>
<br/>
-
喜欢看的书:
<span th:text="${#vars.book}">
</span>
<br/>
-
喜欢的城市:
<span th:text="${#httpSession.getAttribute('city')}">
</span>
<br/>
-
你的国家:
<span th:text="${#locale.country}+'-'+${#locale.getDisplayCountry()}">
</span>
<br/>
-
你的母语:
<span th:text="${#locale.language}+'-'+${#locale.getDisplayLanguage()}">
</span>
<br/>
-
<hr/>
-
时间:
<span th:text="${#dates.format(#dates.createNow())}">
</span>
<br/>
-
收入:
<span th:text="'¥'+${#numbers.formatDecimal(2345.5645345, 3, 2)}">
</span>
<br/>
-
</div>
-
<div class="panel-footer text-right">
-
<span class="panel-title">酒城工作室@2107
</span>
-
</div>
-
</div>
-
</div>
-
</div>
-
</div>
-
</body>
-
</html>
14、在HomeController里添加请求映射方法
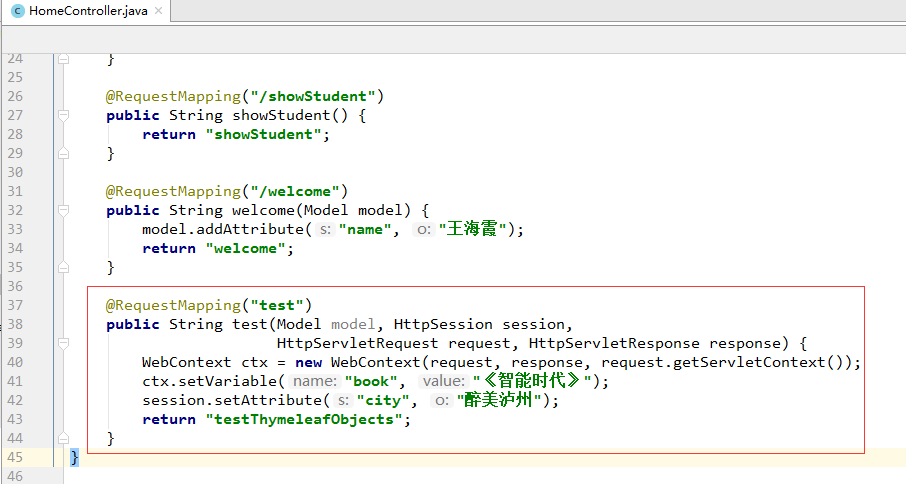
启动程序,访问http://localhost:8080/test
15、在pom.xml文件添加yaml的依赖
-
<dependency>
-
<groupId>org.yaml
</groupId>
-
<artifactId>snakeyaml
</artifactId>
-
<version>1.18
</version>
-
</dependency>
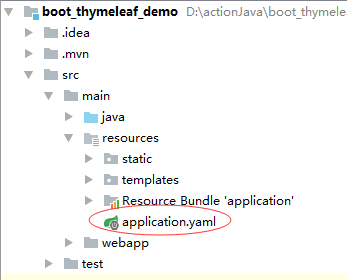
16、在resources里创建application.yaml
-
server:
-
port: 8080
-
-
serverHost:
-
inetAddressA:
-
ip: 127
.0
.0
.1
-
length: 160
-
port: 2000
-
inetAddressB:
-
ip: 192
.168
.0
.15
-
length: 180
-
port: 2000
-
inetAddressB:
-
ip: 192
.168
.0
.16
-
length: 288
-
port: 2000
-
-
udp:
-
server:
-
host: 192
.168
.60
.34
-
port: 8001
17、创建ServerHostProperties类
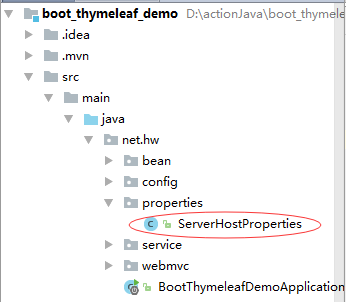
-
package net.hw.properties;
-
-
import org.springframework.boot.context.properties.ConfigurationProperties;
-
import org.springframework.stereotype.Component;
-
-
/**
-
* Created by howard on 2017/4/27.
-
*/
-
@Component
-
@ConfigurationProperties(
"serverHost")
-
public
class ServerHostProperties {
-
private InetAddress inetAddressA;
-
private InetAddress inetAddressB;
-
private InetAddress inetAddressC;
-
-
public
static
class InetAddress {
-
private String ip;
-
private
int length;
-
private
int port;
-
-
public String getIp() {
-
return ip;
-
}
-
-
public void setIp(String ip) {
-
this.ip = ip;
-
}
-
-
public int getLength() {
-
return length;
-
}
-
-
public void setLength(int length) {
-
this.length = length;
-
}
-
-
public int getPort() {
-
return port;
-
}
-
-
public void setPort(int port) {
-
this.port = port;
-
}
-
}
-
-
public InetAddress getInetAddressA() {
-
return inetAddressA;
-
}
-
-
public void setInetAddressA(InetAddress inetAddressA) {
-
this.inetAddressA = inetAddressA;
-
}
-
-
public InetAddress getInetAddressB() {
-
return inetAddressB;
-
}
-
-
public void setInetAddressB(InetAddress inetAddressB) {
-
this.inetAddressB = inetAddressB;
-
}
-
-
public InetAddress getInetAddressC() {
-
return inetAddressC;
-
}
-
-
public void setInetAddressC(InetAddress inetAddressC) {
-
this.inetAddressC = inetAddressC;
-
}
-
}
18、在webmvc子包里创建ServerHostController
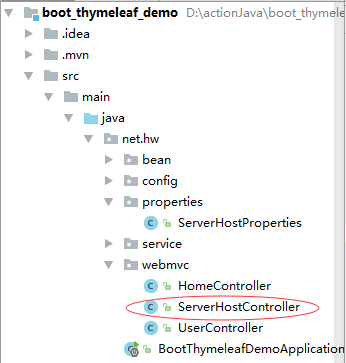
-
package net.hw.webmvc;
-
-
import net.hw.properties.ServerHostProperties;
-
import org.springframework.beans.factory.annotation.Autowired;
-
import org.springframework.stereotype.Controller;
-
import org.springframework.ui.Model;
-
import org.springframework.web.bind.annotation.RequestMapping;
-
-
import java.util.ArrayList;
-
import java.util.List;
-
-
/**
-
* Created by howard on 2017/4/27.
-
*/
-
@
Controller
-
public
class ServerHostController {
-
@
Autowired
-
private
ServerHostProperties serverHostProperties;
-
-
@
RequestMapping(
"/showServerHost")
-
public
String serverHost(
Model model) {
-
List<
ServerHostProperties.
InetAddress> inetAddresses = new
ArrayList<
ServerHostProperties.
InetAddress>();
-
inetAddresses.add(serverHostProperties.getInetAddressA());
-
inetAddresses.add(serverHostProperties.getInetAddressB());
-
inetAddresses.add(serverHostProperties.getInetAddressC());
-
model.addAttribute(
"inetAddresses", inetAddresses);
-
return
"showServerHost";
-
}
-
}
19、在templates里创建showServerHost.html
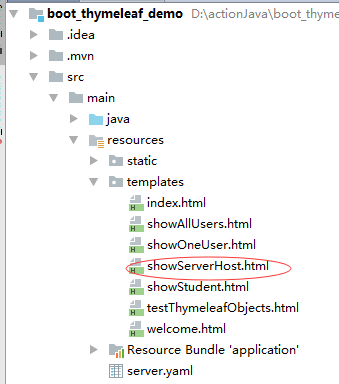
-
<!DOCTYPE html>
-
<html xmlns:th="http://www.thymeleaf.org">
-
<head>
-
<title>显示服务器主机信息
</title>
-
<meta charset="UTF-8"/>
-
<meta name="viewport" content="width=device-width, initial-scale=1"/>
-
<link th:href="@{/bootstrap/css/bootstrap.css}" href="../static/bootstrap/css/bootstrap.css" rel="stylesheet"/>
-
<link th:href="@{/bootstrap/css/bootstrap-theme.css}" href="../static/bootstrap/css/bootstrap-theme.css"
-
rel=
"stylesheet"/>
-
<script th:src="@{/scripts/jquery-3.1.1.min.js}" src="../static/scripts/jquery-3.1.1.min.js">
</script>
-
<script th:src="@{/bootstrap/js/bootstrap.js}" src="../static/bootstrap/js/bootstrap.js">
</script>
-
</head>
-
<body>
-
<div class="container">
-
<div class="row">
-
<div class="col-md-5">
-
<div class="panel panel-primary">
-
<div class="panel-heading text-center">
-
<span class="panel-title">服务器主机信息
</span>
-
</div>
-
<div class="panel-body">
-
<ul class="list-group">
-
<li class="list-group-item" th:each="inetAddress:${inetAddresses}">
-
<div th:if="${inetAddressStat.count==1}">
-
<p style="font-weight: bold">inetAddressA
</p>
-
</div>
-
<div th:if="${inetAddressStat.count==2}">
-
<p style="font-weight: bold">inetAddressB
</p>
-
</div>
-
<div th:if="${inetAddressStat.count==3}">
-
<p style="font-weight: bold">inetAddressC
</p>
-
</div>
-
ip:
<span th:text="${inetAddress.ip}">
</span>
<br/>
-
length:
<span th:text="${inetAddress.length}">
</span>
<br/>
-
port:
<span th:text="${inetAddress.port}">
</span>
<br/>
-
</li>
-
</ul>
-
</div>
-
<div class="panel-footer text-right">
-
<span class="panel-title">酒城工作室@2107
</span>
-
</div>
-
</div>
-
</div>
-
</div>
-
</div>
-
</body>
-
</html>
20、启动程序,访问http://localhost:8080/showServerHost

五、小结
采用Thymeleaf模板引擎,关键要注意动态数据与静态数据,一个用于服务器端数据的获取,一个用于客户端数据的显示,前端与后端很好地分离来处理,即使没有启动程序,也能在客户端看到页面的样式效果。通过案例学会正确使用Thymeleaf的各种表达式得到预期的动态数据,呈现在模板页面上。


 8240
8240


 被折叠的 条评论
为什么被折叠?
被折叠的 条评论
为什么被折叠?
 到【灌水乐园】发言


