


TextView属性
1getResource.getColro();
2设置连接setAutoLink();/all,web,phone
3java中设置连接
setAutoLinkMask(Linkify.PHONE_UNMBERS);
后面跟文本
4图片位于文字位置
drawableTop/Left/Right/Bottom
5文图距离
drawablePadding /Top/Left/Right/Bottom
<?xml version="1.0" encoding="utf-8"?>
<LinearLayout xmlns:android="http://schemas.android.com/apk/res/android"
    android:layout_width="match_parent"
    android:layout_height="match_parent"
    android:gravity="bottom"
    android:orientation="horizontal">

    <TextView
        android:layout_width="0dip"
        android:layout_height="wrap_content"

        android:gravity="center_horizontal"
        android:layout_weight="1"
        android:drawableTop="@mipmap/ic_launcher"
        android:text="短信"
        android:textColor="@color/red"
        />

    <TextView
        android:layout_width="0dip"
        android:layout_height="wrap_content"

        android:gravity="center_horizontal"
        android:layout_weight="1"
        android:drawableTop="@mipmap/ic_launcher"
        android:text="电话" />

    <TextView
        android:layout_width="0dip"
        android:layout_height="wrap_content"

        android:gravity="center_horizontal"
        android:layout_weight="1"
        android:drawableTop="@mipmap/ic_launcher"
        android:text="应用" />

    <TextView
        android:layout_width="0dip"
        android:layout_height="wrap_content"

        android:gravity="center_horizontal"
        android:layout_weight="1"
        android:drawableTop="@mipmap/ic_launcher"
        android:text="网络" />

</LinearLayout>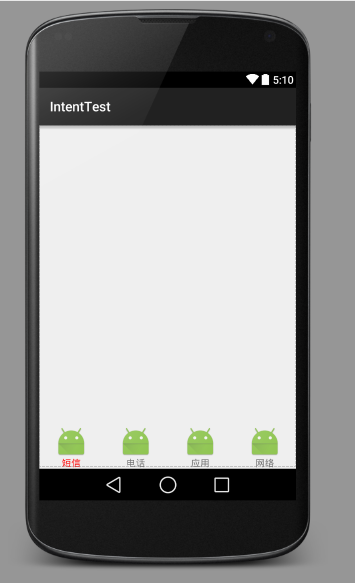
Button、EditText都是TextView的子类所以TextView的属性他们也有
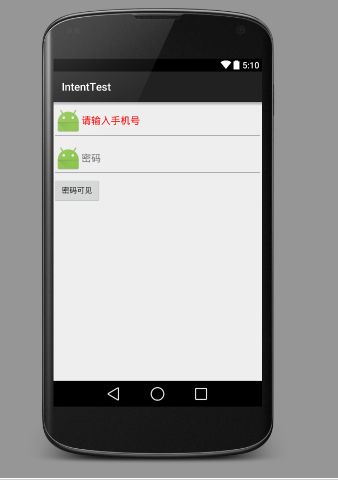
<?xml version="1.0" encoding="utf-8"?>
<LinearLayout xmlns:android="http://schemas.android.com/apk/res/android"
android:orientation="vertical"
android:layout_width="match_parent"
android:layout_height="match_parent">
<EditText
android:layout_width="match_parent"
android:layout_height="wrap_content"
android:drawableLeft="@mipmap/ic_launcher"
android:hint="请输入手机号"
android:textColorHint="@color/red"
android:inputType="phone"/>
<EditText
android:layout_width="match_parent"
android:layout_height="wrap_content"
android:hint="密码"
android:drawableLeft="@mipmap/ic_launcher"
android:password="true"
android:inputType="textPassword"
android:id="@+id/edittext"
/>
<Button
android:layout_width="wrap_content"
android:layout_height="wrap_content"
android:text="密码可见"
android:id="@+id/button"/>
<EditText
android:layout_width="match_parent"
android:layout_height="wrap_content"
android:hint="请输入省份证号"
android:digits="1234567890xX"/>
</LinearLayout>
****************************************************
package com.example.administrator.intenttest;
import android.app.Activity;
import android.os.Bundle;
import android.view.View;
import android.widget.Button;
import android.widget.EditText;
/**
* Created by Administrator on 2015/8/21.
*/
public class EditTestActivity extends Activity {
private Button mbutton;
private EditText mEditTextPassword;
@Override
protected void onCreate(Bundle savedInstanceState) {
super.onCreate(savedInstanceState);
setContentView(R.layout.edixtext);
mbutton = (Button) findViewById(R.id.button);
mEditTextPassword = (EditText) findViewById(R.id.edittext);
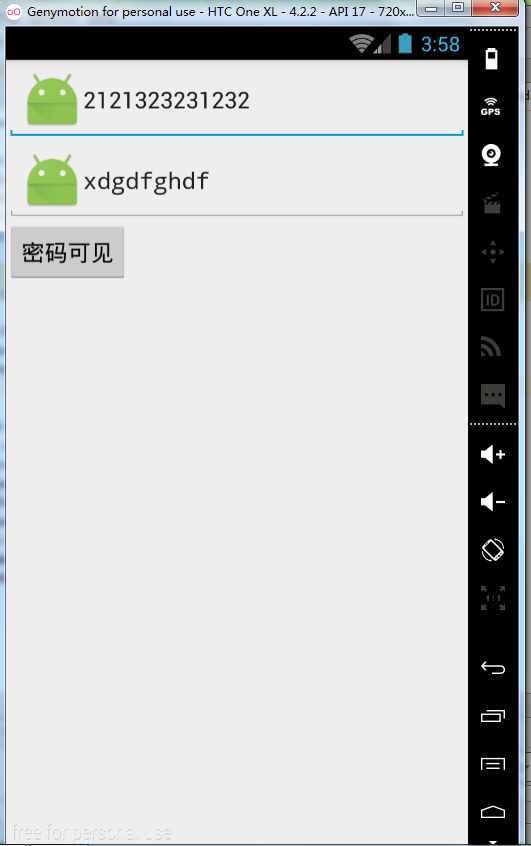
mbutton.setOnClickListener(new View.OnClickListener() {
@Override
public void onClick(View v) {
mEditTextPassword.setTransformationMethod(null);
}
});
}
}
点击密码可见演示
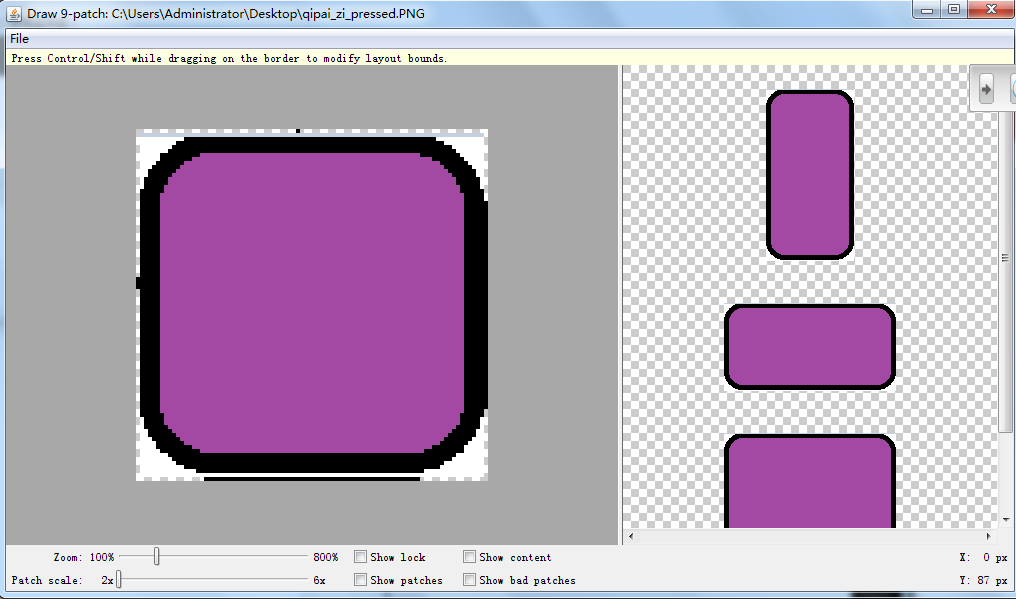
.9图制作
sdk下面的Draw 9-patch
双击打开后,拖入图片即可
上左代表拉伸位置
下右代表文本位置
实现按钮点击变色
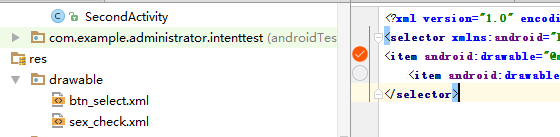
drawable下面新建XML文件btn_select.xml实现点击变色
<?xml version="1.0" encoding="utf-8"?>
<selector xmlns:android="http://schemas.android.com/apk/res/android">
    <item android:drawable="@mipmap/qipao_zi_pressed" android:state_pressed="true"/>
    <item android:drawable="@mipmap/qipao_zi"/>
</selector>
这样在按钮下面背景直接引用就可以了 android:background=”@drawable/btn_select”
富文本
    mTextView=(TextView)findViewById(R.id.textView1);
        String text="我是<font color='#ff0000'>富文本</font>,此处<img src='a_main_icon04'/>加<img src='ic_launcher'/>图片";
        //查找给定名字的图片
        Html.ImageGetter getter=new Html.ImageGetter() {

            @Override
            public Drawable getDrawable(String source) {

             int id=R.mipmap.ic_launcher;
                Class clazz=R.mipmap.class;
                try {
                    Field field=clazz.getDeclaredField(source);
                    id=field.getInt(clazz);
                    Log.d("printID",""+id);

                } catch (NoSuchFieldException e) {
                    e.printStackTrace();
                } catch (IllegalAccessException e) {
                    e.printStackTrace();
                }
                Drawable drawable=getResources().getDrawable(id);
                drawable.setBounds(0,0,drawable.getIntrinsicWidth(),drawable.getIntrinsicHeight());
           return  drawable;
            }
        } ;
        Spanned spanned= Html.fromHtml(text, getter,null) ;
        mTextView.setText(text);
TextView中让长文字显示省略号和滚动
 <TextView
      android:gravity="top"
      android:layout_width="100dp"
      android:layout_height="wrap_content"
      android:singleLine="true"
      android:focusable="true"
      android:focusableInTouchMode="true"


      android:text="11111"/>
RadioButton实现自定义性别图片
1drawable下面新建XML文件
<?xml version="1.0" encoding="utf-8"?>
<selector xmlns:android="http://schemas.android.com/apk/res/android">
<item android:drawable="@mipmap/a_radbtn_select" android:state_checked="true"/>
    <item android:drawable="@mipmap/a_radbtn"/>
</selector>
2在RadioButton引用图片时如下
一般使用RadioGroup
<?xml version="1.0" encoding="utf-8"?>
<LinearLayout xmlns:android="http://schemas.android.com/apk/res/android"
    android:orientation="vertical"
    android:layout_width="match_parent"
    android:layout_height="match_parent">

    <LinearLayout
        android:layout_width="match_parent"
        android:layout_height="wrap_content"
        android:orientation="horizontal"


        >
        <Button
            android:layout_width="wrap_content"
            android:layout_height="wrap_content"
            android:text="性别"/>
        <RadioGroup
            android:layout_width="wrap_content"
            android:layout_height="wrap_content"
            android:checkedButton="@+id/default_sex"
            android:orientation="horizontal"
            android:id="@+id/radio">

            <RadioButton
                android:layout_width="wrap_content"
                android:layout_height="wrap_content"
                android:text="男"


                android:id="@+id/default_sex"
                android:button="@drawable/sex_check"/>
            <RadioButton
                android:layout_width="wrap_content"
                android:layout_height="wrap_content"
                android:text="女"

                android:button="@drawable/sex_check"/>


        </RadioGroup>


    </LinearLayout>
     <Button
        android:layout_width="wrap_content"
        android:layout_height="wrap_content"
        android:text="提交信息"
         android:id="@+id/signin"
        />


</LinearLayout>
提交按钮添加点击事件
public class RadioButtonActivity extends Activity {

    private RadioGroup mRadioGroup;
    private Button mbtn;
    @Override
    protected void onCreate(Bundle savedInstanceState) {
        super.onCreate(savedInstanceState);
        setContentView(R.layout.radiobutton);
        mRadioGroup=(RadioGroup)findViewById(R.id.radio);
        mbtn=(Button)findViewById(R.id.signin);
        mRadioGroup.setOnCheckedChangeListener(new RadioGroup.OnCheckedChangeListener() {
            @Override
            public void onCheckedChanged(RadioGroup group, int checkedId) {
                RadioButton rb=(RadioButton)findViewById(checkedId);
                Log.d("选中性别",""+rb.getText());
            }
        });
        mbtn.setOnClickListener(new View.OnClickListener() {
            @Override
            public void onClick(View v) {


            }
        });


    }
}


 115
115

 被折叠的 条评论
为什么被折叠?
被折叠的 条评论
为什么被折叠?
 到【灌水乐园】发言


