


最近一直有小項目用到 WebApi現在整理一下思路,写一份說明出來,让后来人不走弯路…
1. 第一步 新建項目
-
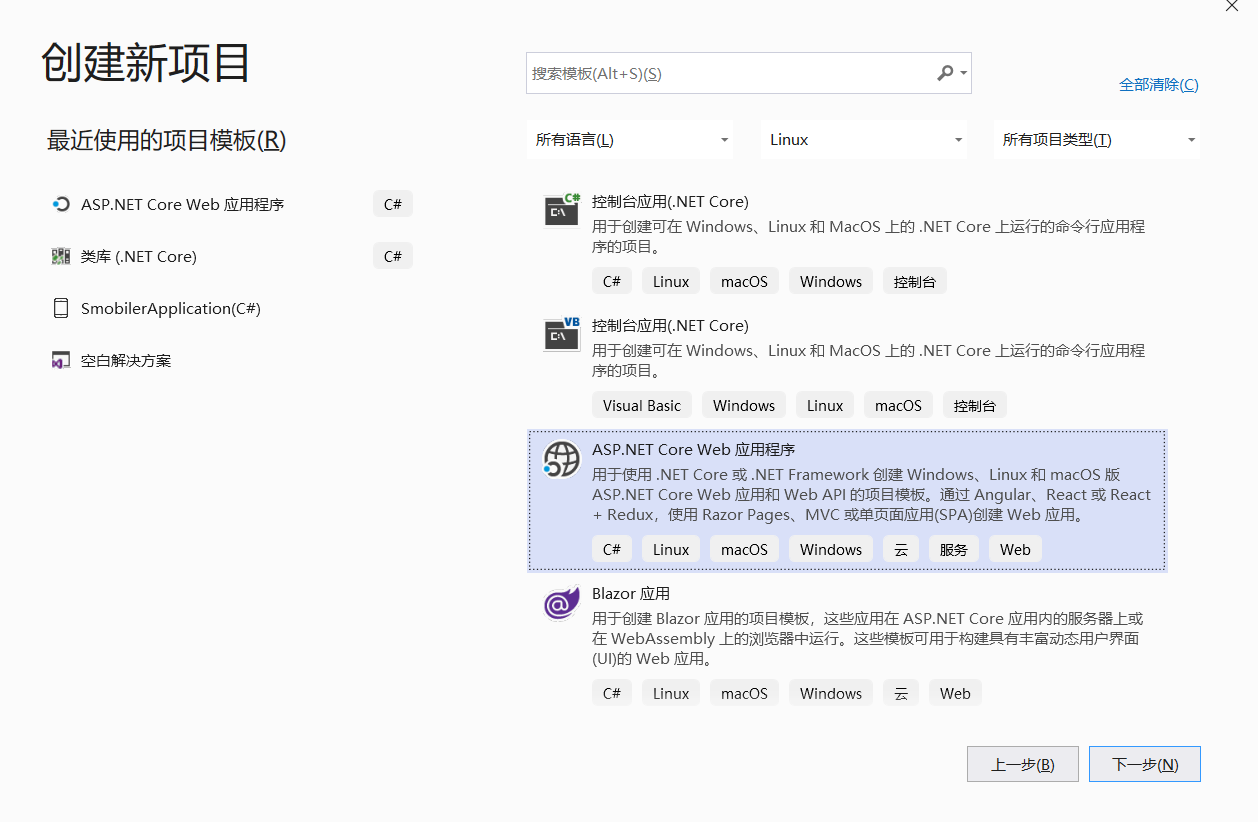
打开VS2019,选择新建项目,选择ASP.NET Core Web 应用程式
-
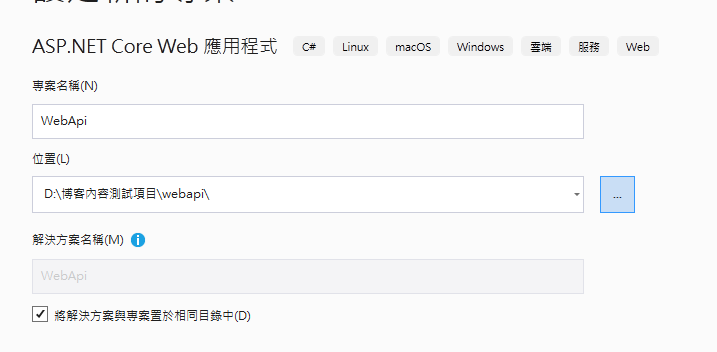
设置好专案名称
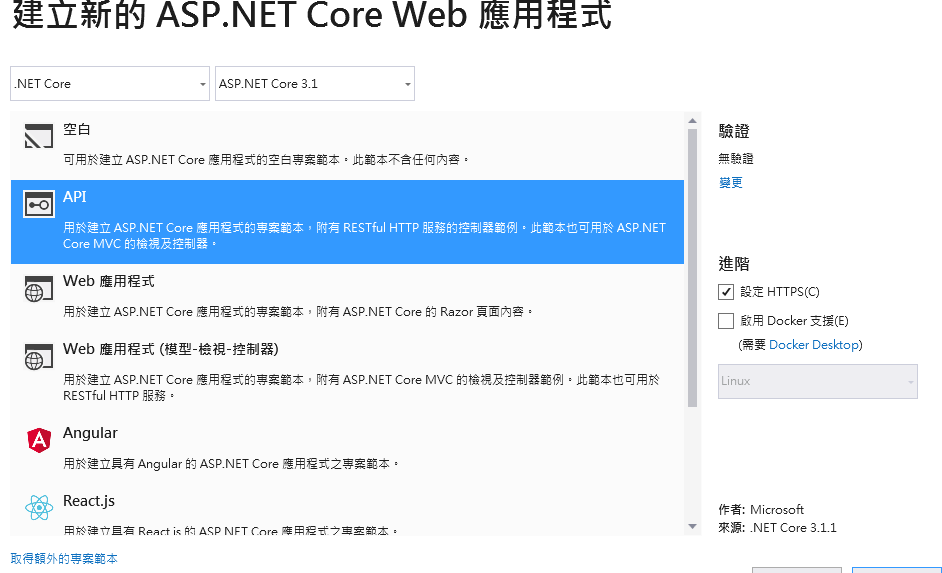
- 创建API 应用程式
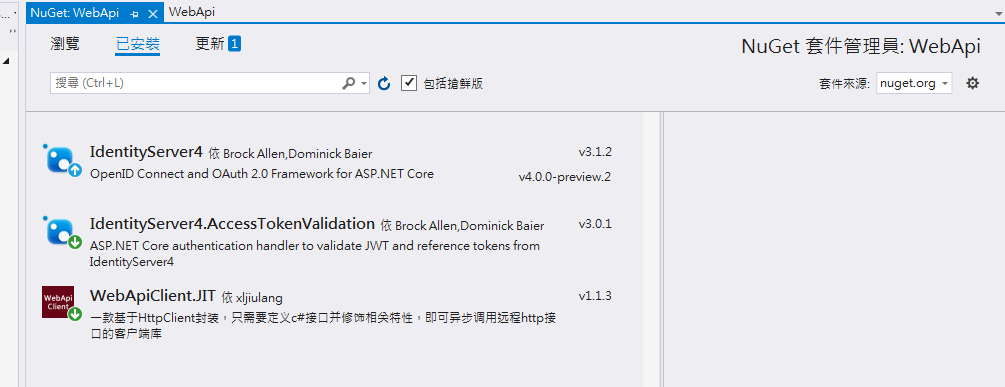
2.第二步 Nuget 所需包准备
-
IdentityServer4 -
IdentityServer4.AccessTokenValidation -
WebApiClient.JIT
关于这三个包这里不做过多叙述,这里先负责搭建运行,如有必要后期单独说明
3.第三步 identityserver4环境配置
首先建一个 IdentityConfig类
  public class IdentityConfig
    {
        /// <summary>
        ///   ApiResource
        /// </summary>
        /// <returns></returns>
        public static IEnumerable<ApiResource> GetResource =>
             new List<ApiResource>() {
                new ApiResource("api1","My API")
             };
        /// <summary>
        /// Client
        /// </summary>
        /// <returns></returns>
        public static IEnumerable<Client> GetClients =>
            new List<Client>
            {
                new Client
                {
                    ClientId="client",//这里设置账号
                    AllowedGrantTypes =GrantTypes.ClientCredentials,
                    ClientSecrets={
                    new Secret("aju".Sha256())//这里设置加密
                    },
                    AllowedScopes={ "api1"}
                }
            };
    }
按提示引用 using IdentityServer4.Models;
在Startup文件中注册 identityserver4
ConfigureServices中
 //依赖注入系统中注册IdentityServer
            services.AddIdentityServer()
                .AddDeveloperSigningCredential()//扩展在每次启动时,为令牌签名创建了一个临时密钥。在生成环境需要一个持久化的密钥
                .AddInMemoryApiResources(IdentityConfig.GetResource)//Api 资源
                .AddInMemoryClients(IdentityConfig.GetClients);//Api的客户端
            services.AddControllers();
            services.AddAuthentication("Bearer").AddJwtBearer("Bearer", options =>
            {
                options.Authority = "https://localhost:61399";//这里填写WEBAPI地址
                options.RequireHttpsMetadata = false;
                options.Audience = "api1";
            });
Configure中新增
   app.UseIdentityServer();//使用服务 中间件被添加到HTTP管道中
  app.UseAuthentication();//将身份认证服务添加到DI比配置Bearer为默认||将身份认证服务添加到管道中,以便对主机的每次调用都将自动执行身份验证||添加授权中间件,以确保匿名客户端无法访问我们的API资源
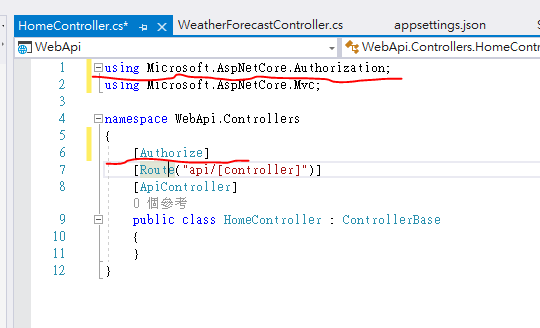
4.新建webapi控制器
-
项目建好后新建空的WEBAPI控制器
-
在新建的
HomeController.cs中 引用Microsoft.AspNetCore.Authorization包
在控制器上添加[Authorze]
-
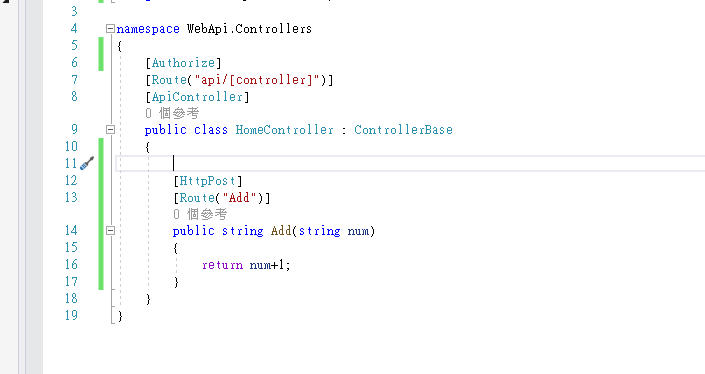
开始写相关业务逻辑方法
Add()注意:控制器上的路由和方法上的路由为访问地址
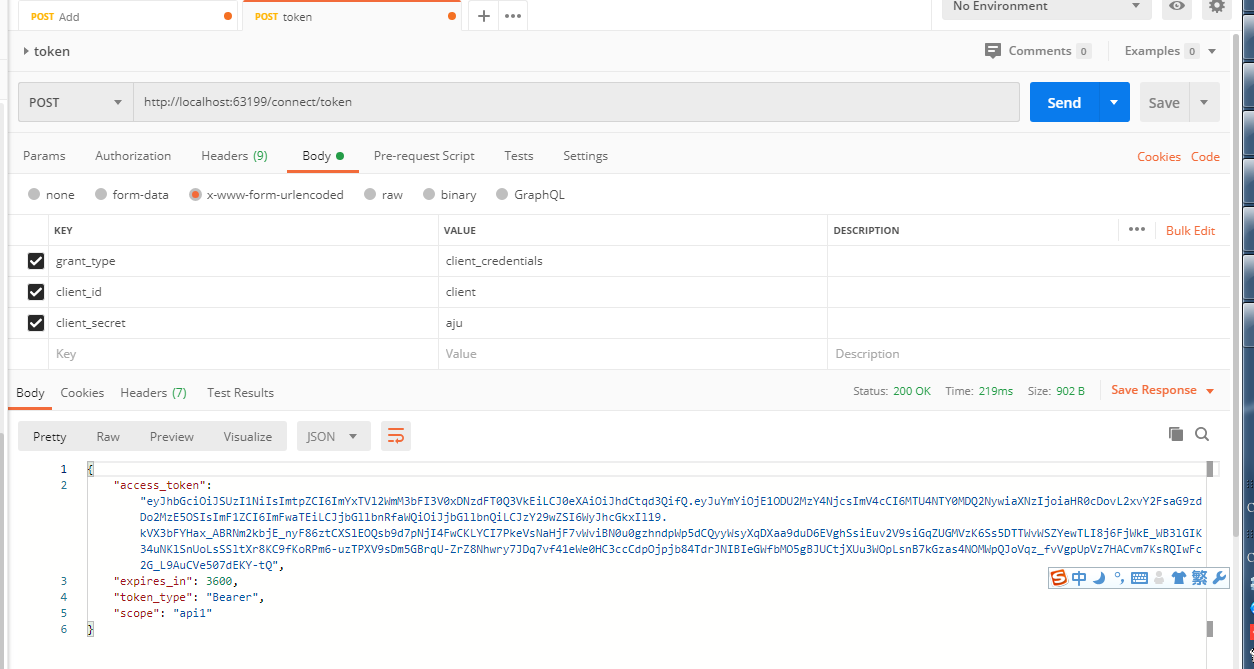
5.Postman测试
-
获取
token采用
post方式,地址为connect/token参数
grant_type采用client_credentials
client_id在第三步配置IdentityServer4环境中设置client
client_secret在第三步配置IdentityServer4环境中设置aju
-
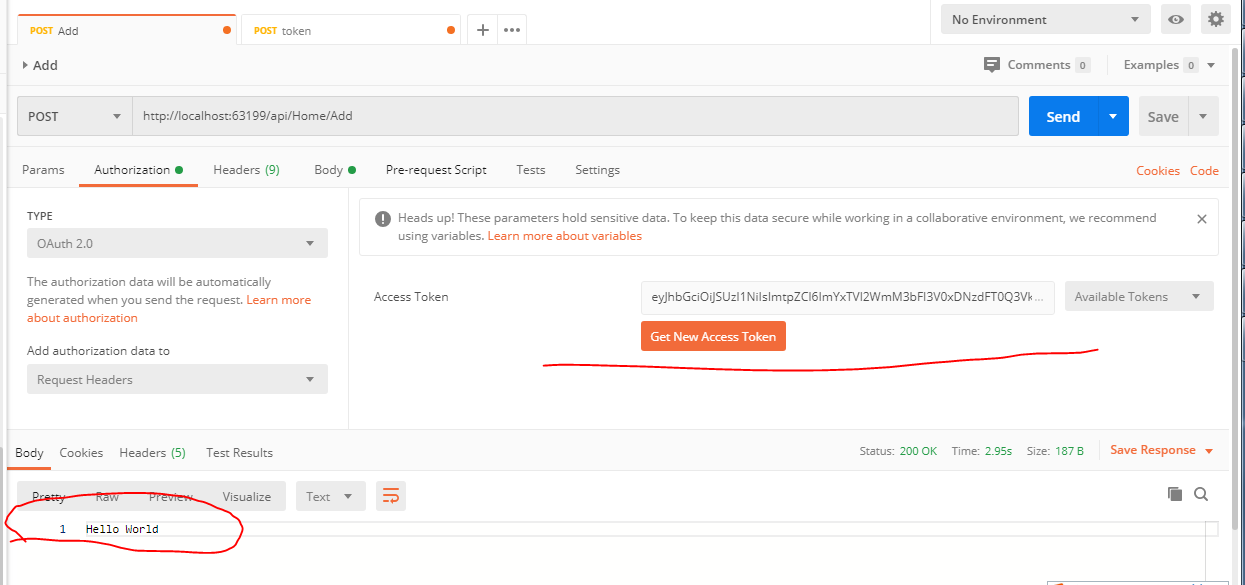
执行
Add方法将上一步获取的
token放入 postmanAuthorization的Access Token中访问地址
http://localhost:63199/api/Home/Add只要 返回状态为 200 OK时即成功


 1万+
1万+


 被折叠的 条评论
为什么被折叠?
被折叠的 条评论
为什么被折叠?
 到【灌水乐园】发言


