


 这篇博客详细介绍了SpringMVC的搭建过程,包括创建项目、配置视图解析器以实现请求跳转到jsp页面,讲解了SpringMVC的运行流程,并探讨了如何接收jsp的请求和数据。此外,还讨论了添加过滤器解决图片显示问题,使用Ajax返回JSON数据,以及配置拦截器的实践方法。
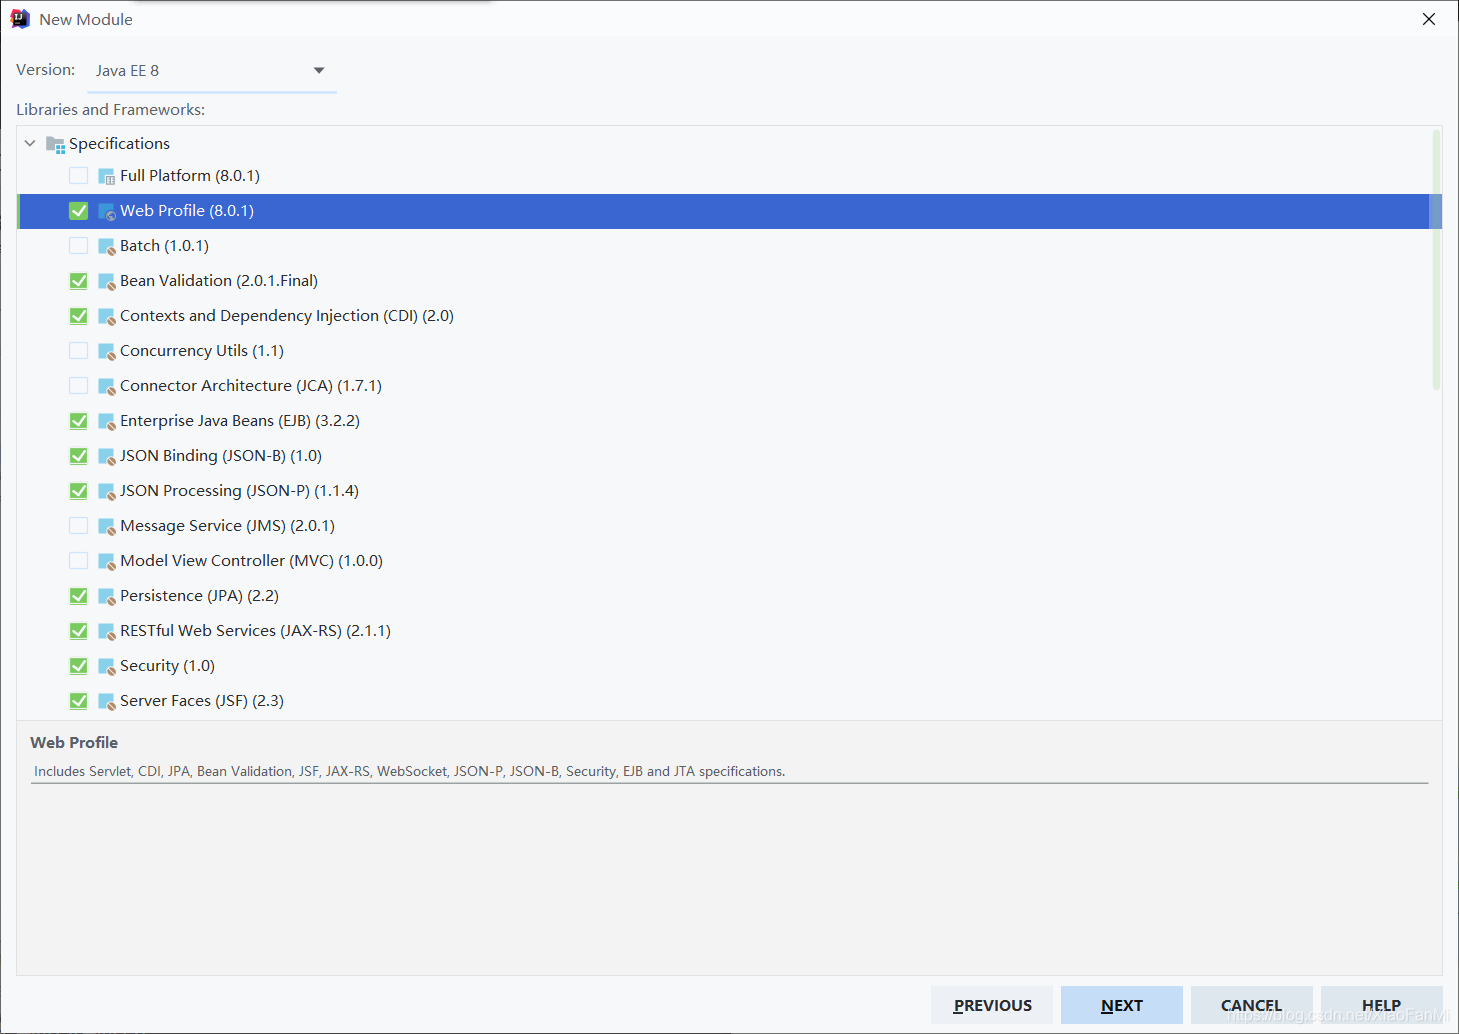
创建项目

进行配置
1.pom.xml导包
<dependency>
	<groupId>org.springframework</groupId>
	<artifactId>spring-webmvc</artifactId>
	<version>5.2.2.RELEASE</version>
</dependency>

<!-- https://mvnrepository.com/artifact/javax.servlet/jstl -->
<dependency>
     <groupId>javax.servlet</groupId>
     <artifactId>jstl</artifactId>
     <version>1.2</version>
</dependency>
2.在webapp下的web.xml中配置web.xml
<?xml version="1.0" encoding="UTF-8"?>
<web-app xmlns="http://xmlns.jcp.org/xml/ns/javaee"
         xmlns:xsi="http://www.w3.org/2001/XMLSchema-instance"
         xsi:schemaLocation="http://xmlns.jcp.org/xml/ns/javaee http://xmlns.jcp.org/xml/ns/javaee/web-app_4_0.xsd"
         version="4.0">

    <!--
        配置Spring中核心请求转发servlet
        由此servlet对请求进行拦截处理
    -->
    <servlet>
        <servlet-name>springmvc</servlet-name>
        <servlet-class>org.springframework.web.servlet.DispatcherServlet</servlet-class>
        <init-param><!--init 方法读取参数-->
            <param-name>contextConfigLocation</param-name>
            <!--读取spring文件-->
            <param-value>classpath:spring.xml</param-value>
        </init-param>
        <load-on-startup>0</load-on-startup><!--服务器启动创建servlet对象-->
    </servlet>

    <!--请求映射-->
    <servlet-mapping>
        <servlet-name>springmvc</servlet-name>

        <!--配置所有请求都进入DispatcherServlet进行处理-->
        <url-pattern>/</url-pattern>
    </servlet-mapping>

</web-app>
3.先在java下创建包,再在resource下创建spring.xml
<?xml version="1.0" encoding="UTF-8"?>
<beans xmlns="http://www.springframework.org/schema/beans"
       xmlns:xsi="http://www.w3.org/2001/XMLSchema-instance"
       xmlns:context="http://www.springframework.org/schema/context"
       xmlns:aop="http://www.springframework.org/schema/aop"
       xmlns:tx="http://www.springframework.org/schema/tx"
       xmlns:mvc="http://www.springframework.org/schema/mvc"
       xsi:schemaLocation="http://www.springframework.org/schema/beans
        https://www.springframework.org/schema/beans/spring-beans.xsd
        http://www.springframework.org/schema/context
        http://www.springframework.org/schema/context/spring-context.xsd
        http://www.springframework.org/schema/aop
        http://www.springframework.org/schema/aop/spring-aop.xsd
        http://www.springframework.org/schema/tx
        http://www.springframework.org/schema/tx/spring-tx.xsd
        http://www.springframework.org/schema/mvc
        http://www.springframework.org/schema/mvc/spring-mvc.xsd">

    <!--开启注解扫描-->
    <context:component-scan base-package="com.wyf.ssm"></context:component-scan>

    <!--开启springmvc注解-->
    <mvc:annotation-driven></mvc:annotation-driven>
</beans>
4.配置tomcat,创建controller类,并测试
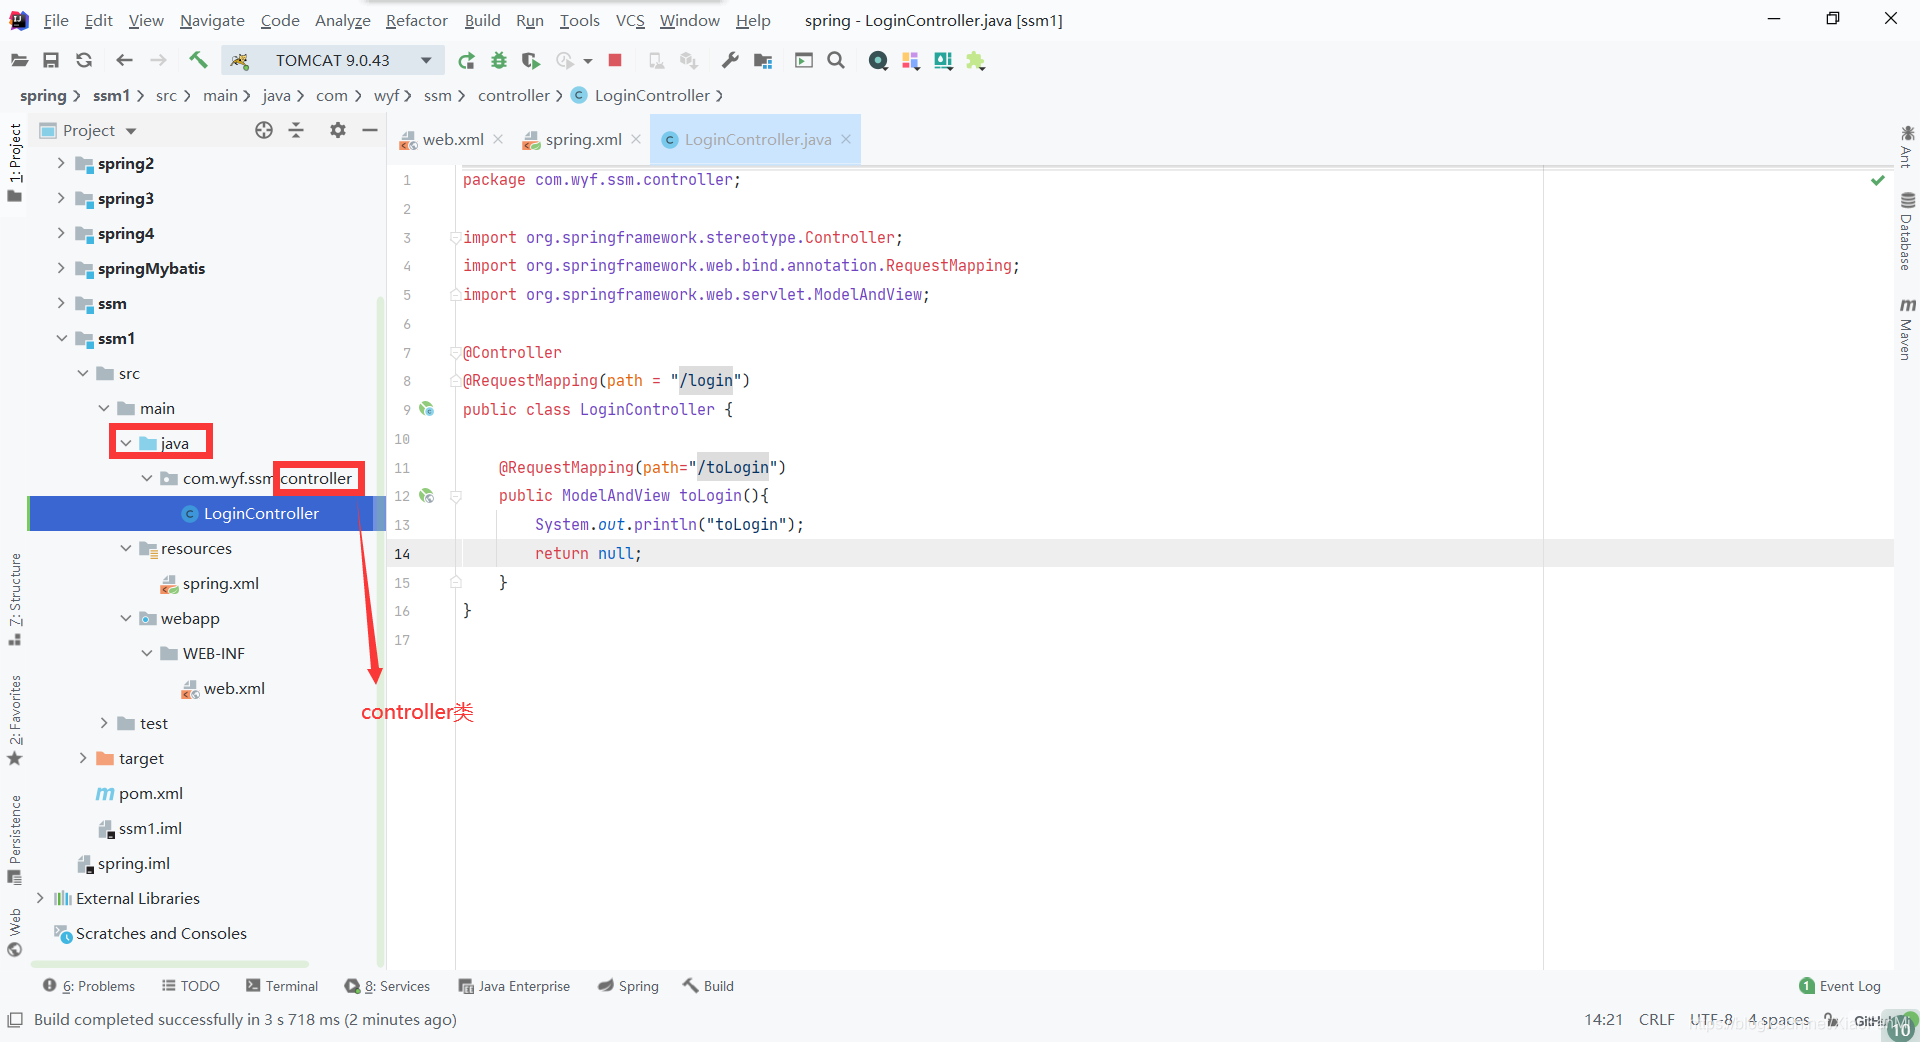
创建loginController
package com.wyf.ssm.controller;

import org.springframework.stereotype.Controller;
import org.springframework.web.bind.annotation.RequestMapping;
import org.springframework.web.servlet.ModelAndView;

@Controller
@RequestMapping(path = "/login")
publ
最低0.47元/天 解锁文章


 被折叠的 条评论
为什么被折叠?
被折叠的 条评论
为什么被折叠?
 到【灌水乐园】发言


