


原文链接: Introduction to MotionLayout (part II)
前言
这是系列文章「MotionLayout 介绍」的 part II。阅读之前请先查看 part I! (中文点这)
在文本中,我们将继续通过各种示例揭露基本的 MotionLayout 特性,介绍自定义属性 (custom attribute)、图像操作 (image operations) 和关键帧 (keyframes)。
示例 03: 自定义属性 (Custom attribute)
在part I的最后,我们创建了一个引用MotionScene的MotionLayout(self-contained MotionScene)。我们可以进一步利用它,来实现其他属性的过渡。
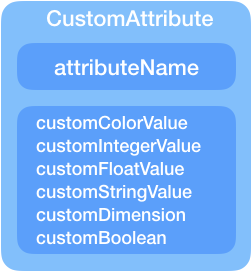
事实上,最初的ConstraintSet只封装了布局规则;但是为了丰富动画效果,我们经常需要做些别的事(比如背景颜色)。在 ConstraintLayout 2.0,ConstraintSet也可以存储自定义属性状态。查看下方动画,背景颜色跟着移动过程发生了改变。
以前,你不得不在代码中处理此问题。现在,你可以直接通过 XML 指定属性:
<Constraint
    android:id="@+id/button" ...>
    <CustomAttribute
        motion:attributeName="backgroundColor"
        motion:customColorValue="#D81B60"/>
</Constraint>
复制代码这是这个动画修改后的MotionScene 文件
<?xml version="1.0" encoding="utf-8"?>
<MotionScene xmlns:android="http://schemas.android.com/apk/res/android"
    xmlns:motion="http://schemas.android.com/apk/res-auto">

    <Transition
        motion:constraintSetEnd="@+id/end"
        motion:constraintSetStart="@+id/start"
        motion:duration="1000"
        motion:interpolator="linear">
        <OnSwipe
            motion:dragDirection="dragRight"
            motion:touchAnchorId="@+id/button"
            motion:touchAnchorSide="right" />
    </Transition>

    <ConstraintSet android:id="@+id/start">
        <Constraint
            android:id="@+id/button"
            android:layout_width="64dp"
            android:layout_height="64dp"
            android:layout_marginStart="8dp"
            motion:layout_constraintBottom_toBottomOf="parent"
            motion:layout_constraintStart_toStartOf="parent"
            motion:layout_constraintTop_toTopOf="parent">
            <CustomAttribute
                motion:attributeName="backgroundColor"
                motion:customColorValue="#D81B60" />
        </Constraint>
    </ConstraintSet>

    <ConstraintSet android:id="@+id/end">
        <Constraint
            android:id="@+id/button"
            android:layout_width="64dp"
            android:layout_height="64dp"
            android:layout_marginEnd="8dp"
            motion:layout_constraintBottom_toBottomOf="parent"
            motion:layout_constraintEnd_toEndOf="parent"
            motion:layout_constraintTop_toTopOf="parent">
            <CustomAttribute
                motion:attributeName="backgroundColor"
                motion:customColorValue="#9999FF" />
        </Constraint>
    </ConstraintSet>

</MotionScene>
复制代码
自定义属性是用属性名字 (attributeName) 来指定的,属性名字需要和对象中的getter/setter方法对应:
- getter:
getName(e.g. getBackgroundColor) - setter:
setName(e.g. setBackgroundColor)
另外还需要指定属性值的类型:
customColorValuecustomIntegerValuecustomFloatValuecustomStringValuecustomDimensioncustomBoolean
最后当我们定义一个自定义属性,你需要同时定义开始 (start) 和结束 (end) 的ConstraintSet
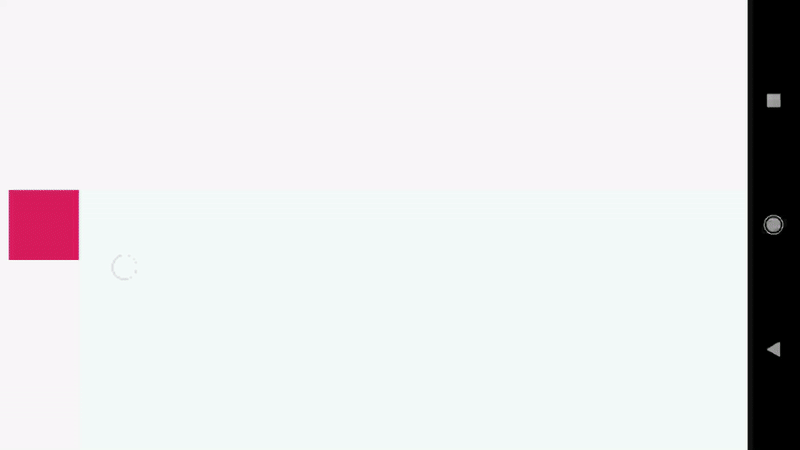
示例 04 : 图像滤镜(ImageFilterView)(1/2)
当我们处理复杂的过渡时,常常需要对图像进行一些操作,并且对他们进行动画处理。ConstraintLayout2.0 引入了名为 ImageFilterView (继承与AppCompatImageView)的一个有用的工具类来轻松实现这一点。
下面是我们在两张图片之间做的淡入淡出 (cross-fade) 效果:
首先我们需要创建一个包含 ImageFilterView 的 MotionLayout 文件。
<?xml version="1.0" encoding="utf-8"?>
<android.support.constraint.motion.MotionLayout
    xmlns:android="http://schemas.android.com/apk/res/android"
    xmlns:tools="http://schemas.android.com/tools"
    xmlns:app="http://schemas.android.com/apk/res-auto"
    android:id="@+id/motionLayout"
    app:layoutDescription="@xml/scene_04"
    android:layout_width="match_parent"
    android:layout_height="match_parent">

    <android.support.constraint.utils.ImageFilterView
        android:id="@+id/image"
        android:background="@color/colorAccent"
        android:src="@drawable/roard"
        app:altSrc="@drawable/hoford"
        android:layout_width="64dp"
        android:layout_height="64dp"/>

</android.support.constraint.motion.MotionLayout>
复制代码
它与 ImageView 的主要区别在于altSrc 属性
<android.support.constraint.image.ImageFilterView
    android:id="@+id/image"
...
    android:src="@drawable/roard"
    app:altSrc="@drawable/hoford"/>
复制代码
在MotionScene 文件中使用对应的淡入淡出属性(crossfade)
<?xml version="1.0" encoding="utf-8"?>
<MotionScene xmlns:android="http://schemas.android.com/apk/res/android"
    xmlns:motion="http://schemas.android.com/apk/res-auto">

    <Transition
        motion:constraintSetEnd="@+id/end"
        motion:constraintSetStart="@+id/start"
        motion:duration="1000"
        motion:interpolator="linear">
        <OnSwipe
            motion:dragDirection="dragRight"
            motion:touchAnchorId="@+id/image"
            motion:touchAnchorSide="right" />
    </Transition>

    <ConstraintSet android:id="@+id/start">
        <Constraint
            android:id="@+id/image"
            android:layout_width="100dp"
            android:layout_height="100dp"
            android:layout_marginStart="8dp"
            motion:layout_constraintBottom_toBottomOf="parent"
            motion:layout_constraintStart_toStartOf="parent"
            motion:layout_constraintTop_toTopOf="parent">
            <CustomAttribute
                motion:attributeName="crossfade"
                motion:customFloatValue="0" />
        </Constraint>
    </ConstraintSet>

    <ConstraintSet android:id="@+id/end">
        <Constraint
            android:id="@+id/image"
            android:layout_width="100dp"
            android:layout_height="100dp"
            android:layout_marginEnd="8dp"
            motion:layout_constraintBottom_toBottomOf="parent"
            motion:layout_constraintEnd_toEndOf="parent"
            motion:layout_constraintTop_toTopOf="parent">
            <CustomAttribute
                motion:attributeName="crossfade"
                motion:customFloatValue="1" />
        </Constraint>
    </ConstraintSet>

</MotionScene>
复制代码
示例 05 : 图像滤镜(ImageFilterView)(1/2)
ImageFilterView 也提供了更多的功能:
饱和度 saturation : 0 = grayscale, 1 = original, 2 = hyper saturated 对比度 contrast : 1 = unchanged, 0 = gray, 2 = high contrast 色温 warmth : 1 = neutral, 2 = warm (red tint), 0.5 = cold (blue tint) 淡入淡出 crossfade (with
app:altSrc)
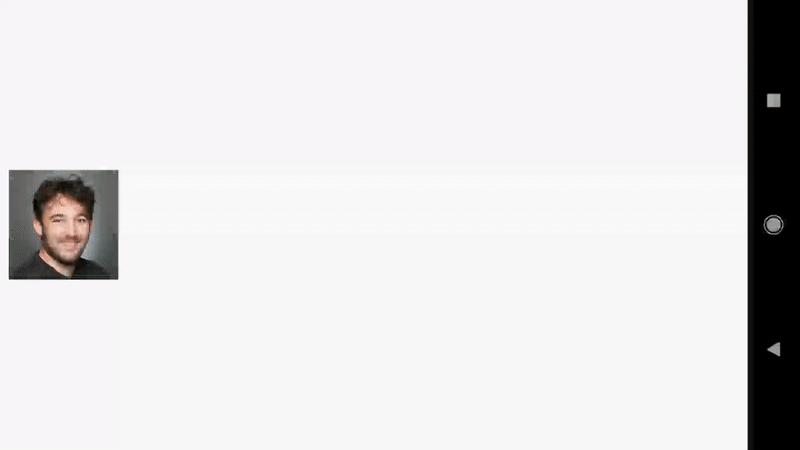
这里有另外一个例子显示怎么使用滤镜饱和度:
简单的指定自定义属性就可以操作饱和度:
<CustomAttribute
    motion:attributeName="saturation"
    motion:customFloatValue="1" />
复制代码
这里是这个例子使用的 MotionLayout 文件:
<?xml version="1.0" encoding="utf-8"?>
<android.support.constraint.motion.MotionLayout xmlns:android="http://schemas.android.com/apk/res/android"
    xmlns:app="http://schemas.android.com/apk/res-auto"
    android:id="@+id/motionLayout"
    app:layoutDescription="@xml/scene_05"
    android:layout_width="match_parent"
    android:layout_height="match_parent">

    <android.support.constraint.utils.ImageFilterView
        android:id="@+id/image"
        android:src="@drawable/sunset2"
        android:scaleType="centerCrop"
        android:layout_width="match_parent"
        android:layout_height="300dp" />

</android.support.constraint.motion.MotionLayout>
复制代码
这里是对应的场景(Scene)文件:
<?xml version="1.0" encoding="utf-8"?>
<MotionScene
    xmlns:android="http://schemas.android.com/apk/res/android"
    xmlns:motion="http://schemas.android.com/apk/res-auto">

    <Transition
        motion:constraintSetStart="@+id/start"
        motion:constraintSetEnd="@+id/end"
        motion:duration="1000">
        <OnSwipe
            motion:touchAnchorId="@+id/image"
            motion:touchAnchorSide="top"
            motion:dragDirection="dragUp" />
    </Transition>

    <ConstraintSet android:id="@+id/start">
        <Constraint
            android:id="@+id/image"
            android:layout_width="match_parent"
            android:layout_height="300dp"
            motion:layout_constraintStart_toStartOf="parent"
            motion:layout_constraintTop_toTopOf="parent">
            <CustomAttribute
                motion:attributeName="saturation"
                motion:customFloatValue="1" />
        </Constraint>
    </ConstraintSet>

    <ConstraintSet android:id="@+id/end">
        <Constraint
            android:id="@+id/image"
            android:layout_width="match_parent"
            android:layout_height="300dp"
            motion:layout_constraintBottom_toBottomOf="parent"
            motion:layout_constraintEnd_toEndOf="parent">
            <CustomAttribute
                motion:attributeName="saturation"
                motion:customFloatValue="0" />
        </Constraint>
    </ConstraintSet>

</MotionScene>
复制代码
关键帧(Keyframes)
大多数情况下,MotionLayout 是使用“静止状态” (resting states) 的 ConstraintSets 实现的。这种方式下,我们知道最终的布局结果将适应不同的屏幕尺寸:从本质上来说,MotionLayout的表现像一个典型的 ConstraintLayout。
原文:The general idea for MotionLayout is that “resting states” are implemented as ConstraintSets. This way, we know that the resulting layouts will correctly adapt to different screen sizes: essentially, MotionLayout will behave like a typical ConstraintLayout.
在某些情况,你可能希望有一个中间状态——一个要经过的状态(a state to go through),而不是要停留的状态(not a state to stay in)。当然你可以指定两个以上的 ConstraintSets 来解决,但是更好的做法是使用 Keyframes。
关键帧可以应用于位置或属性值。它们主要让你在转换期间指定一个时间节点上的改变。
举个栗子,你可能想让一个控件在过渡进行到 25% 的时候转换变成红色。或者在过渡中的 50% 时,改为向上移动。
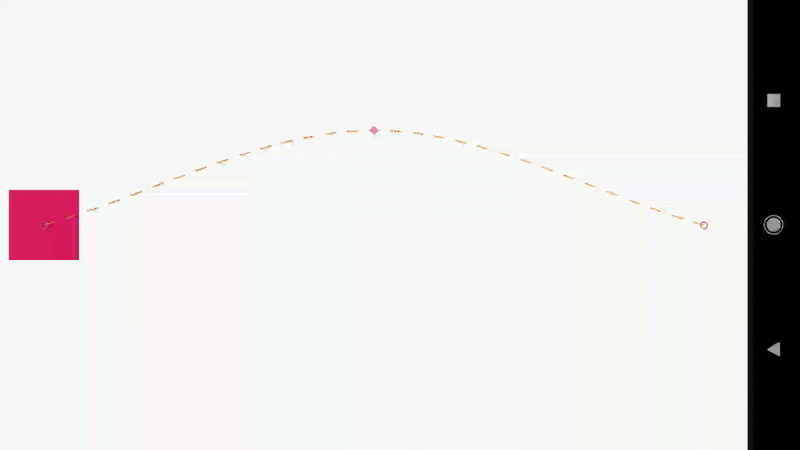
示例 06 : 关键帧 (1/2), 坐标(postion)
有多种设置位置关键帧 (KeyPosition) 的方法 (pathRelative、deltaRelative、parentRelative),我们将在本系列的第4部分详细介绍。
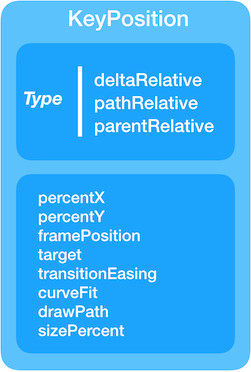
简单介绍位置关键帧 (position keyframes),这里指定了在过渡进行到 50% 的时候,位置在屏幕高度的 25%处。
<Transition ...>
    <KeyFrameSet>
        <KeyPosition
            motion:keyPositionType="parentRelative"
            motion:percentY="0.25"
            motion:framePosition="50"
            motion:target="@+id/button"/>
    </KeyFrameSet>
</Transition>
复制代码
最终的效果如下:
和以往一样,MotionLayout 文件仍然非常简单:
<?xml version="1.0" encoding="utf-8"?>
<android.support.constraint.motion.MotionLayout xmlns:android="http://schemas.android.com/apk/res/android"
    xmlns:tools="http://schemas.android.com/tools"
    xmlns:app="http://schemas.android.com/apk/res-auto"
    android:id="@+id/motionLayout"
    app:layoutDescription="@xml/scene_06"
    android:layout_width="match_parent"
    android:layout_height="match_parent">

    <View
        android:id="@+id/button"
        android:background="@color/colorAccent"
        android:layout_width="64dp"
        android:layout_height="64dp" />

</android.support.constraint.motion.MotionLayout>
复制代码
MotionScene 文件与我们之前看到的非常相似,只是添加了一个KeyPosition 元素:
<?xml version="1.0" encoding="utf-8"?>
<MotionScene
    xmlns:android="http://schemas.android.com/apk/res/android"
    xmlns:motion="http://schemas.android.com/apk/res-auto">

    <Transition
        motion:constraintSetStart="@+id/start"
        motion:constraintSetEnd="@+id/end"
        motion:duration="1000"
        motion:interpolator="linear">
        <OnSwipe
            motion:touchAnchorId="@+id/button"
            motion:touchAnchorSide="right"
            motion:dragDirection="dragRight" />

        <KeyFrameSet>
            <KeyPosition
                motion:keyPositionType="parentRelative"
                motion:percentY="0.25"
                motion:framePosition="50"
                motion:target="@+id/button"/>
        </KeyFrameSet>
    </Transition>

    <ConstraintSet android:id="@+id/start">
        <Constraint
            android:id="@+id/button"
            android:layout_width="64dp"
            android:layout_height="64dp"
            android:layout_marginStart="8dp"
            motion:layout_constraintBottom_toBottomOf="parent"
            motion:layout_constraintStart_toStartOf="parent"
            motion:layout_constraintTop_toTopOf="parent">
            <CustomAttribute
                motion:attributeName="backgroundColor"
                motion:customColorValue="#D81B60"/>
        </Constraint>
    </ConstraintSet>

    <ConstraintSet android:id="@+id/end">
        <Constraint
            android:id="@+id/button"
            android:layout_width="64dp"
            android:layout_height="64dp"
            android:layout_marginEnd="8dp"
            motion:layout_constraintBottom_toBottomOf="parent"
            motion:layout_constraintEnd_toEndOf="parent"
            motion:layout_constraintTop_toTopOf="parent">
            <CustomAttribute
                motion:attributeName="backgroundColor"
                motion:customColorValue="#9999FF"/>
        </Constraint>
    </ConstraintSet>

</MotionScene>
复制代码
Example 07 : 关键帧 (2/2), 属性(attribute)
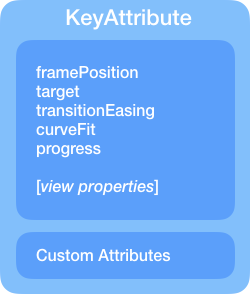
类似位置关键帧,你可以在过渡中的特定的指定属性值(使用KeyAttribute)。
例如,我们可能需要操纵对象在 50% 位置的时候,指定执行缩放和旋转,效果如下:

这可以通过在KeyFrameSet中添加一个KeyAttribute 元素来实现:
<KeyFrameSet>
    <KeyAttribute
        android:scaleX="2"
        android:scaleY="2"
        android:rotation="-45"
        motion:framePosition="50"
        motion:target="@id/button" />
</KeyFrameSet>
复制代码
MotionLayout 文件与前一个例子相同,唯一不同的是 MotionScene 文件中添加了KeyAttribute:
<?xml version="1.0" encoding="utf-8"?>
<MotionScene
    xmlns:android="http://schemas.android.com/apk/res/android"
    xmlns:motion="http://schemas.android.com/apk/res-auto">

    <Transition
        motion:constraintSetStart="@+id/start"
        motion:constraintSetEnd="@+id/end"
        motion:duration="1000"
        motion:interpolator="linear">
        <OnSwipe
            motion:touchAnchorId="@+id/button"
            motion:touchAnchorSide="right"
            motion:dragDirection="dragRight" />

        <KeyFrameSet>
            <KeyAttribute
                android:scaleX="2"
                android:scaleY="2"
                android:rotation="-45"
                motion:framePosition="50"
                motion:target="@id/button" />
            <KeyPosition
                motion:keyPositionType="screenRelative"
                motion:percentY="0.2"
                motion:framePosition="50"
                motion:target="@id/button"/>
        </KeyFrameSet>
    </Transition>

    <ConstraintSet android:id="@+id/start">
        <Constraint
            android:id="@+id/button"
            android:layout_width="64dp"
            android:layout_height="64dp"
            android:layout_marginStart="8dp"
            motion:layout_constraintBottom_toBottomOf="parent"
            motion:layout_constraintStart_toStartOf="parent"
            motion:layout_constraintTop_toTopOf="parent">
            <CustomAttribute
                motion:attributeName="backgroundColor"
                motion:customColorValue="#D81B60"/>
        </Constraint>
    </ConstraintSet>

    <ConstraintSet android:id="@+id/end">
        <Constraint
            android:id="@+id/button"
            android:layout_width="64dp"
            android:layout_height="64dp"
            android:layout_marginEnd="8dp"
            motion:layout_constraintBottom_toBottomOf="parent"
            motion:layout_constraintEnd_toEndOf="parent"
            motion:layout_constraintTop_toTopOf="parent">
            <CustomAttribute
                motion:attributeName="backgroundColor"
                motion:customColorValue="#9999FF"/>
        </Constraint>
    </ConstraintSet>

</MotionScene>
复制代码
结论
第二章介绍了 MotionLayout 更高级的功能,给出了如何利用自定义属性和关键帧创建更引入注目的动画示例。
你可以在ConstraintLayout examples github repository查看这些示例的源码。
在本系列文章中还有更多内容:
- Introduction to MotionLayout (part I)
- Custom attributes, image transitions, keyframes (part II)
- Taking advantage of MotionLayout in your existing layouts (CoordinatorLayout, DrawerLayout, ViewPager) (part III)
- All about Keyframes! (part IV)
- MotionLayout as a choreographer of root layout
- Nesting MotionLayout & other Views
- MotionLayout with fragments
作者:高杰
链接:https://juejin.cn/post/6844903744807649294
来源:掘金
著作权归作者所有。商业转载请联系作者获得授权,非商业转载请注明出处。


 361
361


 被折叠的 条评论
为什么被折叠?
被折叠的 条评论
为什么被折叠?
 到【灌水乐园】发言


