


1>今天开始给博友们分享完整的项目框架搭建到项目中所有重难点到项目上架!废话不多说,直接上代码!
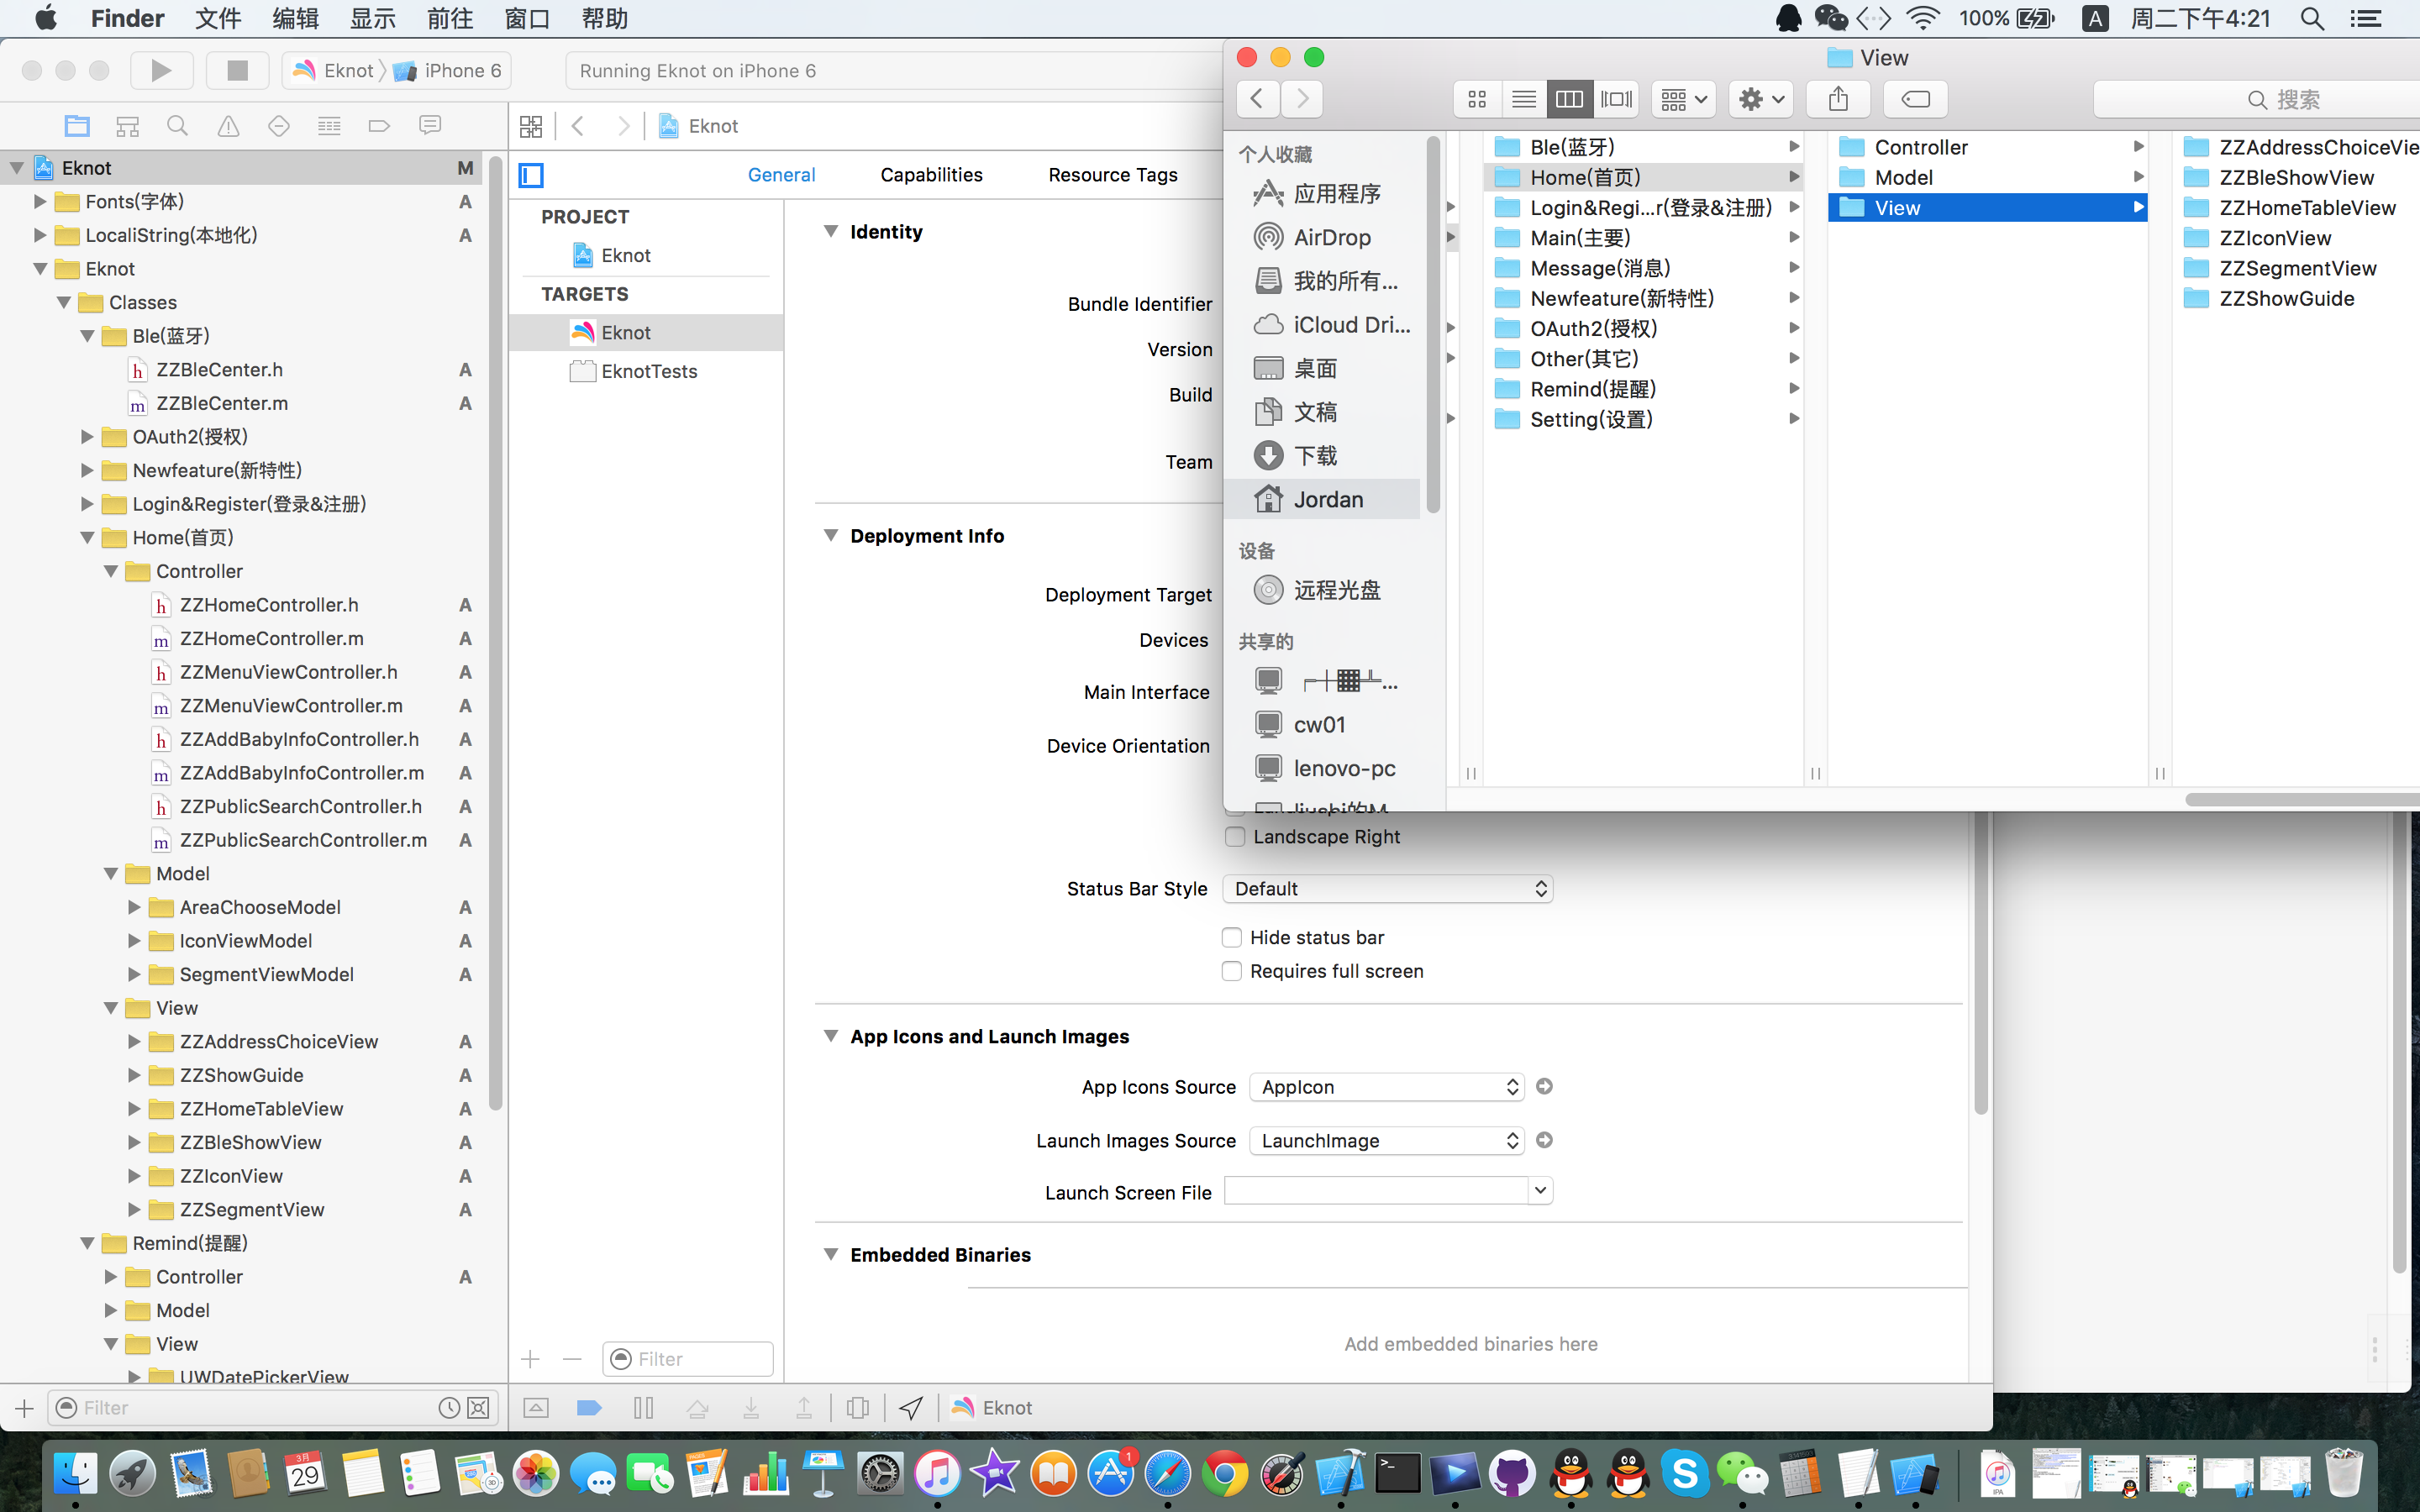
2>首先我们在创建一个工程时要养成良好的习惯创建完工程从硬盘上创建文件夹分类那么今天以公司项目框架图为事例图!
为什么要这么创建呢?废话不多说,当你在项目中创建类时候就会创建在你从硬盘上拖进项目中的目录下,这样在以后你以后更改或者找代码就很方便,大家体会到这个好处没有?
//
// ZZNewfeatureController.h
// 项目-版本新特性
//
// Created by 周昭 on 16/3/29.
// Copyright © 2016年 Jordan Zhou. All rights reserved.
//
#import <UIKit/UIKit.h>
@interface ZZNewfeatureController : UIViewController
@end
//
// ZZNewfeatureController.m
// 项目-版本新特性
//
// Created by 周昭 on 16/3/29.
// Copyright © 2016年 Jordan Zhou. All rights reserved.
//
#import "ZZNewfeatureController.h"
#import "ViewController.h"
#define ZZNewfeatureImageCount 3
/*
1.分析思路这肯定是在一个UIScrollView上面是去实现;
2.主流新特性都会有UIPageControl这样的圆点跟着动;
3.每次发布程序版本会不一样那么也就是新特性只需要展示一次那么请问同学们怎么做?
4.我们需要在AppDelegate中读取存在沙盒中的版本号进行比较来判断是否显示;
5.分析清楚上代码;
*/
@interface ZZNewfeatureController () <UIScrollViewDelegate>
@property (nonatomic, weak) UIPageControl *pageControl;
@end
@implementation ZZNewfeatureController
- (void)viewDidLoad {
[super viewDidLoad];
// 1.添加UISrollView
[self setupScrollView];
// 2.添加pageControl
[self setupPageControl];
}
/**
* 添加pageControl
*/
- (void)setupPageControl
{
// 1.添加
UIPageControl *pageControl = [[UIPageControl alloc] init];
pageControl.numberOfPages = ZZNewfeatureImageCount;
CGFloat centerX = self.view.frame.size.width * 0.5;
CGFloat centerY = self.view.frame.size.height - 30;
pageControl.center = CGPointMake(centerX, centerY);
pageControl.bounds = CGRectMake(0, 0, 100, 30);
pageControl.userInteractionEnabled = NO; // 这里请问同学们他的父类是什么?那么必然是可以进行交互的所以要取消交互
[self.view addSubview:pageControl];
self.pageControl = pageControl;
// 2.设置圆点的颜色\建议同学们 颜色的自定义自己去写成宏写在一个.h/.pch文件中
pageControl.currentPageIndicatorTintColor = [UIColor orangeColor];
pageControl.pageIndicatorTintColor = [UIColor whiteColor];
}
/**
* 添加UISrollView
*/
- (void)setupScrollView
{
UIScrollView *scrollView = [[UIScrollView alloc] init];
scrollView.frame = self.view.bounds;
scrollView.delegate = self;
[self.view addSubview:scrollView];
// 2.添加图片 那么一些固定的属性没必要写在循环中每次都去创建生成,不要给个傻逼的似的这点要清楚?
CGFloat imageW = scrollView.frame.size.width;
CGFloat imageH = scrollView.frame.size.height;
for (int index = 0; index < ZZNewfeatureImageCount; index++) {
UIImageView *imageView = [[UIImageView alloc] init];
// 设置图片(那么图片命名规范要么UI写好要么你自己要命名规范)
NSString *name = [NSString stringWithFormat:@"new_feature_%d", index + 1];
imageView.image = [UIImage imageNamed:name];
// 设置frame
CGFloat imageX = index * imageW;
imageView.frame = CGRectMake(imageX, 0, imageW, imageH);
[scrollView addSubview:imageView];
// 在最后一个图片上面添加按钮(一般在最后都会多一个按钮或者一个分享的勾选按钮)
if (index == ZZNewfeatureImageCount - 1) {
[self setupLastImageView:imageView];
}
}
// 3.设置滚动的内容尺寸
scrollView.contentSize = CGSizeMake(imageW * ZZNewfeatureImageCount, 0);
scrollView.showsHorizontalScrollIndicator = NO;
scrollView.pagingEnabled = YES;
scrollView.bounces = NO;
}
/**
* 添加内容到最后一个图片
*/
- (void)setupLastImageView:(UIImageView *)imageView
{
// 0.让imageView能跟用户交互这点需要注意不然你添加的按钮能点吗?
imageView.userInteractionEnabled = YES;
// 1.添加开始按钮
UIButton *startButton = [[UIButton alloc] init];
[startButton setBackgroundImage:[UIImage imageNamed:@"new_feature_finish_button"] forState:UIControlStateNormal];
[startButton setBackgroundImage:[UIImage imageNamed:@"new_feature_finish_button_highlighted"] forState:UIControlStateHighlighted];
// 2.设置frame
CGFloat centerX = imageView.frame.size.width * 0.5;
CGFloat centerY = imageView.frame.size.height * 0.58;
startButton.center = CGPointMake(centerX, centerY);
startButton.bounds = (CGRect){CGPointZero, startButton.currentBackgroundImage.size};
// 3.设置文字
[startButton setTitle:@"开始体验" forState:UIControlStateNormal];
[startButton setTitleColor:[UIColor whiteColor] forState:UIControlStateNormal];
[startButton addTarget:self action:@selector(start) forControlEvents:UIControlEventTouchUpInside];
[imageView addSubview:startButton];
// 4.添加checkbox
UIButton *checkbox = [[UIButton alloc] init];
checkbox.selected = YES;
[checkbox setTitle:@"分享给大家" forState:UIControlStateNormal];
[checkbox setImage:[UIImage imageNamed:@"new_feature_share_false"] forState:UIControlStateNormal];
[checkbox setImage:[UIImage imageNamed:@"new_feature_share_true"] forState:UIControlStateSelected];
checkbox.bounds = CGRectMake(0, 0, 200, 50);
CGFloat checkboxCenterX = centerX;
CGFloat checkboxCenterY = imageView.frame.size.height * 0.5;
checkbox.center = CGPointMake(checkboxCenterX, checkboxCenterY);
[checkbox setTitleColor:[UIColor whiteColor] forState:UIControlStateNormal];
checkbox.titleLabel.font = [UIFont systemFontOfSize:15];
[checkbox addTarget:self action:@selector(checkboxClick:) forControlEvents:UIControlEventTouchUpInside];
// checkbox.titleEdgeInsets = UIEdgeInsetsMake(0, 10, 0, 0);
checkbox.imageEdgeInsets = UIEdgeInsetsMake(0, 0, 0, 10);
// checkbox.contentEdgeInsets = UIEdgeInsetsMake(10, 10, 10, 10);
[imageView addSubview:checkbox];
}
/**
* 开始微博
*/
- (void)start
{
// 显示状态栏(这里一般现在会显示这些状态栏)
[UIApplication sharedApplication].statusBarHidden = NO;
// 切换窗口的根控制器
self.view.window.rootViewController = [[ViewController alloc] init];
}
- (void)checkboxClick:(UIButton *)checkbox
{
checkbox.selected = !checkbox.isSelected;
}
/**
* 只要UIScrollView滚动了,就会调用
*/
- (void)scrollViewDidScroll:(UIScrollView *)scrollView
{
// 1.取出水平方向上滚动的距离
CGFloat offsetX = scrollView.contentOffset.x;
// 2.求出页码
double pageDouble = offsetX / scrollView.frame.size.width;
int pageInt = (int)(pageDouble + 0.5); // 这里一个专门算分页过半的算法
self.pageControl.currentPage = pageInt;
}
@end
//
// AppDelegate.m
// 项目-版本新特性
//
// Created by 周昭 on 16/3/29.
// Copyright © 2016年 Jordan Zhou. All rights reserved.
//
#import "AppDelegate.h"
#import "ZZNewfeatureController.h"
#import "ViewController.h"
@interface AppDelegate ()
@end
@implementation AppDelegate
- (BOOL)application:(UIApplication *)application didFinishLaunchingWithOptions:(NSDictionary *)launchOptions {
self.window = [[UIWindow alloc] initWithFrame:[[UIScreen mainScreen] bounds]];
// 这里怎么看?为什么key是这个?Info.plist 文件中看版本号
NSString *key = @"CFBundleVersion";
// 取出沙盒中存储的上次使用软件的版本号
NSUserDefaults *defaults = [NSUserDefaults standardUserDefaults];
NSString *lastVersion = [defaults stringForKey:key];
// 获得当前软件的版本号
NSString *currentVersion = [NSBundle mainBundle].infoDictionary[key];
if (![currentVersion isEqualToString:lastVersion]) { // 测试代码 实际开发中! 取反符号要删掉
// 显示状态栏
application.statusBarHidden = NO;
self.window.rootViewController = [[ViewController alloc] init];
} else { // 新版本
self.window.rootViewController = [[ZZNewfeatureController alloc] init];
// 存储新版本
[defaults setObject:currentVersion forKey:key];
[defaults synchronize];
}
[self.window makeKeyAndVisible];
return YES;
}


#pragma mark — 这里给同学们推荐一个封装很好的第三方新特性框架 但是原理大家要懂!
http://www.code4app.com/ios/CoreNewFeatureVC/553f3b68933bf080078b4d88


 2万+
2万+

 被折叠的 条评论
为什么被折叠?
被折叠的 条评论
为什么被折叠?
 到【灌水乐园】发言


