How_to_build_a_static_Qt_version_for_Windows_with_gcc | Qt Wiki | Qt Developer Network
Table of Content
How to build a static Qt version for Windows with GCC
This guide contains the way, I took and which worked for me. I hope it can help you a little bit.
Preparation
First download the QtSDK you need, I took 4.7.0 and install it (incl. gcc).
Then copy the complete qt file tree from Path-To-Qt-SDK\qt to Path-To-Qt-SDK\qt-static (or whatever path you prefer).
copy Path-To-Qt-SDK\bin\qtenv.bat to static folder and adapt content
—> replace xxx\qt with XXX\qt_staticCleaning up the folders
As you copied the sources from an existing build, you have to clean it up, before doing a new build. To get this, do the following:
- delete all tmp folders inside Path-To-Qt-SDK\qt_static
- go to Path-To-Qt-SDK\qt_static\lib\ and delete everything except the readme and the fonts folder
- go to Path-To-Qt-SDK\qt_static\bin and delete all executables and dlls
- search for all makefiles inside Path-To-Qt-SDK\qt_static and delete them (Makefile, Makefile.debug, Makefile.release, not the others!)
Editing the config files for static build
Now you have to edit some configuration files, to enable static builds and also to like statically against the mingw c library:
- edit the file Path-To-Qt-SDK\qt_static\mkspecs\win32-g++\qmake.conf and add the bold (with * ) marked stuff
- QMAKE_CFLAGS_RELEASE = -Os -momit-leaf-frame-pointer
- QMAKE_LFLAGS = -static -static-libgcc …
- DEFINES += QT_STATIC_BUILD
- edit Path-To-Qt-SDK\qt_static\qmake\Makefile.win32-g++
- LFLAGS = -static -static-libgcc …
- edit Path-To-Qt-SDK\qt_static\src\3rdparty\webkit\WebKit.pri
- add CONFIG += staticlib on the top
build
- Open a command shell and go to the following path: Path-To-Qt-SDK\qt_static
- call configure with the needed options. The one I took are:
- configure.exe -static -debug-and-release -opensource -confirm-license -platform win32-g++ -no-exceptions -dont-process -no-qt3support -webkit -qt-sql-sqlite -qt-zlib -qt-libpng -qt-libjpeg
- the important ones are: * -static -platform win32-g++ -no-exceptions*
- Now you have to build the makefiles (but only for the libraries, not for the tools):
- bin\qmake.exe projects.pro QT_BUILD_PARTS=“libs” JAVASCRIPTCORE_JIT=“yes”
- Now you can build Qt:
- mingw32-make.exe
- go and have some coffee. On my machine, it took about 3 hours (Laptop with Intel Core2 Duo T7700 2,4 GHz, 2 GB RAM, Windows 7 Professional, 32 Bit)
Other stuff
I do not recomend to build the tools (designer, assitant, etc.) as you have them in QtCreator so you don’t need them anymore. If you really want to execute them (like lrelease, lupdate), take the ones from the dynamic libraries folder (Path-To-Qt-SDK\qt\bin, incl. the needed dlls) :-)
Optimization
As the binaries might get really big, and you perhaps want to distribute them via the net, you should make them smaller. To achieve that, you can use tools like upx [upx.sourceforge.net] (http://upx.sourceforge.net)
How to integrate static version of Qt additionally to QtCreator
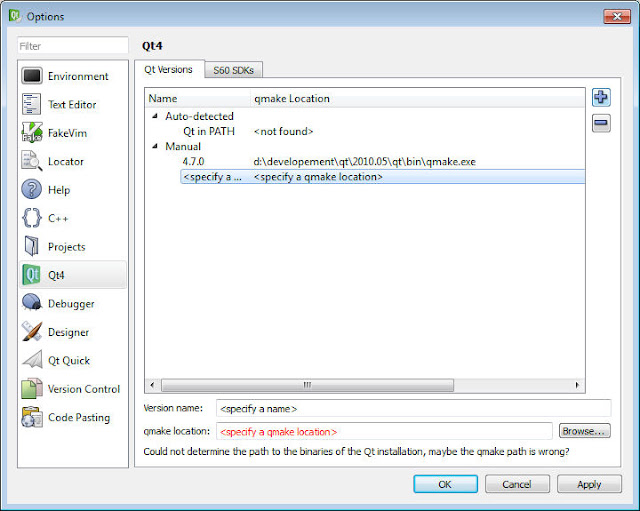
Open QtCreator and go to the Tools / Options menu. Select Qt4:
Add a new version by pressing the plus button
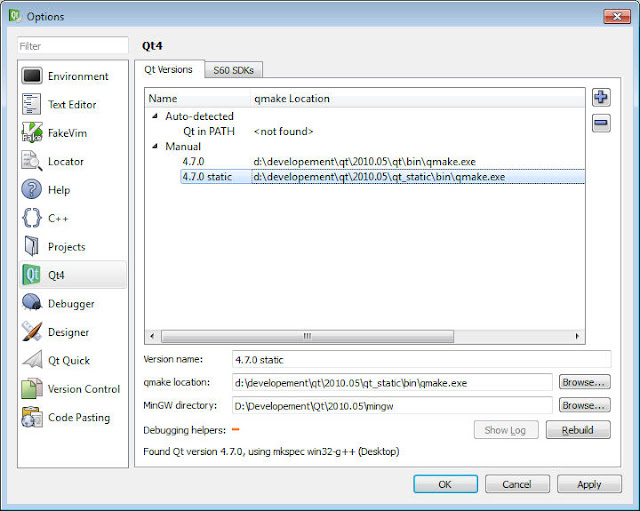
enter a name and the path to qmake (Path-To-Qt-SDK\qt_static\bin\qmake.exe)
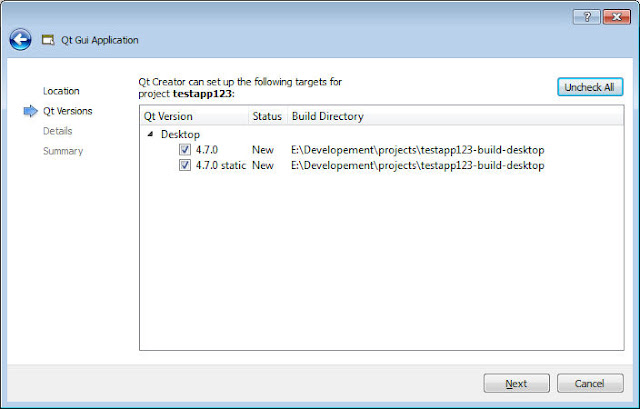
add the MinGW directory (copy from 4.7.0)If you create a new project, you are asked, which Qt version you want to use. Leave both checkboxes checked.
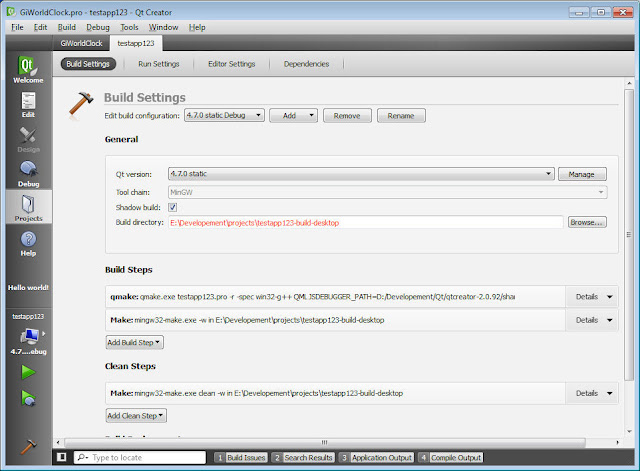
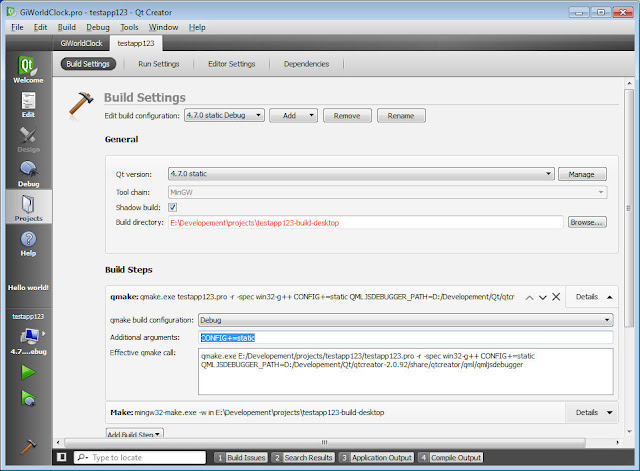
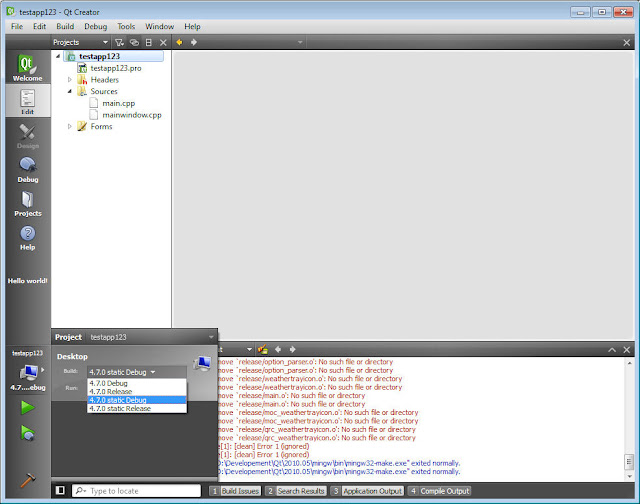
If you already have a project and want to add this version, go to Projects (left hand of QtCreator) and add a setting.
For the static project configuration, you should add CONFIG+=static in the command line.
Open the project settings, and press details for the qmake step. In the additional arguments, add CONFIG+=staticIn the project (*.pro) file, add the following:
What also makes sense is to add a d to the binary, if you create a debug build:
Now you have it. Build the static version (select he static project settings and build it).
Categories:




 被折叠的 条评论
为什么被折叠?


