


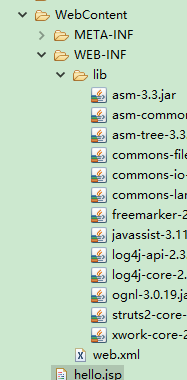
一:导入jar包

二:导入struts.xml
配置struts.xml 

<struts>
 <constant name="struts.devMode" value="true" />
<constant name="struts.action.extension" value="do,qq"/>
 <package name="default"  namespace="/"  extends="struts-default">
     <action name="hello">
         <result>
         /hello.jsp
         </result>
     </action>
 </package>
    <!-- Add packages here -->
</struts>
三:配置web.xml
(1)找web.xml
(2)关联源代码(JAVA):
struts.jar-->properties-->Java Resources Attach-->External location-->
(3)修改内容
<?xml version="1.0" encoding="UTF-8"?>
<web-app id="WebApp_9" version="2.4" xmlns="http://java.sun.com/xml/ns/j2ee"
         xmlns:xsi="http://www.w3.org/2001/XMLSchema-instance"
 1 <?xml version="1.0" encoding="UTF-8"?>
 2 <web-app id="WebApp_9" version="2.4" xmlns="http://java.sun.com/xml/ns/j2ee"
 3          xmlns:xsi="http://www.w3.org/2001/XMLSchema-instance"
 4          xsi:schemaLocation="http://java.sun.com/xml/ns/j2ee http://java.sun.com/xml/ns/j2ee/web-app_2_4.xsd">
 5
 6     <display-name>Struts Blank</display-name>
 7
 8     <filter>
 9         <filter-name>struts2</filter-name>
10         <filter-class>org.apache.struts2.dispatcher.ng.filter.StrutsPrepareAndExecuteFilter</filter-class>
11     </filter>
12
13     <filter-mapping>
14         <filter-name>struts2</filter-name>
15         <url-pattern>/*</url-pattern>
16     </filter-mapping>
17
18 </web-app>
四:新建hello.jsp
 1 <%@ page language="java" contentType="text/html; charset=ISO-8859-1"
 2     pageEncoding="ISO-8859-1"%>
 3 <!DOCTYPE html PUBLIC "-//W3C//DTD HTML 4.01 Transitional//EN" "http://www.w3.org/TR/html4/loose.dtd">
 4 <html>
 5 <head>
 6 <meta http-equiv="Content-Type" content="text/html; charset=ISO-8859-1">
 7 <title>Insert title here</title>
 8 </head>
 9 <body>
10 helloStruts2!!!
11 </body>
12 </html>
五:(1)普通的JAVA类
1 package nuc.sw.action;
2
3 public class HelloAction1 {
4  public String execute() throws Exception{
5      return "OK";
6  }
7 }
(2)实现接口Action的类
 1 package nuc.sw.action;
 2
 3 import com.opensymphony.xwork2.Action;
 4
 5 public class HelloAction2 implements Action {
 6
 7     @Override
 8     public String execute() throws Exception {
 9         // TODO Auto-generated method stub
10         return SUCCESS;
11     }public HelloAction2() {
12         // TODO Auto-generated constructor stub
13     }
14 }
(3)继承ActionSupport类
 1 package nuc.sw.action;
 2
 3 import com.opensymphony.xwork2.ActionSupport;
 4
 5 public class HelloAction3 extends ActionSupport {
 6 @Override
 7 public String execute() throws Exception {
 8     // TODO Auto-generated method stub
 9     return SUCCESS;
10 }
11 }
(4)修改struts.xml
 1  <package name="default" namespace="/" extends="struts-default">
 2      <action name="hello1"  class="nuc.sw.action.HelloAction1" method="">
 3          <result name="OK">
 4              /hello.jsp
 5          </result>
 6      </action>
 7       <action name="hello2"  class="nuc.sw.action.HelloAction2" method="">
 8          <result name="success">
 9              /hello.jsp
10          </result>
11      </action>
12       <action name="hello3"  class="nuc.sw.action.HelloAction3" method="">
13          <result name="success">
14              /hello.jsp
15          </result>
16      </action>
17  </package>
六:执行结果
(1):普通的JAVA类

(2):实现接口的Action类

(3):继承ActionSupport类

(4):修改action后缀名
<constant name="struts.action.extension" value="do,qq"/>


 1253
1253


 被折叠的 条评论
为什么被折叠?
被折叠的 条评论
为什么被折叠?
 到【灌水乐园】发言


