


·使用LoadTemplate()方法
·创建自定义模板列
使用LoadTemplate()方法增加TemplateField
为了本例的实现,你需要在Visutal Studio新建一个websit。拖拽一个GridView和SqlDataSource到默认页。我们将通过编码设置这些控件的一些列属性。首先,我们将使用LoadTemplate()方法来增加一个TemplateField。LoadTemplate()方法对于页面上所有的模板控件来说都是可用的。它通过虚拟路径加载模板。LoadTemplate()的返回值是一个实现了ITemplate接口的对象。
在我们的例子里我们将在用户控件里创建一个模板。在website里新建一个名为ItemTemplate.ascx的用户控件。其关键代码如下。

 <%
<%
 @ Control Language="C#" AutoEventWireup="true" CodeFile="ItemTemplate.ascx.cs" Inherits="ItemTemplate"
%>
@ Control Language="C#" AutoEventWireup="true" CodeFile="ItemTemplate.ascx.cs" Inherits="ItemTemplate"
%>
 <
asp:Label
ID
="Label1"
runat
="server"
Text
='<%#
Eval("EmployeeID") %
>
'>
</
asp:Label
>
<
asp:Label
ID
="Label2"
runat
="server"
Text
='<%#
Eval("FirstName") %
>
'>
</
asp:Label
>
<
asp:Label
ID
="Label3"
runat
="server"
Text
='<%#
Eval("LastName") %
>
'>
</
asp:Label
>
<
asp:Label
ID
="Label1"
runat
="server"
Text
='<%#
Eval("EmployeeID") %
>
'>
</
asp:Label
>
<
asp:Label
ID
="Label2"
runat
="server"
Text
='<%#
Eval("FirstName") %
>
'>
</
asp:Label
>
<
asp:Label
ID
="Label3"
runat
="server"
Text
='<%#
Eval("LastName") %
>
'>
</
asp:Label
>
仔细看一下上面的标记。它包含了3个Label控件。每个Label控件的Text属性分别绑定了Employees表的EmployeeID,FirstName和LastName列。Eval()表达式是asp.net中的一种数据绑定方法,它使用列的名字去绑定。这个用户控件稍后将在我们的ItemTemplate中使用。
现在打开默认webform的代码编辑窗口,其Page_Load事件中的关键代码如下。
protected
void
Page_Load(
object
sender, EventArgs e)
{ SqlDataSource1.ConnectionString = @"data source=.;initial catalog=northwind;integrated security=true"; SqlDataSource1.SelectCommand = "select employeeID,FirstName,LastName from employees"; if (!IsPostBack)
 { GridView1.DataSourceID = "SqlDataSource1"; GridView1.AutoGenerateColumns = false; TemplateField tf1 = new TemplateField(); tf1.ItemTemplate=LoadTemplate("ItemTemplate.ascx"); GridView1.Columns.Add(tf1);
 }
} }
}
这段代码指出了SQL数据源控件的ConnectionString属性是连到Northwind数据库的。其SelectCommand属性指定为一段select查询语句,它从Employees表中检索出EmployeeID,FirstName和LastName列。然后设置了GridView的DataSourceID属性为该数据源控件的ID。同时AutoGenerateColumns属性设置成false以便动态的增加列。再接下来的那几行代码是非常重要的。首先实例化一个TemplateField类,该类是可以呈现为一个GridView的TemplateColumn。TemplateField类的ItemTemplate属性设置为LoadTemplate()方法的返回值。LoadTemplate()方法使用虚拟路径来加载模板(在我们的例子里模板文件为ItemTemplate.ascx)。然后把这个TemplateField增加到GridView控件的列集合中。
在你的浏览器中运行这个webform将会如下显示。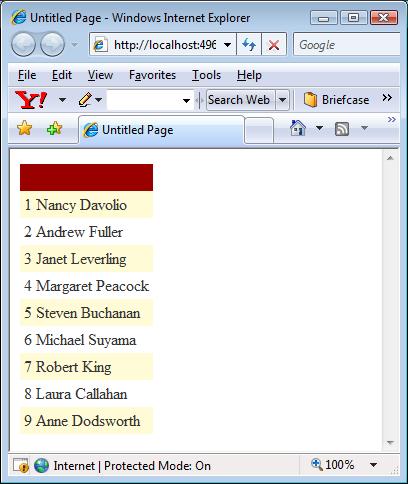
注意如何应用用户控件中指定的模板。同时我们看到标题是空的,因为没有指定HeaderTemplate。你可以指定它或者关闭它。
使用自定义模板类增加TemplateField
现在你已经知道了如何使用LoadTemplate()方法,接下来让我们来看看如何使用另一种方法。在最后的例子中你学到了用LoadTemplate()方法返回一个实现了Itemplate接口的对象。你自己也可以创建这样一个实现了Itemplate接口的类并直接使用它,从而代替LoadTemplate()方法。
我们在App_Code文件夹内新建一个名为MyTemplate的类。其关键代码如下。
public
class
MyTemplate:ITemplate
{ private string colname; public MyTemplate(string colname) { this.colname = colname; } public void InstantiateIn(Control container) { LiteralControl l = new LiteralControl(); l.DataBinding += new EventHandler(this.OnDataBinding); container.Controls.Add(l); } public void OnDataBinding(object sender, EventArgs e) { LiteralControl l = (LiteralControl)sender; GridViewRow container = (GridViewRow)l.NamingContainer; l.Text = ((DataRowView)container.DataItem)[colname].ToString(); }}
这段代码创建了一个实现了Itemplate接口的名为MyTemplate的类。这个接口只包含一个你必须实现的方法 - InstantiateIn()。这段代码声明了一个变量用来保存被显示的列的名称,该名称在类的构造函数中设置,然后实现InstantiateIn()方法。该方法的参数为一个容器类型或父控件类型的控件的对象。在这里,我们创建了一个LiteralControl和一个DataBinding事件(OnDataBinding)。这个事件在容器控件调用DataBind()方法时发生。然后把这个LiteralControl加到容器控件的控件集合中。
OnDataBinding()事件所作的工作就是把所需的数据绑定到LiteralControl。给容器控件加上NamingContainer属性,然后提取出一个Row。最后,LiteralControl的Text属性被设置为构造函数所指出的列的在数据库中所存储的值。这样,我们的自定义模板类就完成了。
在website里新建一个webform。像以前一样拖拽一个GridView和SqlDataSouce到页上。其Page_Load事件中的代码如下。
protected
void
Page_Load(
object
sender, EventArgs e)
{ SqlDataSource1.ConnectionString = @"data source=.;initial catalog= northwind;integratedsecurity=true"; SqlDataSource1.SelectCommand = "select employeeID,FirstName,LastName from employees"; if (!IsPostBack) { GridView1.DataSourceID = "SqlDataSource1"; GridView1.AutoGenerateColumns = false; TemplateField tf1 = new TemplateField(); MyTemplate t1 = new MyTemplate("FirstName"); tf1.HeaderText = "First Name"; tf1.ItemTemplate = t1; TemplateField tf2 = new TemplateField(); MyTemplate t2 = new MyTemplate("LastName"); tf2.HeaderText = "Last Name"; tf2.ItemTemplate = t2; GridView1.Columns.Add(tf1); GridView1.Columns.Add(tf2); }}
这段代码如从前一样设置了GridView和SqlDataSource的属性。注意代码中加粗的部分(译者注:就是代码的中下部份),它是用来创建TemplateField类的实体的。这次TemplateField的ItemTemplate属性被设置成了实例化的MyTemplate类。列的名称 - FirstName和LastName被传到了构造函数中。TemplateField被增加到了GridView的列集合中。
运行上面的webform将如下显示。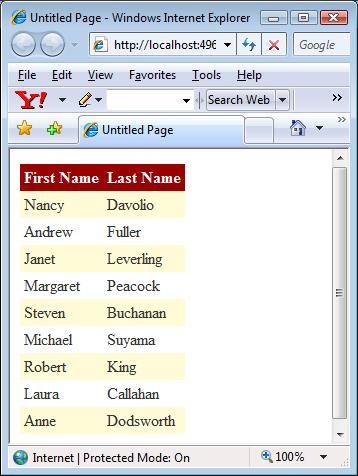


 79
79


 被折叠的 条评论
为什么被折叠?
被折叠的 条评论
为什么被折叠?
 到【灌水乐园】发言


